
Related Manuals for Hitachi DMP260

Summary of Contents for Hitachi DMP260
- Page 1 Instruction Manual DMP260 DMP460 DMP860 2GB/4GB/8GB Music and Video Multimedia Player...
- Page 2 Congratulations on the purchase of your new Hitachi MP3 Player. It has many exciting features to make your listening to music experience more enjoyable. We recommend that you spend some time reading this instruction manual in order to fully understand these features.
-
Page 3: Table Of Contents
Contents Contents ........................3 Product Overview....................5 Unpacking the MP3 Player......................5 Features............................5 Identification of Parts and Controls ..................6 Connecting to a Computer..................7 System Requirements......................... 7 Installing the Driver for Windows 98 SE ................7 Loading Files from a Computer to the MP3 Player............7 Disconnecting the USB Cable .................... - Page 4 Voice Recording and Playback ................15 Entering the Voice Setup Menu.....................17 – To Set Repeat ........................17 – To Set Equalizer ........................18 – To Set 3D Sound Effect ....................19 – To Set Play Rate ........................19 – To Navigate Music Files ....................20 – To Record Voce .........................20 Photo Playback .....................21 Entering the Photo Setup Menu ...................21 Movie Playback.....................22...
-
Page 5: Product Overview
Product Overview Unpacking the MP3 Player Remove all packaging from the MP3 player. Retain the packaging. If you dispose it please do so according to local regulations. The following items are included: MP3 Player Earphones USB Cable Installation CD with part number: part number: Instruction Manual... -
Page 6: Identification Of Parts And Controls
Identification of Parts and Controls MENU Power on/off; Open or exit sub-menu; Stop recording Microphone for voice recording Screen Screen display area Increase volume; Navigate upwards; Previous picture/line Previous track/page/screen; Fast backward; Navigate leftwards; Return to previous screen Start /Pause playback; Enter main menu; Confirm selection in the main menu Next track;... -
Page 7: Connecting To A Computer
Connecting to a Computer System Requirements Your computer system must meet the following requirements: Pentium 200MHz or above Microsoft Windows 98SE / 2000 / ME / XP / Vista® 120MB of available hard disk space USB port supported CD-ROM drive Installing the Driver for Windows 98 SE If your computer is running Windows ME / 2000 / XP / Vista®, no driver is required. -
Page 8: Disconnecting The Usb Cable
Disconnecting the USB Cable After completing the file transfer, disconnect the USB cable in the following way: Double click the green arrow “ Safely Remove Hardware” in the taskbar on the bottom right of the window. Select “ USB Mass Storage Device” and click “Stop”. The “... -
Page 9: Basic Operation
Basic Operation Power On/Off the MP3 Player Make sure the battery is sufficient and the earphones are connected. Press and hold the MENU button to power on. Press and hold the MENU button to power off. Resetting the MP3 Player If the user interface is not responding, you will need to use a pointed object to insert into the RESET hole/button to re-initialise the system of your MP3 player. -
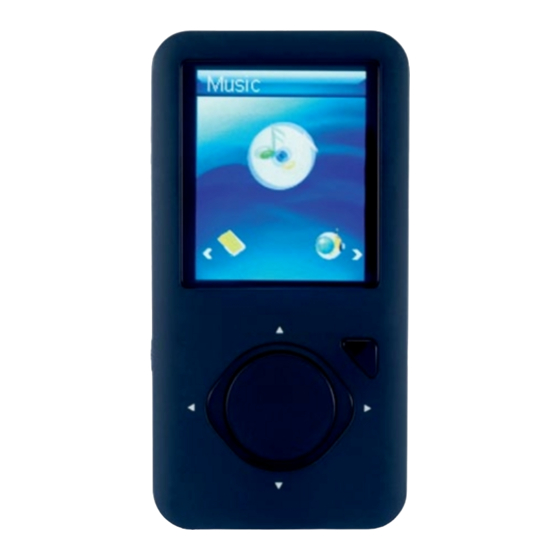
Page 10: Music Playback
Music Playback Playing Music Make sure the battery power level is sufficient and the earphones are connected correctly. Press and hold the button to enter the main menu. Press the Press the buttons to select Music. buttons to select Music. Press the button to display the following screen. -
Page 11: Display Lyrics
Searching : Press and hold the buttons to fast rewind / fast forward within a track. Adjusting the Volume : Press the buttons to increase / decrease the volume. Exit : Press and hold the button to return to the main menu. Displaying Lyrics This MP3 player supports lyrics display while playing music. -
Page 12: To Set Equalizer
Press the button to enter the Repeat Menu. Press the Music buttons to select the desired mode as below and then Repeat press the button to confirm and exit. No Repeat No Repeat Repeat One Play all the saved music files in order once. Repeat All Repeat One Random All... -
Page 13: To Set 3D Sound Effect
To customise EQ, select Custom EQ, and press the button. The Custom EQ value bars appear on the screen. Press the buttons to navigate between the value bars. When navigating to a value bar, press the button to select it. The blue arrow becomes red. Use the buttons to adjust the value and then press the button to confirm. -
Page 14: To Navigate Music Files
Press the button to enter the Play Rate Menu. Press the Music buttons to select a play rate from 1.00X, 1.14X, 1.33X, Play Rate 0.67X and 0.80X. Press the button to confirm and exit. 1.00X 1.14X 1.33X 0.67X 0.80X To Navigate Music Files Press the MENU button while listening to a track. -
Page 15: Voice Recording And Playback
Voice Recording and Playback You can make voice recordings using the integrated microphone. Press and hold the button to enter the main menu. Press the buttons to select Voice. Press the button and then the MENU button. Press the Voice buttons to select Record. - Page 16 During recording, you can: Pausing/Resume Recording : Press the button to pause recording. Press the button again to resume recording. Stop Recording : Press the MENU button to save the recordings. The MP3 player will go to the Voice playback interface automatically. Volume level Recording voice name Bit rate...
-
Page 17: Entering The Voice Setup Menu
Entering the Voice Setup Menu While playing the recording, press the MENU button to enter the Voice Setup Menu. Press the buttons and then the button to access the following: Repeat, Equalizer, 3D, Play Rate, File, Record. After finishing the music setting, press the MENU button to exit the Music Setup Menu. -
Page 18: To Set Equalizer
To Set Equalizer The equalizer setting enables you to select an equalizer from the six preset equalizer settings to suit the type of audio output or customise your personal equalizer effect. Press the MENU button while listening to a track. The Voice Voice Setup Menu appears on the screen. -
Page 19: To Set 3D Sound Effect
To Set 3D Sound Effect Press the MENU button while listening to a track. The Voice Voice Setup Menu appears on the screen. Press the Repeat buttons to select 3D. Equalizer Play Rate File Record Press the button to enter the 3D Menu. Press the Voice buttons to select On or Off, and then press the button... -
Page 20: To Navigate Music Files
To Navigate Recorded Files Press the MENU button while listening to a track. The Voice Voice Setup Menu appears on the screen. Press the Repeat buttons to select File. Equalizer Play Rate File Record Press the button. The recorded file list appears on the Voice screen. -
Page 21: Photo Playback
Photo Playback This MP3 player supports the playback of pictures in JPEG and BMP format. Press and hold the button to enter the main menu. Press the buttons to select Photo. Press the button. The picture list appears on the screen. Photo PHOTO al.jpg... -
Page 22: Movie Playback
Movie Playback This MP3 player supports the playback of converted videos in MTV format. Press and hold the button to enter the main menu. Press the buttons to select Movie. Press the button. The movie list appears on the screen. Movie pride.mtv Press the... -
Page 23: Deleting Files And Folders
Deleting Files and Folders In the Delete mode, you can delete the files and folders stored on your MP3 player without a computer. Press and hold the button to enter the main menu. Press the buttons to select Delete. Press the button. -
Page 24: E-Book Viewing
E-Book Viewing This MP3 player only supports the playback of files in TXT format. Other formats must be saved as TXT formats before transfering to the MP3 player. Press and hold the button to enter the main menu. Press the buttons to select E-Book. -
Page 25: Customising Settings
Customising Settings The MP3 player settings can be customised by accessing the Settings Menu. The Settings Menu consists of several items where various functions can be selected concerning language, play mode, recording, contrast, time off, storage, reset, etc. Press and hold the button to enter the main menu. -
Page 26: Power
Power Auto off Settings To set the auto off time. Power The available options include: 15, 30, 60, 90, 120 minutes and Auto off Disable. Always on Always on The MP3 player will be always on while playing. However, it will turn off automatically in any other mode if no button is pressed for the set time. -
Page 27: Record
Record Before starting the recording, you can set the recording quality. Settings Record Press the buttons to select a recording quality from Long Time, Normal Quality and High Quality. Quality Press the button to confirm and return to the pervious screen. -
Page 28: Converting Video To Mtv Format
Converting Video to MTV Format This MP3 player supports the playback of videos in MTV format. Other formats (AVI, WMV, MEPG1, Quick Time, MPEG2, RealMedia, MPEG4, 3GP) must be converted to MTV format. The “MTVVideo Converter” is supplied on the CD to enable you to convert the other formats to MTV format. -
Page 29: Hints And Tips
Hints and Tips If a problem does occur, it may often be due to something very minor. The following table contains various tips. Cannot power on The battery may be exhausted. Recharge the battery. Files cannot be Check if the driver is installed correctly in the computer. downloaded Check the connection between the MP3 player and the computer. -
Page 30: Specifications
Specifications Model DMP260 / DMP460 / DMP860 Audio Format MP3 / WMA / WAV Photo Format JPEG / BMP Video Format MP3 bit Rate 8Kbps-320Kbps WMA bit rate 5Kbps-320Kbps S/N rate ≥85dB Distortion <0.2% Size 43 x 84 x 8.3 mm Weight <40g (without accessories) Frequency response... -
Page 31: Safety Warnings
Safety Warnings Retain the manual. If you pass the unit onto a third party make sure to include this manual. Damage Please inspect the unit for damage after unpacking. Do not continue to operate the unit if you are in any doubt about it working normally, or if it is damaged in any way - switch off and consult your dealer. - Page 32 SOME DOS AND DON’TS ON THE SAFE USE OF EQUIPMENT This equipment has been designed and manufactured to meet international safety standards but, like any electrical equipment, care must be taken if you are to obtain the best results and safety is to be assured. ************** DO read the operating instructions before you attempt to use the equipment.
- Page 33 Note: If you require a replacement for any of the items listed below, please quote their corresponding part numbers: Replacement Part Part Number USB Cable 38-012-10300019 Earphones 50-110-26900119 Installation CD with Instruction Manual 54-809-30000109 Visit Partmaster.co.uk today for the easiest way to buy electrical spares and accessories.