Table of Contents
Advertisement
Advertisement
Table of Contents

Related Manuals for Hitachi 42PD3000


Summary of Contents for Hitachi 42PD3000
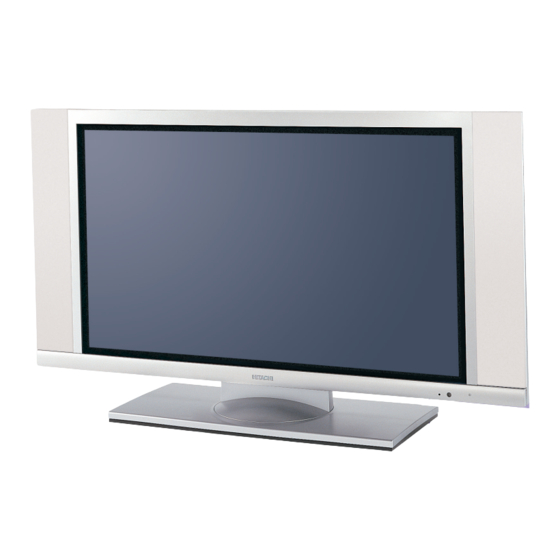
- Page 1 Users Guide 32PD3000 42PD3000 S C R E E N...
- Page 2 Dear HITACHI customer Congratulations on your purchase of the very latest state of the art television from HITACHI. At Hitachi we pride ourselves on producing high quality televisions with outstanding picture and audio capabilities. Together with our reputation for superior reliability, you should enjoy many years of trouble free operation from your TV.
-
Page 3: Table Of Contents
PC mode ........................41 information trouble shooting guide ....................45 guarantee ........................46 HITACHI environmental notice ................47 technical data ......................48 OSD Menu Flow chart ....................49 Caution Avoid displaying still images on the plasma TV for an extended time as it may result in a residual image, and permanently damage the Plasma Display. -
Page 4: Television Safety
This plasma television has been designed and manufactured to meet international safety standards, but like any electrical equipment, care must be taken if you are to obtain the best results and safety is to be assured. DO consult your dealer if you are in any doubt about installation, operation or safety of your equipment. - Page 5 DO NOT lie the plasma screen flat. AUDIO VISUAL CONTROL STATION AV3000F NEVER let anyone, especially children, push anything into holes, slots, or any other opening in DO NOT cut off the fitted mains plug as it the case - this could result in a fatal electrical may contain a special radio interference shock.
-
Page 6: Battery Safety And Installation
always always always Take care to fit your batteries Replace the whole set of Store unused batteries in their correctly, observing the plus batteries at one time, taking packaging and away from ‘+’ and minus ‘-’ marks on the care not to mix old and new metal objects which may battery and appliance. -
Page 7: Rear Socket And Scart Details
Mains Socket audio output (RCA) VGA input Link Sockets These sockets can be These should be Use this to connect to This should be connected used to connect to connected to your your computer if to the Mains Supply via external amplifier or Hi-Fi plasma screen via the desired. -
Page 8: Plasma Screen, Avc Unit And Equipment Connection
TV and VCR and wish to SLEEVING to the Plasma Screen. obtain stereo sound from your equipment. These leads can be purchased from your Hitachi dealer or any good High Street electrical Connect the Mains lead with NO Sleeving to retailer. - Page 9 PLASMA SCREEN U.K. ONLY EUROPE LINK LEAD VIDEO OUT CENTER AUDIO IN AUDIO OUT S-VHS FMS5011 AUDIO VISUAL CONTROL U.K. ONLY (AVC) UNIT Placing the AVC vertically Vertical Stand *Please make sure to use the attachment screws for the vertical stand when placed vertically.
-
Page 10: Speaker Assembly (42Pd3000 Model Only)
42” Speaker system can be attached to Plasma Screen or original speaker stand. Left and Right Speakers are the same When carrying the product, p ease ift from both sides and ho d with one hand using the the product with the screen side facing you. cover on the bottom of the product. - Page 11 This part is to be hooked Remove screws, both sides onto loose screw SPEAKER TERMINAL (8 8W) Slacken screws both sides Black Terminal Red Terminal Silver Lead Copper Lead < Optional Speaker Stands PLASMA SCREEN SPEAKERS AVC UNIT SPEAKER STANDS (optional)
-
Page 12: Front Control Panel Details
PLASMA SCREEN on/off button TV mode light (Underside of plasma screen). Use this to switch This will be green when your TV is on and red when in standby mode. the plasma screen on and off. (When switched off using this button the screen infra-red lens consumes no power - unlike This is for reading commands sent from your remote control handset. -
Page 13: Handset Controls
The handset controls shown below are used when programming your TV and to adjust the sound and picture features. accept cursor up This button is used to confirm a highlighted Use this button to selection. move the menu selection box up. exit menu This button is used to... -
Page 14: Television/Vcr Operation
TV status. VCR and DVD Operation Your handset incorporates controls for operation of HITACHI VCR and DVD. These controls are PLAY, STOP, REWIND, FAST FORWARD, PAUSE, STANDBY, and MENU. To PLAY : Press the VCR or DVD and Play buttons on To enter STANDBY : Press the VCR or your handset simultaneously. -
Page 15: Teletext Functions
The handset controls shown here TV+TEXT, are used when you are PC window operating Teletext. In TV mode teletext This button allows you to switch between TV + TEXT screen and TV only. Press this button to In PC mode use the Teletext services. -
Page 16: Programme Tuning
Television, extra on screen help will be displayed in this window. To make your programme tuning easier, HITACHI have installed an automatic tuning procedure to find the programmes. Switch your Plasma screen and AVC (Audio Visual Control) unit on. - Page 17 Once highlighted, accept selection. The next screen viewed will ask you to insert your aerial connection lead. If you are satisfied all external equipment has been connected, press the OK button on your handset and AUTOTUNE will begin. Next, the country screen requires you to select the country in which you will be watching your TV.
-
Page 18: Manual Tuning Procedure
...notes on manual tuning As well as an automatic tuning procedure your HITACHI television also allows you to input broadcast frequencies through a number of different entry methods. Follow the steps below and choose one of the 4 entry methods to input broadcast frequencies. - Page 19 entry method 1 The first option will be to fine tune the chosen frequency either UP or DOWN using the LEFT/RIGHT cursor keys or search tune UP or DOWN using the UP/DOWN cursor keys. entry method 2 If the CH key is pressed, you can enter a two digit channel number (CH) using buttons 0 - 9 on...
-
Page 20: Programme Sort
Press the MENU button. MAIN MENU appears. Press the cursor DOWN button to select INSTALL. Once highlighted, accept selection. Press the cursor DOWN button to select MANUAL SETUP. Once highlighted, accept selection. Use the UP/DOWN cursor keys to select the programme you wish to move. Once highlighted, accept selection. -
Page 21: Programme Name Change And Download
...notes on programme name change Programme name change can be very useful if you connect external equipment to your television. For example, if you have a games machine connected, you can name the allocated channel ‘GAME’, making it easier to find. Press the MENU button. -
Page 22: Viewlink
2. The VCR must be connected to the AV1 socket on the TV by a fully wired scart cable. A Viewlink compatible VCR means a Hitachi VCR with the viewlink logo, or a VCR with one of the following logos: “Q-Link”... - Page 23 Viewlink features - continued Direct TV Recording - continued VCR Recording from VCR Tuner VCR Recording From TV The VCR is recording from its own tuner, using a The VCR is recording from the televisions tuner. If the frequency sent by the television, i.e. not one of the channel is changed on the television, it will affect the VCRs own preset channels.
-
Page 24: Customer I.d
...notes on Customer I.D. The Customer I.D. feature allows the user to enter a personal security code and address information into the television’s memory, so that in the unfortunate event of theft, it will help the Police trace the owner. Please follow the steps below. Press the MENU button. -
Page 25: Password Change
Press O.K. to complete. PLEASE NOTE : After you have changed your address etc., please see ‘password change’ section of this manual before Repeat steps 6, 7 and 8 to highlight and change your returning to normal TV operation. address and postcode. If you make a mistake, or wish to cancel the change of address, press X key on your handset ...notes on Changing your Password... -
Page 26: Picture Controls
For picture and sound values, moving the cursor left will decrease values, whilst moving the cursor right will increase values. Picture mode DYNAMIC This selects dynamic picture suitable for Sport, Documentary, etc. NATURAL This selects the natural picture suitable for News, Talk show, etc. CINEMA This selects the picture suitable for Movie. -
Page 27: Nicam And Stereo Sound Controls
...notes on NICAM features NICAM is a method for transmitting and receiving stereo sound. If your TV is unable to receive NICAM because of the wrong geography, climate etc., or when NICAM in not transmitted in your location it will produce a monaural sound source. -
Page 28: Audio And Trubass Controls
Audio mode MUSIC This selects the audio suitable for MUSIC. SPEECH This selects the audio suitable for News, Talk show, etc. CINEMA This selects the audio suitable for Movie. FAVOURITE You can adjust following items to your preference. Select the Audio menu on Main Menu Preference FAVOURITE Volume... - Page 29 TruBass TruBass takes advantage of the ability of the human ear to be able to distinguish between two different tones. By using this ability, TruBass reproduces bass sound which sometimes cannot be heard. The options are OFF/LOW/MED/HIGH. Adjust this control to suit your personal taste. In the AUDIO Favourite option menu, Balance...
-
Page 30: Sleep Timer And On Screen Display
...notes on Sleep Timer This feature is used to automatically place your TV into standby mode after a set number of minutes - use the RIGHT/LEFT cursor buttons to set the timer between 5 and 120 minutes. When the timer has only a minute left this will be shown on the screen as a countdown from 59 seconds to zero, after which your TV’s status will be standby. -
Page 31: Wide Screen Viewing
...notes on wide screen features Various broadcast stations now transmit movies and programmes in true wide screen format. Your TV detects these signals and automatically switches your TV to the correct viewing format. However, some broadcasters do not transmit this automatic sensing signal, and so your TV will not recognize which format is being transmitted. - Page 32 ...notes on Default features Your TV also has default features which can control the viewing format of your TV’s picture. See below for entry into and adjustment of these features..notes on Default Zoom Various broadcast stations now transmit WSS (Wide Screen Signals) which identify the picture format movies and programmes are broadcast in.
-
Page 33: Teletext Operation
...notes on Teletext Teletext is an on screen information magazine and it is entered by pressing the teletext button on your handset - a page similar to the one below will appear. Select the topic you want to view by entering a three digit number on your handset corresponding to the page number eg. - Page 34 ...notes on TV+Teletext screen Press button to obtain TV screen on the left and Teletext screen on the right. In TV + Teletext mode, all operations on handset follow Teletext features. To change channel or AV mode you have to return to TV only mode. Press button again to return previous mode, TV only or Teletext only.
-
Page 35: Other Equipment Connection
camcorder Connecting a camcorder to your TV is easy. First, identify the type of camcorder and its connecting sockets. If it is a standard 8mm type camera then this is likely to have 'RCA' type sockets. If you have an S-VHS or Hi8 camera you may have an S-VHS socket. -
Page 36: Signal Source Entry
...notes on signal source entry Each piece of external equipment connected to your TV must have its own input socket. It would also be easier, and more organized, if the external equipment connected also had its own programme number. Signal Source entry allows you to tell the allocated program what equipment is connected to which socket. - Page 37 option 2 AV2 and AV3 are the signal source used when connecting external equipment such as home entertainment systems and Set Top Boxes/Decoders through a scart lead to the AV2 or AV3 socket at the rear of your TV. option 3 FRONT is the signal source used when connecting FRONT temporary equipment like a camcorder through the audio/video...
-
Page 38: Language And Installation
Language This enables you to change the language of the On Screen Displays. Please see below for details. Press the MENU button. The MAIN MENU appears. Press the cursor DOWN button to select INSTALL. Once highlighted, accept selection. Press the cursor DOWN button to select LANGUAGE. -
Page 39: Programme Download And Demo Mode
Programme Download If you have purchased a Viewlink compatible VCR, select this feature to download the programme listings from your TV to the new VCR. REPEAT STEPS 1 - 3 AS PREVIOUS Press the cursor DOWN button to select PROGRAMME DOWNLOAD. -
Page 40: Screen Saver, Screen Wipe & No Signal Shutdown
Screen Saver This feature moves the picture around the screen in small amounts, at set intervals, to reduce persistence. This is where stationary objects, such as screen logos, leave a slight image visible after they should have disappeared. Press the MENU button to obtain MAIN MENU. -
Page 41: Pc Mode
PC Mode This enables you to connect your home computer, or laptop computer, to your TV to use the plasma screen as a display. important note on Installation Switch off your Plasma screen and AVC Unit before connecting or disconnecting any external equipment. Do not switch them on until all external equipment is connected correctly. - Page 42 This mode fits the image to the full screen size. PC FULL This mode fits the image to a 4:3 screen size. PC NORMAL This mode gives the image the same shape as it is displayed on a computer monitor.* PC REAL *Please Note: This format is only available for True VGA e.g.
- Page 43 When there is the flicker on the PC picture, changing picture Enhancement setting may reduce the flicker..notes on PC WINDOW Press button to obtain small TV screen on bottom right on PC screen. In PC WINDOW mode, you can select AV modes on small screen by AV button or select TV channel by UP/Down button.
- Page 44 Recommended signal This AVC unit has the following input signals already stored. DOTCLOCK HORIZONTAL SIGNAL NOTES FREQUENCY FREQUENCY SIGNAL (KHz) (MHz) RESOLUTION VERT. FREQ. (Hz) 640 X 400 31.47 25.18 70.08 640 X 480 59.94 31.47 25.18 37.86 31.50 640 X 480 72.81 640 X 480 37.50...
-
Page 45: Trouble Shooting Guide
answers questions Check that the plasma screen and the AVC unit are connected together correctly. Why won't my TV switch on? Check that both plugs are connected to the socket and switched on, check fuse and make sure TV is not in standby mode (see below). Make sure there are no obstructions between the handset and the TV's infra-red Why doesn't my remote lens, or the batteries may be exhausted - replace the whole set of batteries. -
Page 46: Guarantee
Plasma screen and on the bottun of the AVC. Also, record where and when you purchased this T.V. This information will help any future queries you may have and should be used in all correspondence with Hitachi service centres. MODEL... -
Page 47: Hitachi Environmental Notice
E nv i ro n m e n t a l N o t i c e Hitachi are signatories to the commitment made by the consumer electronics industry on reducing energy consumption by televisions and video recorders on standby. -
Page 48: Technical Data
1233×300×713mm Dimensions AVC Unit (W×D×H) 430×240×80mm System Cable/Hyperband PAL; B,G,H/I/D,K. SECAM; B,G/D,K/K1/L,L' VIDEO; PAL60/NTSC4.43/3.58 HITACHI R6P(G) × 2,(Equivalent‘AA’) Remote Control Batteries scart sockets 20 18 16 14 12 10 21 19 17 15 13 11 scart socket AV2/AV3 scart socket AV1... -
Page 49: Osd Menu Flow Chart
OSD Menu Flow Chart (1) Main Menu Preference DYNAMIC/NATURAL/CINEMA/FAVOURITE Picture White Balance Favourite Contrast Brightness Colour Sharpness Hue (When receiving NTSC only) More Contrast Mode DYNAMIC/NORMAL/AUTO OFF/LOW/MID/HIGH OFF/LOW/MID/HIGH OFF/LOW/MID/HIGH OFF/LOW/MID/HIGH More Black Stretch OFF/LOW/MID/HIGH Film Mode OFF/ON Audio Preference MUSIC/SPEECH/CINEMA/FAVOURITE Volume TV Speaker OFF/NORMAL/CENTRE... - Page 50 Fax: +46 (0) 8 562 711 13 Tel: +39 02 38073415 Servizio Clienti Email: csgswe@hitachi-eu.com Fax: +39 02 48786381/2 Email: customerservice.italy@hitachi-eu.com HITACHI EUROPE S.A.S HITACHI EUROPE LTD (Norway) AB Lyon Office STRANDVEIEN 18 B.P. 45, 69671 BRON CEDEX 1366 Lysaker FRANCE...