
Related Manuals for GE 295861


Summary of Contents for GE 295861
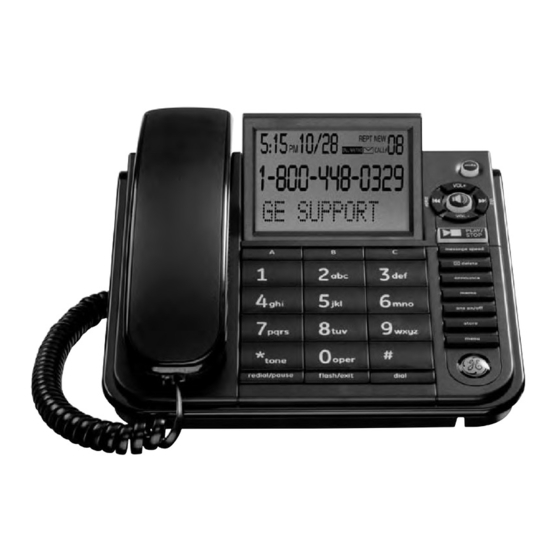
- Page 1 Model 29586 Digital Answerer with Call Waiting Caller ID and Speakerphone Telephone User’s Guide...
-
Page 2: Equipment Approval Information
Equipment Approval Information Your telephone equipment is approved for connection to the Public Switched Telephone Network and is in compliance with parts 15 and 68, FCC Rules and Regulations and the Technical Requirements for Telephone Terminal Equipment published by ACTA. 1 Notification to the Local Telephone Company On the bottom of this equipment is a label indicating, among other information, the US number and Ringer Equivalence Number (REN) for the equipment. -
Page 3: Interference Information
Interference Information This equipment has been tested and found to comply with the limits for a Class B digital device, pursuant to Part 15 of the FCC Rules. These limits are designed to provide reasonable protection against harmful interference in a residential installation. This equipment generates, uses, and can radiate radio frequency energy and, if not installed and used in accordance with the instructions, may cause harmful interference to radio communications. -
Page 4: Table Of Contents
Table of Contents ....2 ....18 quipmEnt pprovAl nformAtion etting oCal ......3 ......18 ntErfErEncE nformAtion etting the ialing ......3 ........18 EAring ompAtibility etting ay of .............3 ......19 icEnsing etting the ime anD fcc rf r ..3 ........20 AdiAtion xposurE tAtEmEnt etting the anguage ..........6 ..........20... - Page 5 Table of Contents ..........33 eaving a ........... 33 emory ..........34 emote CCess ....... 34 emote CCess ommanDs ........35 EssAgE ndicAtors ......35 roublEsHooting uidE ......38 EnErAl roduct ......38 AusEs of EcEption .........39 ArrAnty ssistAncE ........40 imitEd ArrAnty ............42 ndEx CAUTION: RISK OF ELECTRIC SHOCK DO NOT OPEN...
-
Page 6: E Xposure Adiation
Introduction CAUTION: When using telephone equipment, there are basic safety instructions that should always be followed. Refer to the IMPORTANT SAFETY INSTRUCTIONS provided with this product and save them for future reference. Before You Begin Parts Checklist Make sure your package includes the following items: AC power adaptor Base Handset... -
Page 7: Important Installation Information
Important Installation Information • Never install telephone wiring during a lightning storm. • Never touch non-insulated telephone wires or terminals, unless the telephone line has been disconnected at the network interface. • Use caution when installing or modifying telephone lines. •... -
Page 8: Base Layout
Base Layout Quick dial/emergency speaker repeat memory (buttons) (button) (button) mute (button) display Hook VOL+/- (buttons) switch ringer volume switch skip (button) PLAY/STOP (button) message speed (button) delete (button) announce (button) memo (button) ans on/off * tone (button) (button) store (button) menu (button) redial/pause Microphone... -
Page 9: Desktop Installation
Installing the Phone Desktop Installation CAUTION: To reduce risk of personal injury, fire, or damage use only the 5-2784 power adaptor listed in the user’s guide. This power adaptor is intended to be correctly orientated in a vertical or floor mount position. 1. -
Page 10: All Ounting The Hone
Wall Mounting the Phone 1. Carefully turn the handset hook 180° with a coin or screwdriver until it points upward. You need to do this so that the handset doesn’t fall out of the base. 2. Plug the coiled cord into the handset. Plug the other end into the jack on the side of the base. -
Page 11: Mportant A Nswerer
Important Instructions for Moving the Answerer: To move the answerer to a different location in the house, follow these instructions: 1. Disconnect the phone line. 2. Go to the electrical outlet and unplug the power adaptor. 3. Move the unit and phone line to the desired location. 4. -
Page 12: Ecording The Utgoing Eviewing The Nnouncement
• To return to the answerer’s default greeting after you’ve recorded one, press ANNOUNCE and release it when you hear the tone, or press and hold DELETE when the greeting is playing. Reviewing the Announcement Press and release the ANNOUNCE button to review your outgoing announcement. Telephone Operation Using the Speakerphone Speakerphone Location... -
Page 13: Receiving A Phone Call
Receiving a Phone Call 1. When the phone rings, the speakerphone indicator blinks and the caller’s information, if any, will be shown on the display panel. Lift the handset or press the SPEAKER button to connect your phone call. 2. You can adjust the volume of the caller’s voice by pressing the VOL (+ or -) buttons. Placing a Phone Call 1. -
Page 14: Lash
Flash Press the FLASH button instead of using the hook switch to activate customer calling services such as call waiting or call transfer, which are provided by your local phone company. Redial Redial the last number you called by pressing the REDIAL button after you get a dial tone. -
Page 15: Elephone Et
Telephone Set Up You can customize the following settings to suit your needs. Rings to Answer Selects the number of rings before Default Settings the unit answers. Rings to Answer Message Length Sets the length of time allowed for Message Length 1 minute Recording Quality Standard... -
Page 16: Etting The Ncoming Essage Etting The Ecording Uality
Toll Saver Toll Saver can save you the cost of a call when you access your messages from another phone: • If you have new messages, the unit answers after the 2nd ring. • If you have no new messages, the unit answers after the 5th ring. You can hang up after the 3rd ring and save the pay telephone or long distance charge. -
Page 17: Setting The Security Code
Setting the Security Code This feature allows you to change the factory default remote access code used for remote access to you answerer. The default code is 123. 1. Press and release the MENU button until the screen displays REMOTE ACCESS” 2. -
Page 18: Ialing Ode
Setting Your Local Area Code 1. Press and release the MENU button until the screen displays LOCAL AREA CODE. 2. The left-most digit, or a (_) sign flashes indicating the unit is ready to accept the area code entry. 3. Press the keypad number to set the 3-digit local area code in one step. 4. -
Page 19: Ime And D Ate
Setting the Time and Date NOTE: If you have subscribed to the Caller ID display feature from your telephone company, the telephone company sends the time and date with the Caller ID information. The unit automatically sets the time and date when the first call is received. Hour 1. -
Page 20: Anguage
Date 1. Use the keypad to enter two digit numbers to set the date. 2. When finished, press MENU to confirm. TIP: For example, to enter 8:09 a.m. 7/4: 1. Press 08. 2. Press 09. 3. Press * (for a.m.). 4. - Page 21 Handset Volume Use the VOL (+ or -) buttons to adjust the handset listening volume while it is in use. Speakerphone Volume Use the VOL (+ or -) buttons to adjust the speakerphone listening volume while it is in use.
-
Page 22: Olume
Caller ID Features IMPORTANT: In order to use this unit’s Caller ID features, you must subscribe to either the standard Name/Number Caller ID Service or Call Waiting Caller ID Service. To know who is calling while you are on the phone, you must subscribe to Call Waiting Caller ID Service. This unit receives and displays CID information transmitted by your local telephone company. -
Page 23: C All W Aiting
Caller ID with Call Waiting Provided you subscribe to Call Waiting Caller ID service from your phone company; if you receive an incoming call and you are already on the phone, a beep indicates the presence of a Call Waiting call on the line. Only the handset that is in use at the time of the call will display and store the Call Waiting Caller ID information. -
Page 24: Ecords Oving The D Ialing B Ack
Deleting CID Records • To delete the record shown in the display, press the DELETE button once. • To delete all records while reviewing, press and hold the DELETE button for about three seconds. The screen displays DELETE ALL?. Press DELETE again to complete. Dialing Back When reviewing Caller ID records, you can dial back the numbers on the display by pressing the dial button. -
Page 25: If You Did Not Program Your Local Area Code
3. If you are at on-hook and PICKUP or ADJ displays, you can adjust the phone number format by pressing the DIAL button. If the phone is off-hook and ADJUST shows in the display, you can adjust the phone number format by pressing the DIAL button. -
Page 26: Emory
Memory You may store up to 13 numbers in memory for quick dialing – 3 in the Quick Dial buttons (A, B, and C) and 10 in the keypad numbers (0-9). Each memory location can store number up to 32 digits. Storing a Number in Memory 1. -
Page 27: Edial Umber To Emory
7. To enter another name and number in a different memory location, return to Step 1 and repeat the process. Storing a Redial Number to Memory 1. Press the REDIAL button and the screen displays the number. 2. Press the STORE button. The screen displays LOCATION?. 3. -
Page 28: Id M Emories To Ser Emory
Erasing a Stored Number 1. Press the STORE button. 2. Press the memory location (0-9, A, B, C) to be erased. 3. Press the DELETE button. Copying Caller ID Memories to User Memory 1. Press the VOL (+ or -) buttons to view the caller number and name you want to copy. -
Page 29: Ause In The Ialing Equence Tored Umber
Inserting a Pause in the Dialing Sequence Press the REDIAL/PAUSE button to insert a delay in the dialing sequence of a stored telephone number when a pause is needed to wait for a dial tone (for example after you dial 9 for an outside line, or to wait for a computer access tone). Each pause is represented as “P”... -
Page 30: Tored Umbers
Reviewing Stored Numbers 1. Press DIAL. The screen displays LOCATION?. 2. Press a memory location key (0-9, A, B , C ) to review the memory location’s content. • To dial the displayed number, press DIAL. The speakerphone comes on and dials the number automatically. -
Page 31: Emory
Chain Dialing from Memory Use this feature to make calls which require a sequence of numbers, for instance, if you use a calling card for a frequently called long distance number. Basically, you dial each part of the sequence from memory. The following example shows how you can use chain dialing to make a call through a long distance service: The Number For Memory Location... -
Page 32: Auto Disconnect
Auto Disconnect Auto disconnect is a feature that tells the unit to stop playing the greeting or recording when a extension phone is picked up. Sometimes you may pick up and the machine keeps playing the greeting. This is normal. If you want to pick up the phone during the greeting play, wait about two seconds after the system answers before picking up a phone. -
Page 33: Information
Erase Messages Single Messages You can erase a message itself, leaving the Caller ID information. • While the message is playing, press and release DELETE. The unit erases the current message and announces, “Message erased.” All Messages You can also erase all the old messages only, leaving the new messages and Caller ID information. -
Page 34: Remote Access
Remote Access You can access your answerer from any touch-tone phone from another location by entering your 3-digit security code (the default security code is 1 2 3, but you can change it.) Be aware that remote functions do not work with rotary or push-button pulse-dialing phones. -
Page 35: Message Indicators
Message Indicators The following special messages indicate the status of a message or the unit: 00 CALLS The call record log is empty. UNKNOWN CALLER The incoming call does not have Caller ID service or their service area is not linked to yours. If UNKNOWN NAME appears along with a calling number, the name information for that number was not available. - Page 36 Can’t be heard by other party • Make sure the phone cord is securely plugged in. • Make sure the MUTE function is OFF. Memory dialing • Make sure you entered the numbers correctly. (See “Memory.”) Answerer Solutions Doesn’t answer or answers on 10th ring •...
- Page 37 Can’t hear messages • Adjust the volume control. Greeting continues to play even after an extension phone is picked up. • This is normal operation. Auto disconnect is delayed for 1 second after the unit answers a call. If you are near the unit, press PLAY/STOP to stop the greeting. No information is shown after the phone rings •...
-
Page 38: General Product Care
General Product Care To keep your product working and looking good, follow these guidelines: • Avoid putting it near heating appliances and devices that generate electrical noise (for example, motors or fluorescent lamps). • DO NOT expose to direct sunlight or moisture. •... -
Page 39: Warranty Assistance
Warranty Assistance If trouble is experienced with this equipment, for warranty information, please contact customer service at 1-800-448-0329. If the equipment is causing harm to the telephone network, the telephone company may require that you disconnect the equipment until the problem is resolved. -
Page 40: Limited Warranty
Limited Warranty What your warranty covers: • Defects in materials or workmanship. For how long after your purchase: • One year, from date of purchase. (The warranty period for rental units begins with the first rental or 45 days from date of shipment to the rental firm, whichever comes first.) What we will do: •... - Page 41 Product Registration: • Please visit www.ge.com/phones to register your unit. It will make it easier to contact you, should it ever be necessary. Registration is not required for warranty coverage. Limitation of Warranty: • THE WARRANTY STATED ABOVE IS THE ONLY WARRANTY APPLICABLE TO THIS PRODUCT.
-
Page 42: Imited
Index Answering System Operation FCC RF Radiation Exposure Statement Answering System Setup Flash Auto Disconnect General Product Care Base Layout Before You Begin Hearing Aid Compatibility Call Answering If You Did Not Program Your Local Area Caller ID Features Code Caller ID with Call Waiting If You Programmed Your Local Area Code 24 Causes of Poor Reception... - Page 43 Index Summary Screen Parts Checklist Placing a Phone Call 13 Switching between Speaker and Handset 13 Playing Messages Telephone Jack Requirements 6 Telephone Operation 12 Receiving a Phone Call Receiving and Storing Calls Telephone Set Up Recording the Outgoing Announcement Temporary Tone Dialing Troubleshooting Guide Redial...
- Page 44 Visit our website at: www.GE.com/phones Thomson Inc. 101 West 103rd Street Model 29586 Indianapolis, IN 46290-1102 00024178 (Rev. 0 Dom E) © 2008Thomson Inc. 08-14 Trademark(s) ® Registered Printed in China Marca(s) Registrada(s)