Table of Contents
Advertisement
Quick Links
Advertisement
Table of Contents

Related Manuals for Asus DS300i


Summary of Contents for Asus DS300i
-
Page 1: User Manual
ASUS Storage DS300f, DS300i User Manual Version 1.0... - Page 2 For the latest information and specifications regarding ASUSTek COMPUTER INC. (Taiwan) and any of its offerings or services, please contact your local ASUS office or the corporate headquarters. Visit http://www.asus.com/ for more information on ASUS products.
-
Page 3: Table Of Contents
Chapter 2: ASUS Storage Installation ......9 Unpacking the ASUS Storage ......9 Installing the LCD Panel (Optional) . - Page 4 Console ........36 Chapter 3: ASUS Storage Setup ......39 Setting up the Serial Connection .
- Page 5 Chapter 4: Management with ASUS Storage Management, cont. Working with the Storage Network, cont. Logging into a Subsystem ......63 Hiding the Other Subsystems .
- Page 6 Chapter 4: Management with ASUS Storage Management, cont. Managing Users, cont. Viewing User Sessions .......80 Logging out Other Users .
- Page 7 Chapter 4: Management with ASUS Storage Management, cont. Managing Network Attached Storage (NAS), cont. Making Windows Protocol Settings .....102 Making FTP Protocol Settings ......104 Making UNIX and Linux Protocol Settings .
- Page 8 Chapter 4: Management with ASUS Storage Management, cont. Shutting Down the Subsystem ......127 Monitoring the Shutdown ......128 Starting Up After Shutdown .
- Page 9 Chapter 4: Management with ASUS Storage Management, cont. Managing Disk Arrays, cont. Creating a Disk Array – Advanced .....152 Deleting a Disk Array .......154 Viewing Disk Array Information .
- Page 10 Language .....178 Closing Smart NAS Console ....... . .178...
- Page 11 Chapter 5: Smart NAS Console, cont. Working with the Device List ......179 Adding NAS Devices .
- Page 12 Chapter 5: Smart NAS Console, cont. NAS Management ........198 Restarting the Subsystem .
- Page 13 Chapter 6: Management with the CLU, cont. Managing the Enclosure, cont. Reconditioning a Battery ......220 Locating an Enclosure .
- Page 14 Chapter 6: Management with the CLU, cont. Managing Logical Drives, cont. Initializing a Logical Drive ......240 Running Redundancy Check .
- Page 15 Restarting ASUS Storage – Telnet Connection ...280 Restarting ASUS Storage – Serial Connection ... .280 Making Buzzer Settings ....... . .282...
- Page 16 Chapter 8: Maintenance ........305 Updating the Firmware in ASUS Storage Management .
- Page 17 Chapter 8: Maintenance, cont. Updating the Firmware in the CLU ......309 Downloading the Firmware Image File ....309 Updating the Firmware .
- Page 18 Chapter 10: Troubleshooting ......355 ASUS Storage is Beeping .......356 LEDs Display Amber or Red .
- Page 19 Unsaved Data in the Controller Cache .....397 ASUS Storage Does Not Boot ......397 Chapter 11: Support .
-
Page 20: Chapter 1: Introduction To Asus Storage
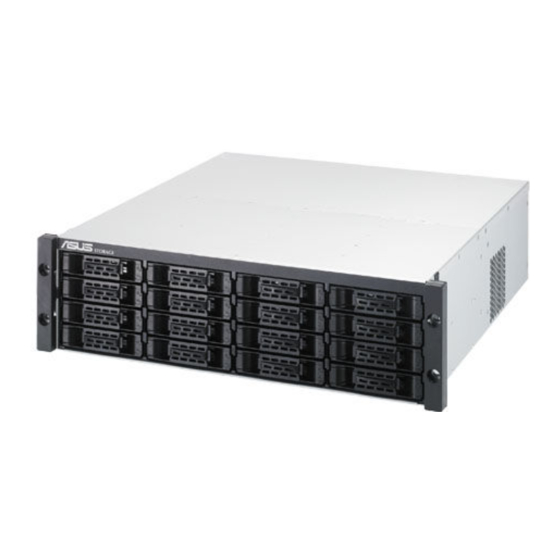
Specifications (page 5) About This Manual This User Manual describes how to setup, use, and maintain the ASUS Storage DS300f and DS300i external disk array subsystems. It also describes how to use the built-in command-line interface (CLI), command-line utility (CLU) and embedded ASUS Storage Management software. - Page 21 If so configured, a hot spare drive will automatically replace a failed drive, securing the fault-tolerant integrity of the logical drive. The self- contained hardware-based RAID logical drive provides maximum performance in a compact external enclosure. Figure 2. ASUS Storage DS300f rear view Dual Power Supplies SAS RAID Controller...
-
Page 22: Disk Drive Support
SAS RAID Controller For a description of the LEDs, see pages 33 through 35. All ASUS Storage enclosures include a mid-plane, RAID controller, power supply unit, and enclosure processor all in one cable-less chassis design. Multiple fans and optional power supplies provide redundancy to ensure continued usage during component failure. -
Page 23: External Ports
Chapter 1: Introduction to ASUS Storage • Interfaces: • ASUS Storage Management, through browser and Ethernet • CLU and CLI, through serial and Telnet • Subsystem buzzer and LEDs External Ports • High-availability DAS, NAS, SAN, and cluster-friendly platforms: •... -
Page 24: Management Tools
Chapter 1: Introduction to ASUS Storage Management Tools • ASUS Storage Management: browser-based, embedded, out-of-band, OS independent, localized in multiple languages, no host agent needed. • Command Line Interface (CLI) via RJ-11 serial port or Telnet. • Command Line Utility (CLU) via RJ-11 serial port or Telnet. -
Page 25: Current (Maximum), Cont
8 A @ 100 VAC or 4 A @ 240 VAC current rating with two power cords Power Consumption DS300f: without disk drives, 51.3 W; with 16 disk drives, 241.8 W DS300i: without disk drives, 72.3 W; with 16 disk drives, 242.8 W Temperature Normal conditions: 5°... -
Page 26: Environmental
Warranty: Three year limited warranty on all components except the optional battery backup unit, which has a one-year warranty. Support: 24 x 7 email and phone support (English only). 24 x 7 access to ASUS support site for drivers, firmware, and compatibility. - Page 27 Chapter 1: Introduction to ASUS Storage...
-
Page 28: Chapter 2: Asus Storage Installation
RJ11-to-DB9 serial data cable • Screws for disk drives (70 pieces) A Battery Backup Unit (BBU) is optional on the ASUS Storage subsystem. In the event of a power failure, the BBU powers the controller cache to preserve any data it contains. Warning This is a Class A product. -
Page 29: Installing The Lcd Panel (Optional)
The LCD panel mounts to the left ear of the ASUS Storage enclosure. Align the connector on the left bracket of the ASUS Storage enclosure to the connector on the back of the LCD panel, as shown in Figure 1. - Page 30 Chapter 2: ASUS Storage Installation Tighten the screws to secure the LCD panel to the bracket. Figure 2. Attach the LCD panel to the ASUS Storage enclosure The LCD screen activates when the ASUS Storage boots. See ―Connecting the Power‖ on page 33.
-
Page 31: Mounting Asus Storage In A Rack
At least two persons are required to safely lift, place, and attach the ASUS Storage unit into a rack system. • Do not lift or move the ASUS Storage unit by the handles, power supplies or the controller units. Hold the subsystem itself. - Page 32 Handles mount outside the rack post outside the rack post To install the ASUS Storage subsystem into a rack with the supplied mounting rails: Check the fit of the mounting rails in your rack system. See page 14, Figure 4.
- Page 33 Chapter 2: ASUS Storage Installation Figure 4. Rack mount assembly diagram Rack rear post Rack front post Alignment pins two on each flange Rear rail Front rail Support for subsystem Inside of post Rail attaching screws Inside of post (not included) Note that only the front rail has a support for the subsystem.
-
Page 34: Installing Disk Drives
Drive Slot Numbering You can install any suitable disk drive into any slot in the enclosure. The diagram below shows how ASUS Storage’s drive slots are numbered. Whether you have the original or plus carriers, the slots are numbered the same. -
Page 35: Installing Your Disk Drives
Chapter 2: ASUS Storage Installation Figure 5. ASUS Storage drive slot numbering Install all of the drive carriers into the ASUS Storage enclosure to ensure proper airflow, even if you do not populate all the carriers with disk drives. Installing Your Disk Drives... - Page 36 Figure 6. Disk drive mounted in a drive carrier Disk drive mounting screw mounting screw This completes disk drive installation. Caution ASUS Storage supports disk drive hot-swapping. To avoid hand contact with an electrical hazard, do not remove more than one drive carrier a time.
-
Page 37: Making Data And Management Connections
Ethernet RJ45 iSCSI Port connectors. See ―iSCSI Direct Attached Storage (DAS)‖ on page 24 for connection instructions. Data Path The ASUS Storage DS300f controller has two (2) FC Port connectors and one (1) SFF-8088 SAS Expansion Port connector. See page 19, Figure 7. To establish the data path: Install an FC transceiver into the FC data port on the ASUS Storage controller. - Page 38 Chapter 2: ASUS Storage Installation Connect the FC transceiver on the ASUS Storage DS300f controller to the Host PC or Server. See also ―SAS JBOD Expansion‖ on page 30. Management Path The ASUS Storage DS300f controller has one (1) Ethernet RJ-45 Management Port connector.
- Page 39 Chapter 2: ASUS Storage Installation Figure 8. FC DAS data and management connections Host PC or Server Network Switch Management Cables ASUS Storage DS300f FC card Data Cable Management Port FC Data Ports (2)
-
Page 40: Fibre Channel Storage Area Network (San)
RJ45 iSCSI Port connectors. See ―iSCSI Storage Area Network (SAN)‖ on page 27 for connection instructions. Data Path The ASUS Storage DS300f controller has two (2) FC Port connectors and two (2) Ethernet RJ45 iSCSI Port connectors. See page 19, Figure 7. To establish the data path: Install an FC transceiver into the FC data port on the ASUS Storage controller. - Page 41 Chapter 2: ASUS Storage Installation Attach the other end of the Ethernet cable to the Management Port on the ASUS Storage DS300f subsystem. If you have multiple ASUS Storage subsystems, Host PCs or Servers, repeat steps 1 and 2 as required.
- Page 42 Chapter 2: ASUS Storage Installation Figure 9. FC SAN data and management connections FC card FC card Host PCs or Management Cables Servers Data Cables Network Switch FC Switch ASUS Storage DS300f ASUS Storage DS300f Management Port FC Data Ports (2)
-
Page 43: Iscsi Direct Attached Storage (Das)
These instructions also apply to the iSCSI Ports on ASUS Storage Fibre Channel subsystems. Configuring a Data Path The ASUS Storage DS300i controller has four (4) Ethernet RJ45 iSCSI Port connectors. See page 25, Figure 10. To establish the data path: Attach one end of an Ethernet cable to the GbE (iSCSI) NIC in the Host PC. - Page 44 Chapter 2: ASUS Storage Installation Figure 10. ASUS Storage D300i data and management ports iSCSI Data Port 4 iSCSI Data Port 3 iSCSI Data Port 2 SAS Expansion iSCSI Data Port 1 Port (to DS300j) Management Port...
- Page 45 Chapter 2: ASUS Storage Installation Figure 11. iSCSI DAS data and management connections Host PC or Server Standard NIC GbE NIC Management Cables Standard Network Switch Data Cable ASUS Storage DS300i Management Port iSCSI Data Ports (4)
-
Page 46: Iscsi Storage Area Network (San)
Storage (NAS). See ―Installing Smart NAS Console‖ on page 36. Configuring a Data Path Depending on the model, the ASUS Storage DS300i controller has two (2) or four (4) Ethernet RJ45 iSCSI Port connectors. See page 25, Figure 10. To establish the data path: Attach one end of an Ethernet cable to the GbE (iSCSI) NIC in the Host PC. - Page 47 Chapter 2: ASUS Storage Installation Configuring a Management Path The ASUS Storage DS300i controller has one (1) Ethernet RJ-45 Management Port connector. See page 25, Figure 10. To establish the management path: Attach one end of an Ethernet cable to the standard NIC in the Host PC.
- Page 48 Chapter 2: ASUS Storage Installation Figure 12. iSCSI SAN data and management connections Standard Standard GbE NIC GbE NIC Host PCs or Servers Standard Network Switch Network Switch Management Cables Data Cables ASUS Storage DS300i iSCSI Data Ports (4) Management Port...
-
Page 49: Sas Jbod Expansion
Port on the ASUS DS300j expansion units. If you have another ASUS DS300j expansion unit, attach one end of the SFF-8088 to SFF-8088 SAS cable to the SAS OUT Port of the first ASUS DS300j to the SAS IN Port of the second ASUS DS300j. - Page 50 Chapter 2: ASUS Storage Installation Figure 13. ASUS Storage DS300j expansion data connections SAS Expansion Port SAS data cable ASUS Storage DS300i SAS OUT Port ASUS DS300j SAS IN Port ASUS DS300j After you complete your data and management connection, go to ―Setting Up...
-
Page 51: Setting Up Serial Cable Connections
Chapter 2: ASUS Storage Installation Setting Up Serial Cable Connections Serial communication enables the Command Line Interface (CLI) and Command Line Utility (CLU) on your PC to monitor and control the ASUS Storage subsystem. The ASUS Storage package includes a RJ11-to-DB9 serial data cable. -
Page 52: Connecting The Power
JBOD expansion units first. When the power is switched on, the LEDs and LCD screen light up. Front Panel LEDs When boot-up is finished and the ASUS Storage DS300f or DS300i subsystem is functioning normally: • Power, Global Enclosure Status, and Global RAID Status LEDs display green continuously. -
Page 53: Controller Leds
Chapter 2: ASUS Storage Installation Controller LEDs When boot-up is finished and the ASUS Storage subsystem is functioning normally: • Battery, and Controller status LEDs display green continuously. • Ethernet LEDs display green or flash depending on your network connection. - Page 54 Chapter 2: ASUS Storage Installation Figure 18. ASUS Storage DS300i Controller LEDs Controller Status Dirty Cache Fan 2 JBOD Expansion Fan 1 USB 2 iSCSI Ports Battery USB 1 Fan 1 Fan 2 There are two LEDs on each Drive Carrier. They report the presence of a disk drive, activity of the drive, and the drive’s current condition.
-
Page 55: Lcd Panel
ASUS Storage’s power supply. System is Initializing At first, the LCD screen displays When the ASUS Storage DS300f or DS300i subsystem is fully booted and running under normal conditions, the LCD screen shows ASUS Storage and IP address, as shown in Figure 20. - Page 56 Chapter 2: ASUS Storage Installation In the first Installation Complete screen, click the Finish button. To register your software online, your PC must have an Internet connection. Thank you for registering. In the second Installation Complete screen, choose whether you want to restart your PC now.
- Page 57 Chapter 2: ASUS Storage Installation...
-
Page 58: Chapter 3: Asus Storage Setup
Microsoft HyperTerminal. This procedure uses the serial cable connection you made in Chapter 2, page 32. You must use the CLI or CLU to assign an IP address to the ASUS Storage to enable a network connection for ASUS Storage Management. -
Page 59: Choosing Dhcp Or A Static Ip Address
If you choose to enable DHCP, have your Network Administrator dedicate an IP address for the ASUS Storage, linked to the ASUS Storage’s MAC address. This action will prevent the DHCP server from assigning a new IP address when the ASUS Storage restarts, with the result that users can no longer log in. -
Page 60: Setting Up With The Cli
Chapter 3: ASUS Storage Setup Setting up with the CLI Type the following string to set the system date and time, then press Enter. administrator@cli> date -a mod -d 2009/01/25 -t 14:50:05 In the above example, the date and time are included as examples only. - Page 61 Chapter 3: ASUS Storage Setup To verify the settings, type net, and press Enter. administrator@cli> net =========================================== CId Port Type Mask Gateway Link =========================================== Mgmt 192.168.10.85 255.255.255.0 192.168.10.1 iSCSI 192.168.10.88 255.255.255.0 192.168.10.1 iSCSI 10.0.0.3 0.0.0.0 0.0.0.0 Down iSCSI 10.0.0.4 0.0.0.0 0.0.0.0...
-
Page 62: Setting Up With The Clu
Chapter 3: ASUS Storage Setup Setting up with the CLU At the administrator@cli> prompt, type menu and press Enter. The CLU main menu appears. Figure 2. CLU main menu With Quick Setup highlighted, press Enter. The first Quick Setup screen enables you to make Date and Time settings. -
Page 63: Making Automatic Ip Settings
Configuring the RAID You can configure your RAID arrays and logical drives using the CLU at this time. However, those actions are described in Creating Disk Arrays with ASUS Storage Management (page 47). ASUS suggests that you highlight Skip the Step and Finish and press Enter. -
Page 64: Setting Up With The Lcd
Chapter 3: ASUS Storage Setup Setting up with the LCD The LCD Panel displays the current IP address during normal operation. If you did not install the LCD Panel, see ―Installing the LCD Panel (Optional)‖ on page 10. The LCD does not have a date and time function. -
Page 65: Making Automatic Ip Settings
The display shows the new IP address set by the DHCP server. This completes the Management Port setup. You can also make network settings for the iSCSI ports with the LCD screen, however that task is easier using CLU or ASUS Storage Management. -
Page 66: Creating Disk Arrays With Asus Storage Management
ASUS Storage Management uses an HTTP connection ..http:// • Enter the ASUS Storage’s IP address ... . 192.168.10.85 Together, your entry looks like this: http://192.168.10.85 Secure Connection •... -
Page 67: Choosing A Language
The User Name and Password are case sensitive. Figure 4. ASUS Storage Management log-in screen After sign-in, the ASUS Storage Management opening screen appears. If there are any unconfigured physical drives in the enclosure, an Array Configuration menu will also appear. See page 49, Figure 6. -
Page 68: Creating Your Logical Drives
Chapter 3: ASUS Storage Setup Figure 5. Clicking “Language” on the ASUS Storage Management banner Creating Your Logical Drives On a newly activated ASUS Storage subsystem, there are no disk arrays or logical drives. To create a logical drive: Click the Disk Arrays icon, then click the Create tab. - Page 69 Chapter 3: ASUS Storage Setup Automatic When you choose the Automatic option, the following parameters appear on the screen: • Disk Arrays – The number of physical drives in the disk array, their ID numbers, configurable capacity, and the number of logical drives to be created •...
- Page 70 Uncheck the boxes if you want to disable Media Patrol or PDM. ASUS recommends leaving these features enabled. Highlight physical drives you want in the disk array from the Available list and press the >> button to move them to the Selected list.
- Page 71 Chapter 3: ASUS Storage Setup • For DAS and SAN, enter an Alias (name) for the logical drive. An Alias is optional. Use letters, numbers, space between words, and underscore. An Alias is optional. • iSCSI only. For NAS, enter a Mount Point (name) for the logical drive.
-
Page 72: Logging Out Of Asus Storage Management
Using ASUS Storage Management over the Internet The above instructions cover connections between ASUS Storage and your company network. It is also possible to connect to a ASUS Storage from the Internet. Your MIS Administrator can tell you how to access your network from outside the firewall. -
Page 73: Logging Out Of Asus Storage Management
Chapter 3: ASUS Storage Setup... -
Page 74: Chapter 4: Management With Asus Storage Management
Managing Disk Arrays (page 149) • Managing Logical Drives (page 163) • Managing Spare Drives (page 171) • Working with the Logical Drive Summary (page 175) For information about ASUS Storage’s audible alarm and LEDs, see ―Chapter 10: Troubleshooting‖ on page 355. -
Page 75: Logging Into Asus Storage Management
ASUS Storage Management uses an HTTP connection ..http:// • Enter the ASUS Storage’s IP address ... . 192.168.10.85 Together, your entry looks like this: http://192.168.10.85 Secure Connection •... -
Page 76: Choosing A Language
Chapter 4: Management with ASUS Storage Management Figure 1. ASUS Storage Management log-in screen After sign-in, the ASUS Storage Management opening screen appears. If there are any unconfigured physical drives in the enclosure, an Array Configuration menu will also appear (see page 31). -
Page 77: Perusing The Interface
Chapter 4: Management with ASUS Storage Management Figure 2. Clicking “Language” on the ASUS Storage Management banner Perusing the Interface ASUS Storage Management is browser-based RAID management software with a graphic user interface. Figure 3. ASUS Storage Management interface... -
Page 78: Using The Header
View – To view the Event Frame, see ―Viewing the Event Frame‖ on page 61. • Storage Network – To view all of the ASUS Storage subsystem enclosures currently accessible the network, see ―Working with the Storage Network‖ on page 63. - Page 79 Chapter 4: Management with ASUS Storage Management Figure 4. ASUS Storage Management Tree View Name of Logged-in user Subsystem IP address and ASUS storage model Physical Drives in this Enclosure...
-
Page 80: Using Management View
Chapter 4: Management with ASUS Storage Management Using Management View Management View provides the actual user interface with the ASUS Storage, including creation, maintenance, deletion, and monitoring of disk arrays and logical drives. Function Tabs control specific actions and processes. This window changes depending on which item you choose in Tree View and which tab you choose in Management View itself. -
Page 81: Logging Out Of Asus Storage Management
Chapter 4: Management with ASUS Storage Management Logging out of ASUS Storage Management There are two ways to log out of ASUS Storage Management: • Close your browser window • Click Logout on the ASUS Storage Management banner Figure 5. Clicking “Logout” on the ASUS Storage Management banner Clicking Logout brings you back to the Login Screen. -
Page 82: Working With The Storage Network
When you log into ASUS Storage Management, you access a specific ASUS Storage subsystem. See ―Logging into ASUS Storage Management‖ on page 56. The Storage Network feature enables you to access all of the ASUS Storage subsystems with a Management Port connection to your network. -
Page 83: Working With Subsystems
Chapter 4: Management with ASUS Storage Management Working with Subsystems An ASUS Storage subsystem is identified by its Management Port IP address. Subsystem functions include: • Viewing Subsystem Information (page 64) • Saving a System Service Report (page 65) •... -
Page 84: Saving A System Service Report
Chapter 4: Management with ASUS Storage Management Saving a System Service Report To save a System Service Report as a text file on your Host PC: In Tree View, click the Subsystem icon. On the Information tab, click the upper Save button. -
Page 85: Setting Subsystem Ntp
Click the Submit button. The change takes effect immediately. Setting Subsystem NTP Network Time Protocol (NTP) synchronizes the ASUS Storage subsystem to an NTP server. After you have made NTP settings, the ASUS Storage subsystem synchronizes: • At startup. •... -
Page 86: Viewing The Runtime Event Log
Chapter 4: Management with ASUS Storage Management In Management View, from the Settings tab dropdown menu, choose NTP Management. Click the Start Time Sync button. Click the OK button in the notification dialog box. Viewing the Runtime Event Log Runtime Events lists information about the 1023 most recent runtime events recorded since the system was started. -
Page 87: Clearing The Runtime Event Log
Chapter 4: Management with ASUS Storage Management In the File Download dialog box, click the Save button. In the Save dialog box, name the file, navigate to the folder where you want to save the log file, and click the Save button. -
Page 88: Saving Nvram Events
Chapter 4: Management with ASUS Storage Management Saving NVRAM Events To save the NVRAM event log as a text file: In Tree View, click the Subsystem icon. In Management View, click the Events tab dropdown menu and choose System Events in NVRAM. -
Page 89: Running Background Activities
Chapter 4: Management with ASUS Storage Management In Management View, click the Background Activities tab and choose Settings from the dropdown menu. Click the dropdown menu to choose a priority of Low, Medium, and High for the following functions: •... -
Page 90: Running Media Patrol
Chapter 4: Management with ASUS Storage Management • Transition – See ―Transitioning a Disk Array‖ on page 161 • Initialization – See ―Initializing a Logical Drive‖ on page 166 • Redundancy Check – See ―Running Redundancy Check‖ on page 166 In the next screen, make the choices as requested. -
Page 91: Viewing Scheduled Activities
Chapter 4: Management with ASUS Storage Management Viewing Scheduled Activities To view scheduled activities for this subsystem: Click the Subsystem icon Tree View. Click the Scheduler tab in Management View. Scheduling an Activity To set a scheduled activity for this subsystem: Click the Subsystem icon Tree View. -
Page 92: Deleting A Scheduled Activity
Chapter 4: Management with ASUS Storage Management • Choose the Auto Fix option. This feature attempts to repair the problem when it finds an error. • Choose the Pause on Error option. This feature stops the process when it finds an error •... -
Page 93: Setting The Lock
Chapter 4: Management with ASUS Storage Management Setting the Lock The lock prevents other sessions (including by the same user) from making a configuration change to the controller until the lock expires or a forced unlock is done. You can set the lock to last from one minute to one day. To set the lock for this... - Page 94 Chapter 4: Management with ASUS Storage Management If you are the User who set the lock, click the Unlock option. If another User set the lock and you are a Super User, click the Unlock option and check the Force Unlock box.
-
Page 95: Managing Users
The Information tab appears in Management View. Making User Settings To change settings of other users: Log into ASUS Storage Management as the Administrator or a Super User. Click the Subsystem icon in Tree View. Click the Administrative Tools icon. -
Page 96: Making Your Own User Settings
―Changing Another User’s Password‖ on page 78 for more information. Making Your Own User Settings To change your own user settings: Log into ASUS Storage Management under your own user name. Click the Subsystem icon in Tree View. Click the Administrative Tools icon. -
Page 97: Changing Another User's Password
To send a test message to the email address in the listed under General Info, click the Test Email button. Changing Another User’s Password To change a user’s password: Log into ASUS Storage Management as the Administrator or a Super User. Click the Subsystem icon in Tree View. Click the Administrative Tools icon. -
Page 98: Creating A User
Enter a password of 1 to 31 characters, no spaces, in the New Password and Retype Password fields. A password is optional. If you do not specify a password, log into ASUS Storage Management with the User Name and leave the password field blank. -
Page 99: Deleting A User
There will always be at least one Super User account. You cannot delete the user account you used to log in. To delete a user: Log into ASUS Storage Management as the Administrator or a Super User. Click the Subsystem icon in Tree View. -
Page 100: Managing The Network Connection
Changing a Link Aggregation Entry (page 83) Making Management Port Settings When you log into ASUS Storage Management over your network, you use the ASUS Storage’s management port. Before you change settings, please see ―Choosing DHCP or a Static IP Address‖... -
Page 101: Creating A Link Aggregation Entry
Chapter 4: Management with ASUS Storage Management To make changes to the iSCSI Port settings: Click the Subsystem icon in Tree View. Click the Administrative Tools icon. Click the Network Management icon. Click the iSCSI Ports tab. Click one of the Port Configuration links. -
Page 102: Viewing Link Aggregation Entries
Chapter 4: Management with ASUS Storage Management Viewing Link Aggregation Entries To view the current Link Aggregation entries: Click the Subsystem icon in Tree View. Click the Administrative Tools icon. Click the Network Management icon. Click the Link Aggregation tab in Management View. -
Page 103: Managing Fibre Channel Connections
Chapter 4: Management with ASUS Storage Management Managing Fibre Channel Connections This feature pertains to the ASUS Storage DS300f. Functions include: • Viewing Fibre Channel Node Information (page 84) • Viewing Fibre Channel Port Settings (page 84) • Making Fibre Channel Port Settings (page 85) •... -
Page 104: Making Fibre Channel Port Settings
Chapter 4: Management with ASUS Storage Management • Fabric WWNN – World Wide Node Name (appears when connected to a switch) • Fabric WWPN – World Wide Port Name (appears when connected to a switch) • Current Speed – 8 Gb/s, 4 Gb/s, or 2 Gb/s •... -
Page 105: Viewing Fibre Channel Port Statistics
Point to Point Private Loop Example 1: If you connect the ASUS Storage to a Fibre Channel switch and choose NL-Port topology, you will create a Fabric Direct attached topology. Example 2: If you have a Point to Point attached topology, you made a direct connection (no switch) and selected N-port topology. -
Page 106: Viewing Sfp Information
Initiator IO Count – I/O Count on the initiator on the host side. Clearing Statistics To clear statistics, see ―Clearing Statistics‖ on page 126. Viewing SFP Information SFPs (small form-factor pluggable) transceivers connect the ports the ASUS Storage controllers to the Fibre Channel fabric. To view SFP information: Click the Subsystem icon in Tree View. -
Page 107: Viewing Fibre Channel Logged-In Devices
Viewing Fibre Channel Initiators You must add an initiator to the ASUS Storage's initiator list in order to use the initiator to create a LUN for your logical drive. To view a list of recognized initiators: Click the Subsystem icon in Tree View. - Page 108 Chapter 4: Management with ASUS Storage Management Adding an Initiator To add an initiator to the ASUS Storage’s initiator list: Check the box to the left of the initiator. Click the Add to Initiator List button. The initiator appears under Storage Services. See page 112. You can then use...
-
Page 109: Managing Iscsi Connections
For more information, contact the Internet Engineering Task Force at http://www.ietf.org/ Viewing iSCSI Node Information The iSCSI node is the ASUS Storage DS300i controller. The iSCSI Node has four ports. See ―Making Data and Management Connections‖ on page 18 for information about how these ports are physically connected to the Host PC. -
Page 110: Viewing Iscsi Target Ports
Chapter 4: Management with ASUS Storage Management Enter a value in the field for each of the following items: • Node Name – An iSCSI node is identified by its name. • Node Alias – Optional. Maximum of 31 characters. Use letters, numbers, space between words and underscore. -
Page 111: Viewing The Iscsi Portal
Chapter 4: Management with ASUS Storage Management The Target Ports tab displays the following information: • Controller ID – 1 • Port ID – 1, 2, 3, or 4 • Max Receive Data Segment Length – 8 KB is the default •... -
Page 112: Working With Iscsi Isns
Chapter 4: Management with ASUS Storage Management iSCSI session information includes: • Index – ASUS Storage iSCSI session index number. • Device Name – iSCSI initiator on the Host PC. • Port ID – ID number of the port on the iSCSI HBA card in the Host PC. -
Page 113: Working With Iscsi Chaps
With ASUS subsystems, CHAP secrets cannot be assigned to individual LUNS. Use LUN mapping and masking to restrict LUN access to a unique initiator. A single target CHAP secret should not be shared among multiple initiators. - Page 114 Chapter 4: Management with ASUS Storage Management Click the CHAP tab in Management View. The CHAP tab displays the list of current CHAPs. Adding CHAPs To add a CHAP: Click the Subsystem icon in Tree View. Click the Administrative Tools icon.
-
Page 115: Using Iscsi Ping
Check the box to the left of the CHAP you want to delete. Click the Submit button. Using iSCSI Ping You can send a ping through ASUS Storage’s iSCSI data ports to verify a network connection. To send a ping: Click the Subsystem icon in Tree View. -
Page 116: Managing Network Attached Storage (Nas)
Chapter 4: Management with ASUS Storage Management Managing Network Attached Storage (NAS) The Network Attached Storage (NAS) feature supports up to 32 logical drives of any RAID level and uses the iSCSI ports as the network connection. • Viewing a List of NAS Users (page 98) •... -
Page 117: Viewing A List Of Nas Users
Chapter 4: Management with ASUS Storage Management Viewing a List of NAS Users To view a list of NAS users: Click the Subsystem icon in Tree View. Click the Administrative Tools icon. Click the NAS icon. Click the NAS User Management icon. -
Page 118: Deleting Nas Users
Chapter 4: Management with ASUS Storage Management Click the NAS icon. Click the NAS User Management icon. Click the Change Password tab in Management View. From the dropdown menu, choose the user whose password you want to change. Enter a new password of 1 to 16 characters, no spaces, in the New Password field. -
Page 119: Creating Nas Groups
Chapter 4: Management with ASUS Storage Management Creating NAS Groups To create a NAS Group: Click the Subsystem icon in Tree View. Click the Administrative Tools icon. Click the NAS icon. Click the NAS User Group Management icon. Click the Create tab in Management View. -
Page 120: Deleting Group Members
Chapter 4: Management with ASUS Storage Management Click the Group Members tab in Management View. From the dropdown menu, choose the Group to which you want to add a User. From the Users list, highlight a User to add to the Group and click the >>... -
Page 121: Managing Quotas
Chapter 4: Management with ASUS Storage Management • Free space – Amount of quota assigned but not used, in MB. Applies when a quota has been assigned. • Usage – Amount of quota used, by percentage. Applies when a quota has been assigned. - Page 122 Choose the Enable option button to enable the Recycle Bin function. Enabled – Deleted files to the Recycle Bin. You must empty the Recycle Bin to remove them from the ASUS Storage. Uses more space. Disabled – Default. Deleted files are immediately removed from the ASUS Storage.
-
Page 123: Making Ftp Protocol Settings
Chapter 4: Management with ASUS Storage Management Making FTP Protocol Settings Protocols are disabled by default. Enable the protocols appropriate for your Hosts or PCs. To make FTP Protocol settings: Click the Subsystem icon in Tree View. Click the Administrative Tools icon. -
Page 124: Viewing The Share Folders List
Chapter 4: Management with ASUS Storage Management Click the OK button to acknowledge. Note If you join an NIS Domain, you automatically disable your AD Domain settings. See ―Making Windows Protocol Settings‖ on page 102. Viewing the Share Folders List... -
Page 125: Modifying A Share Folder
Chapter 4: Management with ASUS Storage Management Important By default, all users have full Read-Write access to all NAS share folders. To change permissions, click the Sharing Setup icon. Modifying a Share Folder To modify a Share Folder: Click the Subsystem icon in Tree View. -
Page 126: Making Windows And Ftp Sharing Settings
Chapter 4: Management with ASUS Storage Management Making Windows and FTP Sharing Settings Sharing settings enable you to designate NAS user and group access to share folders on your ASUS Storage NAS system. To make Windows or FTP sharing settings: Click the Subsystem icon in Tree View. -
Page 127: Viewing File System Status
Chapter 4: Management with ASUS Storage Management Click the Sharing Setup icon. Click the UNIX/Linux Sharing tab. From the Volume dropdown menu, choose the volume containing the folder you want to modify. From the Folder Name dropdown menu, choose the folder you want to modify. -
Page 128: Creating A Nas File System
Chapter 4: Management with ASUS Storage Management Creating a NAS File System To create a NAS file system: Create a new logical drive. Choose a capacity of 10 GB or greater, click the NAS option beside LD Type, and specify a mount point. See ―Creating a Disk Array – Advanced‖ on page 152 and ―Creating a Logical Drive‖... -
Page 129: Setting-Up Nas Replication
Chapter 4: Management with ASUS Storage Management Click the Administrative Tools icon. Click the NAS icon. Click the NAS Replication icon. The items displayed under the Information tab vary depending on the current configuration and activity: • Role – Standalone, Primary (source) Server, or Backup (target) Server •... -
Page 130: Resolving Mount-Point Conflicts
Chapter 4: Management with ASUS Storage Management Make the following choices as needed: • Disable – Disables NAS replication • Do it once – Performs one NAS replication immediately • Time interval by hour – Choose the number of hours from the dropdown menu •... -
Page 131: Managing Storage Services
Adding a LUN Map (page 113) • Editing a LUN Map (page 114) Adding an Initiator You must add an initiator to the ASUS Storage's initiator list in order to use the initiator to create a LUN To add an initiator: Click the Subsystem icon in Tree View. -
Page 132: Viewing The Lun Map
Chapter 4: Management with ASUS Storage Management Check the box to the left of the initiator you want to delete. Click the Submit button. Viewing the LUN Map To view the current LUN Map: Click the Subsystem icon in Tree View. -
Page 133: Editing A Lun Map
Chapter 4: Management with ASUS Storage Management Editing a LUN Map To edit the LUN Map: Click the Subsystem icon in Tree View. Click the Administrative Tools icon. Click the Storage Services icon. Click the LUN Map tab in Management View. -
Page 134: Managing Software Services
Enter an Email subject (example: ASUS Storage Status). 10. Click the Submit button. Sending a Test Message To send one test message to the User currently logged into ASUS Storage Management: Under Test Email, check the ―Send A Test Email‖ box. -
Page 135: Making Slp Settings
Starting or Restarting Email service To start or restart the Email service, click the Start or Restart button. Making SLP Settings ASUS Storage's SLP service discovers services available over the Internet. To make SLP service settings: Click the Subsystem icon in Tree View. -
Page 136: Making Web Server Settings
Enter the HTTP Port number. 80 is the default. Enter Session Time Out interval. This setting causes ASUS Storage Management to time-out after a period of inactivity. 24 minutes is the default. The range is 1 to 1440 minutes (one day). -
Page 137: Making Telnet Settings
Starting or Restarting Web Server service To start or restart the Web Server service, click the Start or Restart button. Making Telnet Settings ASUS Storage’s Telnet service enables you to access ASUS Storage’s Command Line Interface (CLI) through a network connection. To make Telnet settings: Click the Subsystem icon in Tree View. -
Page 138: Making Snmp Settings
To start or restart the Telnet service, click the Start or Restart button. Making SNMP Settings ASUS Storage’s SNMP service enables the SNMP browser to obtain information from the ASUS Storage. The Trap Sink is where SNMP events are sent and can be viewed. To change the SNMP settings: Click the Subsystem icon in Tree View. -
Page 139: Making Netsend Settings
To start or restart the SNMP service, click the Start or Restart button. Making Netsend Settings ASUS Storage’s Netsend service sends ASUS Storage subsystem events in the form of text messages to your Host PC and other networked PCs. This service is normally Stopped and set to Manual start. - Page 140 Chapter 4: Management with ASUS Storage Management Adding Netsend recipients See ―Netsend Requirements‖ on page 121. To add a Netsent recipient: In the Recipient Address field, type the IP address of the recipient PC. Under Recipient filter, choose the lowest level of Severity to be reported for each event.
- Page 141 Chapter 4: Management with ASUS Storage Management If your Netsend and Messenger service settings are correct but the recipient PC does not receive event messages, check the recipient PC’s Firewall settings. Refer to your OS documentation for more information.
-
Page 142: Exporting The User Database
Click the Export button. In the Opening export dialog box, click the Save to Disk option. Click the OK button. The user database file is saved to the Host PC from which you access ASUS Storage Management. Note The Encryption box is grayed out. Encryption is always enabled. -
Page 143: Importing A Configuration Script
Importing a Configuration Script The Software Management – Import tab enables you to import a Configuration Script to the ASUS Storage DS300f or DS300i subsystem. You can write a CLI configuration script to automatically configure your ASUS Storage DS300f or DS300i subsystem. -
Page 144: Updating The Firmware
Flashed Image Info – The firmware package flashed to memory If the Running and Flashed Images do not match, the ASUS Storage has not restarted since the firmware was last updated. Restart the ASUS Storage to run the Flashed firmware package. See ―Restarting the Subsystem‖ on page 130. -
Page 145: Restoring Factory Defaults
Chapter 4: Management with ASUS Storage Management Restoring Factory Defaults ASUS Storage includes a function to restore the default settings to its Firmware and Software settings. Caution The action of restoring default settings can disrupt your ASUS Storage functions. Use this feature only when necessary and only the settings that must reset to default in order to set them correctly. -
Page 146: Shutting Down The Subsystem
Chapter 4: Management with ASUS Storage Management Shutting Down the Subsystem You can only do part of this function in ASUS Storage Management. Additional action is required, as described below. Important If you have a JBOD expansion, always power off the RAID subsystem first. -
Page 147: Monitoring The Shutdown
Chapter 4: Management with ASUS Storage Management Monitoring the Shutdown To monitor a shutdown, you must use the Command Line Interface (CLI) though a serial connection to the ASUS Storage. Turn off both power supply switches when the following this message appears:... -
Page 148: Starting Up After Shutdown
Try the power switches again. Wait about two minutes. Open your browser and log into ASUS Storage Management. See ―Logging into ASUS Storage Management‖ on page 56. If you cannot log in, wait 30 seconds and try again. -
Page 149: Restarting The Subsystem
If you have a JBOD expansion, you are not required to restart the JBOD expansion units when you restart the RAID subsystem. You can only do part of this function in ASUS Storage Management. Additional action is required, as described below. To restart the subsystem Click the Subsystem icon in Tree View. -
Page 150: Managing The Controller
Chapter 4: Management with ASUS Storage Management Managing the Controller The RAID controller is the heart of the ASUS Storage subsystem. Controller management includes the following functions: • Viewing Controller Information (page 131) • Viewing Controller Information (page 131) •... -
Page 151: Viewing Controller Statistics
Chapter 4: Management with ASUS Storage Management • Write Back Cache Flush Interval • Enclosure Polling Interval See ―Making Controller Settings‖ on page 132. Upgradable items You can upgrade the following items: • Boot loader Version • Firmware Version number •... - Page 152 Chapter 4: Management with ASUS Storage Management • Check the Enable Coercion box to enable disk drive capacity coercion. For more information, see ―Capacity Coercion‖ on page 339. • Choose a coercion method from the Coercion Method dropdown menu. The choices are: GB Truncate –...
-
Page 153: Clearing An Orphan Watermark
Chapter 4: Management with ASUS Storage Management When enabled, NCQ allows the physical drive to determine the optimal order in which to retrieve outstanding requests. To use this feature, the physical drive must support NCQ. • From the Appliance Mode box dropdown menu, choose the mode suited to your application. -
Page 154: Managing Enclosures
Chapter 4: Management with ASUS Storage Management Managing Enclosures On ASUS Storage, enclosures include the main ASUS Storage subsystem or Head Unit as well as ASUS DS300j units that are connected through expansion. Enclosure Management includes the following functions: •... -
Page 155: Viewing Enclosure Topology
Individual Subsystem – One ASUS Storage subsystem • JBOD Expansion – One ASUS Storage subsystem plus one or more ASUS DS300j expansion units, managed through the ASUS Storage or head unit The logical connections for these arrangements are shown the Enclosure Topology tab. -
Page 156: Making Enclosure Settings
Chapter 4: Management with ASUS Storage Management Click the Enclosure icon. Enclosure information appears the Information tab in Management View. You can monitor power supplies, fans, enclosure temperatures and voltages, and the battery. Adjustable items You can set or adjust the following items: •... -
Page 157: Checking The Battery
Use this information when communicating with Technical Support and when ordering replacement units. For contact information, see ―Contacting Technical Support‖ on page 402. Checking the Battery A cache backup battery or Battery Backup Unit (BBU) is optional on ASUS Storage. To check the battery: Click the Subsystem icon in Tree View. -
Page 158: Reconditioning A Battery
Chapter 4: Management with ASUS Storage Management Reconditioning a Battery A cache backup battery or Battery Backup Unit (BBU) is optional on ASUS Storage. To recondition the battery: Click the Subsystem icon in Tree View. Click the Enclosures icon. Click the Enclosure icon. -
Page 159: Managing Physical Drives
Click the Physical Drives icon. The list of physical drives appears in Management View. Identifying a Physical Drive To identify physical drive in the ASUS Storage subsystem enclosure: Click the Subsystem icon in Tree View. Click the Enclosures icon. -
Page 160: Making Global Physical Drive Settings
Chapter 4: Management with ASUS Storage Management Making Global Physical Drive Settings Global settings apply to all of the physical disk drives installed in the ASUS Storage subsystem enclosure. To make global physical drive settings: Click the Subsystem icon in Tree View. -
Page 161: Viewing Physical Drive Statistics
Chapter 4: Management with ASUS Storage Management • Operational Status – OK is normal. Can also show Rebuilding, Forced Online, Forced Offline, Transition Running, PDM Running, Media Patrol Running, Stale, PFA, Offline, or Dead. • Configuration Status – The array to which the drive is assigned or its spare designation, including Unconfigured, Stale, PFA, Global Spare, Dedicated Spare, Revertible Global Spare, Revertible Dedicated Spare. -
Page 162: Clearing Stale And Pfa Conditions
Chapter 4: Management with ASUS Storage Management Click the Settings tab in Management View. Type an alias into the Physical Drive Alias field. Maximum of 31 characters. Use letters, numbers, space between words, and underscore. An alias is optional. Click the Submit button. -
Page 163: Locating A Physical Drive
Click the Enclosure icon. Click the Physical Drives icon. Click a Physical Drive icon. Click the physical drive you want to locate on the ASUS Storage Management screen. The disk status LED for the physical drive blinks for one minute. - Page 164 Chapter 4: Management with ASUS Storage Management...
-
Page 165: Managing Ups Units
Viewing a List of UPS Units (below) • Making UPS Settings (page 147) Viewing a List of UPS Units To view a list of UPS units supporting the ASUS Storage: Click the Subsystem icon in Tree View. Click the UPS icon. -
Page 166: Making Ups Settings
Chapter 4: Management with ASUS Storage Management Making UPS Settings These settings control how the ASUS Storage subsystem detects the UPS unit and responds to data reported by the UPS unit. To make UPS settings: Click the Subsystem icon in Tree View. - Page 167 Chapter 4: Management with ASUS Storage Management Detection Setting must be set to Auto. If a UPS is detected, the setting changes to Enable. To specify UPS units by DNS name, ask your IT administrator to add the DNS names to the DNS server, before you make UPS settings.
-
Page 168: Managing Disk Arrays
Chapter 4: Management with ASUS Storage Management Managing Disk Arrays Disk Array Management includes the following functions: • Viewing Disk Arrays (page 149) • Creating a Disk Array (page 149) • Deleting a Disk Array (page 154) • Viewing Disk Array Information (page 155) •... -
Page 169: Creating A Disk Array - Automatic
Chapter 4: Management with ASUS Storage Management • Advanced – You directly specify all parameters for a new disk array. Makes one logical drive automatically. You can create additional logical drives at a later time, if additional configurable capacity is available. Does not make a hot spare drive. - Page 170 Chapter 4: Management with ASUS Storage Management If you prefer to specific the parameters directly, use the Advanced option to create your disk array. If you are uncertain about choosing parameters for your disk array, use the Automatic option. If you have both Hard Disk Drives (HDD) and Solid State Drives (SSD), separate disk arrays will be created for your HDDs and for your SSDs.
-
Page 171: Creating A Disk Array - Advanced
Chapter 4: Management with ASUS Storage Management If you have both Hard Disk Drives (HDD) and Solid State Drives (SSD), separate disk arrays will be created for your HDDs and for your SSDs. Each array will have the number of logical drives that you specified. - Page 172 Chapter 4: Management with ASUS Storage Management The drive type you selected appears in the list of Physical Drives. You cannot mix HDDs and SSDs in the same disk array. Highlight the physical drives you want in the disk array from the Available list and press the >>...
-
Page 173: Deleting A Disk Array
Chapter 4: Management with ASUS Storage Management The choices are Read Cache, Read Ahead, and No (read) Cache. Read Ahead is the default. See ―Cache Policy‖ on page 337. • From the Write Policy dropdown menu, choose a Write Cache policy for this logical drive. -
Page 174: Viewing Disk Array Information
Chapter 4: Management with ASUS Storage Management Click the Submit button. In the confirmation box, type the word confirm in the field provided. Click the OK button. The selected disk array disappears from the Disk Array List the Information tab. -
Page 175: Making Disk Array Settings
Chapter 4: Management with ASUS Storage Management Making Disk Array Settings To make Disk Array settings: Click the Subsystem icon in Tree View. Click the Disk Arrays icon. Click the Disk Array icon. Click the Settings tab in Management View. - Page 176 Chapter 4: Management with ASUS Storage Management RAID 50 and 60 only – Specify the number of axles for your array. For more information on axles, see ―RAID 30 and 50 Axles‖ on page 329 or ―RAID 60 Axles‖ on page 331.
-
Page 177: Deleting A Logical Drive
Chapter 4: Management with ASUS Storage Management Deleting a Logical Drive Caution All data the logical drive will be lost. Back up any valuable data before deleting the logical drive. To delete a logical drive: Click the Subsystem icon in Tree View. -
Page 178: Rebuilding A Disk Array
Chapter 4: Management with ASUS Storage Management From the dropdown menu the Background Activities tab, choose Start Migration. Highlight physical drives you want in the disk array from the Available list and press the >> button to move them to the Selected list. -
Page 179: Running Media Patrol On A Disk Array
Chapter 4: Management with ASUS Storage Management Click the Disk Arrays icon. Click the Disk Array icon. If there are multiple disk arrays, choose the icon with the yellow !. From the dropdown menu the Background Activity tab, choose Start Rebuild. -
Page 180: Running Pdm On A Disk Array
Chapter 4: Management with ASUS Storage Management Running PDM on a Disk Array Predictive Data Migration (PDM) migrates data from the suspect physical drive to a spare physical drive, similar to Rebuilding. But unlike Rebuilding, PDM acts before the disk drive fails and your Logical Drive goes Critical. -
Page 181: Preparing A Disk Array For Transport
Important Before you can use this feature, the disk array’s Operational Status must be OK. When transporting a NAS logical drive from one ASUS Storage enclosure to another, the firmware automatically renames the share folder to prevent a conflict. To prepare a disk array for transport: Click the Subsystem icon in Tree View. -
Page 182: Managing Logical Drives
Chapter 4: Management with ASUS Storage Management Managing Logical Drives Logical drive management includes: • Viewing Information for All Logical Drives (below) • Viewing Logical Drive Information (page 164) • Viewing Logical Drive Statistics (page 165) • Making Logical Drive Settings (page 165) •... -
Page 183: Viewing Logical Drive Information
Chapter 4: Management with ASUS Storage Management may remain intact. You must determine the cause of the problem and correct it. ―Critical & Offline Disk Arrays‖ on page 384 • Transport Ready – The result of a successful Prepare for Transport operation. -
Page 184: Viewing Logical Drive Statistics
Chapter 4: Management with ASUS Storage Management Viewing Logical Drive Statistics To view information for a single logical drive: Click the Subsystem icon in Tree View. Click the Disk Arrays icon. Click the Disk Array icon. Click the Logical Drives... -
Page 185: Initializing A Logical Drive
Chapter 4: Management with ASUS Storage Management Initializing a Logical Drive Initialization is done to logical drives after they are created from a disk array. Initialization sets all data bits in the logical drive to zero. The action is useful because there may be residual data the logical drives left behind from earlier configurations. -
Page 186: Viewing The Logical Drive Check Table
Chapter 4: Management with ASUS Storage Management Redundancy Check a Logical Drive: Click the Subsystem icon in Tree View. Click the Logical Drive Summary icon. Click the icon of the logical drive you want to Initialize. You can also start Redundancy check from the Subsystem... -
Page 187: Making Logical Drive Lun Settings
Before you can specify an initiator for your LUN map, you must add the initiator to the ASUS Storage 's initiator list. See ―Adding an Initiator‖ on page 112. You must enable LUN Masking in order apply a LUN map. See ―Enabling LUN Masking‖... -
Page 188: Creating A Lun Clone
Chapter 4: Management with ASUS Storage Management 10. Click the Submit button. Notes • Obtain the initiator name from the initiator utility on your host system. • The initiator name you input must match exactly in order for the connection to work. - Page 189 Chapter 4: Management with ASUS Storage Management 10. In the confirmation box, type the word confirm in the field provided and click the OK button. Note the Target Logical Drive ID. Use this number to identify the LUN clone in the Logical Drive list.
-
Page 190: Managing Spare Drives
Dedicated to Array – For dedicated spares, the disk array to which it is assigned. Global spares show N/A. Locating a Spare Drive To locate a physical drive assigned as a spare drive in the ASUS Storage subsystem enclosure: Click the Subsystem icon in Tree View. -
Page 191: Creating A Spare Drive
Chapter 4: Management with ASUS Storage Management Click the Spare Drive icon. In Management View, the Enclosure Front View diagram appears with the location of the spare drive highlighted. Creating a Spare Drive Important • There must be an unconfigured physical drive available for selection as a spare drive. -
Page 192: Deleting Spare Drive
Chapter 4: Management with ASUS Storage Management 10. If you selected a Dedicated spare drive, in the Dedicated to Disk Arrays field, highlight disk arrays to which you want assign the spare drive from the Available list and press the >> button to move the array to the Selected list. -
Page 193: Running Spare Check
Chapter 4: Management with ASUS Storage Management If you selected a Dedicated spare drive, in the Dedicated to Disk Arrays field, highlight the disk arrays to which you want assign the spare drive from the Available list and press the >> button to move them to the Selected list. -
Page 194: Working With The Logical Drive Summary
Chapter 4: Management with ASUS Storage Management Working with the Logical Drive Summary The Logical Drive Summary displays a list of all logical drives in the ASUS Storage enclosure plus the expanded or cascaded enclosures. This list does not arrange the logical drives under the disk array to which they belong nor under the enclosure in which they are located. - Page 195 Chapter 4: Management with ASUS Storage Management To create a LUN clone of a logical drive: Click the Subsystem icon in Tree view. Click the Logical Drives Summary icon. Click the Logical Drive icon. Click the LUN Clone tab in Management View.
-
Page 196: Chapter 5: Smart Nas Console
• Managing RAID Volumes (page 201) Managing your NAS with Smart NAS Console Smart NAS Console software enables you to manage your ASUS Storage subsystem when it is configured as Network Attached Storage (NAS). The NAS option requires: • An iSCSI SAN data connection, see page 24. -
Page 197: Choosing A Smart Nas Console
Chapter 5: SmartNAVI Choosing a Smart NAS Console Language To choose the display language for Smart NAS Console: Right-click the Smart NAS Console icon in the Windows tray and choose Language from the popup menu. Highlight and click the language you want. -
Page 198: Working With The Device List
A NAS device is a logical drive with the NAS feature enabled. The NAS device is listed by the unit number and IP address of the ASUS Storage subsystem. For information about how to create NAS enabled logical drives, See page 49 or page 156. -
Page 199: Adding Nas Devices
Under the Device List, right-click Click here to refresh... and choose Find NAS over WWW. The IP dialog box opens. In the IP dialog box, type the IP address of the ASUS Storage NAS subsystem and click the Add button. -
Page 200: Logging Into A Nas Device
Chapter 5: SmartNAVI The ASUS Storage NAS subsystem appears in the Device List. NAS Device added Logging Into a NAS Device You can log into any NAS device in the Device List that has a blue icon and shows an IP address. - Page 201 Example: directory.com\user. A Warning dialog box appears. In the Warning dialog box, click the Yes button. The ASUS Storage NAS system appears: • At the top left of the Smart NAS Console window. •...
-
Page 202: Changing Nas Device Settings
Console remembers your user name and password. Changing NAS Device Settings You make initial network settings when you set up the ASUS Storage subsystem. This feature makes network settings on a ASUS Storage NAS system currently running on the network. -
Page 203: Deleting A Nas Device
Chapter 5: SmartNAVI The computer name is the name of your ASUS Storage subsystem as it appears in the Device List. If you chose the Manual option, make changes as required to • IP address (of the ASUS Storage) •... -
Page 204: Managing Backups
Doing a Backup Now This feature enables you to perform an immediate backup of your files from your PC to the NAS system (ASUS Storage). To perform an immediate backup: Click the SmartSYNC icon at the top of the screen. -
Page 205: Scheduling A Backup
Scheduling a Backup A scheduled backup runs automatically. The files on you PC are backed up to the ASUS Storage. You can create multiple schedules. To set a backup schedule: Click the SmartSYNC icon at the top of the window. -
Page 206: Monitoring Backup Progress
Chapter 5: SmartNAVI Click the Schedule button. Under Schedule Settings, click the option button you want, • Hourly • Daily • Weekly From the dropdown menus, choose, • Number of hours • Time of day • Day of the week Click the Add button to set the scheduled backup. -
Page 207: Viewing Backup Schedules
Chapter 5: SmartNAVI Viewing Backup Schedules To view the list of current schedules: Click the SmartSYNC icon at the top of the window. Click the Schedule List icon at the bottom of the window. The list of all backup schedules appears. Changing a Scheduled Backup To change the scheduled backup: Click the SmartSYNC icon at the top of the window. -
Page 208: Restoring Backed-Up Files
Be careful which files you restore and where on your PC you direct the backup files. To restore your backed-up files from the ASUS Storage subsystem to your PC: Click the SmartSYNC icon at the top of the window. Click the Restore icon at the bottom of the window. -
Page 209: Saving The Backup Event Log
Chapter 5: SmartNAVI Click the Event Log icon at the bottom of the window. Optional. Set the Event Filter dropdown menu to display: • All events • Information events only • Error events only Optional. Click the arrow on the Date/Time header to reverse the chronological order. -
Page 210: Managing Share Folders
Chapter 5: SmartNAVI Managing Share Folders This category includes the following topics: • Creating a Share Folder (page 191) • Opening a Share Folder (page 191) • Viewing a List of Share Folders (page 191) • Changing Share Folder Permissions (page 192) •... -
Page 211: Changing Share Folder Permissions
Chapter 5: SmartNAVI The list of share folders displays. Changing Share Folder Permissions The Admin user always has read and write permission. All other users have read- only permission by default. To change permissions: Click the Share Folder icon at the top of the window. Click the Share Folder Permission icon at the bottom of the window. - Page 212 Chapter 5: SmartNAVI Click the share folder you want to delete. Click the OK button. Click the Yes button in the first confirmation box. Type Yes then click the OK button in the second confirmation box. Mounting a Share Folder / Creating a Network Drive To mount a share folder (Linux) or create a network drive (Windows): Click the Share Folder icon at the top of the window.
-
Page 213: Managing Users And Groups
In the confirmation box, click the Yes button. Note These users can access the share folders but not Smart NAS Console or ASUS Storage Management. Changing User Passwords To change a user’s password: Click the User Management icon at the top of the screen. -
Page 214: Viewing A List Of Users
Chapter 5: SmartNAVI Administrator user only, type the old password in the field provided. Type the new password in the field provided. Retype the password in the Confirm field. Click the OK button. Changing User Permissions The Administrator user always has read and write permission. All other users have read-only permission by default. -
Page 215: Creating A Group
Chapter 5: SmartNAVI Creating a Group To create a Group: Click the User Management icon at the top of the screen. Click the Create New Group icon at the bottom of the screen. Type a Group Name in the field provided. Up to 16 characters, A-Z, 0-9, and _, first character must be a letter. -
Page 216: Deleting A Group
Chapter 5: SmartNAVI Deleting Members from a Group Note Deleting a User from a Group does not delete the User from the System. To delete Users from a Group: Click the User Management icon at the top of the screen. Click the Modify Group Member icon at the bottom of the screen. -
Page 217: Nas Management
Chapter 5: SmartNAVI NAS Management This category includes the following topics: • Restarting the Subsystem (page 198) • Powering Off the Subsystem (page 199) • Shutting Down the Subsystem (page 199) Restarting the Subsystem To restart the subsystem: Click the NAS Management icon at the top of the screen. The Shutdown icon at the bottom of the screen is automatically selected. -
Page 218: Powering Off The Subsystem
Monitoring the Power-Off To monitor a power-off, you must use the Command Line Interface (CLI) though a serial connection to the ASUS Storage. Turn off both power supply switches when the following this message appears: Shutdown complete. It is now safe to power off the subsystem. - Page 219 Monitoring the Shutdown To monitor a shutdown, you must use the Command Line Interface (CLI) though a serial connection to the ASUS Storage. Turn off both power supply switches when the following this message appears: Shutdown complete. It is now safe to power off the subsystem.
-
Page 220: Managing Raid Volumes
Managing Backups (page 185) Creating a RAID Volume RAID Volumes are logical drives with the NAS feature enabled on the ASUS Storage subsystem. To create a RAID volume, see ―Creating a Disk Array – Advanced‖ on page 152 and ―Creating a Logical Drive‖ on page 156. - Page 221 Chapter 5: SmartNAVI...
-
Page 222: Chapter 6: Management With The Clu
Shutting Down the Subsystem (page 277) • Starting Up After Shutdown (page 279) • Restarting the Subsystem (page 280) • Making Buzzer Settings (page 282) For information about ASUS Storage DS300f and DS300i’s audible alarm and LEDs, see ―Chapter 10: Troubleshooting‖ on page 355. -
Page 223: Initial Connection
Logging Back Into the CLI and CLU (page 207) Making a Serial Connection Before you begin, be sure the RJ11-to-DB9 serial data cable is connected between the Host PC and ASUS Storage subsystem, and that both machines are booted and running. Figure 1. Serial port on the controller... -
Page 224: Making A Telnet Connection
Type telnet 192.168.1.56 2300 and press Enter. The IP address above is only an example. Use your ASUS Storage's Management port IP address. 2300 is the Telnet port for the ASUS Storage. Press Enter once to launch the CLI. Logging In At the Login prompt, type the user name and press Enter. - Page 225 Chapter 6: Management with the CLU Figure 3. CLU main menu Quick Setup – A sequence of four steps to setup System Date & Time, Management Port, and RAID Configuration. Subsystem Management – View controller information, lock/unlock the controller, set date and time, and monitor the enclosure. Physical Drive Management –...
-
Page 226: Accessing Online Help
Close the terminal emulation, Telnet or terminal window. Logging Out of the CLI When you shut down or restart the ASUS Storage subsystem, you are automatically logged out of the CLI. To manually log out of the CLI (no shut down or restart): At the username@cli>... -
Page 227: Running Quick Setup
Chapter 6: Management with the CLU Running Quick Setup Quick Setup is discussed under ―Setting up with the CLU‖ on page 43. -
Page 228: Managing The Subsystem
Chapter 6: Management with the CLU Managing the Subsystem Subsystem Management includes the following functions: • Setting an Alias for the Subsystem (page 209) • Running Media Patrol (page 209) • Locking or Unlocking the Subsystem (page 209) • Setting Subsystem Date and Time (page 210) •... - Page 229 Chapter 6: Management with the CLU Highlight Lock Management and press Enter. In the Lock Time field, type a lock time in minutes. 1440 minutes = 24 hours Highlight Lock and press Enter. Resetting the Lock To reset the lock with a new time: From the Main Menu, highlight Subsystem Management and press Enter.
- Page 230 Enter a plus or minus sign and the number. Press Ctrl-A to save your settings. Setting Subsystem NTP Network Time Protocol (NTP) synchronizes the ASUS Storage subsystem to as NTP server. After you have made NTP settings, the ASUS Storage subsystem synchronizes: • At startup.
- Page 231 The NTP service must be enabled before you can manually synchronize the subsystem. See ―Setting Subsystem NTP‖ on page 211. To synchronize the ASUS Storage subsystem with an NTP Server: From the Main Menu, highlight Subsystem Management and press Enter.
- Page 232 Chapter 6: Management with the CLU Managing the Controller Controller Management includes the following functions: • Viewing Controller Information (page 213) • Clearing an Orphan Watermark (page 213) • Making Controller Settings (page 213) • Locating the Controller (page 215) Viewing Controller Information Controller Management includes information, settings and statistics.
- Page 233 Chapter 6: Management with the CLU Highlight the controller you want and press Enter. Highlight Controller Settings and press Enter. Make the following settings as required: • Type and alias into the Alias field. Maximum of 48 characters. Use letters, numbers, space between words and underscore.
-
Page 234: Locating The Controller
Enable and Disable. • Highlight Rescue Mode and press the spacebar to toggle between Enable and Disable. Rescue Mode enables ASUS Storage to boot from a USB drive. Press Ctrl-A to save your settings. Locating the Controller To locate this controller: From the Main Menu, highlight Subsystem Management and press Enter. - Page 235 Chapter 6: Management with the CLU Figure 4. Controller Status LED Controller Status...
-
Page 236: Managing The Enclosure
Highlight Enclosure Management and press Enter. Highlight Power Supply Units and press Enter. The screen displays the status of ASUS Storage’s power supply. If any status differs from Powered On and Functional, there is a power supply malfunction. See ―Replacing a Power Supply‖ on page 311. -
Page 237: Locating A Power Supply
Highlight Enclosure Management and press Enter. Highlight Cooling Units and press Enter. The screen displays the status and speed of ASUS Storage’s cooling fans. If the speed is below the Healthy Threshold, there is a fan malfunction. See ―Replacing a Cooling Fan‖ on page 313. -
Page 238: Setting Temperature Thresholds
See ―Replacing the Cache Battery‖ on page 314. ASUS Storage automatically reconditions the battery every two months. When you install a new battery, the cycle count shows 0. ASUS Storage automatically runs a recondition on the battery to verify it. If you restart the... - Page 239 Write Back. See ―Making Controller Settings‖ on page 213. Locating an Enclosure This feature helps you identify the physical ASUS Storage enclosure you are working with through the CLU. From the Main Menu, highlight Subsystem Management and press Enter.
- Page 240 Individual Subsystem – One ASUS Storage subsystem • JBOD Expansion – One ASUS Storage subsystem plus one or more ASUS DS300j expansion units, managed through the ASUS Storage or head unit The physical connections for these arrangements are discussed in ―Chapter 2: ASUS Storage Installation‖...
- Page 241 Chapter 6: Management with the CLU Managing Physical Drives Physical Drive Management includes the following functions: • Making Global Physical Drive Settings (page 222) • Setting an Alias (page 223) • Viewing Advanced Information (page 223) • Viewing Physical Drive Statistics (page 223) •...
-
Page 242: Setting An Alias
Chapter 6: Management with the CLU Setting an Alias An alias is optional. To set an Alias for a physical drive: From the Main Menu, highlight Physical Drive Management and press Enter. Highlight the physical drive of your choice and press Enter. Type an alias into the Alias field. - Page 243 Press Y to confirm. Locating a Physical Drive This feature helps you identify a physical drive within the ASUS Storage enclosure you are working with through the CLU. To locate a physical drive: From the Main Menu, highlight Physical Drive Management and press Enter.
- Page 244 Chapter 6: Management with the CLU Managing Disk Arrays Disk Array Management includes the following functions: • Creating a Disk Array (page 225) • Deleting a Disk Array (page 229) • Viewing Disk Array Information (page 229) • Setting an Alias for a Disk Array (page 230) •...
- Page 245 Chapter 6: Management with the CLU Creating a Disk Array – Automatic To create a disk array using the Automatic feature: From the Main Menu, highlight Disk Array Management and press Enter. Highlight Create New Array and press Enter. Highlight Configuration Method and press the spacebar to toggle to Automatic.
- Page 246 Chapter 6: Management with the CLU Creating a Disk Array – Express To create a disk array using the Express feature: From the Main Menu, highlight Disk Array Management and press Enter. Highlight Create New Array and press Enter. Highlight Configuration Method and press the spacebar to toggle to Express. Highlight Configuration Method and press to spacebar to choose each of the following characteristics for your disk array: •...
- Page 247 Chapter 6: Management with the CLU Creating a Disk Array – Advanced For more information on the choices below, see ―Chapter 9: Technology Background‖ on page 319. To create a disk array: From the Main Menu, highlight Disk Array Management and press Enter. Highlight Create New Array and press Enter.
- Page 248 Chapter 6: Management with the CLU • Highlight Read Policy and press the spacebar to toggle read cache policy though ReadCache, ReadAhead, and NoCache. 14. Highlight Save Logical Drive and press Enter. 15. Review logical drive(s) you are about to create for your new array. Then do one of the following actions: •...
-
Page 249: Setting An Alias For A Disk Array
Chapter 6: Management with the CLU Disk Array Operational Status • OK – The normal state of a disk array. For RAID Levels other than RAID 0 (Striping), the disk array has full redundancy. • Synchronizing – When you first create a disk array, the disk array synchronizes. -
Page 250: Enabling Media Patrol On A Disk Array
Chapter 6: Management with the CLU Enabling Media Patrol on a Disk Array Media Patrol checks the magnetic media on physical drives. To enable or disable Media Patrol: From the Main Menu, highlight Disk Array Management and press Enter. Highlight the disk array you want and press Enter. Highlight Media Patrol and press the spacebar to toggle between Enable and Disable. - Page 251 Chapter 6: Management with the CLU The available drives are either HDD or SSD, depending on the type of drives in the array. Highlight Start and press Enter. Migrating a Disk Array In order to migrate RAID level, you may have to add physical drives. For more information, see ―RAID Level Migration‖...
-
Page 252: Running Transition On A Disk Array
Chapter 6: Management with the CLU The screen jumps to Disk Arrays Summary. Running PDM Be sure PDM must be enabled. See ―Enabling PDM on a Disk Array‖ on page 231. To run Predictive Data Migration on a disk array: From the Main Menu, highlight Disk Array Management and press Enter. - Page 253 Chapter 6: Management with the CLU To locate a disk array: From the Main Menu, highlight Disk Array Management and press Enter. Highlight the disk array you want and press Enter. Highlight Locate Disk Array and press Enter. The disk status LEDs for the physical drives in the disk array blink for one minute.
- Page 254 Chapter 6: Management with the CLU • Read Policy – Press spacebar to choose: No Cache, Read Cache, or Read Ahead Cache Highlight Number of Axles and press the spacebar to choose the number of axles. Applies to RAID 50 and 60 only. Press Ctrl-A to save your settings.
- Page 255 Chapter 6: Management with the CLU Managing Spare Drives Spare Drive Management includes the following functions: • Viewing a list of Spare Drives (page 236) • Creating a Spare Drive (page 236) • Making Spare Drive Settings (page 237) • Running Spare Check (page 237) •...
- Page 256 Chapter 6: Management with the CLU Highlight Spare Type and press the spacebar to toggle between Dedicated and Global. Dedicated means this spare drive can only be used with the specified disk arrays. Global means this spare drive can be used by any disk array. If you chose Dedicated, highlight Dedicated to Arrays and press the backspace key to erase the current value, then type the new value.
-
Page 257: Deleting A Spare Drive
Chapter 6: Management with the CLU Deleting a Spare Drive Caution If the spare drive you delete is the only spare, the controller will not rebuild a critical array until you provide a new spare drive. To delete a spare drive: From the Main Menu, highlight Spare Drive Management and press Enter. - Page 258 Chapter 6: Management with the CLU Managing Logical Drives Logical drive management includes: • Viewing Logical Drive Information (page 239) • Making Logical Drive Settings (page 239) • Initializing a Logical Drive (page 240) • Running Redundancy Check (page 240) •...
- Page 259 Chapter 6: Management with the CLU Initializing a Logical Drive This function sets all data bits in the logical drive to zero. Caution When you initialize a logical drive, you delete all the data it contains. Back up all important data before initializing a logical drive.
- Page 260 Chapter 6: Management with the CLU To change a parameter, highlight it and press the backspace toggle between Yes and No. Highlight Start and press Enter. If necessary, you can pause and resume or stop and restart the Redundancy Check. You can use the logical drive while Redundancy Check is running. Locating a Logical Drive This feature helps you identify the physical drives assigned to the logical drive you are working with in the CLU.
- Page 261 Chapter 6: Management with the CLU Creating a LUN Clone A LUN clone is an exact copy of the original LUN or logical drive, including all the data it contains, at one point in time. Use a LUN clone as a backup or to migrate a LUN from one system to another.
- Page 262 Deleting a Link Aggregation Entry (page 245) Making Management Port Settings When you log into the ASUS Storage over your network, you use the ASUS Storage’s management port. Before you change settings, please see ―Choosing DHCP or a Static IP Address‖...
- Page 263 3260 is the default and recommended for most applications. Press Ctrl-A to save your settings. Making iSCSI Port Settings ASUS Storage iSCSI models have four iSCSI ports. ASUS Storage FC models have two iSCSI ports. You must make network settings to each iSCSI port individually.
- Page 264 Chapter 6: Management with the CLU To create a link aggregation entry: From the Main Menu, highlight Network Management and press Enter. Highlight Link Aggregation and press Enter. Highlight Create New Link Aggregation Entry and press Enter. Highlight Trunk ID and type a value. Use the numbers 1 through 32.
-
Page 265: Viewing Node Information
Chapter 6: Management with the CLU Managing Fibre Channel Connections The Fibre Channel Management option appears only with ASUS Storage Fibre Channel models. Fibre Channel Management includes the following functions: • Viewing Node Information (page 246) • Viewing Fibre Channel Logged-in Devices (page 246) •... - Page 266 Point to Point Private Loop Example 1: If you connect the ASUS Storage to a Fibre Channel switch and choose NL-Port topology, you will create a Fabric Direct attached topology. Example 2: If you have a Point to Point attached topology, you made a direct connection (no switch) and chose N-port topology.
- Page 267 Chapter 6: Management with the CLU Viewing Fibre Channel Port Statistics To view port statistics: From the Main Menu, highlight Fibre Channel Management and press Enter. Highlight Fibre Channel Ports and press Enter. Highlight the port you want and press Enter. Highlight Fibre Channel Port Statistics and press Enter.
- Page 268 LUN Mapping must be enabled in order for ASUS Storage to add a Fibre Channel. See ―Enabling LUN Mapping‖ on page 261. You must add an initiator to the ASUS Storage’s initiator list in order to use the initiator to create a LUN for your logical drive.
- Page 269 Chapter 6: Management with the CLU Managing iSCSI Connections iSCSI connections deal with the ASUS Storage’s four host data ports. • Viewing iSCSI Node Information (below) • Making iSCSI Node Settings (below) • Viewing iSCSI Target Ports (page 251) •...
- Page 270 Chapter 6: Management with the CLU Highlight, press the backspace key to erase the current value, and type a new value for each of the following items: • Node Name – An iSCSI node is identified by its name. • Node Alias –...
- Page 271 Chapter 6: Management with the CLU The screen displays the following information: • Controller ID – 1 • Port ID – 1, 2, 3, or 4 • Max Receive Data Segment Length – 8 KB is the default • Number of Active Sessions – Number of sessions logged into this port •...
- Page 272 From the Main Menu, highlight iSCSI Management and press Enter. Highlight iSCSI Sessions and press Enter. The screen displays the following information: • Index – ASUS Storage iSCSI session index number. • Device Name – iSCSI initiator on the Host PC. •...
- Page 273 With ASUS subsystems, CHAP secrets cannot be assigned to individual LUNS. Use LUN mapping and masking to restrict LUN access to a unique initiator. A single target CHAP secret should not be shared among multiple initiators.
- Page 274 Chapter 6: Management with the CLU Viewing CHAPs To view a list of current CHAPs: From the Main Menu, highlight iSCSI Management and press Enter. Highlight iSCSI CHAPs and press Enter. The screen displays a CHAP list with the following information: •...
-
Page 275: Using Iscsi Ping
Highlight Delete Marked Entries and press Enter. Press Y to confirm. Using iSCSI Ping You can send a ping through ASUS Storage’s iSCSI data ports to verify a network connection. To send a ping: From the Main Menu, highlight iSCSI Management and press Enter. -
Page 276: Managing Background Activity
Managing Background Activity Background activity refers to any of several functions that take place in the background while normal operation of the ASUS Storage continues. Background activities work in conjunction with disk arrays and logical drives. See ―Managing Disk Arrays‖ on page 225 and ―Managing Logical Drives‖ on page 239 for more information about how and when to use background activities. - Page 277 Chapter 6: Management with the CLU Highlight following and press the spacebar to toggle through Low, Medium, and High rates: • Rebuild – Checks the data integrity on disk arrays • Migration – Change RAID level or add physical dries to disk arrays •...
-
Page 278: Working With The Event Viewer
Chapter 6: Management with the CLU Working with the Event Viewer Working with the Event Viewer includes the following functions: • Event Severity (page 259) • Viewing Runtime Events (page 259) • Clearing Runtime Events (page 260) • Viewing NVRAM Events (page 260) •... -
Page 279: Clearing Runtime Events
Chapter 6: Management with the CLU Clearing Runtime Events To clear the Runtime Event log: From the Main Menu, highlight Event Viewer and press Enter. Highlight Clear Runtime Event Log and press Enter. Press Y to confirm. Viewing NVRAM Events NVRAM events refer to the 63 most important events over multiple subsystem startups. -
Page 280: Working With Lun Mapping
If LUN Mapping is currently disabled, highlight Enable LUN Mapping and press Enter. Creating an Initiator You must add an initiator to the ASUS Storage’s initiator list in order to use the initiator to create a LUN. To create (add) a new initiator: From the Main Menu, highlight Additional Info and Management and press Enter. -
Page 281: Mapping A Lun To An Initiator
Mapping a LUN to an Initiator You must add an initiator to the ASUS Storage’s initiator list in order to use the initiator to create a LUN. See ―Creating an Initiator‖ on page 261. To map a LUN to an initiator: From the Main Menu, highlight Additional Info and Management and press Enter. - Page 282 • Viewing UPS Information (page 265) Viewing a List of UPS Units To view a list of UPS units supporting the ASUS Storage: From the Main Menu, highlight Additional Info and Management and press Enter. Highlight UPS Management and press Enter.
- Page 283 Chapter 6: Management with the CLU Making UPS Settings These settings control how the ASUS Storage subsystem detects the UPS unit and responds to data reported by the UPS unit. To make UPS settings: From the Main Menu, highlight Additional Info and Management and press Enter.
-
Page 284: Viewing Ups Information
Chapter 6: Management with the CLU Detection Setting must be set to Auto. If a UPS is detected, the setting changes to Enable. To specify UPS units by DNS name, ask your IT administrator to add the DNS names to the DNS server, before you make UPS settings. Viewing UPS Information To view information about a specific UPS unit: From the Main Menu, highlight Additional Info and Management and press... - Page 285 Chapter 6: Management with the CLU Managing Users User Management includes the following functions: • Viewing User Information (page 266) • Creating a User (page 266) • Changing a User’s Password (page 267) • Changing a User’s Display Name and Email Address (page 267) •...
-
Page 286: Changing A User's Password
Chapter 6: Management with the CLU List of User Privileges • View – Allows the user to see all status and settings but not to make any changes • Maintenance – Allows the user to perform maintenance tasks including Rebuilding, PDM, Media Patrol, and Redundancy Check •... -
Page 287: Changing A User's Privilege And Status
Chapter 6: Management with the CLU Press Ctrl-A to save the settings. Changing a User’s Privilege and Status No user can change their own privilege or status. To change another user’s privilege or status. Log in as the Administrator or a Super user. From the Main Menu, highlight Additional Info and Management and press Enter. -
Page 288: Working With Software Management
Chapter 6: Management with the CLU Working with Software Management Software Management includes the following functions: • Making Email Settings (page 269) • Making SLP Settings (page 270) • Making Web Server Settings (page 270) • Making Telnet Settings (page 271) •... - Page 289 Chapter 6: Management with the CLU Making SLP Settings By default, SLP service is set to Automatic and its normal status is Started. To make SLP service settings: From the Main Menu, highlight Additional Info and Management and press Enter. Highlight Software Management and press Enter.
- Page 290 Chapter 6: Management with the CLU Making Telnet Settings By default, Telnet service is set to Automatic and its normal status is Started. To make Telnet service settings: From the Main Menu, highlight Additional Info and Management and press Enter. Highlight Software Management and press Enter.
-
Page 291: Managing Snmp Trap Sinks
Chapter 6: Management with the CLU Press Ctrl-A to save your settings. To start, stop or restart the SNMP service, highlight Start, Stop, or Restart and press Enter. Managing SNMP Trap Sinks Creating a SNMP trap sink To create a trap sink: From the Main Menu, highlight Additional Info and Management and press Enter. -
Page 292: Managing Netsend Recipients
Chapter 6: Management with the CLU Making Netsend Settings By default, Netsend service is set to Manual and its normal status is Stopped. To make Netsend service settings: From the Main Menu, highlight Additional Info and Management and press Enter. Highlight Software Management and press Enter. - Page 293 Highlight Delete Marked Entries and press Enter. Netsend Requirements In order to use Netsend: • NetSend must be running the ASUS Storage • You must provide the IP address for each recipient PC • The Messenger service must be running on each recipient PC If your Netsend and Messenger service settings are correct but the recipient PC does not receive event messages, check the recipient PC’s Firewall settings.
-
Page 294: Flashing Through Tftp
Flashed Image Info – The firmware package flashed to memory If the Running and Flashed Images do not match, the ASUS Storage has not restarted since the firmware was last updated. Restart the ASUS Storage to run the Flashed firmware package. See ―Restarting the Subsystem‖ on page 280. - Page 295 Chapter 6: Management with the CLU Restoring Factory Defaults This function restores the factory default settings to the firmware and software items you select. Caution Use this function with care. Do not restore to default settings for any item unless you are sure this action is needed. To restore factory default settings: From the Main Menu, highlight Additional Info and Management and press Enter.
-
Page 296: Shutting Down The Asus Storage – Telnet Connection
Then power off the JBOD expansion units. Shutting down the ASUS Storage – Telnet Connection This function enables you to shut down the ASUS Storage subsystem on a Telnet connection. Additional action is required, as described below. To shut down the ASUS Storage: From the Main Menu, highlight Additional Info and Management and press Enter. -
Page 297: Shutting Down The Asus Storage – Serial Connection
Chapter 6: Management with the CLU Shutting down the ASUS Storage – Serial Connection This function enables you to shutdown the ASUS Storage subsystem on a serial connection. Additional action is required, as described below. To shutdown the ASUS Storage: From the Main Menu, highlight Additional Info and Management and press Enter. -
Page 298: Starting Up The Asus Storage – Telnet Connection
Chapter 6: Management with the CLU Starting Up After Shutdown There are two methods for shutting down the subsystem. Choose one: • Starting up the ASUS Storage – Telnet Connection (page 279) • Starting up the ASUS Storage – Serial Connection (page 279) Important If you have a JBOD expansion, always power on the JBOD expansion units first. -
Page 299: Restarting Asus Storage – Telnet Connection
JBOD expansion units when you restart the RAID subsystem. Restarting ASUS Storage – Telnet Connection This function enables you to restart the ASUS Storage subsystem on a Telnet connection. You can only do part of this procedure in the CLU. Additional action is required, as described below. - Page 300 Chapter 6: Management with the CLU Highlight Submit and press Enter. A warning message appears. Press Y to continue. The screen will display shutdown and startup functions. Login: When the prompt appears, log into the CLU again.
- Page 301 Chapter 6: Management with the CLU Making Buzzer Settings This function enables the buzzer on the controller. When you first power-up the ASUS Storage, it beeps twice to show normal operation. To change buzzer settings: From the Main Menu, highlight Buzzer and press Enter.
-
Page 302: Chapter 7: Management With The Lcd Panel
ASUS Storage’s power supply. System is Initializing At first, the LCD screen displays When the ASUS Storage is fully booted and running under normal conditions, the LCD screen displays the ASUS Storage model number and IP address, as shown in Figure 1. -
Page 303: Simple Mode
Perusing the Interface Perusing the Interface • Making Mode Settings (page 284) • Simple Mode (page 284) • Advanced Mode (page 285) • Limitations (page 285) • Viewing Events (page 285) Making Mode Settings The LCD panel has two modes, Simple and Advanced. Simple is the default setting. -
Page 304: Advanced Mode
Viewing event logs • Shutting down or restarting the ASUS Storage Refer to ―Chapter 4: Management with ASUS Storage Management‖ on page 55 and ―Chapter 6: Management with the CLU‖ on page 203 when you need to perform these functions. - Page 305 Perusing the Interface To view events: Press the button until the display says View Events. Press the button and the display the first critical event. • Press the button to display more information about the event. • Press the button to scroll through any additional events.
- Page 306 Managing the Network Connection Managing the Network Connection The network connection deals with the ASUS Storage’s Management Port. • Making Management Port Settings (below) Making Management Port Settings Manual IP Settings To make Management Port settings manually: Press the button until the display says Management Port.
- Page 307 Managing the Network Connection If it says Link Status Down, reconnect to the network before preceding. Press the button and the display says DHCP Disable. Press the button to make a change. Press the button to Enable. Press the button to confirm. The display shows the new IP address set by the DHCP server.
- Page 308 Managing the Controller Managing the Controller The RAID controller is the heart of the ASUS Storage subsystem. To view Controller statistics or to make Controller settings, see ―Managing the Controller‖ on page 131 (ASUS Storage Management) or page 213 (CLU).
-
Page 309: Viewing The Enclosure
Then press button to return to the item list. Making Buzzer Settings The buzzer sounds to inform you that the ASUS Storage needs attention. See ―ASUS Storage is Beeping‖ on page 355 for more information. To make buzzer settings: Press the button until the display says Misc. - Page 310 Status Locating a Physical Drive This function requires the LCD to be in Advanced mode. See page 284. This feature helps you identify a physical drive in the ASUS Storage enclosure. To locate a physical drive: Press the button until the display says Physical Drive Management.
- Page 311 Managing Physical Drives Press the button. The disk status LED for the physical drive blinks for one minute. See Figure 2. Figure 2. Disk Status LED Disk Status...
- Page 312 Viewing Logical Drive Information (page 300) • Locating a a Logical Drive (page 301) For other disk array functions, see ―Managing Disk Arrays‖ on page 149 (ASUS Storage Management) or page 225 (CLU). For other logical drive functions, see ―Managing Logical Drives‖ on page 163 (ASUS Storage Management) or page 239 (CLU).
- Page 313 Managing Disk Arrays Verifying To verify the results of the automatic disk array creation: From the default screen, press the button until the display says Logical Disk Management. Press the button and the display says 000. Press the button again to choose this logical drive. From the default screen, press the buttons to scroll through the information for the logical drive.
- Page 314 Managing Disk Arrays Press the button again and the display says 000. Press the button again and the display says RAID Level. Press the button until the display shows the RAID level you want. Note that the available RAID levels depend on the number of physical drives in your disk array.
- Page 315 Managing Disk Arrays Press the button again to display the available physical drives by number. Press the button to move through the list. Press the button to choose a physical drive for your spare drive. Note that your spare drive must be the same type of drive, HDD or SSD, as the drives in your disk array.
-
Page 316: Locating A Disk Array
• Transport Ready – This function is not supported in the LCD panel. See ―Preparing a Disk Array for Transport‖ on page 162 (ASUS Storage Management) or page 231 (CLU). Locating a Disk Array This feature helps you identify the physical drives assigned to the disk array you are working with in the LCD panel. - Page 317 Managing Disk Arrays Press the button until the display says Locate Disk Array. Press the button. The disk status LEDs for the physical drives in the disk array blink for one minute. See page 298, Figure 3. Figure 3. Disk Status LED Disk Status Creating a Logical Drive You can create logical drives on existing disk arrays if there is available space in...
- Page 318 Managing Disk Arrays 13. Press the button until the display shows the sector size you want. The display shows the default read policy. The choices are ReadCache, ReadAhead and None. 14. Press the button until the display shows the read policy you want. 15.
- Page 319 See ―Critical & Offline Disk Arrays‖ on page 384. • Transport Ready – This function is not supported in the LCD panel. See ―Preparing a Disk Array for Transport‖ on page 162 (ASUS Storage Management) or page 231 (CLU).
-
Page 320: Locating A A Logical Drive
Managing Disk Arrays Locating a a Logical Drive This function requires the LCD to be in Advanced mode. See page 284. This feature helps you identify the physical drives assigned to the logical drive. To locate a logical drive: Press the button until the display says Logical Disk Management. -
Page 321: Viewing Spare Drive Information
Managing Disk Arrays Managing Spare Drives Spare Drive Management on the LCD includes: • Viewing Spare Drive Information (page 302) • Creating a Spare Drive (page 302) • Deleting a Spare Drive (page 303) • Locating a Spare Drive (page 303) For other spare drive functions, see ―Managing Spare Drives‖... - Page 322 To create a dedicated or revertible spare drive, see ―Creating a Spare Drive‖ on page 172 (ASUS Storage Management) or page 236 (CLU). Deleting a Spare Drive Caution If the spare drive you delete is the only spare, the controller will not rebuild a critical array until you provide a new spare drive.
- Page 323 Managing Spare Drives Press the button choose a spare drive. Press the button until the display says Locate Spare Drive. Press the button. The disk status LED for the physical drive blinks for one minute. See Figure 5. Figure 5. Disk Status LED Disk Status...
-
Page 324: Chapter 8: Maintenance
Go to the ASUS support web site http://support.asus.com/ and download the latest firmware image (.img) file to your TFTP server or your PC. The firmware update image file includes all of the files for the ASUS Storage subsystem, including: •... -
Page 325: Updating Firmware From Tftp Server
Click the Submit button. 10. When the download is completed, click the Next button. A popup message appears warning you not to reboot the ASUS Storage subsystem during the firmware update procedure. 11. In the popup message, click the OK button. - Page 326 Click the Submit button. When the download is completed, click the Next button. A popup message appears to warn you not to reboot the ASUS Storage subsystem during the firmware update procedure. In the popup message, click the OK button.
- Page 327 When the controller shuts down, your ASUS Storage Management connection will be lost. Wait for two to three minutes. 10. In your browser, log into ASUS Storage Management once again. If you cannot log in, wait for 30 seconds, and try again. Repeat until login is successful.
-
Page 328: Updating The Firmware In The Clu
Highlight File Name and type the file name of the firmware image file in the field provided. Highlight Start and press Enter. A message appears to tell you to reboot the ASUS Storage subsystem. Restart the ASUS Storage subsystem. See ―Restarting Subsystem over a Telnet Connection‖ on page 309 or ―Restarting Subsystem over a Serial Connection‖... -
Page 329: Restarting Subsystem Over A Serial Connection
Chapter 8: Maintenance To restart the ASUS Storage subsystem on a Telnet connection: From the Main Menu, highlight Additional Info and Management, and press Enter. Highlight Shutdown or Restart and press Enter. Press the spacebar to display Restart then press Enter. -
Page 330: Replacing A Power Supply
Chapter 8: Maintenance Replacing a Power Supply The redundant power supplies on ASUS Storage subsystem are designed as field-replaceable units. You can replace a power supply without removing the subsystem from the rack. Figure 1. Replacing a Power Supply Power supply LEDs... -
Page 331: Replacing A Raid Controller
ASUS Technical Support. See page 402. • Only a qualified technician should perform this procedure. • You must shut down the ASUS Storage subsystem before you can perform this procedure. Removing the Old Controller To replace the RAID controller: Shut down the ASUS Storage subsystem. -
Page 332: Replacing A Cooling Fan
Replacing a Cooling Fan Cautions Only a qualified technician should perform this procedure. The ASUS Storage subsystems have externally mounted fans that you can replace without shutting down the subsystem. To replace a fan: Verify that the Fan LED on the RAID controller is amber or red. See Figure 3. -
Page 333: Replacing The Cache Battery
This completes the fan replacement procedure. Replacing the Cache Battery A cache battery or Battery Backup Unit (BBU) is optional on the ASUS Storage subsystem. If your subsystem has a cache battery, it is located inside the RAID controller. The battery assembly is replaced as a unit. - Page 334 Chapter 8: Maintenance See ―Replacing a RAID Controller‖ on page 312. Lay the RAID Controller on a non-static surface and remove the cover attaching screws, one on each side, then remove the cover. See Figure 5. Figure 5. RAID controller cover and attaching screw Cover Attaching screw (one each side)
-
Page 335: Replacing The Memory Module
You must shut down the ASUS Storage subsystem before you can perform this procedure. • Installing the wrong SIMM results in boot failure. To replace the memory module: Shut down the ASUS Storage subsystem and remove the RAID controller. See ―Replacing a RAID Controller‖ on page 312. - Page 336 Chapter 8: Maintenance Figure 8. Removing the RAID Controller Thumbscrew Latch Lay the RAID controller on a non-static surface and remove the cover attaching screws, one on each side, then remove the cover. See page 315, Figure 5. Gently press the retainers outward until the memory module pops out of the memory slot.
- Page 337 Chapter 8: Maintenance...
-
Page 338: Introduction To Raid
Chapter 9: Technology Background This chapter covers the following topics: • Introduction to RAID (below) • Choosing a RAID Level (page 332) • Choosing Stripe Size (page 336) • Choosing Sector Size (page 336) • Cache Policy (page 337) • Capacity Coercion (page 339) •... -
Page 339: Raid 0 – Stripe
120 GB drives will form a 400 GB (4 x 100 GB) disk array instead of 460 GB. If physical drives of different capacities are used, there will also be unused capacity on the larger drives. RAID 0 logical drives on ASUS Storage consist of one or more physical drives. -
Page 340: Raid 1 – Mirror
If physical drives of different capacities are used, there will be unused capacity on the larger drive. RAID 1 logical drives on ASUS Storage consist of two physical drives. If you want a mirrored logical drive with more than two physical drives, see ―RAID 1E –... -
Page 341: Raid 1E – Enhanced Mirror
Chapter 9: Technology Background RAID 1E – Enhanced Mirror RAID 1E offers the security of mirrored data provided by RAID 1 plus the added capacity of more than two physical drives. It also offers overall increased read/ write performance plus the flexibility of using an odd number of physical drives. With RAID 1E, each data stripe is mirrored onto two physical drives. -
Page 342: Raid 3 – Block Stripe And Dedicated Parity
100 GB physical drives will have a capacity of 300 GB. A RAID 3 logical drive with two 120 GB physical drives and one 100 GB physical drive will have a capacity of 200 GB. A RAID 3 on ASUS Storage consists of 3 to 32 physical drives. -
Page 343: Raid 5 – Block And Parity Stripe
120 GB physical drives and one 100 GB physical drive will have a capacity of 200 GB. RAID 5 is generally considered to be the most versatile RAID level. A RAID 5 on ASUS Storage consists of 3 to 32 physical drives. -
Page 344: Raid 6 – Block And Double Parity Stripe
RAID 6 provides double fault tolerance. Your logical drive remains available when up to two physical drives fail. RAID 6 is generally considered to be the safest RAID level. A RAID 6 on ASUS Storage consists of 4 to 32 physical drives. -
Page 345: Raid 10 – Mirror / Stripe
RAID 10 can increase performance by reading and writing data in parallel or striping, while protecting data by duplicating it or mirroring. ASUS implements RAID 10 by creating a data stripe over one pair of disk drives, then mirroring the stripe over a second pair of disk drives. Some applications refer to this method as RAID 0+1. -
Page 346: Raid 30 – Striping Of Dedicated Parity
Chapter 9: Technology Background RAID 30 – Striping of Dedicated Parity RAID 30 combines both RAID 3 and RAID 0 features. Data is striped across physical drives as in RAID 0, and it uses dedicated parity as in RAID 3. RAID 30 provides data reliability, good large file read, and high transfer rate performance. -
Page 347: Raid 50 – Striping Of Distributed Parity
Chapter 9: Technology Background RAID 50 – Striping of Distributed Parity RAID 50 combines both RAID 5 and RAID 0 features. Data is striped across physical drives as in RAID 0, and it uses distributed parity as in RAID 5. RAID 50 provides data reliability, good overall performance, and supports larger volume sizes. - Page 348 Chapter 9: Technology Background RAID 30 and 50 Axles When you create a RAID 30 or RAID 50, you must specify the number of axles. An axle refers to two or more RAID 3 logical drives striped together to make a RAID 30.
-
Page 349: Raid 60 – Striping Of Double Parity
Chapter 9: Technology Background RAID 60 – Striping of Double Parity RAID 60 combines both RAID 6 and RAID 0 features. Data is striped across disks as in RAID 0, and it uses double distributed parity as in RAID 6. RAID 60 provides data reliability, good overall performance and supports larger volume sizes. - Page 350 Chapter 9: Technology Background RAID 60 Axles When you create a RAID 60, you must specify the number of axles. An axle refers to a single RAID 6 logical drive that is striped with other RAID 6 logical drives to make RAID 60. An axle can have from 4 to 16 physical drives, depending on the number of physical drives in the logical drive.
-
Page 351: Choosing A Raid Level
Chapter 9: Technology Background Choosing a RAID Level There are several issues to consider when choosing the RAID Level for your ASUS Storage disk array. The following discussion summarizes some advantages, disadvantages, and applications for each choice. RAID 0 Advantages... - Page 352 Chapter 9: Technology Background RAID 1E Advantages Disadvantages Implemented as a mirrored disk array Very high disk overhead - uses only whose segments are RAID 0 disk 50% of total capacity arrays High I/O rates are achieved thanks to multiple stripe segments Can use an odd number of disks Recommended Applications for RAID 1E •...
- Page 353 Chapter 9: Technology Background RAID 6 Advantages Disadvantages High disk overhead – equivalent of two High Read data transaction rate Medium Write data transaction rate drives used for parity Good aggregate transfer rate Slightly lower performance than RAID 5 Safest RAID level, except for RAID 60 Recommended Applications for RAID 6 •...
- Page 354 Chapter 9: Technology Background RAID 50 Advantages Disadvantages High Read data transaction rate Higher disk overhead than RAID 5 Medium Write data transaction rate Good aggregate transfer rate High reliability Supports large volume sizes Recommended Applications for RAID 50 • File and Application servers •...
-
Page 355: Choosing Stripe Size
Stripe Size. If you do not know the cache buffer or fixed data block sizes, ASUS suggests you choose 64 KB as your Stripe Size. Generally speaking, email, POS, and Web Servers prefer smaller stripe sizes. -
Page 356: Tb Limitation
Cache Policy As it is used with ASUS Storage, the term cache refers to any of several kinds of high-speed, volatile memory that hold data moving from your computer to the physical drives or vice-versa. Cache is important because it can read and write data much faster than a physical drive. -
Page 357: Read Cache Policy
Write Back. Forced Read-Ahead Cache On the ASUS Storage subsystem, you can set the logical drive read cache policy to Forced Read Ahead an enable the aggressive pre-fetch feature. The Forced Read-Ahead cache policy setting provides predictive pre-fetching of data requests, allowing the controller to aggressively buffer large chunks of data in cache memory to prevent frame drops on high-bandwidth video playback. -
Page 358: Capacity Coercion
With ASUS Storage, you can choose to enable Capacity Coercion and any one of four methods. -
Page 359: Hot Spare Drive(S)
ASUS Storage will replace a failing disk drive in a disk array with an unassigned drive, if one is available. The unassigned drive is not part of any disk array. Such a drive is called a hot spare drive. -
Page 360: Partition And Format The Logical Drive
Chapter 9: Technology Background ASUS Storage includes a function that enables you to return a hot spare drive from a disk array back to spare status. When you create the hot spare drive, check the Revertible box to enable this feature. See ―Transition‖ on page 352. - Page 361 Chapter 9: Technology Background RAID 0 A RAID 0 source logical drive can migrate to the following target logical drives: Target Requirements RAID 0 Add physical drives. RAID 1 2 physical drives only. Only a single-drive RAID 0 can migrate to RAID 1 by adding 1 physical drive.
- Page 362 Chapter 9: Technology Background RAID 1 A RAID 1 Source logical drive can migrate to the following Target logical drives: Target Requirements RAID 0 None. RAID 1E 3 or more physical drives. Add 1 or more physical drives. RAID 3 3 physical drives minimum, 32 maximum.
- Page 363 Chapter 9: Technology Background RAID 3 A RAID 3 Source logical drive can migrate to the following Target logical drives: Target Requirements RAID 0 None. RAID 1E None. RAID 3 Add physical drives. 32 maximum. RAID 5 3 physical drives minimum, 32 maximum. If existing physical drives have no unused space, add 1 or more physical drives.
- Page 364 Chapter 9: Technology Background RAID 5 A RAID 5 Source logical drive can migrate to the following Target logical drives: Target Requirements RAID 0 None. RAID 1E None. RAID 3 3 physical drives minimum, 32 maximum. If existing physical drives have no unused space, add 1 or more physical drives.
- Page 365 Chapter 9: Technology Background RAID 6 A RAID 6 Source logical drive can migrate to the following Target logical drives: Target Requirements RAID 6 Add physical drives. 32 maximum. RAID 60 8 physical drives minimum, 32 per axle maximum. If existing physical drives have no unused space, add 1 or more physical drives.
- Page 366 Chapter 9: Technology Background RAID 30 A RAID 30 Source logical drive can migrate to the following Target logical drives: Target Requirements RAID 0 None. RAID 1E None. RAID 3 32 physical drives maximum. RAID 30 must have less than 32 physical drives. RAID 5 RAID 6 32 physical drives maximum.
- Page 367 Chapter 9: Technology Background RAID 50 A RAID 50 Source logical drive can migrate to the following Target logical drives: Target Requirements RAID 0 None. RAID 1E None. RAID 3 32 physical drives maximum. RAID 50 must have less than 32 physical drives. RAID 5 RAID 6 32 physical drives maximum.
-
Page 368: Ranges Of Disk Array Expansion
Note that once you create your logical drive, you cannot change the size of the sectors. Nor can you increase the number of address blocks that the OS recognizes. You can direct ASUS Storage Management to expand a logical drive beyond the maximum expansion size. When the expansion is finished: •... -
Page 369: Media Patrol
Backup the data from the current logical drive. Delete the current logical drive. See page 158 (ASUS Storage Management) or page 235 (CLU). Create a new logical drive with the desired capacity. See page 156 (ASUS Storage Management) or page 234 (CLU). -
Page 370: Predictive Data Migration (Pdm)
Rebuilding, PDM constantly monitors your disk drives and automatically copies your data to a spare disk drive before the disk drive fails and your Logical Drive goes Critical. See ―Running PDM‖ on page 71 (ASUS Storage Management) or page 233 (CLU). - Page 371 Transition The Transition feature enables you to specify ―permanent‖ spare drives for your ASUS Storage subsystem. Transition is the process of replacing a revertible spare drive that is currently part of a disk array with an unconfigured physical drive or a non-revertible spare. The revertible spare drive returns to its original status.
- Page 372 Chapter 9: Technology Background Example Following is an example to explain the Transition function. In the example above, there is a four-drive RAID 5 disk array and a global spare drive. Physical drives 1, 2, 3, and 4 belong to the disk array. Physical drive 5 remains unconfigured.
- Page 373 At this juncture, you would replace the failed drive in slot 3 with a new one of the same or greater capacity. When the ASUS Storage controller detects the new drive in slot 3, it will: • Automatically transition the data on drive 6 to drive 3 •...
-
Page 374: Chapter 10: Troubleshooting
When you first power-up the ASUS Storage, it beeps twice to show normal operation. See pattern 1, in Figure 1. The audible alarm sounds at other times to inform you that the ASUS Storage needs attention. But the alarm does not specify the condition. - Page 375 Chapter 10: Troubleshooting When the alarm sounds: • Check the front and back of ASUS Storage for red or amber LEDs, as described above. • If email notification is enabled, check for new messages. • Check for yellow !s red Xs in Tree View, see page 364.
-
Page 376: Leds Display Amber Or Red
Chapter 10: Troubleshooting LEDs Display Amber or Red Front Panel LEDs When boot-up is finished and the ASUS Storage subsystem is functioning normally: • Power, Global Enclosure Status, and Global RAID Status LEDs display green continuously. • Controller Activity LED flashes green when there is controller activity. -
Page 377: Disk Drive Leds
When the Global Enclosure LED on ASUS Storage’s front panel shows Amber or Red, check the LEDs on the back of ASUS Storage. These LEDs give the status of individual components. See page 360, Figure 6. - Page 378 LCD Panel When the ASUS Storage subsystem is fully booted and running under normal conditions, the LCD screen shows ASUS Storage and IP address. If a problem is detected in the subsystem, the LCD screen displays a Check Event message, as shown in Figure 4.
- Page 379 Chapter 10: Troubleshooting Figure 5. FC Controller LEDs Controller Status FC Ports Dirty Cache Fan 2 JBOD expansion Fan 1 USB 2 iSCSI Battery USB 1 Fan 1 Fan 2 Figure 6. iSCSI controller LEDs Controller Status Dirty Cache Fan 2 JBOD expansion Fan 1 USB 2...
- Page 380 Do NOT power down the ASUS Storage while this LED is on. See ―Browser Does Not Connect to ASUS Storage Management‖ on page 396 for more information.
-
Page 381: Clu Reports A Problem
CLU Reports a Problem The CLU reports information passively, that is you must determine which functions to check based on the sound of the ASUS Storage’s buzzer and any amber or red LEDs. See page 355 through 360. Check the event logs first. Then check the reported component. -
Page 382: Checking A Reported Component
Chapter 10: Troubleshooting Checking a Reported Component In this example, let us check disk array status. Open the CLU. Highlight Disk Array Management and press Enter. Observe the status of your disk arrays. DaId Alias OpStatus CfgCapacity FreeCapacity MaxContiguousCap ------------------------------------------------------------------------------------------- 75.44GB 66.06GB 66.06GB... - Page 383 Chapter 10: Troubleshooting ASUS Storage Management Reports a Problem ASUS Storage Management aids in troubleshooting your logical drives and enclosure by continuous monitoring and reporting to the User in the following ways: • Displays yellow !s red Xs in Tree View.
- Page 384 Chapter 10: Troubleshooting Figure 8. An example of a popup message • Keeps a record in the Event Log. Figure 9. The Event Log • Keeps a record in the Event Log. • Displays full information in Management View.
- Page 385 Chapter 10: Troubleshooting Figure 10. A failed disk drive shown in Management View Auto Rebuild Replacement Drive Failed Disk Drive Critical / Rebuilding Status Also see these troubleshooting topics: • ―Event Notification Response‖ on page 370 • ―Critical & Offline Disk Arrays‖ on page 384 •...
-
Page 386: Lcd Panel Reports A Problem
Chapter 10: Troubleshooting LCD Panel Reports a Problem The LCD panel can report a certain problems, including a Critical logical drives. Figure 11. Optional LCD panel reports a Critical logical drive Press the button until you see the View Events menu. Then press the button to read the corresponding event. -
Page 387: Viewing A Report From Opas
The ASUS Storage subsystem comes with One Plug Auto Service (OPAS). OPAS automatically saves a comprehensive system profile and diagnostic report as a text file when you plug a USB stick in one of the USB ports on the ASUS Storage controller. - Page 388 Chapter 10: Troubleshooting Open the subinfo_xxxxxxxxxx.log file in a text editor to read the system profile and diagnostic report. Note Choose a text editor with some word processor capability, such as WordPad on a Windows PC, for easier viewing.
-
Page 389: Event Notification Response
When you choose Event Notification, ASUS Storage Management sends popup and/or email messages regarding its status. The messages you see depend on your notification selection and what is currently happening in the ASUS Storage. See ―Setting-up User Event Subscriptions‖ on page 77. - Page 390 Blowers have stopped Verify that the fans are properly installed. If they still does not turn, replace the fan. See page 313. Blower speed is Check the ASUS Storage for overheating. See increased page 390. Blower speed is Temporary overheat condition was corrected.
- Page 391 Blower status is unknown Check for airflow out of the cooling unit. If there is none, check for proper installation. Cache BBU flushing has started ASUS Storage’s cache is being flushed. BBU flushing has ended ASUS Storage’s cache has been flushed.
- Page 392 The physical drives of the disk array were removed removed from the enclosure. Disk array settings have The user successfully disk array settings. See been changed page 156 (ASUS Storage Management) or page 230 (CLU). Drive Interface Controller Drive-interface controller Normal. found Drive-interface controller Restart the ASUS Storage.
- Page 393 The initiator sent a reset command. If this message has detected bus reset appears repeatedly, contact Technical Support. See page 402. Host-interface controller Restart the ASUS Storage. See page 130 (ASUS has encountered an Storage Management) or page 280 (CLU). unrecoverable error Host-interface controller Result of user action.
- Page 394 225 (CLU). Logical drive initialization System resources are low. Reduce system load or is aborted due to an restart the ASUS Storage. See page 130 (ASUS internal error. Storage Management) or page 280 (CLU). Logical drive initialization Initialization has been set manually or by schedule.
- Page 395 Bad block found on a disk drive. Migration will finish. expansion has Check the disk drive check table after migration and encountered a physical replace disk drive as needed. See page 141 (ASUS disk error Storage Management) or page 223 (CLU). Online capacity System resources are low.
- Page 396 Result of settings or user action. Normal. dedicated spare Physical disk is no longer Result of settings or user action. Normal. assigned as dedicated spare Physical disk has been A disk drive has been inserted into the ASUS Storage inserted subsystem.
- Page 397 A configured dead The disk drive inserted into the ASUS Storage was physical drive has been marked as dead and will not work on the ASUS inserted Storage. Replace the disk drive. A physical drive page 0/1 Result of settings or user action. Normal.
- Page 398 RAID Level migration is System resources are low. Reduce system load or aborted due to an internal restart the ASUS Storage. See page 130 (ASUS error. Storage Management) or page 280 (CLU). RAID Level migration is Migration has been set manually or by schedule.
- Page 399 If rebuild stopped by the user, restart the rebuild. See page 159 (ASUS Storage Management) or page 231 (CLU). Rebuild stopped internally The logical drive is offline. See page 384.
- Page 400 See page 384. Redundancy Check is System resources are low. Reduce system load or aborted due to internal restart the ASUS Storage. See page 130 (ASUS error Storage Management) or page 280 (CLU). Redundancy Check Check the logical drive’s inconsistent block table.
- Page 401 Synchronization is System resources are low. Reduce system load or aborted due to an internal restart the ASUS Storage. See page 130 (ASUS error. Storage Management) or page 280 (CLU). Synchronization is Synchronization is already running on another logical queued drive in the same array.
- Page 402 RAID migration was interrupted by a shutdown. to missing NV Watermark If array is online, try migration again. See page 158 (ASUS Storage Management) or page 232 (CLU). If array is offline, delete and recreate array. See page 154 and page 149 (ASUS Storage...
-
Page 403: Critical & Offline Disk Arrays
Restore the data from a backup source. When a Physical Drive Fails ASUS Storage provides both audible and visual indicators to alert you of a disk drive failure. The following will occur when a disk drive fails or goes offline: •... -
Page 404: With A Hot Spare Drive
After the disk array rebuilds itself using the spare drive, you must replace the failed drive. To set up a spare drive, see ―Creating a Spare Drive‖ on page 172 (ASUS Storage Management) or page 236 (CLU). Without a Hot Spare Drive... -
Page 405: Rebuild Operation
To enable Automatic Rebuild, see ―Making Background Activity Settings‖ on page 69 (ASUS Storage Management) or page 257 (CLU). To set Hot Spare Policy, see ―Making Spare Drive Settings‖ on page 173 (ASUS Storage Management) or page 237 (CLU) Important... -
Page 406: Incomplete Array
If you choose NOT to accept the incomplete array: Click Cancel in the incomplete array dialog box. Do one of the following: • Delete the array. See ―Deleting a Disk Array‖ on page 154 (ASUS Storage Management) or page 229 (CLU). • Replace the missing physical drive. -
Page 407: Physical Drive Problems
Stale Configuration – Caused by obsolete array information on the physical drive. Identify the disk array to which the physical drive belongs. Then delete the disk array. See ―Deleting a Disk Array‖ on page 154 (ASUS Storage Management) or page 229 (CLU). - Page 408 Chapter 10: Troubleshooting You can set the ASUS Storage to migrate disk arrays under Non-Volatile Random Access Memory (NVRAM), a much faster process because it writes data to the memory in the controller. However, if a physical drive or the controller fails during migration, the logical drives will go offline and you will lose data.
-
Page 409: Enclosure Problems
Figure 17. Enclosure information in Management View In this example, one of the RAID Controller fans has failed. The Enclosure Diagram displays color and motion changes to identify the failed fan. In ASUS Storage Management, RAID Controller fans are called Blowers. - Page 410 Ambient temperature above 95°F (35°C) where the ASUS Storage is operating Cooling Down the Enclosure To cool down a ASUS Storage enclosure: • Correct any problems identified above • Power down the ASUS Storage and let it sit for an hour or longer...
- Page 411 The power supplies are hot-swappable. ASUS Storage 1700 Series ASUS Storage 1700 Series has only one power supply and it is not replaceable onsite. If you need to replace the power supply, contact Technical Support and make arrangements to return the subsystem to ASUS for service.
-
Page 412: Connection Problems
And they will work when your network connection is down. For ASUS Storage, you must use the CLI or CLU to set the Management Port IP address in order for ASUS Storage Management to connect with it. See ―Setting Up Serial Cable Connections‖... -
Page 413: Network Connections
Management port and four RJ45 connectors for the iSCSI ports. The ASUS Storage becomes a node on your network like any other PC or server. ASUS Storage supports DHCP. If there is a DHCP server on your network, do not assign an IP address manually without consulting your network administrator. - Page 414 1000 Mb/s 100 Mb/s Fibre Channel Ports The Fibre Channel ports on ASUS Storage have activity LEDs but no speed LEDs. Refer to ―Managing Fibre Channel Connections‖ on page 84 or page 246 to verify link speed. Figure 20. Fibre Channel port LEDs Port 1 Link –...
- Page 415 Figure 21. LCD panel default display Figure 22. If your ASUS Storage does not have an LCD panel, set up a serial connection to access the CLI. See page 32 and 39 for more information. To find the new IP address: Start your PC’s terminal VT100 or ANSI emulation program.
-
Page 416: Unsaved Data In The Controller Cache
LED goes dark. ASUS Storage Does Not Boot The most common cause of a ASUS Storage not booting is when power to the subsystem was interrupted during a firmware flash. See ―Chapter 8: Maintenance‖ on page 305 for more information about firmware flashing. - Page 417 Chapter 10: Troubleshooting Monitor the boot sequence from a serial connection. Figure 24. USB ports USB ports You enable Rescue Mode under the CLU controller settings. See page 213. Also see ―Making a Serial Connection‖ on page 204 and ―Contacting Technical Support‖...
-
Page 418: Frequently Asked Questions
The DS300f and DS300i subsystems does not support Parallel ATA (PATA) disk drives. Can I take the disk drives from one ASUS Storage subsystem, put them into another ASUS Storage subsystem, and keep my disk array or logical drive intact? Yes. - Page 419 Also, with ASUS Storage, you do not have to create a subsystem because the subsystem already exists. Why can a RAID 1 logical drive on ASUS Storage consist of only two disk drives? On ASUS Storage, RAID 1 logical drives work in mirrored physical drive pairs.
- Page 420 What happens if a logical drive goes critical? On the front of ASUS Storage, the logical drive LED turns amber and an audible alarm sounds. See ―Critical & Offline Disk Arrays‖ on page 384. Can a ASUS Storage subsystem run on just one power supply? Yes, it is possible to run the ASUS Storage subsystem on a single power supply.
-
Page 421: Contacting Technical Support
Chapter 11: Support Contacting Technical Support ASUS Technical Support provides several support options for ASUS users to access information and updates. We encourage you to use one of our electronic services, which provide product information updates for the most efficient service and support. -
Page 422: Limited Warranty
Chapter 11: Support Limited Warranty ASUS Technology, Inc. (―ASUS‖) warrants that this product, from the time of the delivery of the product to the original end user: all components, except the cache backup battery, for a period of three (3) years;... -
Page 423: Your Responsibilities
Chapter 11: Support ASUS DOES NOT WARRANT that any product is free from errors or that it will interface without problems with your computer system. It is your responsibility to back up or otherwise save important data before installing any product and continue to back up your important data regularly. -
Page 424: Returning The Product For Repair
30 days, whichever is longer. ASUS will pay for standard return shipping charges only. You will be required to pay for any additional shipping options (such as express shipping). - Page 425 Chapter 11: Support...
-
Page 426: Appendix A: Setting-Up Nas Network Drives
If the Search button is not shown, from the View menu, choose Toolbars, then Standard Buttons. In the Computer name field, type the IP address of the ASUS Storage’s iSCSI port and click the Search button. An icon representing the iSCSI port appears. - Page 427 Appendix A: Setting-up NAS Network Drives Right-click the iSCSI port icon and choose Open from the dropdown menu. The Connect to dialog box appears.
- Page 428 Appendix A: Setting-up NAS Network Drives In the Connect to dialog box, type your user name and password in the fields provided and click the OK button. Type the user name and password of a NAS user. See―Adding NAS Users‖ on page 98.
- Page 429 Appendix A: Setting-up NAS Network Drives Right-click the public folder and choose Map Network Drive from the dropdown menu. The Map Network Drive dialog box appears. In the Map Network Drive dialog box, choose a drive letter from the Drive: dropdown menu and click the Finish button.
- Page 430 When you double-click the My Computer icon on your Windows desktop, the public folder on the ASUS Storage appears as a network drive. Public folder on the ASUS Storage You can now copy files to and from the folder on the ASUS Storage.
-
Page 431: Setting-Up A Network Drive – Unix And Linux
Drive‖ on page 156. Change to the public directory. Type cd /public and press Enter. You can now copy files to and from the folder on the ASUS Storage. When you are done with the public folder, type: cd; umount /PUBLIC and press Enter. - Page 432 The user name and password are case sensitive. Leave the Domain field blank. Type the user name and password of a NAS user. See ―Adding NAS Users‖ on page 98. The folder opens. You can now copy files to and from the folder on the ASUS Storage.
- Page 433 Appendix A: Setting-up NAS Network Drives...
- Page 434 Index Symbols ASUS Storage Management, cont. 97–111 219, 290, 340 364, 385 problem reporting times out Numerics Tree View 133, 214, 339 10GB Truncate 73, 167, 240 Auto Fix 337, 400 2 TB Limitation Auto Rebuild 70, 257 enable 159, 385...
- Page 435 Index battery, cont. configuration status, physical drive 139, 220 reconditioning 370, 371 connection power reported events problems BBU, reported events 371, 372 blower, reported events 129, 279 connector, RJ45 boot the subsystem controller browser, does not connect 33, 357 activity LED buzzer 139, 282, 290 132, 214...
- Page 436 Index delete, cont. disk array, cont. 156, 230, 231 initiator settings 83, 245 status link aggregation 158, 235, 299 155, 230, 297 critical logical drive 155, 230, 297 NAS groups rebuilding 155, 230, synchronizing NAS user schedule, background 155, 230, activities transport ready 173, 238, 303...
- Page 437 77, 121, 259, 273, 86, 247 severity topology Find NAS over WWW firmware update subscriptions event log ASUS Storage Management 68, 69, 190, 260 clear 260, 362 NVRAM problem reporting from PC 306, 309 reported events from TFTP server...
- Page 438 Fibre Channel, add physical drive not usable 113, 262 map LUN to 136, 221 topology Internet access, ASUS Storage Management intranet access to ASUS Storage KCC statement Management IP address ASUS Storage NAS language 40, 394 default ASUS Storage Management...
- Page 439 Index LCD panel LCD panel, cont. advanced mode settings 36, 283 at startup buzzer buzzer settings management port Check Event mode controller, view simple mode create spare drive create disk array, advanced delete disk array, automatic locate logical drive view spare drive view delete...
- Page 440 73, 209 subsystem Summary 73, 209 view status synchronization log in view list of all 169, 176, 242 ASUS Storage Management LUN cloning 47, 56 LUN map 41, 396 113, 262 log out edit ASUS Storage Management logical drive...
- Page 441 121, 274 requirements delete 121, 273 service delete members 120, 273 settings list of network drive create 51, 153, 154, 156 logical drive disconnect management ASUS Storage Manage- network drives 98–111 ment Linux Smart NAS Console Unix mount point conflicts Windows...
- Page 442 141, 222 DMA mode 133, 215 energy saving reported events fail during migration online help fail during transport ASUS Storage Management failure recovery 143, 224 force offline or online from VessRAID subsystem OPAS OPAS report 141, 222 global settings...
- Page 443 RAID 0 reported events applications 137, 217 status description Predictive Data Migration, see RAID 1 applications privileges description ASUS Storage Management RAID 10 user applications CLU user description problem reporting RAID 1E ASUS Storage Management applications 364, 385 description...
- Page 444 Index read cache reported events, cont. 141, 222 physical drive Media Patrol 52, 153, 157, 165, 229, policy online capacity expansion 235, 295 policy, defined physical drive read check table power supply 70, 258 reassigned block threshold RAID level migration rebuild rebuild 159, 231, 386...
- Page 445 Index 77, 121, 259, sector size severity of events 273, 285 defined 52, 153, 157, 228, 87, 247 setting SFP information 234, 295 share folders 105, 191 create serial connection, setting up 74, 209 106, 192 delete setting lock settings host IP 69, 257 background activities...
- Page 446 173, 237 language settings 174, 237 network drive Spare Check disconnect transition RAID volume view create specifications, ASUS Storage 143, 223 list stale condition 133, 215 restore files standby time, HDD share folder statistics create 126, 275 clear...
- Page 447 78, 115 debug information report, save test, email 306, 309 as text file TFTP server 65, 211 fully booted time zone, subsystem information timing out, ASUS Storage 73, 74, 209 lock Management logging into topology 136, 221 maintenance enclosure 86, 247...
- Page 448 137, 218 ASUS Storage Management voltage, enclosure 39, 205 CLI/CLU Smart NAS Console 134, 215 Wake on SAS WebPAM PROe warranty on ASUS Storage watermark 134, 213 orphan ASUS Storage reported events 355, 385 beeping Web Server 103, 412...
- Page 449 Index...