Dell 1815dn - All-in-one Laser Printer Owner's Manual
Laser multi-function printer
Hide thumbs
Also See for 1815dn - All-in-one Laser Printer:
- User manual (149 pages) ,
- Service manual (153 pages)
Table of Contents
Advertisement
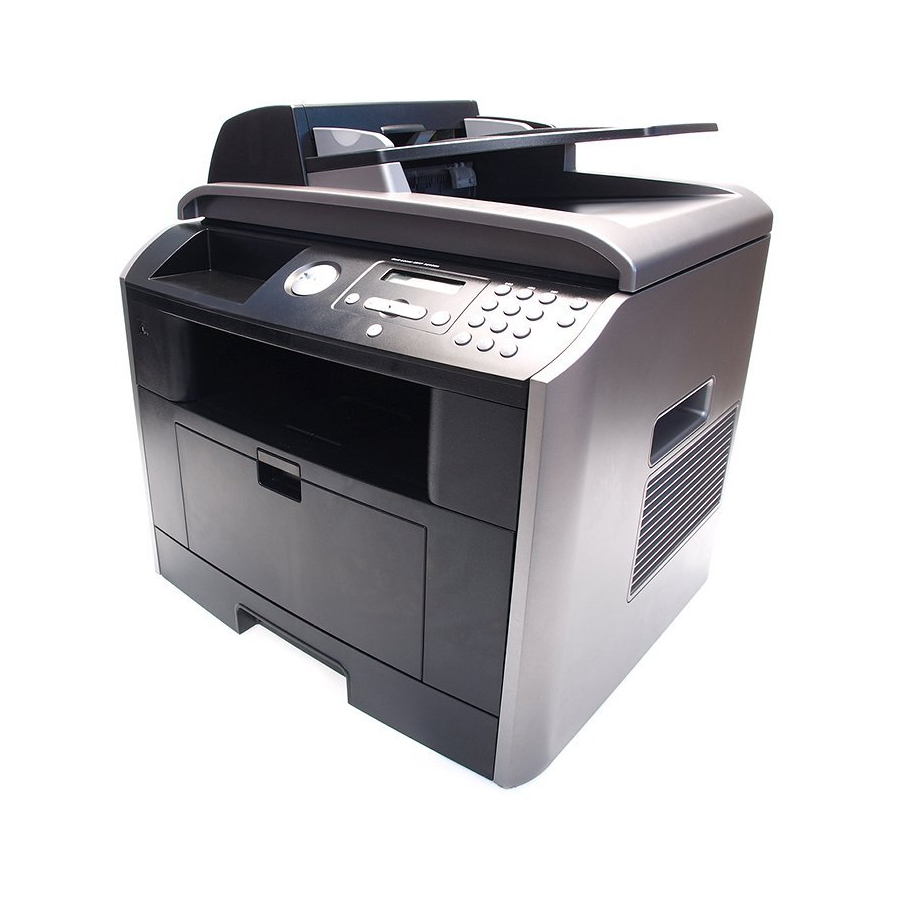
Dell™ Laser Multi-Function Printer 1815dn
Owner's Manual
Look Inside For:
• Preparing Your Multi-Function Printer
• Understanding the Printer Software
• Loading Print Media
• Using Your Multi-Function Printer
• Maintenance
• Troubleshooting
• Installing Options
• Contacting Dell
Temporary
w w w . d e l l . c o m | s u p p o r t . d e l l . c o m
Advertisement
Table of Contents
Troubleshooting

Related Manuals for Dell 1815dn - All-in-one Laser Printer


Summary of Contents for Dell 1815dn - All-in-one Laser Printer
- Page 1 Dell™ Laser Multi-Function Printer 1815dn Owner’s Manual Look Inside For: • Preparing Your Multi-Function Printer • Understanding the Printer Software • Loading Print Media • Using Your Multi-Function Printer • Maintenance • Troubleshooting • Installing Options • Contacting Dell Temporary...
- Page 3 Ordering Supplies Dell™ toner cartridges are available only through Dell. You can order toner cartridges online at www.dell.com/supplies or premier.dell.com: Dell’s secure, customizable, procurement, and support site for its larger relationship customers. 877-INK-2-YOU Luxembourg 02.713 1590 Austria 08 20 - 24 05 30 35...
- Page 5 © 2006 Dell Inc.. All rights reserved. Reproduction in any manner whatsoever without the written permission of Dell Inc. is strictly forbidden. Trademarks used in this text: Dell, DELL logo, Dell ScanCenter and Dell Toner Management System are trademarks of Dell Inc.; Microsoft ...
-
Page 7: Table Of Contents
Dell Laser MFP 1815dn Menu Functions........ - Page 8 Installing Dell Software For Local Printing ....... . . 32...
- Page 9 Using Your Multi-Function Printer Printing ..............51 Printing in Windows .
- Page 10 Activating the Installed Optional Tray 2 in the Printer Properties ..100 Contacting Dell Technical Assistance ........... 101 Automated Order-Status Service .
- Page 11 Dell Software License Agreement ........
- Page 12 Directive sur la mise au rebut des appareils électriques et électroniques (WEEE) ............145 Richtlinie für Abfall von elektrischen und elektronischen Geräten (WEEE) .
-
Page 13: Caution: Safety Information
• This product is designed to meet safety standards with the use of specific Dell-authorized components. The safety features of some parts may not always be obvious. Dell disclaims liability associated with use of non-Dell-authorized components. CAUTION: Do not use this product during a lightning storm. -
Page 14: Czech
Czech Danish Dutch Finnish French German Hebrew Italian Iberian Portugese Spanish Norwegian Polish Ruaaian Swedish Turkey... -
Page 15: Understanding Your Multi-Function Printer
Understanding Your Multi-Function Printer Front View Use the: When you want to: Automatic Document Load the document for copying, scanning, or sending faxes. Feeder (ADF) Document Width Ensure proper document feeding. Guides Document Input Tray Load the document for copying, scanning, or sending faxes. Document Cover Open to place a document on the scanner glass. -
Page 16: Rear View
When you want to: Front Cover Access the toner cartridge. Express Service Code Identify your printer while using support.dell.com or contacting technical support. Enter the Express Service Code to direct your call when contacting technical support. The Express Service Code is not available in all countries. - Page 17 Use the: When you want to: Optional Tray 2 Cable Connect the optional Tray 2 to your printer. Connector Telephone Line Socket Connect the telephone line to your printer. (Line) Extension Telephone Connect additional devices, such as a telephone or If the phone Socket (EXT) answering machine, to the printer (Optional).
-
Page 19: Preparing Your Multi-Function Printer
Preparing Your Multi-Function Printer Unlocking the Scanner Remove the label completely from the scanner module by gently pulling it. The scan unlock switch automatically moves FORWARD to the unlock position. NOTE: To confirm the scanner is unlocked, open the scanner cover and make sure the blue latch is in the unlocked ( ) position. -
Page 20: Using The Operator Panel
Using the Operator Panel Setup Diagram If you have not already done so, follow the steps on the (poster) to complete the hardware installation. Use the printer operator panel to scan, copy, and fax. Key pad Common keys Common Keys Press: ➊... -
Page 21: Dell Laser Mfp 1815Dn Menu Functions
Dell Laser MFP 1815dn Menu Functions Paper Setting 2. Copy Defaults 3. Fax Defaults Paper Size # of Copies Quality Contrast Receive Mode Paper Type Zoom Select Tray Resolution Redial Delay Contrast Duplex Ring to Answer Redial Attmpts 3. Fax Defaults 4. -
Page 22: Changing The Display Language
Changing the Display Language To change the displayed language that the operator panel displays, follow these steps: Press Scroll ( ) to highlight Menu and press Select ( Press Scroll ( ) to highlight Machine Setup and press Select ( Press Scroll ( ) to highlight Language and press Select ( Press Scroll (... -
Page 23: Using The Number Keypad To Enter Characters
Using the Number Keypad to Enter Characters As you perform various tasks, you may need to enter names and numbers. For example, when you set up your printer, you should enter your name or your company’s name and telephone number. When you store fax numbers in memory, you may also enter the corresponding names. -
Page 24: Setting The Time And Date
Changing Numbers or Names If you make a mistake while entering a number or name, press the left Scroll ( ) button to delete the last digit or character. Then enter the correct number or character. Inserting a Pause For some telephone systems, it is necessary to dial an access code and listen for a second dial tone. A pause must be entered in order for the access code to function. -
Page 25: Storing A Number For Speed Dialing
Storing a Number for Speed Dialing Press Directory ( ) on the operator panel. Press Scroll ( ) to highlight Fax and press Select ( Press Scroll ( ) to highlight Menu and press Select ( Press Scroll ( ) to highlight Directory and press Select ( Press Scroll ( ) to highlight PhoneBook and press Select ( Press Scroll (... -
Page 26: Preparing Networking
Enter a one, two or three-digit speed dial number you want to assign to the group and press Select Or select the location by pressing Scroll ( ) and then press Select ( At the Add Another? prompt, press Select ( ) to enter other speed dial numbers into the group. -
Page 27: Printing The Network Configuration Page
Connect one end of the printer power cord into the socket at the back of the printer and the other end into a properly grounded outlet. Press the switch to power on the printer. Warming Up Please Wait appears on the display indicating that the printer is now on. If not, make sure the power cord is firmly plugged in to the back of the printer and the electrical outlet. -
Page 28: Run The Installation Software
If your printer doesn’t respond, or if the IP address is not what you expected: drivers and utilities CD into your computer. Insert the If setup does not start automatically: drivers and utilities CD : click Start → Run and browse your CD drive (for example, •... - Page 29 To launch the Dell Printer Configuration Web Tool, type the network printer IP address in your Web browser, and the printer configuration appears on the screen. See the User’s Guide for more information. You can set up the Dell Printer Configuration Web Tool to send you an email when the printer needs supplies or intervention.
- Page 30 Preparing Your Multi-Function Printer...
-
Page 31: Understanding The Printer Software
- displays the status of the printer and the name of the job when you send a job to print. The Dell Toner Management System window also displays the level of toner remaining and allows you to order replacement toner cartridges. -
Page 32: Installing Dell Software For Local Printing
Make sure that the printer is connected to your computer and powered on. Close all unnecessary programs. NOTE: If the printer is not connected to your computer when you install the Dell software, the No Printer Found screen appears. Follow the instructions to install the software. drivers and utilities CD . -
Page 33: Windows 2000
Windows 2000: Make sure that the printer is connected to your computer and powered on. drivers and utilities CD and click Next. When the hardware wizard screen appears, insert the NOTE: For each wizard that appears, select Search for a suitable driver for my device (Recommended), click Next, select CD-ROM Drives, and then click Next through the wizard screens. -
Page 34: Windows Me
Windows Me: Make sure that the printer is connected to your computer and powered on. When the hardware wizard screen appears, Automatic search for a better driver for your device (Recommended) is selected. drivers and utilities CD and click Next. The driver installs. Insert the Click Finish, and a second wizard appears. -
Page 35: Installing Dell Software For Network Printing
If you want to install the drivers on this computer for network operation, select Local Installation, and click Next. If you want to install the Dell software on the remote computers or network servers on the same network, select Remote Installation. The domain administrator’s ID and password are required. Select the client computer(s) in the same domain on a network and click Next. -
Page 36: Uninstalling Software
Close all programs before uninstalling software, and restart your computer after completing the uninstall process. From the Start menu, select Programs or All Programs → DELL → DELL Printers → Dell Laser MFP 1815 → Dell MFP Software Uninstall. Select the software you want to remove. -
Page 37: Loading Print Media
Loading Print Media Print Media Guidelines The following tables provide information on standard and optional sources, including the print media sizes you can select from the paper size menu and supported weights. NOTE: If you use a print media size not listed, select the next larger size. Print Media Sizes and Support Legend Dimensions... - Page 38 Legend Dimensions Paper Tray Bypass Tray Duplex Printing Y- indicates Support (tray 1 and optional tray 2) Print Media Size Envelope 7-3/4 3.875 x 7.5 in. (Monarch) (98.4 x 190.5 mm) Envelope COM-10 4.12 x 9.5 in. (105 x 241 mm) Envelope DL 4.33 x 8.66 in.
- Page 39 Print Media Types and Weights Print Media Type Print Media Weight Tray 1 and Bypass Tray Optional Tray 2 Paper Xerographic or 60-90 g/m grain long 60-135 g/m grain long business paper (16-24 lb bond) (16 to 36 lb bond) Card stock-maximum Index Bristol 120 g/m...
-
Page 40: Loading Paper
Loading Paper Using the Paper Tray Load up to 250 sheets of plain paper (75 , 20 lb) in the paper tray. NOTE: Set the paper type and size after loading paper into the paper tray. See "Setting the Paper Size and Type" on User’s Guide page 47 for the paper used in copying and faxing, or Paper Tab on the for PC-printing. - Page 41 Flex the sheets back and forth to loosen them, and then fan them out. Do not fold or crease the print media. Align the edges on a level surface. Insert the paper stack into the paper tray with the side to be printed on, facing down. Do not exceed the maximum stack height indicated by the paper limit marks on the both inside walls of the tray.
- Page 42 Slide in the paper length guide until it lightly touches the end of the paper stack. For paper smaller than Letter size, adjust the front paper length guide so that it lightly touches the paper stack. Pinch the paper width guide, as shown, and move it towards the stack of paper until it lightly touches the side of the stack.
-
Page 43: Using The Bypass Tray
Insert and slide the paper tray back into the printer. Set the paper type and size. See "Setting the Paper Size and Type" on page 47 for copying and faxing or User’s Guide for PC-printing. Paper Tab on the Using the Bypass Tray Use the bypass tray to print manual duplex, transparencies, labels, envelopes or postcards in addition to making quick runs of paper types or sizes that are not currently loaded in the paper tray. - Page 44 To use the bypass tray: Open the bypass tray and unfold the paper support extension, as shown. If you are using paper, flex or fan the edge of the paper stack to separate the pages before loading. For transparencies, hold them by the edges and avoid touching the print side. Oils from your fingers can cause print quality problems.
- Page 45 Depending on the paper type you are using, keep the following loading method: • Envelopes: load them with the flap side down and with the stamp area on the top left side. • Transparencies: load them with the print side up and the top with the adhesive strip entering the printer first.
- Page 46 CAUTION: Make sure to open the rear cover when you print on transparencies. If not, they may tear while exiting the machine. After printing, fold away the paper support extension and close the bypass tray. You can load up to: Make sure: 250 sheets of plain paper in The paper is designed for use with laser printers.
-
Page 47: Setting The Paper Size And Type
You can load up to: Make sure: 5 sheets of custom sized paper Your paper size should fit within these dimensions: in the bypass tray Width Length 3.0-8.5 in. (76-216 mm) 5.0-14.0 in. (127-356 mm) Your printer has two output locations; the rear output slot and the front output tray. Before you begin copying, printing, or printing received faxes, refer to the table below about how much paper the printer output trays can hold: Output Location... -
Page 48: Placing Documents On The Scanner Glass
Placing Documents on the Scanner Glass NOTE: Contaminants on the scanner glass may cause black spots on the printout. For best results, clean the scanner glass before use. See page 81. NOTE: To get the best scan quality, especially for color or gray scale images, use the scanner glass instead of the ADF. -
Page 49: Loading Documents Into The Adf
Loading Documents Into the ADF NOTICE: Do not load more than 50 sheets into the ADF or allow more than 50 sheets to be fed to the ADF output tray. The ADF output tray should be emptied before it exceeds 50 sheets or your original documents may be damaged. - Page 50 Loading Print Media...
-
Page 51: Using Your Multi-Function Printer
When you print a file from a Macintosh computer, you can use the PostScript driver by installing the PPD file. Refer to the User’s Guide . Printing in Linux User’s Guide . Your printer supports Linux systems with Dell’s MFP driver package. Refer to the Using Your Multi-Function Printer... -
Page 52: Printing From The Usb Memory Key
Printing from the USB Memory Key You can print files stored in the USB memory key. TIFF, BMP, TXT, PDF, and PRN file formats are supported. NOTE: Only English TXT files, PDF files generated by this printer, and TIFF 6.0 files are available. Insert the USB memory key into the USB memory port on your printer Press Scroll ( ) to highlight PRINT from and press Select (... - Page 53 NOTE: If you press Cancel ( ) while you set the copy options, all of the options you have set for the current copy job may be canceled and return to their default status. Or, they automatically return to their default status after copying.
-
Page 54: Making Copies
Text: Use for documents with fine details, such as fine text. • • Text & Photo: Use for documents with both text and photo/gray tones. • Photo: Use for documents with photo or gray tones. Making Copies NOTE: A computer connection is not required for copying. NOTE: Contaminates on the ADF glass or the document glass may cause black vertical lines or black spots on the printout. -
Page 55: Selecting A Paper Tray
ID Copying (available via scanner glass only): Prints a two-sided original document on one sheet of paper. Use this feature to print one side on the upper half of the paper and the reverse side on the lower half without reducing the original size. This is helpful for copying a small-sized document as some portions may not be printed if the original is larger than the printable area. -
Page 56: Changing The Default Settings
Press Scroll ( ) to select the binding option you want and press Select ( • Off: Prints in normal mode. • Long Edge: Prints pages to read like a book. • Short Edge: Prints pages to read by flipping over like a note pad. If necessary, customize the copy settings including the number of copies, copy size, contrast, and image quality by using the Copy menus. -
Page 57: Scanning
Scanning Use your Dell Laser MFP 1815 to convert pictures and text into editable images on your computer. After drivers and utilities CD you install the software from the , you can start scanning images using either the operator panel or applications such as Dell ScanCenter, PaperPort and Adobe PhotoShop on your computer, or through the network using Network Scan, which allows you to scan a document on your printer as a JPEG, TIFF or PDF and save it to a network-connected computer. -
Page 58: Knowing The Scan Menu
Icons on the Dell ScanCenter bar represent the programs that are limited to PaperPort and to Dell ScanCenter. To scan and send an item to a program, click the program icon and then scan the item. Dell ScanCenter automatically starts the selected program when the scan is complete. -
Page 59: Scanning Using Network Scan
The PIN must be 4 digits. This is optional. You can select the default password option. When you have added your printer to the network, Click Finish. Your printer appears on the Dell Network Scan Manager window and you can now scan through the network. -
Page 60: Scanning To The Usb Memory Key
Press Scroll ( ) to highlight PC and press Select ( Press Scroll ( ) to select the registered name you want and press Select ( Enter the PIN you have registered and press Select ( Press Scroll ( ) to highlight Scan Setting and press Select ( Choose the file type and resolution and then press Select ( •... - Page 61 Plugging in a USB Memory Key The USB memory port on the front of your printer is designed for USB V1.1 and USB V2.0 memory. You must use only an authorized USB memory key whose connector style is A Plug Type. Insert a USB memory key into the USB memory port on the front of your printer.
- Page 62 Press Select ( ) to access Quick Scan. Your printer begins scanning the document and save it to your USB memory key. For the document loaded on the document glass, the display asks if you want to load another page. Select Yes or No.
-
Page 63: Scanning Using The Windows Image Acquisition (Wia) Driver
Press Scroll ( ) to highlight the image size, Letter, A4, Legal, Folio, Executive, A5, B5, or A6 and press Select ( Press Scroll ( ) to highlight Version and press Select ( Press Scroll ( ) to highlight the file format, BMP, TIFF, PDF, or JPEG and press Select If you select JPEG, skip to step 11. -
Page 64: Scanning And Sending An Email
Scanning and Sending an Email To use e-mail features such as Scanning to E-mail and Fax Forward to E-mail addresses, you first need to User’s Guide configure the network settings and set up your e-mail account. See the Make sure that your printer is connected to a network. Load the document(s) face up with top edge in first into the ADF. -
Page 65: Faxing
Faxing NOTE: A computer connection is not required for faxing. It is possible to begin typing the number on the number pad without first selecting fax mode. The printer will automatically switch to fax mode when the fourth digit is entered on the number pad. Knowing the Fax Menu Fax to: Redials... -
Page 66: Sending A Fax Automatically
The document types recommended for the resolution settings are described in the table below. Mode Recommended for: Standard Documents with normal sized characters. Fine Documents containing small characters or thin lines or documents printed using a dot-matrix printer. Super Fine Documents containing extremely fine detail. -
Page 67: Sending A Fax Manually
) to cancel the fax job at any time while sending the fax. Receiving a Fax NOTE: The Dell Laser MFP 1815dn cannot receive color faxes. Press Scroll ( ) to highlight Fax and press Select ( Press Scroll (... -
Page 68: Forwarding Faxes To E-Mail Addresses
Forwarding Faxes to E-mail Addresses You can set the printer to forward all outgoing or incoming faxes to specified email addresses. Press Scroll ( ) to highlight Menu and press Select ( Press Scroll ( ) to highlight Email setup and press Select ( Press Scroll ( ) to highlight Email Forward and press Select ( Select the desired status by pressing Scroll (... - Page 69 Fax options • Contrast: You can select the default contrast value to fax your documents lighter or darker. • Resolution: You can select the default resolution setting. • Ring to Answer: You can specify the number of times the printer rings, 1-7, before answering an incoming call.
-
Page 70: Using Fax Features
Discard Size: When receiving a document as long as or longer than the paper loaded in the paper tray, • you can set the printer to discard any excess at the bottom of the page. If the excess is outside the margin you set, it will print on two sheets of paper at the actual size. -
Page 71: Using Advanced Fax Features
Scheduled Jobs: Scheduled job information • • MSG Confirm: Message confirmation • Junk Fax List: Junk fax number list • Scan Journal: Network Scan sessions list • Email Report: Sent email list Press Select ( The selected information prints out. Using Advanced Fax Features User’s Guide The following options are available. -
Page 72: Using An Answering Machine
Line Telephone Answering Device Line Phone Dell Laser MFP 1815dn Figure 1 You can connect a telephone answering device (TAD) directly to the back of your printer as shown in Figure 1. Set your printer to Ans/Fax mode and set the Ring to Answer to a digit greater than the Rings to Answer setting for the TAD. -
Page 73: Using A Computer Modem
To fax via the computer modem, follow the instructions provided with your computer modem and fax application. User's Guide if you want to capture images using your printer • Refer to the DELL Laser MFP 1815dn and Dell ScanDirect and send images using your fax application with the computer modem. Using Your Multi-Function Printer... - Page 74 Using Your Multi-Function Printer...
-
Page 75: Maintenance
We strongly recommend that these items be installed by a trained service professional. Replacing the ADF Rubber Pad You can purchase an ADF rubber pad from your Dell dealer or the retailer where you bought your printer. Open the ADF cover. - Page 76 Remove the ADF rubber pad from the ADF, as shown. Insert a new ADF rubber pad into place. Align the left end of the ADF roller with the slot and push the right end of the ADF roller into the right slot.
-
Page 77: Ordering Supplies
Ordering Supplies You can order supplies using the Dell Toner Management System or the Dell Printer Configuration Web Tool. If your printer is connected to a network, type your printer’s IP address in your Web browser or open the Network Status Monitor Center to launch the Dell Printer Configuration Web Tool and click the toner supplies link. -
Page 78: Replacing The Toner Cartridge
To order more toner, go to www.dell.com/supplies or premier.dell.com. CAUTION: For best results, use Dell toner cartridges. Print quality and printer reliability are not guaranteed if you do not use Dell supplies. To replace the toner cartridge: Open the front cover. - Page 79 Remove the packing tape and thoroughly shake the cartridge from side-to-side to distribute the toner. Save the box and the cover for shipping. NOTE: If toner comes into contact with your clothing, wipe the toner off with a dry cloth and wash your clothing in cold water.
-
Page 80: Cleaning Your Multi-Function Printer
Cleaning Your Multi-Function Printer To maintain the print quality, follow the cleaning procedures below, each time the toner cartridge is replaced or if print quality problems occur. NOTE: Do not touch the transfer roller located under the toner cartridge when cleaning inside the printer. Oil from your fingers may cause print quality problems. -
Page 81: Cleaning The Scanner
Plug in the power cord and power the printer on. Cleaning the Scanner Keeping the scanner and ADF glass clean ensure the highest quality copies and sent faxes. Dell recommends cleaning the scanner at the start of each day and during the day, as needed. -
Page 82: Cleaning The Drum
Wipe the surface of the scanner glass and ADF glass until it is clean and dry. White Sheet Document Cover ADF Glass Scanner Glass Wipe the underside of the white document cover and white sheet until it is clean and dry. Close the document cover. -
Page 83: Troubleshooting
Troubleshooting Clearing Jams in the ADF When a document jams while it passes through the ADF, Document Jam appears on the display. NOTE: To prevent document jams, use the document glass for thick, thin or mixed documents. Remove the remaining documents from the ADF. If the document is jammed in the paper feed area: Open the ADF cover. - Page 84 If the document is jammed in the paper exit area: Open the document cover and turn the release knob to remove the misfed documents from the document output tray. Close the document cover. Then load the documents back into the ADF. If you cannot see the paper or the paper does not move when you pulled, open the document cover.
-
Page 85: Clearing Jams In The Paper Paths
Clearing Jams in the Paper Paths When a paper jam occurs, Paper Jam appears on the display. Refer to the table below to locate and clear the paper jam. Operator Panel Location of Jam Go to Message Paper Jam 0 Paper Feed Jam (tray 1) page 85, page 86, or page 87. -
Page 86: Paper Feed Jam (Optional Tray 2)
Remove the jammed paper by gently pulling it straight out. If you cannot see the paper or the paper does not move when pulled, check the fuser area. For more information, see "Fuser Area Jam" on page 88. Insert the paper tray into the printer until it snaps into place. Printing automatically resumes. -
Page 87: Bypass Tray Jam
Pull the jammed paper straight up and out. Insert the trays back into the printer. Printing automatically resumes. Bypass Tray Jam If the paper is not feeding properly, pull the jammed paper out of the printer. Open and close the front cover to resume printing. Troubleshooting... -
Page 88: Fuser Area Jam
Fuser Area Jam NOTICE: The fuser area is hot. Take care when removing paper from the printer. Open the front cover and lightly pull the toner cartridge straight out. Remove the jammed paper by gently pulling it straight out. Replace the toner cartridge and close the front cover. Printing automatically resumes. -
Page 89: Paper Exit Jam
Paper Exit Jam Open and close the front cover. The jammed paper automatically exits the printer. If the paper does not exit, go to the next step. Gently pull the jammed paper out of the output tray. If you do not see the jammed paper in the output tray or the jammed paper does not move when pulled, open the rear cover. - Page 90 Release the blue strap, the rear cover stopper, and fully open the rear cover, as shown. Unfold the duplex guide fully. While pushing the fuser lever to the right, open the fuser door. NOTICE: Make sure to unfold the duplex guide before opening the fuser door or you may damage the fuser door.
-
Page 91: Duplex Jam
Pull the jammed paper out. If the jammed paper does not move when you pull, push the two blue pressure levers up to loosen the paper, and then remove the jammed paper. Return the levers, fuser door, duplex guide, and rear cover stopper to their original position. Close the rear cover. - Page 92 Remove the jammed paper from the duplex unit. If the paper does not come out with the duplex unit, remove the paper from the bottom of the printer. Push the duplex unit to the printer. CAUTION: If you do not push the duplex unit in correctly, a paper jam may occur. Troubleshooting...
- Page 93 Duplex Jam 1 Open the rear cover. Unfold the duplex guide fully. Pull the jammed paper out. Return the duplex guide and close the rear cover. Open and close the front cover. Printing automatically resumes. Troubleshooting...
-
Page 94: Tips For Avoiding Paper Jams
Tips for Avoiding Paper Jams By selecting the correct paper types, most paper jams can be avoided. When a paper jam occurs, follow the steps outlined in "Clearing Jams in the Paper Paths" on page 85. • Follow the procedures in "Loading Paper" on page 40. Ensure that the adjustable guides are correctly positioned. -
Page 95: Installing Options
Your printer has 96 MB of memory. It can be expanded to 192 MB. Remove the preinstalled memory DIMM before upgrading the memory. NOTE: Your printer supports only Dell DIMMs. Order Dell DIMMs online at www.dell.com. Power the printer off and unplug all cables from the printer. Grab the control board cover and open it. - Page 96 Completely open the latches on each side of the DIMM slot and remove the preinstalled memory DIMM. Remove a new memory DIMM from its antistatic package. Holding the memory DIMM by the edges, align the notches on the memory DIMM with the grooves at the top of the memory DIMM slot.
-
Page 97: Activating The Added Memory In The Ps Printer Properties
Make sure that the PostScript printer driver is installed on your computer. For details about installing the PS printer driver, see "Installing Dell Software For Local Printing" on page 32. Click the Windows Start menu. -
Page 98: Installing An Optional Tray 2
Installing an Optional Tray 2 You can increase the paper handling capacity of your printer by installing an optional tray 2. This tray holds 250 sheets of paper. Power the printer off and unplug all cables from the printer. Remove the packing tape and the tape fastening the optional tray 2 cable from the bottom of the optional tray 2. - Page 99 Place the printer over the optional tray 2, aligning the feet on the printer with the positioners in the optional tray 2. Connect the cable into the connector on the back of the printer. Load paper in the optional tray 2. For information about loading paper in this tray, see "Using the Paper Tray"...
-
Page 100: Activating The Installed Optional Tray 2 In The Printer Properties
Click the Windows Start button. For Windows 98/Me/NT 4.0/2000, click Settings and point to Printers. For Windows XP, click Printers and Faxes. Click the Dell Laser MFP 1815 printer. Right-click the printer icon and: In Windows 98/Me, click Properties. In Windows 2000/XP, click Print Setup or click Properties and then point to Printing Preferences. -
Page 101: Contacting Dell
In the U.S., Business customers should call 1-877-459-7298, and Consumer (Home and Home Office) customers should call 1-800-624-9896. If you are calling from a different country or are in a different Service area, see "Contacting Dell" on page 102 for your local telephone number. -
Page 102: Automated Order-Status Service
Automated Order-Status Service To check on the status of any Dell products that you have ordered, you can go to support.dell.com, or you can call the automated order-status service. A recording prompts you for the information needed to locate and report on your order. See "Contacting Dell" for the telephone number to call for your region. - Page 103 0820 240 530 14 Preferred Accounts/Corporate Customer Care 0820 240 530 16 Support for XPS portable computers only 0820 240 530 81 Home/Small Business Support for all other Dell 0820 240 530 14 computers Preferred Accounts/Corporate Support 0660 8779 Switchboard...
- Page 104 Country Code: 673 Customer Care (Penang, Malaysia) 604 633 4888 Transaction Sales (Penang, Malaysia) 604 633 4955 Canada (North York, Ontario) Online Order Status: www.dell.ca/ostatus International Access Code: 011 AutoTech (automated Hardware and Warranty toll-free: 1-800-247-9362 Support) Customer Service (Home Sales/Small Business) toll-free: 1-800-847-4096 Customer Service (med./large business,...
- Page 105 Country Code: 86 Technical Support E-mail: cn_support@dell.com City Code: 592 Customer Care E-mail: customer_cn@dell.com Technical Support Fax 592 818 1350 Technical Support (Dell™ Dimension™ and toll-free: 800 858 2968 Inspiron) Technical Support (OptiPlex™, Latitude™, and toll-free: 800 858 0950 Dell Precision™)
- Page 106 Denmark (Copenhagen) Website: support.euro.dell.com International Access Code: 00 Technical Support for XPS portable computers only 7010 0074 Country Code: 45 Technical Support for all other Dell computers 7023 0182 Customer Care (Relational) 7023 0184 Home/Small Business Customer Care 3287 5505...
- Page 107 Home and Small Business Country Code: 33 Technical Support for XPS portable computers only 0825 387 129 City Codes: (1) (4) Technical Support for all other Dell computers 0825 387 270 Customer Care 0825 823 833 Switchboard 0825 004 700...
- Page 108 Website: support.ap.dell.com International Access Code: 001 Technical Support E-mail: HK_support@Dell.com Country Code: 852 Technical Support (Dimension and Inspiron) 2969 3188 Technical Support (OptiPlex, Latitude, and Dell 2969 3191 Precision) Technical Support (PowerApp™, PowerEdge™, 2969 3196 PowerConnect™, and PowerVault™) Customer Care...
- Page 109 Country Code: 353 Technical Support for XPS portable computers only 1850 200 722 City Code: 1 Technical Support for all other Dell computers 1850 543 543 U.K. Technical Support (dial within U.K. only) 0870 908 0800 Home User Customer Care...
- Page 110 Technical Support outside of Japan (Dimension and 81-44-520-1435 Inspiron) Technical Support (Dell Precision, OptiPlex, and toll-free:0120-198-433 Latitude) Technical Support outside of Japan (Dell Precision, 81-44-556-3894 OptiPlex, and Latitude) Technical Support (PDAs, projectors, printers, toll-free: 0120-981-690 routers) Technical Support outside of Japan (PDAs,...
- Page 111 Transaction Sales (Xiamen, China) 29 693 115 Malaysia (Penang) Website: support.ap.dell.com International Access Code: 00 Technical Support (Dell Precision, OptiPlex, and toll-free: 1 800 880 193 Latitude) Country Code: 60 Technical Support (Dimension, Inspiron, and toll-free: 1 800 881 306...
- Page 112 Website: support.euro.dell.com International Access Code: 00 Technical Support for XPS portable computers only 020 674 45 94 Country Code: 31 Technical Support for all other Dell computers 020 674 45 00 City Code: 20 Technical Support Fax 020 674 47 66...
- Page 113 Norway (Lysaker) Website: support.euro.dell.com International Access Code: 00 Technical Support for XPS portable computers only 815 35 043 Country Code: 47 Technical Support for all other Dell products 671 16882 Relational Customer Care 671 17575 Home/Small Business Customer Care 23162298...
- Page 114 International Access Code: 005 Technical Support (Dimension, Inspiron, and toll-free: 1800 394 7430 Electronics and Accessories) Country Code: 65 Technical Support (OptiPlex, Latitude, and Dell toll-free: 1800 394 7488 Precision) Technical Support (PowerApp, PowerEdge, toll-free: 1800 394 7478 PowerConnect, and PowerVault)
- Page 115 Website: support.euro.dell.com International Access Code: 00 Technical Support for XPS portable computers only 0771 340 340 Country Code: 46 Technical Support for all other Dell products 08 590 05 199 City Code: 8 Relational Customer Care 08 590 05 642...
- Page 116 00801 65 1228 Corporate Sales toll-free: 00801 651 227 Thailand Website: support.ap.dell.com International Access Code: 001 Technical Support (OptiPlex, Latitude, and Dell toll-free: 1800 0060 07 Precision) Country Code: 66 Technical Support (PowerApp, PowerEdge, toll-free: 1800 0600 09 PowerConnect, and PowerVault)
- Page 117 Area Codes, International Access Code Website and E-Mail Address Local Numbers, and Country Code Toll-Free Numbers City Code U.K. (Bracknell) Website: support.euro.dell.com International Access Code: 00 Customer Care website: support.euro.dell.com/uk/en/ECare/Form/Home.asp Country Code: 44 E-mail: dell_direct_support@dell.com City Code: 1344 Technical Support (Corporate/Preferred...
- Page 118 1-888-798-7561 Software and Peripherals Sales toll-free: 1-800-671-3355 Spare Parts Sales toll-free: 1-800-357-3355 Extended Service and Warranty Sales toll-free: 1-800-247-4618 toll-free: 1-800-727-8320 Dell Services for the Deaf, Hard-of-Hearing, or toll-free: 1-877-DELLTTY Speech-Impaired (1-877-335-5889) U.S. Virgin Islands General Support 1-877-673-3355 Venezuela...
-
Page 119: Appendix
Payment Terms; Orders; Quotes; Interest. Payment terms are within Dell's sole discretion, and, unless otherwise agreed to by Dell, payment must be made at the time of purchase. Payment for Product may be made by credit card, wire transfer, or some other prearranged payment method. - Page 120 Changed or Discontinued Product. Dell’s policy is one of ongoing update and revision. Dell may revise and discontinue Product at any time without notice to you and this may affect information saved in your online “cart.” Dell will ship Product that have the functionality and performance of the Product ordered, but changes between what is shipped and what is described in a specification sheet or catalog are possible.
-
Page 121: Limited Warranties And Return Policy
Dell will be responsible for paying any arbitration filing fees and fees required to obtain a hearing to the extent such fees exceed the amount of the filing fee for initiating a claim in the court of general jurisdiction in the state in which you reside. - Page 122 • Memory carries a lifetime limited warranty. • Monitors carry the longer of either a 3-year limited warranty or the remainder of the warranty for the Dell computer to which the monitor will be connected. • Other add-on hardware carries the longer of either a 1-year limited warranty for new parts and a 90-day limited warranty for reconditioned parts or, for both new and reconditioned parts, the reminder of the warranty for the Dell computer on which such parts are installed.
- Page 123 What do I do if I need warranty service? Before the warranty expires, please call us at the relevant number listed in the following table. Please also have your Dell Service Tag or order number available. Individual Home Consumers: U.S. Only...
-
Page 124: Limited Warranty Terms For Dell-Branded Hardware Products (Canada Only)
What if I purchased a service contract? If your service contract is with Dell, service will be provided to you under the terms of the service agreement. Please refer to that contract for details on how to obtain service. If you purchased through us a service contract with one of our third-party service providers, please refer to that contract for details on how to obtain service. - Page 125 (that is, the warranty terms in place at the time of purchase will apply to your purchase). What do I do if I need warranty service? Before the warranty expires, please call us at the relevant number listed in the following table. Please also have your Dell Service Tag or order number available.
- Page 126 What if I purchased a service contract? If your service contract is with Dell, service will be provided to you under the terms of the service contract. Please refer to that contract for details on how to obtain service. Dell's service contracts can be found online at www.dell.ca or by calling Customer Care at 1-800-847-4096.
-
Page 127: Dell Return Policy (U.s. Only)
Restocking Fees: Unless the product is defective or the return is a direct result of a Dell error, a restocking fee of 15% may be charged on hardware, accessories, peripherals, parts and unopened software still in its/their sealed package. -
Page 128: Total Satisfaction Return Policy (Canada Only)
While Dell offers a wide selection of software and peripheral products, we do not specifically test or guarantee that all of the products we offer work with any or all of the various models of Dell computers, nor do we test or guarantee all of the products we sell on the hundreds of different brands of computers available today. -
Page 129: 1-Year End-User Manufacturer Guarantee
In the absence of applicable legislation, this Guarantee will be the end user’s sole and exclusive remedy against Dell or any of its affiliates, and neither Dell nor any of its affiliates shall be liable for loss of profit or contracts, or any other indirect or consequential loss arising from negligence, breach of contract, or howsoever. -
Page 130: Angreskjema For Norske Forbrukere
Fristen anses overholdt dersom meldingen er avsendt innen fristens utløp, og du bør sørge for at dette kan dokumenteres. Skal være utfylt av selgeren: Selgerens navn Dell A/S Selgerens adresse Amager Strandvej 60-64, 2300 Kjøpenhavn, Danmark Telefonnr. 23 16 23 57 E-postadresse sales_internet_no@dell.com... - Page 131 Skjema A (bokmål) side 2 av 2. Angrefristens Utgangspunkt Opplysningene i henhold til angrerettloven kapittel 3 er mottatt på foreskreven måte når kravene i § 9 jf. § 7 er oppfylt og dette skjemaet er mottatt ferdig utfylt med de opplysningene selgeren skal fylle ut. Se utdrag fra §§ 9 og 7 nedenfor. §...
-
Page 132: Dell™ Printer Consumables Limited Warranties
1-800-387-5757. If we are not able to replace the product because it has been discontinued or is not available, we will either replace it with a comparable product or reimburse you for the cartridge purchase cost, at Dell’s sole option. This limited warranty does not apply to ink or toner cartridges that have been refilled or improperly stored or due to problems resulting from misuse, abuse, accident, neglect, mishandling, incorrect environments, or wear from ordinary use. -
Page 133: Dell Software License Agreement
001-877-533-6230; in Puerto Rico, call 1-877-839-5123. In cases in which either the production of the cartridge has been discontinued or the cartridge is not available, Dell reserves the right, at its sole discretion, to choose between replacing it by a similar product or reimbursing you for the purchase cost. -
Page 134: Limited Warranty
Software. Some jurisdictions do not allow limits on the duration of an implied warranty, so this limitation may not apply to you. The entire liability of Dell and its suppliers, and your exclusive remedy, shall be (a) return of the price paid for the Software or (b) replacement of any disk not meeting this warranty that is sent with a return authorization number to Dell, at your cost and risk. -
Page 135: Regulatory Notices
A Notice About Shielded Signal Cables: Use only shielded cables for connecting devices to any Dell device to reduce the possibility of interference with radio communications services. Using shielded cables ensures that you maintain the appropriate Electromagnetic Compatibility classification for the intended environment. -
Page 136: Fcc Notice (U.s. Only)
This device must accept any interference received, including interference that may cause undesired operation. NOTICE: The FCC regulations provide that changes or modifications not expressly approved by Dell Inc. could void your authority to operate this equipment. These limits are designed to provide reasonable protection against harmful interference in a residential installation. -
Page 137: Industry Canada (Canada Only)
If you experience trouble with this telephone equipment, see the section titled "Contacting Dell" to find the appropriate telephone number for obtaining customer assistance. If the equipment is causing harm to the telephone network, the telephone company may request that you disconnect the equipment until the problem is resolved. -
Page 138: Ce Notice (European Union)
The REN for the internal modem as stated on the IC regulatory label located on the bottom of the device is 0.6 B. The following information is provided in compliance with IC regulations: Dell Inc. One Dell Way Round Rock, TX 78682 USA 512-338-4400... - Page 139 This Dell device is classified for use in a typical Class B domestic environment. A "Declaration of Conformity" in accordance with the preceding directives and standards has been made and is on file at Dell Inc. Products Europe BV, Limerick, Ireland.
- Page 140 Appendix...
- Page 141 Appendix...
- Page 142 Appendix...
-
Page 143: Nom Information (Mexico Only)
Exporter: Dell Inc. One Dell Way Round Rock, TX 78682 Importer: Dell Computer de México, S.A. de C.V. Paseo de la Reforma 2620 - 11° Piso Col. Lomas Altas 11950 México, D.F. Ship to: Dell Computer de México, S.A. de C.V. -
Page 144: Energy Star ® Compliance
Recycling Information Dell recommends that customers dispose of their used computer hardware, monitors, printers, and other peripherals in an environ- mentally sound manner. Potential methods include reuse of parts or whole products and recycling of products, components, and/or materials. -
Page 145: Direktiv For Bortskaffelse Af Elektrisk Og Elektronisk Udstyr (Weee)
I den Europæiske Union indikerer denne etiket, at dette produkt ikke bør kasseres sammen med husholdningsaffald. Det bør bortskaffes ved en egnet facilitet for at muliggøre genbrug. For information om hvordan dette produkt genbruges ansvarligt i dit land, bedes du gå til: www.dell.com/recyclingworldwide. Richtlijn WEEE, afdanken van elektrische en elektronische apparaten In de Europese Unie geeft dit label aan dit product niet via huishoudelijk afval mag worden afgedankt. -
Page 146: Richtlinie Für Abfall Von Elektrischen Und Elektronischen Geräten (Weee)
Det skal leveres til et mottak for spesialavfall for gjenvinning og resirkulering. Du finner informasjon og retningslinjer for forskriftsmessig gjenvinning av dette produktet i de enkelte landene, ved ĺ gĺ til: www.dell.com/recyclingworldwide. Dyrektywa dotycząca odpadów urządzeń elektrycznych i elektronicznych (WEEE) W Unii Europejskiej etykieta ta oznacza, że tego produktu nie należy wyrzucać... -
Page 147: Diretiva Sobre Equipamentos Eléctricos E Electrónicos A Serem Descartados
Na União Europeia, esta etiqueta indica que esse produto não deve ser descartado junto com o lixo normal. Ele deve ser depositado em uma instalação apropriada para recolha e reciclagem. Para obter informações sobre como reclicar este produto de forma responsável em seu país, visite: www.dell.com/recyclingworldwide. Directiva sobre el deshecho de material eléctrico y electrónico (WEEE) En la Unión Europea, esta etiqueta indica que la eliminación de este producto no se puede hacer junto con el... - Page 148 Appendix...
-
Page 149: Index
85 advanced features, 71 loading, paper canceling, 66 in the bypass tray, 43 computer modem, 73 contrast, 65 in the tray, 40 contacting, Dell, 102 features, 70 copying, 52 receiving, 67 canceling, 54 resolution, 65 contrast, 53 sending... - Page 150 46 speed dial, setting, 25 paper jam, clearing, 85 supplies, ordering, 77 paper size, setting, 47 support contacting Dell, 101-102 paper type, setting, 47, 54 paper, loading in the bypass tray, 43 in the tray, 40 time and date...