Table of Contents
Advertisement
Dell™ Laser Printer 1110 User's Guide
Click the links to the left for information on the features, options, and operation of your printer. For
information on other documentation included with your printer, see
To order replacement toner cartridges or supplies from Dell:
1. Double-click the Dell Toner Reorder Program icon on your desktop.
OR
2. Visit Dell's website, or order Dell printer supplies by phone.
www.dell.com/supplies
Notes, Notices, and Cautions
NOTE:
A NOTE indicates important information that helps you make better use of your
printer.
NOTICE:
A NOTICE indicates either potential damage to hardware or loss of data and tells
you how to avoid the problem.
CAUTION:
A CAUTION indicates a potential for property damage, personal injury, or
death.
-----------------------------------------------------------------
Information in this document is subject to change without notice.
© 2005 Dell Inc.. All rights reserved.
Reproduction in any manner whatsoever without the written permission of Dell
"Finding
Information".
Advertisement
Table of Contents
Troubleshooting

Related Manuals for Dell 1110 - Laser Printer B/W


Summary of Contents for Dell 1110 - Laser Printer B/W
- Page 1 "Finding Information". To order replacement toner cartridges or supplies from Dell: 1. Double-click the Dell Toner Reorder Program icon on your desktop. 2. Visit Dell's website, or order Dell printer supplies by phone. www.dell.com/supplies Notes, Notices, and Cautions...
-
Page 2: Finding Information
Other trademarks and trade names may be used in this document to refer to either the entities claiming the marks or the names of their products. Dell Inc. disclaims any proprietary interest in trademarks and trade names other than its own. -
Page 3: Unpacking Your Printer
• Downloads- Drivers • Reference- Printer documentation and product specifications You can access Dell Support at support.dell.com. Select your region on the WELCOME TO DELL SUPPORT page, and fill in the requested details to access help tools and information. Unpacking Your Printer... - Page 4 Leave the printer in the box until you are ready to set it up. 2. In addition to the Dell Laser Printer 1110, ensure that you have the following items in the box. If there is a missing item, contact Dell:...
-
Page 5: About Your Printer
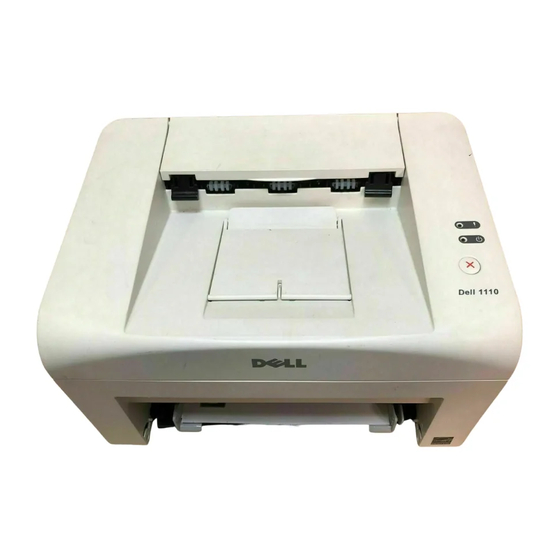
About Your Printer These are the main components of your printer. The following illustrations show the standard Dell Laser Printer 1110: Front View... -
Page 6: Rear View
Rear View Operator Panel Button Functions The operator panel on the top right side of your printer has two LEDs and one button. LEDs Description The operator panel LEDs signify different things, depending on their sequence. LEDs that are off, on, and/or blinking indicate printer conditions, such as printer status, intervention (for example, out of paper and jammed paper), or service. - Page 7 Button Item Description To print a demo In Ready mode, press and hold for 2 seconds until both LEDs blink slowly, and page release. Manual feeding Press each time you load a sheet of paper in the tray, when you select Manual Feed for Source from your software application.
- Page 8 Thoroughly rolling the cartridge will assure maximum copies per cartridge. NOTE: If toner comes into contact with your clothing, wipe the toner off with a dry cloth and wash your clothing in cold water. Hot water sets toner into fabric. CAUTION: To prevent damage to the toner cartridge, do not expose the toner cartridge to light for more than a few minutes.
-
Page 9: Loading Paper
5. Unfold the toner cartridge handle and grasp it. Insert the cartridge into the printer until it snaps into place. 6. Close the front cover. Make sure that the cover is securely closed. If the cover is not firmly closed, printing errors may occur. NOTE: When printing text at 5% coverage, you can expect a toner cartridge life of approximately 1,000 pages for the starter toner cartridge that is shipped with the printer... - Page 10 loading paper into the paper tray. See "Paper Tab". To load paper: 1. Open the paper input tray. Pull on the length and width guides to extend the tray. 2. Flex the sheets back and forth to loosen them, and then fan them out. Do not fold or crease the print media.
-
Page 11: Connecting A Printer Cable
Connecting a Printer Cable To print from your computer, you need to connect your printer to your computer with a Universal Serial Bus (USB) cable. USB cables are sold separately. Contact Dell to purchase a USB cable. NOTE: Connecting the printer to the USB port of the computer requires a certified USB cable. -
Page 12: Powering On The Printer
3. Insert the other end of the cable into an available USB port on the computer. Do not use the USB keyboard port. Powering On the Printer CAUTION: The fusing area at the rear part of the inside of your printer becomes hot once the printer is powered on. -
Page 13: Printing A Demo Page
Printing a Demo Page Print a demo page to make sure that the printer is operating correctly. 1. Wait approximately 30 seconds for the printer to warm up, then press and hold on the operator panel for 2 seconds to print a demo page. 2. -
Page 14: Software Overview
Software". Dell Toner Management System™ – displays the status of the printer and the name of the job when you send a job to print. The Dell Toner Management System™ window also displays the level of toner remaining and allows you to order replacement toner cartridges. -
Page 15: Installing Dell Software
2. Insert the Drivers and Utilities CD. 3. If necessary, select a language by pressing the Language button on the main screen. 4. Select Typical Installation to install the User's Guide, the printer driver, and Dell Toner Management System™ as the default settings. -
Page 16: Uninstalling Software
The selected driver and all of its components are removed from your computer. 3. Click Finish. Using the Dell™ Toner Management System Printing Status Window The Printing Status window displays the status of the printer (Printer Ready, Printer Offline, and Error- Check Printer), the name of the job currently being printed, and the toner level for your printer. -
Page 17: Paper Handling
Dell Toner Reorder Program The Dell Toner Reorder Program window can be launched from the Printing Status window, the Programs window, or the desktop icon. You can order toner by phone or from the Web. For details, see "Ordering Supplies". -
Page 18: Guidelines For Paper And Special Materials
16~24 lbs (60~90 g/m ) bond for the paper tray 16~43 lbs (60~163 g/m ) bond for manual feed mode Brightness: Some papers are whiter than others and produces sharper, more vibrant images. Surface smoothness: The smoothness of the paper affects how crisp the printing looks on the paper. - Page 19 Keep paper away from moisture, or other conditions that can cause it to wrinkle or curl. Store unused materials at temperatures between 15°C and 30oC (59°F to 86°F). The relative humidity should be between 10% and 70%. During storage, you should use moisture-proof wrap, such as a plastic container or bag, to prevent dust and moisture from contaminating your paper.
-
Page 20: Verifying The Output Location
Make sure that there is no exposed adhesive material between labels. Exposed areas can cause labels to peel off during printing, which can cause paper jams. Exposed adhesive can also cause damage to printer components. Do not load a sheet of labels through the printer more than once. The adhesive backing is designed for one pass through the printer. -
Page 21: Loading Print Media In The Paper Tray
NOTE: If you print many pages, the surface of the output tray may become hot. Be careful not to touch the surface, and especially keep children away from the surface. NOTE: The output tray can hold up to 100 sheets of paper. Remove the pages so that the tray does not become overloaded. -
Page 22: Using Manual Feed Mode
Using Manual Feed Mode If you select Manual Feed in the Source option in your software application, you can manually load a sheet of print material in the tray. Manually loading print material can be helpful when you want to check the print quality after each page is printed. -
Page 23: Printing On Special Materials
4. If you are printing multiple pages, load the next sheet after the first page prints out, and press Repeat this step for every page to be printed. Printing on Special Materials 1. Open the paper input tray. 2. Load the print material in the paper input tray. Do not mix types. 3. - Page 24 Load a sheet of labels in the tray with the side to be printed on facing up. NOTE: To prevent labels from sticking to each other, do not let the printed label sheets stack up as they are printed out. ...
- Page 25 Load a sheet of card stock with the side to be printed on facing up, short edge first, from the center of the tray. NOTE: Do not print on media smaller than 3.0 in. (76 mm) wide or 5.0 in. (127 mm) long. ...
-
Page 26: Printing A Document
Printing Posters Using Overlays Printing on Both Sides of Paper (Manual Setting Up a Locally Shared Printer Duplex) Printing a Document The driver provided with your printer allows a wide variety of options. The features provided by the printer driver are as follows: Printer Driver Feature Windows 98/Me/2000/XP... -
Page 27: Canceling A Print Job
3. To take advantage of the printer features provided by your printer, click Preferences or Properties depending on the program or operating system in the print window and go to step If you see Setup, Printer, or Options, click that button instead. Then click Properties on the next screen. -
Page 28: Printer Settings
1. From the Windows Start button, click Settings. 2. Select to Printers (Windows 98/Me/2000) or Printers and Faxes (Windows XP) to open the Printers window and double-click the Dell Laser Printer 1110 icon. 3. From the Document menu, click Cancel (Windows 2000/XP) or Cancel Printing (Windows 98/Me). -
Page 29: Layout Tab
Click the Windows Start button. b. For Windows 98/Me/2000, click Settings and point to Printers. For Windows XP, click Printers and Faxes. Point to the Dell Laser Printer 1110 icon. d. Right-click on the printer icon and: For Windows 98/Me, click Properties. -
Page 30: Paper Tab
• Landscape prints across the length of the page, spreadsheet style. If you want to rotate the page 180-degrees, select 180 from the Rotate drop-down list. Layout Options allows you to select advanced printing options. For details, see Layout "Printing Multiple Pages on One Sheet of Paper"and "Printing Posters". -
Page 31: Graphics Tab
Make sure that Source is set to the appropriate paper input mode. Source The Manual Feed source is used when printing on special materials. You need to load one sheet at a time into the paper tray. See "Using Manual Feed Mode". - Page 32 Property Description You can select the printing resolution by choosing from 600 dpi [Normal] or 300 Resolution dpi [Draft]. The higher the setting, the sharper the clarity of printed characters and graphics. Higher settings may increase the time it takes to print a document. Selecting this option extends the life of your toner cartridge and reduces your cost Toner per page without a significant reduction in print quality.
-
Page 33: Extras Tab
document. This option is available only when you use Windows 98. • Download as Bit Image: When this option is selected, the driver downloads the font data as bitmap images. Documents with complicated fonts, such as Korean or Chinese, or various other fonts, will print faster in this setting. •... -
Page 34: About Tab
2. For Windows 98/Me/2000, select Settings and then Printer. For Windows XP, select Printers and Faxes. 3. Select the Dell Laser Printer 1110 icon. 4. Right-click on the printer icon and select Properties. 5. Click the Printer tab and set the options. -
Page 35: Using A Favorite Setting
Property Description If your printer is going to be used at an altitude above 2,500 m (8,200 ft), checking High this option will optimize the print quality for those circumstances. Altitude Correction When this option is checked, the printer switches to power save mode after the Power Save specified time has elapsed since its last activity. -
Page 36: Using Help
3. Click Save. To use a saved setting, select it from the Favorites drop-down list. To delete a favorite setting item, select it from the list and click Delete. You can also restore the printer driver's default settings by selecting Printer Default from the list. Using Help Your printer has a help screen that can be activated by the Help button in the printer's properties window. -
Page 37: Printing Posters
3. Select the number of pages you want to print per sheet (1, 2, 4, 6, 9, or 16) from the Pages per Side drop-down list. 4. If necessary, select the page order from the Page Order drop-down list. Check Print Page Border to print a border around each page on the sheet. Print Page Border or Page Order is enabled only if the Pages per Side setting is set to a number greater than one. - Page 38 You can print a single-page document onto 4, 9, or 16 sheets of paper, for the purpose of pasting the sheets together to form one poster-sized document. 1. To change the print settings from your software application, access printer properties. See step 3 in "Printing a Document".
-
Page 39: Printing On Both Sides Of Paper (Manual Duplex)
Printing on Both Sides of Paper (Manual Duplex) You can print on both sides of a sheet of paper manually. Before printing, decide how you want your document oriented. The options are: Long Edge, which is the conventional layout used in book binding. ... -
Page 40: Fitting Your Document To A Selected Paper Size
4. Click the Paper tab and select the paper source, size, and type. 5. Click OK and print the document. The printer prints every other page of the document first. Once the first side of your job has printed, the following window appears and blinks red. -
Page 41: Printing A Reduced Or Enlarged Document
properties. See step 3 in "Printing a Document". 2. From the Paper tab, select Fit to Page from the Type drop-down list. 3. Select the size that you want from the Target Page drop-down list. 4. Select the paper source, size, and type in Paper Options. 5. -
Page 42: Using An Existing Watermark
4. Select the paper source, size, and type in Paper Options. 5. Click OK and print the document. Using Watermarks The Watermark option allows you to print text over an existing document. For example, you may want to have large gray letters reading "DRAFT" or "CONFIDENTIAL" printed diagonally across the first page or all pages of a document. -
Page 43: Creating A Watermark
3. Click OK and start printing. NOTE: The preview image shows how the page will look when it is printed. Creating a Watermark 1. To change the print settings from your software application, access printer properties. See step 3 in "Printing a Document". -
Page 44: Deleting A Watermark
4. Select the watermark options. You can select the font name, style, size, and gray scale level from the Font Attributes section and set the angle of the watermark from the Message Angle section. 5. Click Add to add a new watermark to the list. 6. -
Page 45: Creating A New Page Overlay
An overlay is text and/or images stored in the computer hard disk drive (HDD) as a special file format that can be printed on any document. Overlays are often used to take the place of preprinted forms and letterhead paper. Rather than using preprinted letterhead, you can create an overlay containing the exact same information that is currently on your letterhead. -
Page 46: Using A Page Overlay
6. Click Save. You can see the name in the Overlay List. 7. Click OK or Yes until you have finished. The file is not printed; it is stored in your computer. Using a Page Overlay After an overlay has been created, it is ready to be printed with your document. To print an overlay with a document: 1. -
Page 47: Deleting A Page Overlay
After you select the file, click Open. The file is now shown in the Overlay List box and is available for printing. Select the overlay from the Overlay List box. 6. If necessary, select Confirm Page Overlay When Printing checkbox. When this box is checked, a message window appears each time you submit a document for printing, asking you to confirm that you want to print an overlay on your document. -
Page 48: Setting Up A Locally Shared Printer
Setting Up a Locally Shared Printer You can connect the printer directly to a selected computer, called the "host computer," on a network using a USB cable. Your printer can be shared by other users on the network through a Windows 98, Me, 2000, or XP network printer connection. -
Page 49: Maintenance
Setting Up the Host Computer 1. Start Windows. 2. For Windows 2000, click the Start button Settings Printers. For Windows XP, click the Start button and select Printers and Faxes. 3. Double-click your printer icon. 4. Click the Printer menu and select Sharing. 5. -
Page 50: Cleaning Your Printer
Maintaining the Toner Cartridge Ordering Supplies Cleaning Your Printer To maintain print quality, follow the cleaning procedures below, each time the toner cartridge is replaced or if print quality problems occur. NOTE: Do not touch the transfer roller located under the toner cartridge when cleaning inside the printer. - Page 51 3. Gently pull the toner cartridge out, being careful not to scratch against the printer, and lift it up and away from the printer. Set it on a clean flat surface. CAUTION: To prevent damage to the toner cartridge, do not expose the toner cartridge to light for more than a few minutes.
-
Page 52: Maintaining The Toner Cartridge
CAUTION: Do not touch the transfer roller inside the printer. Oil from your fingers may cause print quality problems. 5. Reinsert the toner cartridge and close the front cover. 6. Plug in the power cord and power the printer on. Maintaining the Toner Cartridge Storing the Toner Cartridge Store the toner cartridge in the original packaging until you are ready to install it. -
Page 53: Redistributing Toner
You can check the level of toner remaining in the toner cartridge in the Printing Status window each time you send a print job to the printer. If you are having print quality problems, this can help you determine if the problem is caused by low toner. In the Printing Status window, you will see how much toner is remaining. -
Page 54: Replacing The Toner Cartridge
"Ordering Supplies" for information on ordering toner cartridges. CAUTION: For best results, use Dell toner cartridges. Print quality and printer reliability are not guaranteed if you do not use Dell supplies. To replace the toner cartridge: 1. Open the front cover. - Page 55 CAUTION: Avoid reaching too far into the printer. The fusing area may be hot. 3. Unpack a new toner cartridge. Hold the cartridge carefully and thoroughly shake it from side- to-side 5 or 6 times to distribute the toner. NOTE: If toner comes into contact with your clothing, wipe the toner off with a dry cloth and wash your clothing in cold water.
-
Page 56: Ordering Supplies
Ordering Supplies You can order supplies using the Dell™ Toner Management System or by contacting Dell at www.dell.com/supplies. In addition to the toner level indicator that is displayed in the Printing Status window each time you send a job to print, the printer's operator panel LED sequences tell you about the status of your supplies. -
Page 57: Troubleshooting
In the Printing Status window, click the Order Supplies button. 2. The Order Toner Cartridges window appears. Click Visit Dell's cartridge ordering web site to order supplies online. If ordering by phone, call the number that appears under the By Telephone heading. -
Page 58: Clearing Jams In The Paper Tray
Solving Print Quality Problems Clearing Jams in the Paper Tray Occasionally, paper jams during a print job. Some causes could be: The tray is overfilled. The front cover or top cover has been opened during a print job. ... -
Page 59: Paper Exit Jam
Paper Exit Jam NOTE: Paper jams in this area may result in loose toner on the page. If you get any toner on your clothes, wash them in cold water as hot water will set the toner into the fabric. 1. -
Page 60: Fuser Area Jam
3. Loosen the paper if it is caught in the heat roller. Then remove the paper by gently pulling it out. CAUTION:When removing jammed paper, be careful not to touch the heat roller (located underneath the inner cover). It is hot and could cause burns! 4. - Page 61 NOTICE: The fuser area is hot. Take care when removing paper from the printer. 1. Open the front cover. 2. Gently pull the toner cartridge out, being careful not to scratch against the printer, and lift it up and away from the printer. 3.
-
Page 62: Tips For Avoiding Paper Jams
4. Check that there is no other paper in the printer. 5. Reinstall the toner cartridge and close the front cover. Your printer resumes printing the document from failed pages. Tips for Avoiding Paper Jams By selecting the correct paper types, most paper jams can be avoided. When a paper jam occurs, follow the steps outlined in "Clearing Jams in the Paper Tray". - Page 63 LED Pattern Meaning and Suggested Solution Your printer has some problems. If this problem occurs, contact your service representative. • A paper jam has occurred. To solve the problem, see "Clearing Jams in the Paper Tray". • The front cover is open. Close the front cover. •...
-
Page 64: Troubleshooting Checklist
simplifying the page layout and removing unnecessary graphics from your document. In Manual Feed mode, there is no paper in the paper tray. Load paper into the tray and press to start printing. The toner cartridge is nearly empty. Redistribute the toner to temporarily extend the life of the toner cartridge. -
Page 65: Solving General Printing Problems
The printer may be configured Check the printer properties to ensure that incorrectly. all print settings are correct. The printer driver may be Reinstall the printer driver; see "Installing incorrectly installed. Dell Software". Try printing a demo page. - Page 66 14(A4) or 15(Letter) pages per minute. If you are using Windows 98/Me, From the Start menu, choose Settings and the Spooling Setting may be set Printers. Right-click Dell Laser Printer incorrectly. 1110, choose Properties, click the Details tab, and then choose the Spool Settings button.
-
Page 67: Solving Print Quality Problems
The file may have blank pages. Check the file to ensure that it does not contain blank pages. Some parts, such as the controller Contact a service representative. or the board, may be defective. When you are using The setting in the software Print the document by selecting Download Window 98, the application is wrong. - Page 68 • The paper may not meet paper specifications; for example, the paper is too moist or too rough. See "Paper Specifications". • If the entire page is light, the print resolution setting is too low or the Toner Save mode is on. Adjust the print resolution and turn the Toner Save mode off.
- Page 69 Toner smear • Clean the inside of the printer. See "Cleaning the Interior". • Check the paper type and quality. See "Paper Specifications". • Remove the toner cartridge and install a new one. See "Replacing the Toner Cartridge". Vertical repetitive If marks repeatedly appear on the printed side of the page at even defects intervals:...
- Page 70 Curl or wave • Ensure that the paper is loaded properly. • Check the paper type and quality. Both high temperatures and humidity can cause paper curl. See "Paper Specifications". • Turn over the stack of paper in the paper tray. Also try rotating the paper 180°...
-
Page 71: Printer Specifications
Horizontal stripes If horizontally aligned black streaks or smears appear: • The toner cartridge may be installed improperly. Remove the toner cartridge and reinsert. • The toner cartridge may be defective. Install a new toner cartridge. See "Replacing the Toner Cartridge". -
Page 72: Paper Specifications
Before purchasing large quantities of paper, insure the paper meets the requirements specified in this User's Guide. CAUTION: Using paper that does not meet these specifications may cause problems, requiring repairs. These repairs are not covered by the Dell warranty or service... -
Page 73: Supported Sizes Of Paper
agreements. Supported Sizes of Paper Paper Dimensions Weight Capacity Plain Paper Letter 8.5 x 11 in. (216 x 279 mm) 8.27 x 11.7 in. (210 x 297 mm) 5.83 x 8.27 in. (148 x 210 mm) Executive 7.25 x 10.5 in. (184.2 x 266.7 mm) •... -
Page 74: Guidelines For Using Paper
Letter 8.5 x 11 in. (216 x 279 mm) 8.3 x 11.7 in. (210 x 297 mm) Transparencies Letter 8.5 x 11 in. 138 to 146 g/m² bond (216 x 279 mm) 8.3 x 11.7 in. (210 x 297 mm) Card Stocks 90 to 163 g/m²... -
Page 75: Paper Output Capacity
Increased gray background Too heavy Use lighter paper; use the rear shading/printer wear output slot. Excessive curl problems with Too moist, wrong grain direction, • Use the rear output slot. feeding or short-grain construction • Use long-grain paper. Jamming, damage to printer Cutouts or perforations Do not use paper with cutouts or perforations. -
Page 76: Printer And Paper Storage Environment
Printer and Paper Storage Environment Paper storage conditions directly affect the feed operation. Ideally, the printer and paper storage environment should be at or near room temperature, and not too dry or humid. Remember that paper is hygroscopic: it absorbs and loses moisture rapidly. Heat works with humidity to damage paper.