Table of Contents
Advertisement
Quick Links
m
DIGITAL AUDIO TAPE RECORDER
DX-7
INSTRUCTION MANUAL
KENWOOD CORPORATION
For your records
Record the serial number, found bottom of the unit in the spaces desig-
nated on the warranty card, and in the space provided below. Refer to
the model and serial
~umbers
whenever you call your dealer for infor-
mation or service on this product.
Model DX-7
Serial number _ _ _ _ _ _ _ _ _ _ _ _ _ _
©PRINTED IN JAPAN
860·0410·08 CK,M,U,UE,E,THTI
911121110987654321
Advertisement
Table of Contents

Related Manuals for Kenwood DX-7


Summary of Contents for Kenwood DX-7
- Page 1 DIGITAL AUDIO TAPE RECORDER DX-7 INSTRUCTION MANUAL KENWOOD CORPORATION For your records Record the serial number, found bottom of the unit in the spaces desig- nated on the warranty card, and in the space provided below. Refer to ~umbers the model and serial whenever you call your dealer for infor- mation or service on this product.
- Page 2 Unpacking Unpack the unit carefully and make sure that all accessories and cables are put aside so they will not be lost. Examine the unit for any possibility of shipping damage. If your unit is damaged or fails to operate, notify your dealer immediately.
-
Page 3: Precautions For Use
Precautions for use To maintain the high performance and reliability of this unit, avoid using or storing it in the following conditions. • Dusty places. • Places exposed to direct sun- light, especially in a closed car . • Near heat •... - Page 4 Use of OAT cassette tapes • Tapes cannot be turned over and played on the other side. • Tapes are manufactured with a sealed construction. Do not try to forcefully open the tape cover or pull the tape from the case, and never attempt to disassemble the tape case. •...
- Page 5 • OAT tape recording system Tape running direction PCM audio signals Subcode area DX-7...
-
Page 6: Controls, Connectors And Indicators
Controls, connectors and indicators ® ® ®@® @® ' V El"S PLAY/RE EAT ST lEJECT (r>/<+ Im~) - - , , , 0' , :tR, -10 Rm I ,-:1!- , I' 'I ,-,.,-, Ilifm Ide] -50-24 -12 OVER Ilm:J PAUSE UoAE lEW Uo,~jLJ ®@... - Page 7 [ II ] Pause indicator Cassette holder POWER switch [REC] Recording indicator ® KEY HOLD/TIMER switch [ST -10] indicator Tune number display VOLUME control knob ® DC IN jack PHONES/REMOTE jack ® Threaded hole for accessory DIGITAL I/O jack attachment REC (Record) button PAUSE button System connection jack...
-
Page 8: Power Source
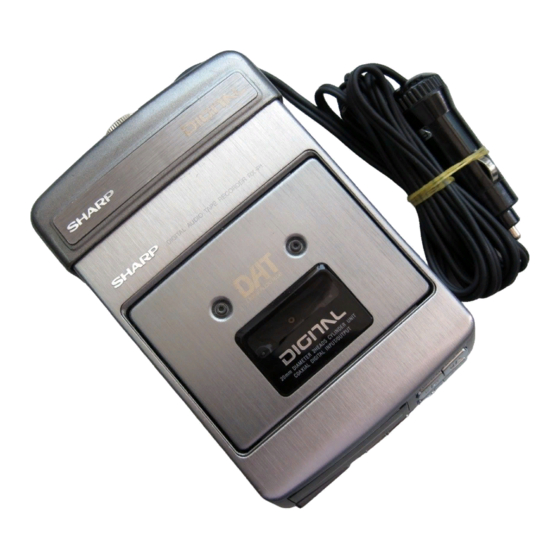
Power source • How to use the unit with the supplied AC adaptor • Insert the plug of the AC adaptor into the [DC IN] jack on the main unit's rear panel, then con- nect the power plug to a household AC power outlet. •... - Page 9 • Using rechargeable batteries Use the separately sold AID converter (BP-A7). • Align the AID converter with the main unit's accessory attachment guide hole and attach. Secure the AID converter in place using the accessory attachment screw. • Always turn the [POWER] switch OFF before inserting/removing batteries or making connections. •...
- Page 10 Connections • Headphone connection • Connect separately sold headphones (use headphones equipped with a 3.5 mm diameter stereo miniplug) to the main unit's [ IREMOTE] jack or the remote controller's [PHONES] jack. • Always turn the volume down before plugging or unplugging the headphones. •...
- Page 11 • Connection to a component equipped with digital 1/0 jacks (coaxial) • Turn off the power to both the amplifier and this unit before making connections. • Using the supplied digital connection cord, connect the 4-pin miniplug to this unit's [DIGITAL 1/0] terminal.
- Page 12 • Connection to an amplifier's analog input jacks • Turn off the power to both the amplifier and this unit before making connections. • Using the supplied analog connection cord, connect the 3-pin miniplug to this unit's [ REMOTE] terminal. Connect the other end of the cord to the amplifier's external input jacks (AUX jacks, TAPE PLAY jacks, etc.).
- Page 13 • Connection for analog recording Use the separately sold AID converter (BP-A7). • Turn off the power to both the amplifier and this unit before making connections. • Connect the AID converter unit (supplied in the BP-A71 to this unit. •...
-
Page 14: Key Hold Function
Key Hold function Setting this function prevents incorrect oper- ation of the unit even if an operation button is accidentally pressed. • When you set the main unit's [KEY HOLD/TIMER] switch to "HOLD", the unit ignores any button operation. • When you set the remote controller's [HOLD] switch to the "... - Page 15 To playback a OAT cassette (Basic operation) First load a tape into the unit (see page 141. Operation is possible with ei!her the main unit or the remote controller. • To playa tape • Press the [PLAY/REPEAT] button. • Tapes recorded in extended play mode cannot be played.
- Page 16 • To fast-forward or rewind the tape • In stop mode, press the [FF/CUE] button to fast-forward the tape and press the [REW/REVIEWl button to rewind the tape. • Auto Rewind function: When the last tune on the tape finishes playing, the tape automatically rewinds to the beginning and then stops.
- Page 17 • Cue/Review function This function allows you to fast-forward (cue) or rewind (review) while listening to the tape sound. • To cue, press the [PAUSE] button and then press the [FF/CUE] button. • To review, press the [PAUSE] button and then press the [REW/REVIEW] button.
-
Page 18: Digital Recording
Digital recording First load a tape into the unit (see page 14). Operation is possible with either the main unit or the remote controller. Connect the unit (See page 11.) • Press the [REC] button. When starting recording from the begin- ning of the tape, the unit automatically cre- ates a 5-second blank section and then enters record-standby mode. -
Page 19: Analog Recording
Analog recording Use the separately sold AID converter (BP-A7), First load a tape into the unit (see page 14), Operation is possible with either the main unit or the remote controller, Connect the unit, (See page 13) Set the [MIG/LINE IN] switch to "LINE" when recording from a LINE input or to "MIG"... - Page 20 Stopping/pausing recording • Operation is possible with either the main unit or the remote controller. • To pause recording • Press the [PAUSE] button. If five minutes elapse in pause mode, the rotating head moves away from the tape to protect the tape. (The REC indicator blinks.1 •...
- Page 21 Timer recording/Timer playback • Before connecting the timer, insert a tape into the unit. • When carrying out timer recording, make sure the accidental erasure protection "slide door" of cassette tape (page 41 is closed to the right side . •...
- Page 22 seMS SCMS (Serial Copy Management System) SCMS is a new standard which allows you to make only first generation copies of digital sources (CD, etc.) which contain a copy prohibition code. Copy prohibition code Sources which contain a copy prohibition code include the following: COs and some commercially available OAT music tapes.
- Page 23 Subcodes With OAT tapes. in addition to the recorded music signal. various subcodes are recorded on the tape to aid in music selection and editing. With commercially available OAT music tapes. subcodes are prerecorded on the tapes. With blank tapes that you record yourself. subcodes are automatically recorded during recording and can also be recorded manually during editing.
- Page 24 Subcode editing • To manually write a ST-ID during recording • In situations such as when recording an audio source that has no space between tunes, you can manually write ST -IDs in the appropriate locations while recording is being carried out.
- Page 25 • To erase an unnecessary ST-ID from a recorded tape • If the tune number changes at a place other than between two tunes. an unnecessary ST -10 is written on the tape. Erase the ST-ID using the following procedure. •...
- Page 26 • To write an END-ID on a recorded tape • If a tape was stopped at the end of a recording without writing an END-ID, you can use the following procedure to write the necessary END-ID. Play the tape and press Set the unit to Press the IFF/CUE] button '~iliC:::...
- Page 27 Cleaning • Cleaning the cabinet Clean the cabinet by wiping with a dry cloth. If an area is particularly dirty and cannot be cleaned well with a dry cloth, wipe the area with a cloth dampened with water, then wipe dry with a dry cloth.
-
Page 28: Specifications
Specifications Tape recording system ....DAT rotating head system mm/sec Tape speed......8.15 Sampling frequency ...... 48 kHz/44.1 kHz/32 kHz No. of quantization bits ....16 bits, linear Frequency response ..... 5-22,000 Hz (EIAJI (for digital recording I Signal-to-noise ratio .....