Table of Contents
Advertisement
Advertisement
Table of Contents

Related Manuals for Honeywell T8001F


Summary of Contents for Honeywell T8001F
-
Page 1: Programmable Thermostat
T8001F, T8024F Flush Mount Programmable Thermostat OWNER’S GUIDE 69-1464-1... -
Page 2: Features
Welcome to the world of comfort and energy Features savings with your new Honeywell programmable thermostat. • Program up to four time periods with temperature settings to complement Your new programmable thermostat is designed your lifestyle. to provide you with reliable, precise temperature •... -
Page 3: Table Of Contents
Contents Features ............................2 Key Locations and Descriptions ...................... 4 Planning Program Schedule ......................5 Program Schedule ........................6 Programming Thermostat ....................... 7 Setting Current Time and Day ....................8 Setting Weekday Program ......................9 Setting Weekend Program ......................10 Setting Temporary Temperature Hold .................. -
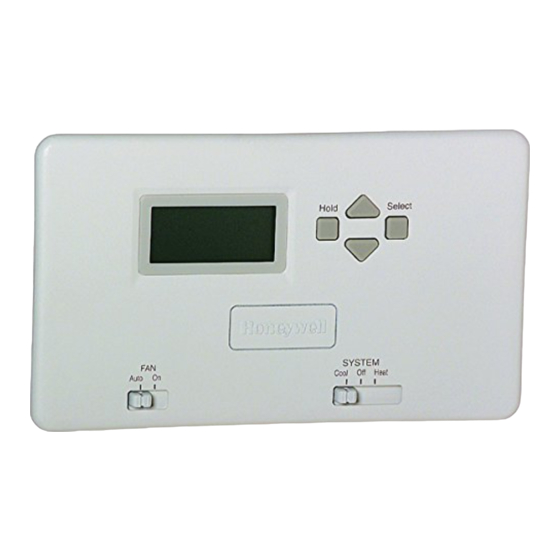
Page 4: Key Locations And Descriptions
Key Locations and Descriptions HOLD KEY • SET TEMPORARY TEMPERATURE HOLD. INCREASE • PROGRAM TIME AND TEMPERATURE. • SET TEMPORARY TEMPERATURE HOLD. SELECT KEY • CURRENT SETPOINT. • CHANGE DAY AND TIME. SWITCH • PROGRAM SELECTIONS. SYSTEM SWITCH DECREASE • PROGRAM TIME AND TEMPERATURE. •... -
Page 5: Planning Program Schedule
Table 1. Preprogrammed Time Planning Program Schedule and Temperature Settings. The thermostat display shows day, time, Heat Cool program period, and temperature. Period Time Setpoint Setpoint Wake 6:00 AM 70°F 78°F The thermostat can be set for four time (21°C) (26°C) periods per day for weekdays and weekend. -
Page 6: Program Schedule
Program Schedule Weekday Start Time Heating Temperature Cooling Temperature Wake ________ ________ ________ Leave ________ ________ ________ Return ________ ________ ________ Sleep ________ ________ ________ Weekend Start Time Heating Temperature Cooling Temperature Wake ________ ________ ________ Leave ________ ________ ________ Return ________ ________... -
Page 7: Programming Thermostat
time, to give the equipment a head start to Programming Thermostat heat or cool the house before you get up. (This will be a higher temperature during The thermostat is flexible and can be program- heating season, and a lower temperature med for different schedules for weekdays and the during cooling season.) weekend to meet your lifestyle needs. -
Page 8: Setting Current Time And Day
Sleep is the time period you can set for an While setting the current time, the word SET is energy-saving temperature while you are displayed. sleeping. (For more comfortable sleep- ing, some people choose not to raise the 2. To set day of week, press Select again. cool temperature during the night.) Press to set current... -
Page 9: Setting Weekday Program
4. Leave Setting Weekday Program Press Select. Press to set Slide the SYSTEM switch to the position, Heat Leave or Cool, you want to program. A flame (heat- time. ing) or a snowflake (cooling) appears in the right side of the display, when setting the program temperature. -
Page 10: Setting Weekend Program
Press Select. Press to set Setting Weekend Program Return 7. Wake temp- Press Select. Press to set erature. Wake time. M12629B 6. Sleep Press Select. Press to set Sleep M18569 time. Press Select. Press to set Wake temp- erature. M18568 Press Select. - Page 11 8. Leave Press Select. Press to set Press Select. Press to set Return Leave temp- time. erature. M12637B 10. Sleep M18550 Press Select. Press to set Press Select. Press to set Sleep Leave time. temp- erature. M18554 M12635B 9. Return Press Select.
-
Page 12: Setting Temporary Temperature Hold
11. Press Select. End is displayed. Program- Setting Indefinite Temperature Hold ming is complete. The thermostat reverts The Hold key allows you to indefinitely hold a to displaying temperature. When Hold is active, the letters the current Hld are displayed continuously. Hold can be day time and canceled by pressing the Hold key again. -
Page 13: Operating Thermostat
Operating Thermostat FAN settings: Auto: Fan operates with equipment. Setting SYSTEM and FAN Switches On: Fan operates continuously. Use the SYSTEM and FAN switches to control Slide the FAN switch in the lower left corner of thermostat operation. the thermostat to select the desired fan setting. SYSTEM settings: Cool: The thermostat controls the cooling. -
Page 14: Minimum Off-Timing
The minimum The minimum off-timer operates in cooling on off-timer is triggered when the compressor turns the T8001F and T8024F. A flashing snowflake off and when the SYSTEM switch position is indicates the minimum off-time is in effect. -
Page 15: Troubleshooting
Troubleshooting Symptom Action Display does not come on. • Check if the thermostat is mounted and latched on the wallplate—mount and latch the thermostat on the wallplate. • Check if the circuit breaker is tripped—reset the circuit breaker. • Check if the fuse is blown—replace the fuse. •... - Page 16 Troubleshooting (Continued) . Symptom Action Heating does not come on. • Check if the circuit breaker is tripped—reset the circuit breaker. • Check if the fuse is blown—replace the fuse. • Check if the switch at the equipment is in the Off position—set to On position.
- Page 17 Troubleshooting (Continued) . Symptom Action System on indicator Wait a couple minutes after seeing the flame or snowflake and then check the registers. is lit, but no warm or cool air is coming from the registers. System on indicator Minimum off-timer is in effect. Wait five minutes until the minimum off-timer is complete.
-
Page 18: Warranty
(1) year from the date of purchase by the consumer. If, at any time during the warranty period, the product is defective or malfunctions, Honeywell shall repair or replace it (at Honeywell’s option) within a reasonable period of time. - Page 19 Honeywell’s sole responsibility shall be to repair or replace the product within the terms stated above. HONEY- WELL SHALL NOT BE LIABLE FOR ANY LOSS OR DAMAGE OF ANY KIND, INCLUDING ANY INCIDENTAL OR CONSEQUENTIAL DAMAGES RESULTING, DIRECTLY OR INDIRECTLY, FROM ANY BREACH OF ANY WARRANTY, EXPRESS OR IMPLIED, OR ANY OTHER FAILURE OF THIS PRODUCT.
- Page 20 1985 Douglas Drive North Golden Valley, MN 55422 Scarborough, Ontario Printed in U.S.A. on recycled M1V 4Z9 paper containing at least 10% post-consumer paper fibers. 69-1464-1 9-01 G.H. Copyright © 2000 Honeywell All Rights Reserved ® U.S. Registered Trademark www.honeywell.com/yourhome/ 69-1464-1...