Epson ELPDC06 Document Camera For serial numbers beginning with N2JF - DC-06 Document Camera User Manual
User's guide
Hide thumbs
Also See for ELPDC06 Document Camera For serial numbers beginning with N2JF - DC-06 Document Camera:
- User manual (79 pages) ,
- Specifications (6 pages) ,
- Quick start manual (4 pages)
Table of Contents
Advertisement
Quick Links
Advertisement
Table of Contents

Related Manuals for Epson ELPDC06 Document Camera For serial numbers beginning with N2JF - DC-06 Document Camera


Summary of Contents for Epson ELPDC06 Document Camera For serial numbers beginning with N2JF - DC-06 Document Camera
- Page 1 Document Camera User's Guide...
-
Page 2: Safety Instructions
Warning v If any of the following situations occur, immediately disconnect the USB cable and contact your local dealer or Epson service center: Smoke, unusual odor, or unusual sound is emitted from the unit. Water or a foreign object has entered the unit. -
Page 3: Usage Precautions
Caution v Do not place any heavy objects on the unit. It may tip over or break. v When using the unit, be sure to extend the foot. The unit may fall, causing personal injury if it strikes someone. v Be careful not to pinch your fingers in the movable parts of the unit. v Do not place the unit on an unstable location, such as a shaky table or slanted surface. -
Page 4: Product Features
Easy setup You can connect the document camera directly to selected models of Epson projectors by simply using a single USB cable. This will let you project enlarged images of printed documents and other materials. (Check your projector User's Guide to verify compatibility.) -
Page 5: Part Names And Functions
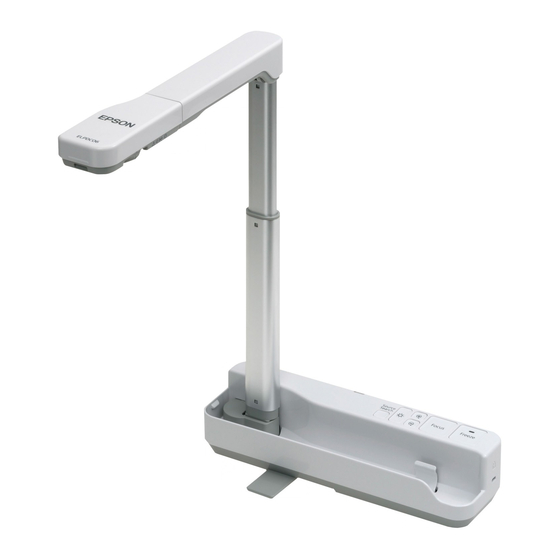
Part Names and Functions Top/Side/Rear Name Function Camera head Rotate the camera head ±90° to display images of a document or from a wall. Foot Extend the foot on the bottom of the case when using the document camera. Camera arm Extend or retract the camera arm to adjust the height of the camera head. -
Page 6: Camera Head
Power indicator This indicator comes on when power is supplied from a projector or computer. USB terminal (type B) This terminal is used to connect the unit to a projector or computer using the supplied USB cable. Camera Head Name Function Image rotation dial Turn this dial to rotate the displayed image ±90°. - Page 7 Connecting to a Projector to Display Images Connect the document camera to a projector using the USB cable that is supplied with the unit. For information on the projectors that can be connected, see the User's Guide supplied with the projector. Procedure Extend the foot, and then hold the base and raise the camera head.
-
Page 8: Displaying Images
To display using the document camera, connect the supplied USB cable (3.0 m) to the USB terminal (type A) identified by the Document Camera icon on the projector. Connecting to a Projector through a Computer For information on connecting to a computer, see “Connecting to a Computer to Display Images”... - Page 9 Displaying Live Action or an Image from a Whiteboard Procedure Turn the camera head to display live action or an image from a whiteboard or wall. If you want to rotate the image, turn the image rotation dial. Connecting to a Computer to Display Images To connect the document camera to a computer, you must install the included ArcSoft Application software for ELPDC06.
-
Page 10: Installing The Software
Using the ArcSoft Application software for ELPDC06 This section explains how to operate the unit when it is connected to a computer. In the following explanations, unless otherwise noted, Windows screen shots are used. However, the screens will be similar even when using Macintosh. Installing the Software Note the following points before installing the software: v Quit all programs that are currently running before installing the software. - Page 11 For Macintosh Turn on the computer. Insert the CD-ROM into the computer. Double-click the "ArcSoft Application software for ELPDC06" icon in the EPSON window. Installation starts. When the installation complete screen appears, click "Finish". ELPDC06 Button Manager must also be installed. Do not clear the check box.
-
Page 12: Uninstalling The Software
Uninstalling the Software Procedure For Windows Click "Add or Remove Programs" or "Uninstall a program" in "Start" - "Settings" - "Control Panel" and delete the ArcSoft Application software for ELPDC06. For Macintosh From "Applications", delete the ArcSoft Application software for ELPDC06 folder. Saving Displayed Images When the unit is connected to a computer, images can be captured and displayed as a slide show. - Page 13 The capture screen appears. See the table below for details on using the capture screen. This screen consists of two windows: the capture album window and the capture preview window In the capture screen, you can use the document camera to capture still images or videos.
-
Page 14: Compatible File Formats
■ Using the capture screen Returns to the start screen. Switches to the editing screen. Specifies the file format and resolution for captured images. Displays and changes the detailed settings and properties for the camera. Enlarges the image to fit the computer screen. To cancel the full screen mode, press the Esc key or click the button. - Page 15 Editing Saved Images Procedure Start the ArcSoft Application software for ELPDC06. Click "Start" - "Programs" (or "All Programs") - ArcSoft Application software for ELPDC06. The start screen appears. Click "Edit" The editing screen appears and the saved images are displayed. The editing screen includes functions to correct captured photos and videos, and the edited files can be saved to a computer hard disk.
- Page 16 Reverse Reverses the image left to right. Undo/redo Undo your last action or redo the last action you undid. Resize Changes the size of the selected photo. In the displayed window, enter the dimensions for the width and height of the photo or click "Keep Aspect Ratio".
-
Page 17: Solving Problems
If you notice any image problems or if you suspect the document camera is broken when installing or using it, stop using the unit. Contact the Epson service center that is indicated in the User's Guide supplied with the projector you are using with the document camera. -
Page 18: Technical Specifications
Technical Specifications Unit Specifications Interface USB terminal (type B) USB 2.0 * Power consumption Maximum 2.5 W W 260 × D 76 × H 388 Dimensions When unfolded (mm) (W10.2 × D3.0 × H15.3 in.) W 260 × D 76 × H 60 When folded (mm) (W10.2 ×... -
Page 19: Software Operating Environment
ArcSoft is a registered trademark of ArcSoft Company. General Notice: Other product names used herein are for identification purposes only and may be trademarks of their respective owners. Epson disclaims any and all rights in those marks. ArcSoft Application software for ELPDC06. © 2009 ArcSoft, Inc. All rights reserved. - Page 20 DECLARATION of CONFORMITY According to 47CFR, Part 2 and 15 Class B Personal Computers and Peripherals; and/or CPU Boards and Power Supplies used with Class B Personal Computers Epson America, Inc. Located at: 3840 Kilroy Airport Way MS: 3-13 Long Beach, CA 90806...
- Page 21 California to cause birth defects or other reproductive harm. Wash hands after handling. (This notice is provided in accordance with Proposition 65 in Cal. Health & Safety Code § 25249.5 and following.) © SEIKO EPSON CORPORATION 2009. All rights reserved.