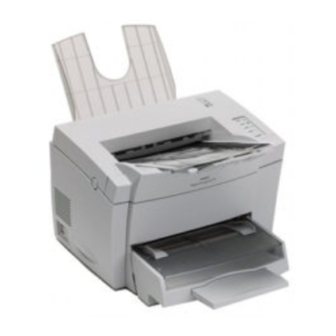
NEC 870 - SuperScript B/W Laser Printer Online User's Manual
User guide
Hide thumbs
Also See for 870 - SuperScript B/W Laser Printer:
- Network quickstart (8 pages) ,
- Network user's manual (52 pages)
Table of Contents
Advertisement
Advertisement
Table of Contents
Troubleshooting

Related Manuals for NEC 870 - SuperScript B/W Laser Printer


Summary of Contents for NEC 870 - SuperScript B/W Laser Printer
- Page 1 UPER CRIPT ™ Online User’s Guide April 1998...
- Page 2 Microsoft, Windows, Windows 3.1x, Windows 95, including all designs and related materials, is the Windows 98, PowerPoint, and MS-DOS are valuable property of NEC Technologies and/or its registered trademarks of Microsoft Corporation. licensors, as appropriate, reserve all patent, Adobe PrintGear®, the Adobe PrintGear® logo,...
-
Page 3: Table Of Contents
Table of Contents Chapter 1 Setting Up the Printer Introduction ..................................10 Selecting a Location for the Printer ..........................11 Printer Dimensions (Front View) ..........................11 Printer Dimensions ............................... 12 Printer Parts ..................................12 Imaging Modules ....................................13 Major Parts – Top Cover Open ............................... 14 Printer Operating Environment .......................... - Page 4 Table of Contents Chapter 2 Using the Operator Panel Using the Operator Panel ............................. 26 LED Operation ................................26 Operator Panel Button ..............................31 Default Settings ................................32 Chapter 3 Installing the Software SuperScript 870 Software for Windows ................................34 SuperScript 870 Printer Software and Accessories ....................
- Page 5 Table of Contents Darkness ......................................54 Accessories Tab ................................54 Advanced Tab ................................. 55 Chapter 4 Windows Status Monitor Introduction ..................................60 What is Printer Status? ..............................60 Loading the Status Monitor ............................61 Minimized Views ................................61 Features of Mini-Window View ..........................62 Features of the Icon View in Windows 3.1 ............................
- Page 6 Table of Contents Change Printer Port Menu ................................79 DOS Status Monitor (TSR) ............................79 Starting the Status Monitor ................................80 Using the DOS Status Monitor ...............................81 Chapter 6 Using the Printer Using the Multi-purpose Tray ............................. 84 Loading Paper into the Multi-purpose Tray ..........................84 Loading Envelopes into the Multi-purpose Tray ..............................
- Page 7 Table of Contents Cleaning the Printer ..............................100 Cleaning the Inside of the Printer ..............................101 Cleaning the Outside of the Printer .............................103 Relocating the Printer ..............................103 Chapter 9 Troubleshooting Updating your System ..............................106 Simple Troubleshooting ............................. 106 Installation Problems ..............................106 About Paper Jams ................................
- Page 8 Table of Contents Adhesive Labels ....................................130 Transparency Film ..................................131 Appendix B Safety Information Ozone Emission ................................134 UL Standards for Ozone ..................................134 Employer Responsibilities ................................134 Recommendations for Minimizing Ozone Exposure ..................................134 Laser Safety ................................... 135 CDRH Regulations ................................... 135 FCC Statement ....................................
-
Page 9: Chapter 1 Setting Up The Printer
Setting Up the Printer Overview This chapter gives you the information you need when you set up your printer, load paper, and begin printing. It includes: • Selecting a location for your printer • Printer dimensions • Location of printer parts •... -
Page 10: Introduction
Chapter 1: Setting Up the Printer Introduction Congratulations on your purchase of the NEC the printer. PCL 4.5 emulation has been provided SuperScript 870 printer. The SuperScript 870 is for DOS and Windows NT 4.0 users. For users of designed to offer the best possible combination Windows 3.1x, Windows 95/98, or Macintosh... -
Page 11: Selecting A Location For The Printer
Printer Dimensions (Front View) Selecting a Location for the Printer Follow all space, electrical, and operating The illustrations below show standard dimensions for the NEC SuperScript 870 printer. environment requirements when selecting a location for your printer. Printer space requirements... -
Page 12: Printer Dimensions
Printer Dimensions Printer Parts The following illustration shows standard dimensions for a NEC SuperScript 870 printer with the optional 500-Sheet cassette attached. To order this option see page 24 in this guide. Side View of the SuperScript 870 printer with optional... -
Page 13: Imaging Modules
5% coverage (typical business letter). Two replacement modules are available. Back View (without Face-up Output Tray Attached) The 3,000 page module– NEC part number 20-120 9. Main output tray extension The 6,000 page module–NEC part number 20-122 Pull out to accommodate longer sized pages 10. -
Page 14: Major Parts - Top Cover Open
Chapter 1: Setting Up the Printer Printer Operating Environment Major Parts – Top Cover Open • Install the printer on a level and stable surface. • Install the printer in an area that will have a temperature range of 50˚F to 95˚F (10˚C to 35˚C). -
Page 15: System Requirements
Chapter 1: Setting Up the Printer Minimum Requirements System Requirements To use the SuperScript 870 Windows software, The SuperScript 870 printer works with MS-DOS you will need: 3.3 or higher, Windows 3.1x (in Enhanced Mode), Windows 95/98, and Windows NT 4.0. •... -
Page 16: Unpacking The Printer
Check to make sure you received all of the items listed below. If any item is missing or damaged, contact the store where you purchased the printer. • NEC SuperScript 870 Printer • Multi-purpose tray • Face-up output tray • Toner module (inside printer) •... - Page 17 Chapter 1: Setting Up the Printer After you have removed the printer and 3. Gently lift out the Toner module. accessories from the shipping box, place the printer on a stable surface and remove any packing or tape from the printer and carefully follow the steps below.
-
Page 18: Installing The Multi-Purpose Tray
Chapter 1: Setting Up the Printer Installing the Multi-purpose tray 5. Holding onto the Toner module’s handle, lower it into the printer, making sure the green and blue markings on the inside of the printer Referring to the external printer parts figure on line up with the markings on the Toner page 12, attach the Multi-purpose tray as shown. -
Page 19: Loading Paper In The Multi-Purpose Tray
Chapter 1: Setting Up the Printer Loading Paper in the Multi-purpose Tray A maximum of 150 sheets of 20 lb. paper (common copy paper) can be loaded into the tray at once. 1. Remove the cover from the Multi-purpose tray and open the tray paper guides. -
Page 20: Turning On The Printer
Do not overload the Multi-purpose tray! Warning: This printer is intended to be For information on loading various media refer to electrically grounded. The NEC Super- Chapter 6, “Using the Printer.” Script 870 comes with a three-wire grounding plug—a plug that has a third 5. -
Page 21: Testing The Printer
Chapter 1: Setting Up the Printer indicates there is no existing error condition and no data remaining to be printed. 3. Press the Operator panel button until all lights cycle and the ON LINE light (only) starts flashing. You may then release the button. This will start the test page print operation. -
Page 22: Connecting The Interface Cable
Chapter 1: Setting Up the Printer Installing the Face-up Output Tray Connecting the Interface Cable The Face-up output tray receives printed pages, Use an IEEE 1284 compliant parallel cable (6 ft. printed side up, as they are output to the rear of recommended) to connect the SuperScript 870 to a the printer. -
Page 23: Printer Safety
UL compatible. hands are wet. (NEC will not replace this cord if you lose it. Similar UL approved AC power cords are • Do not use the printer if the AC power cord is available from most computer retailers.) -
Page 24: Ordering Supplies And Accessories
• When replacing the Imaging modules or your NEC printer dealer or call 1–800–632–2326. clearing a jam, do not touch the Fuser unit. You may also contact NEC through the internet at The Fuser unit operates at a very high http://www.nec.com/nectechsupport temperature and is marked with a warning label. -
Page 25: Operator Panel
Operator Panel Overview This chapter describes the Operator panel and its functions. It explains: • LED operation • Operator panel button • Factory default settings... -
Page 26: Using The Operator Panel
The blinking lights indicate that the printer is initializing and performing an internal test. When the printer is ready to accept a job, the green On This chapter describes the NEC SuperScript Line LED stays steadily lit. From the ready state, Operator panel and its functions. - Page 27 Fan. Corrective Action: First power off the printer and then turn the power back on. If the problem continues, contact your NEC dealer for service or call NEC technical support (see Chapter 10). During power up, press the Operator panel button until the lights...
- Page 28 Chapter 2: Operator Panel Table 2-1: Condition Indications and Solutions LEDs CONDITION CAUSE/SOLUTION Cycle through all Reset When the Operator panel button is pressed for at least 4 seconds LEDs (in all states other than during power up), it cycles through all LEDs and then the green light blinks until the printer is ready to accept a job.
- Page 29 Chapter 2: Operator Panel Table 2-1: Condition Indications and Solutions LEDs CONDITION CAUSE/SOLUTION Error (red) blinks Preprinting paper The printer has detected that the paper size being requested is not Paper (amber) size error available in the specified source (not all paper sources support blinks paper size detection).
- Page 30 Chapter 2: Operator Panel Table 2-1: Condition Indications and Solutions LEDs CONDITION CAUSE/SOLUTION Paper (amber) No paper This occurs when processing with the Multi-purpose tray or 500- blinks Sheet cassette is empty. Corrective Action: Load paper into the tray. On Line (green) In use The on line LED blinks while the printer is processing a job from blinks...
-
Page 31: Operator Panel Button
Chapter 2: Operator Panel Operator Panel Button Printer functions associated with the Operator The following table shows the effect of pressing panel button are not executed until you release the the button for certain conditions and durations. button. The LEDs show that certain conditions Pressing the button for other conditions has no have been selected. -
Page 32: Default Settings
Wait Time-out 200 seconds (for DOS 40 seconds) Auto-Continue Horizontal Offset Vertical Offset Paper Size Letter Lines of Text Orientation Portrait Copies Printer Port LPT1 Printer Name NEC SuperScript 870 DOS Status Monitor Hot-Key Ctrl-Alt-S Font Courier 12 Point medium... -
Page 33: Chapter 3 Installing The Software
This chapter gives you the information you need in order to successfully install and use the SuperScript 870 Printer Driver. You must install the NEC SuperScript 870 Printer Driver in order to successfully print from Windows. This chapter explains: • The printer software and accessories •... -
Page 34: Superscript 870 Software For Windows
Chapter 3: Installing the Software SuperScript 870 Software operator panel always available from your desktop. ® for Windows • For DOS users there are two utility programs: The DOS Printer Control Panel and the DOS Status Monitor. These programs let you Your new SuperScript 870 is built on Adobe change printer settings and monitor printer PrintGear™, an award-winning laser printing... -
Page 35: Installation For Dos Software Only
Chapter 3: Installing the Software Installation for DOS Software Only If you want to install the SuperScript 870 DOS software without using the Windows Install program, see “Installing SuperScript 870 DOS software only,” in Chapter 5. Note: If you are encountering difficulty installing the software or printing a Settings page, refer to chapter 9, From the Run dialog box type D:\Setup.exe... -
Page 36: Installation For Windows 3.1X
OK. on your screen. 3. Continue following the directions on your 4. When you finish, the icon for your NEC screen. SuperScript 870 printer will appear in the Printers folder. It is now ready for you to use. -
Page 37: Uninstalling Superscript 870 Software For Windows 95 And Windows 98
Uninstalling the SuperScript 870 Software for Windows 3.1x To uninstall the SuperScript 870 software in Windows 3.1x double-click the uninstall icon in 3. Select NEC SuperScript 870 from the list. Click the NEC SuperScript 870 program group. Apply, then click OK. -
Page 38: Uninstalling The Superscript 870 Software For Windows 3.1X
Chapter 3: Installing the Software Uninstalling the SuperScript 870 Software for • Poster printing (one page enlarged to print on multiple sheets) Windows NT Note: Many Windows programs allow To uninstall the SuperScript Printer Driver in you to change printer settings, such as Windows NT you must select the 870 SuperScript number of copies, paper size, or printer icon from the Printers folder and select File >... -
Page 39: Accessing The Superscript 870 Windows Printer Driver
Chapter 3: Installing the Software Monitor (described in a later section), click the Printer Setup button on the General tab. • From the SuperScript 870 Status Monitor in mini-window view, double click the name of the default printer at the bottom of the window. - Page 40 Chapter 3: Installing the Software Copies Use the Copies box to set the number of copies you want to print. You can select from 1 to 99 copies. Note: This setting may be overridden by the copies setting in some Windows programs.
-
Page 41: Watermark Options
Chapter 3: Installing the Software Toner Usage You can choose a watermark from either of the lists on the left. If <none> is selected, no Use these buttons to select Normal or Save Toner. watermark will print. As you move the highlight When Save Toner has been selected, text and down the list of watermarks, the preview area at graphics will print gray rather than black. - Page 42 Chapter 3: Installing the Software Use this dialog box to enter the text and layout of Graphic Watermark your watermark. You can set the watermark’s To create a graphic watermark, click Add in the font, size, style, and darkness, as well as the angle graphics area of the Watermark Options dialog and position on the page.
- Page 43 Chapter 3: Installing the Software the driver cannot locate the bitmap file at print time (it may have been moved, renamed, or deleted), the screen displays an alert. You can then choose to either print without the graphic or cancel the print job. Choosing Actual Size will place the graphic on the page at 100%.
- Page 44 Chapter 3: Installing the Software Layout Options around the reduced pages. The preview area at the right shows the effect of the present settings. Clicking this button on the Setup tab lets you choose between normal printing and two special Enlarge for Poster Printing printing options.
- Page 45 Chapter 3: Installing the Software NEC recommends that you select this option because it is very important that the second printing pass be handled correctly. • Choose Display help messages to get detailed on-screen help as the 2-Sided printing process proceeds.
-
Page 46: Booklet Printing
Chapter 3: Installing the Software for your paper source when printing 2- the second side. If this happens, roll the paper in the reverse direction of the curl before you Sided. reinsert the paper into the printer to print the This dialog box lets you choose between two second side. - Page 47 Booklet paper size in from the list of Booklet Sizes. your Windows program without selecting one in the SuperScript 870 Windows Printer Driver, NEC suggests that you select a Booklet paper size in both the driver and the Windows program until you...
- Page 48 Display Booklet printing tips. reformatted when you select the booklet paper NEC strongly recommends that you select this size within the application. You may need to option until you are familiar with Booklet adjust the margins and check the formatting printing.
- Page 49 Chapter 3: Installing the Software setup dialog boxes. Therefore, you cannot use these programs to successfully perform Booklet Printing. 8. Print your document when ready. The SuperScript 870 Windows Printer Driver will print the first side of the booklet pages, with an instruction sheet.
-
Page 50: Paper Size
Chapter 3: Installing the Software feature to print on letterhead stationery for the Selecting a paper size from the list that starts with first page and plain paper for the rest of a “Booklet” (such as “Booklet on Letter”) activates the SuperScript 870 Windows Printer Driver’s document. -
Page 51: Destination Tab
Chapter 3: Installing the Software temperature and toner voltage levels will be used for the print job. The four special settings available are plain paper, transparency, envelope, and heavy paper. To enable this option, use the drop down list box under Paper type to select the specific type of media that you are using. -
Page 52: Image Control Tab
Output Tray reports current settings such as paper size and source. The NEC SuperScript 870 printer has two output trays: the Main output tray (on top) and the Face- Image Control Tab up output tray (in back). When you select the Face-up output tray destination, flip the Paper destination switch toward the back of the printer. -
Page 53: Halftone Features (Advanced Option)
Chapter 3: Installing the Software everything except for fonts is sent as graphic Imaging Mode (Advanced Option) data. This reduces the amount of data sent to The SuperScript 870 Windows Printer Driver can the printer for complex pages and may image the page in several different ways. -
Page 54: Darkness
Chapter 3: Installing the Software The Color smoothing option speeds up printing by • To remove an option from the “installed substituting an appropriate gray for colors which options” list, you highlight it and click the are represented on-screen by a mix of two Remove button. -
Page 55: Advanced Tab
Chapter 3: Installing the Software additional memory, it is recommended that you select this amount in order to optimize printing. Check how much memory is installed by pressing the Operator panel button on your printer to print a Settings page. Advanced Tab The Advanced tab includes: •... - Page 56 Printer Administration (Advanced NEC recommends that you leave Adobe Memory Option) Booster turned enabled so that you can take advantage of its ability to print even your most Selecting the “Printer Administration…”...
- Page 57 Chapter 3: Installing the Software Disabled: A printer message appears on the Operator panel and Windows Status Monitor. Printing stops until you correct the problem. Note: When a SuperScript 870 is connected to a network, Auto-continue should be enabled in order to prevent jobs from backing-up in the print queue.
- Page 58 Chapter 3: Installing the Software Wait timeout–This setting defines the time that You can adjust the setting for the number of the printer waits between blocks of data coming minutes before the printer powers down by from the computer before it considers the job entering any number between 1 and 255 in the complete and processes what is in the print buffer.
-
Page 59: Chapter 4 Windows Status Monitor
Windows Status Monitor Overview This chapter explains the Status Monitor for the NEC SuperScript 870 laser printer it includes: • Loading the Status Monitor • The minimized views of the Status Monitor • The Maximized Status Monitor • Changing the Windows default printer... -
Page 60: Introduction
Chapter 4: Windows Status Monitor A Note About Bidirectional Introduction Communication… The SuperScript 870 Status Monitor gives you The level of features and the level of status many features to monitor your printer and print information available from the Status Monitor jobs, such as: depends on the type of connection established with your printer. -
Page 61: Loading The Status Monitor
Chapter 4: Windows Status Monitor Loading the Status Monitor of aspects of printer operations. This data is referred to as printer status. During installation, the SuperScript 870 Status The SuperScript 870 Status Monitor continuously Monitor is set to load automatically whenever you monitors this printer status information to keep run Windows. -
Page 62: Features Of Mini-Window View
Chapter 4: Windows Status Monitor need to associate the Windows programs that will be used to print your jobs with the file extensions of the files you want to print, as described in the Indicator on Status bar in Windows 95/98 File Manager, Explorer or other program’s documentation. -
Page 63: Features Of The Icon View In Windows 3.1
Chapter 4: Windows Status Monitor are directly connected to your SuperScript 870, Clicking the top left corner of the Mini-window you will also have the option of pausing and brings up the control menu as shown here. resetting the printer from the control menu. Click on Change Printer to bring up the printer chooser which displays a list of all available Windows printers. -
Page 64: The Maximized Status Monitor
Chapter 4: Windows Status Monitor The Maximized Status Monitor • Access to printer details (if you have selected the SuperScript 870 as your default printer) When the SuperScript 870 Status Monitor is • Ability to pause or resume printing if you are maximized, all its features are available from four directly connected to your printer and have tab dialog boxes: General, Change Printer, Alerts,... - Page 65 Chapter 4: Windows Status Monitor For example, you might pause printing a big job to make sure the right kind of paper is loaded. After confirming the paper is right, you can click Resume Printing to continue the print job. Note: The Pause Printer/Resume Printer buttons are only available for SuperScript 870 printers that are connected directly to...
-
Page 66: Change Printer Tab
Chapter 4: Windows Status Monitor Print Manager in Windows 3.1x These features are available from the Printer Info dialog box: Clicking this button displays the Windows Print Manager. Print Manager must be enabled (from Printer Details Area Windows Control Panel, Printers) for this button The area at the upper left gives you information to be active. -
Page 67: Alerts Tab
Chapter 4: Windows Status Monitor Set as Default Click the Set As Default button to make the currently highlighted printer the Windows default printer. Status Area This area reports the status of the currently highlighted printer on the list of available printers. - Page 68 Chapter 4: Windows Status Monitor Never pop up on alerts If you select this option, the mini-window or icon will not pop up to alert you. Have icon flash on alert Choose this option if you want the icon to flash when there is an alert.
-
Page 69: Preferences Tab
Chapter 4: Windows Status Monitor Preferences Tab The Preferences tab lets you choose how you want the SuperScript 870 Status Monitor to be minimized, and whether the SuperScript 870 Status Monitor will load automatically on Windows start up. Preferences Tab in Windows 3.1x Minimized Status Display in Windows The currently selected minimized view is shown... - Page 70 Chapter 4: Windows Status Monitor text display of printer status, and reports which Automatically Load Status Monitor When printer is currently selected as the default. If you Windows Starts Up select the mini-window view, you can choose the Choose this option if you want the SuperScript font size you want for the status text.
-
Page 71: Chapter 5 Dos Printing
DOS Printing Overview This chapter explains printing from your SuperScript 870 printer while in the DOS environment. It includes the following subjects: • The DOS printing utilities • Printing from DOS • Installing DOS software • DOS printer control panel •... -
Page 72: The Dos Printing Utilities
Chapter 5: DOS Printing horizontal offset, and vertical offset. The DOS Printing Utilities These settings will not override your application settings and are explained in The “Printer Drivers and Utilities for Windows the section below called “Change Printer 3.1x and Windows 95/98” software included Settings Menu.”... -
Page 73: Dos Printer Control Panel
2. Change to the directory you have just created: the NEC SuperScript 870 software through DOS: Type cd c:\necdos and press 1. Go to your NEC DOS directory and type: 3. Copy the SuperScript 870 DOS program files cd \necdos and press n870cp.exe, n870cp.hlp and... -
Page 74: Control Printing Menu
If you have multiple printers connected to your computer, you can use this menu to specify which This menu lets you pause or continue printing, printer port your NEC SuperScript printer is reset the printer, or eject a page. (Pause and Reset connected to. -
Page 75: Change Printer Settings Menu
Chapter 5: DOS Printing the printer. Any fonts downloaded to the printer will be cleared. Eject a Page Selecting this option ejects a page from the printer. You can use this feature if there is data left in the printer after printing a text job or doing a print screen. - Page 76 The default setting is on and Auto-continue NEC recommends that you leave this on. See When auto-continue is on, the printer Chapter 3 of this user’s guide for more automatically resumes printing after most errors.
-
Page 77: Change Laserjet Iip Emulation Settings
Chapter 5: DOS Printing print onto pre-printed forms. Setting a negative Change LaserJet IIP Emulation Settings value moves the printing position to the left. A This menu lets you specify a number of settings positive value moves the printing to the right. You that affect your print jobs when you print from can set a value from -127 to +127. -
Page 78: Print Sample Pages Menu
Chapter 5: DOS Printing Print Sample Pages Menu Reference Manual is available through the Hewlett-Packard Company. Call Hewlett- Packard’s Direct Marketing Division toll free at 1- 800-538-8787 or direct at 408-720-2428. In Canada, call 905-206-4383. Return to Main Menu This option returns you to the Main Menu. Change Status Monitor Settings Menu This menu lets you change two settings for the memory-resident DOS Status Monitor. -
Page 79: Change Printer Port Menu
Chapter 5: DOS Printing Audible Warnings Choose whether or not you want sound warnings when there is a printer error. The default for audible warnings is on. Hot-key Choose the hot-key used to pop up the DOS Status Monitor. The default hot-key combination is b-a-S. -
Page 80: Starting The Status Monitor
NEC SuperScript 870 software through DOS: To do this you need to add this line to your AUTOEXEC.BAT file: 1. Go to you NEC DOS directory and type: cd \necdos and press C:\necdos\n870sm.exe 2. Then type: 870sm and press (Substitute the directory location where you installed n870sm.exe if it is not \necdos.) You... -
Page 81: Using The Dos Status Monitor
Chapter 5: DOS Printing Using the DOS Status Monitor C - Continue Printing If your printer has already been paused, or if it is When you press its hot-key (by default, b-a- waiting for you to take some action, pressing C S), the DOS Status Monitor screen pops up. - Page 82 Chapter 5: DOS Printing...
-
Page 83: Chapter 6 Using The Printer
Using the Printer Overview This chapter gives you the information you need when loading specific kinds of media into your SuperScript 870 printer. The chapter has information about: • Using the Multi-purpose tray • Using the Manual feed tray • Loading envelopes •... -
Page 84: Using The Multi-Purpose Tray
Chapter 6: Using the Printer Loading Envelopes into the Using the Multi-purpose Tray Multi-purpose Tray The SuperScript 870 laser printer’s Multi- 1. Remove the cover from the Multi-purpose purpose tray holds up to 150 sheets of 20 pound tray. letter sized paper. It holds 10 sheets of standard labels or transparencies, 10 business size envelopes (Com 10), or 10 pieces of thick paper. -
Page 85: Using The Manual Feed Tray
Chapter 6: Using the Printer Using the Manual Feed Tray 3. Add the paper or envelope to be printed face up. Adjust the paper guides with both hands so that the sides of the paper are secure. Use the Manual feed tray to print transparencies, labels, or envelopes in addition to making quick runs of paper types or sizes that are not currently loaded in the Multi-purpose tray. -
Page 86: Loading Transparencies And Adhesive Labels
Only use transparencies that are designed for laser printers. Adhesive Labels NEC recommends that adhesive labels be fed manually through the Manual feed tray to the Face-up output tray. However, these may also be loaded into the Multi-purpose tray like regular... -
Page 87: Chapter 7 Printer Options
Printer Options Overview This chapter explains the various printer options available for the NEC Superscript 870 laser printer. It includes: • Printer options • Adding the 500-Sheet cassette • Adding memory to the printer... -
Page 88: Printer Options
The 500-Sheet Cassette Printer Options The optional 500-Sheet cassette consists of the You can add the following NEC printer options Feeder unit and the Paper cassette which holds up to the NEC SuperScript 870 laser printer. to 500 sheets of standard 16 pound to 28 pound letter size paper. -
Page 89: Loading Paper Into The 500-Sheet Cassette
Chapter 7: Printer Options 3. Remove the 500-Sheet feeder and cassette from its packaging, including the protective tape used to hold the various components in place. 4. Place the Feeder unit on a stable surface and make sure to align the coupling pins of the Feeder unit with the holes located underneath the printer. -
Page 90: Memory Expansion Module (Simm)
Chapter 7: Printer Options Do not load additional paper until all the paper in 2. Place a stack of paper, face up, into the the cassette is completely used up. cassette. 3. Install the cassette cover and push the cassette into place. - Page 91 Chapter 7: Printer Options fallback problems. Added memory will also increase spooling capability in network printing. The 72-pin industry standard (60, 70, or 80 nanosecond) SIMM is available from your local computer dealer. You can use both parity and non-parity DRAM SIMMs. Upgrade the printer memory by installing a 1 MB, 4 MB, or 16MB SIMM.
- Page 92 Chapter 7: Printer Options 7. Press the module down until it clicks into place. Make sure both ends of the SIMM click Caution! Do not touch any part of the securely into place. controller board with your hands. 5. Locate the memory socket on the controller board.
- Page 93 Chapter 7: Printer Options 8. Replace the Side cover using the two screws provided to secure it in place. • If you ever need to remove the SIMM, press down on the metal tabs on the sides of the socket. •...
- Page 94 Chapter 7: Printer Options...
-
Page 95: Chapter 8 Maintaining Your Printer
This chapter explains the basic maintenance and cleaning procedures you must follow to maintain high print quality and efficient operation of your NEC SuperScript 870 printer: • The Imaging modules • Redistributing the Toner module • Replacing the Toner module •... -
Page 96: Introduction
Photoconductor module lasts for approximately button 20,000 pages. Both modules are replaceable and available through your dealer or by calling NEC at 1-800- 632-2326. There is also a high capacity Toner module available that will print approximately 6,000 pages at 5% toner coverage. - Page 97 Chapter 8: Maintaining Your Printer 3. Gently lift out the Toner module 5. Holding onto the Toner module’s handle, lower it into the printer, making sure the four pins (two on each side) fit into the guides and match the markings inside the printer. Warning! Do not touch the Fuser unit.
-
Page 98: Replacing The Toner Module
You should replace the Toner module when you see print quality problems, such as light images or white streaks across the page. To reorder an NEC 3. Remove the new Toner module from the SuperScript 870 Toner module, contact your NEC shipping carton and the foil wrapper. -
Page 99: Replacing The Photoconductor Module
Chapter 8: Maintaining Your Printer 5. Holding onto the Toner module’s handle, Replacing the Photoconductor Module lower it into the printer. Make sure the four After about 20,000 pages, print images might start pins (two on each side) fit into the guides to become faint and blurred. -
Page 100: Cleaning The Printer
Chapter 8: Maintaining Your Printer Photoconductor Note: Make sure the Photoconductor module module is inserted inside the printer as far as it will go. 3. Remove the new Photoconductor module from its packaging. If you do not plan to immediately install the Photoconductor module, cover it with a cloth to protect it against overexposure to light. -
Page 101: Cleaning The Inside Of The Printer
Chapter 8: Maintaining Your Printer Caution! Before cleaning the printer, be 3. Using a soft cloth, wipe the Image transfer sure to turn it OFF and unplug the power roller while rotating its drive gear. The black cord. If the printer has been running, wait Image transfer roller is located directly a few minutes for the Fuser unit to cool beneath and behind the Photoconductor... - Page 102 Chapter 8: Maintaining Your Printer 5. Using a soft cloth, wipe the Paper transport roller. 7. Carefully close the Top cover of the printer. 6. Reinstall the Toner and Photoconductor modules. Note: Make sure the blue and green markings on the imaging modules line up with the blue and green markings on the inside of the printer.
-
Page 103: Cleaning The Outside Of The Printer
Chapter 8: Maintaining Your Printer 5. Remove any paper from the Multi-purpose Cleaning the Outside of the Printer tray. Wipe the outside of the printer with a soft cloth 6. Uncover and remove the Multi-purpose tray. moistened with a neutral, household detergent. Do not use abrasives or corrosive detergents. - Page 104 Chapter 8: Maintaining Your Printer...
-
Page 105: Chapter 9 Troubleshooting
Troubleshooting Overview This chapter tells you how to resolve problems with your printer’s operation. Topics include: • Simple troubleshooting • Print quality maintenance • Clearing paper jams • Output quality problems... -
Page 106: Updating Your System
These are available from Microsoft Corporation. Information will be available on Reset the printer to factory defaults. See page 27 their website, www.microsoft.com. of this manual. If the LEDs are still all lit, call NEC Technical Support at 1-800-632-4650. Simple Troubleshooting Installation Problems Here are some simple resolutions to occasional printer problems. - Page 107 Help) for information about Safe Mode. bi-directional (other modes may also work, but NEC recommends that you configure your port to bidirectional mode to ensure maximum compat- ability). Since each system is unique, you should review the documentation for your BIOS Setup utility program in your computer’s user guide.
-
Page 108: About Paper Jams
Chapter 9: Troubleshooting About Paper Jams Common causes of paper jams include: • The paper you loaded is not recommended for Paper jams may occur in the following three areas. this printer. (The arrows indicate the two paper paths.) Check •... - Page 109 Chapter 9: Troubleshooting conductor module when clearing the paper printer. Immediately wrap the Photoconductor jam and make sure these are reinstalled module with a cloth to protect it against light. properly (see Chapter 8 for directions). Photoconductor module Jammed Paper Removal Use the following procedure to remove jammed paper from the printer.
- Page 110 Chapter 9: Troubleshooting 5. If you have partially fed paper jammed in the 500-Sheet cassette, remove the cassette cover and push down on the paper stack inside the tray. Gently pull the paper straight out. 4. Gently pull out any paper that may be caught in the Multi-purpose or Manual feed trays.
- Page 111 Chapter 9: Troubleshooting 7. Reinstall the Imaging modules. 6. If paper is caught in the Toner module area, gently pull it out and remove any torn pieces of paper from inside. 8. Carefully close the Top cover of the printer. If a small torn piece of paper has become trapped and cannot be removed as described in the above procedures, try the following steps:...
-
Page 112: Maintaining Print Quality
• The Toner module may need replacing. Following are suggestions for maintaining the • If the problem persists, the Transfer unit may highest print quality from your NEC 870 need replacing. Contact NEC Printer Technical SuperScript laser printer. Support at 800-632-4650. - Page 113 Chapter 9: Troubleshooting Repeating Marks on Page Toner Spots on Page • The paper path may be contaminated. Open • Make sure the paper meets required the Top cover, remove the Toner module, and specifications. check for loose pieces of paper jammed in the •...
- Page 114 Chapter 9: Troubleshooting Random Deletions or Light Areas Black or White Vertical Bands on Page • The Toner module may be damaged and need replacing. • The Toner module or Photoconductor module may be defective. Remove the modules and replace if necessary. Black Page •...
- Page 115 Remove the modules and check them for damage. Replace modules if necessary (see Chapter 8 of this user’s guide). • The Fuser unit may be damaged. Call NEC Printer Technical Support at 1-800-632-4650. Blank Page • The Toner module may be out of toner.
- Page 116 • Make sure you are using only new • There may be a problem with the paper undamaged paper. feeding mechanism. Call NEC Printer • The paper path may be contaminated. Open Technical Support at 800-632-4650. the Top cover, remove the Toner module and check for loose pieces of paper jammed in the paper path.
-
Page 117: Chapter10 Getting Service And Support
Overview This chapter provides information about different resources for information and technical support, including: • How to reach NEC Technical Support by voice, fax, mail, and on line for technical assistance • Finding supplies, options, and spare parts for your printer •... -
Page 118: Service And Support
These central support personnel can then contact How to Contact NEC the appropriate NEC support staff, if needed. There are a number of ways to contact NEC or receive information about technical issues, Getting Help from Your Dealer products, and services. - Page 119 Sending Internet Electronic Mail Reaching the NEC Bulletin Board System You can e-mail your questions to NEC. NEC will You can use the NEC Bulletin Board System (BBS) respond within three business days. Send e-mail to send messages and transfer files.
- Page 120 • Browse Service Programs to learn about ways for a list of dealers in your area. to extend or enhance your existing warranty. • Use the Dealer Locator to find a NEC NEC Warranty Technologies’ sales or service center near you.
-
Page 121: Warranty Return Process
Upon receipt of the defective necessary, to reconfigure and/or furnish printer, NEC will repair the printer and ship it additional hardware and/or software as back to you within 3 business days. required or specified by NEC to assure normal product operation. -
Page 122: Superscript 870 Printer Limited
U.S.A. or Canada by the first consumer purchaser. 2. Any Product on which the serial number has NEC TECHNOLOGIES, INC. (hereinafter been defaced, modified, or removed. NECTECH) warrants this Product to be free from defects in material and workmanship and agrees 3. - Page 123 Chapter 10: Getting Service and Support guarantee receipt of the defective printer. The Warranty Support warranty period on any replacement printer shall be either (1) the remaining balance of the original NECTECH will pay labor and material expenses two (2) year term, or (2) ninety (90) days, for covered items, but we will not pay for the whichever is longer.
- Page 124 This Product is warranted in accordance with the terms of this limited warranty. Consumers are cautioned that Product performance is affected by system configuration, software, the application, customer data, and operator control of the system, among other factors. While NEC TECHNOLOGIES,...
-
Page 125: Appendix A Selecting Print Media
Selecting Print Media Overview This appendix has both general guidelines and detailed specifications for purchasing and storing paper and other media for your NEC SuperScript 870 printer. The appendix covers: • Selecting paper and media • Taking care of printer supplies •... -
Page 126: Selecting Paper And Media
Appendix A: Selecting Print Media Note the following media guidelines. Selecting Paper and Media • Check that the media meets all specifications Your SuperScript 870 printer supports a wide noted in this chapter. variety of print media. • Order a small quantity to test with your printer and your work environment. -
Page 127: Paper Properties
Fan Note: Paper properties can be changed transparencies, labels and envelopes before by the manufacturers. NEC has no control loading them into the Multi-purpose tray. over such changes. Thus NEC neither warrants nor recommends the use of any... -
Page 128: Paper And Print Media You Should Not Use In This Printer
Appendix A: Selecting Print Media Paper and Print Media You Should between the individual labels • Multiple copy perforated checks NOT Use in This Printer • Envelopes with thick or uneven edges Paper jams or poor print quality may result from •... -
Page 129: Preprinted Forms
Appendix A: Selecting Print Media • Index card 3 in. x 5 in. (76.2 mm x 127 mm): using materials that change the electrical or handling properties of the paper. Forms print area of 2.6 in. x 4.6 in. (66 mm x 117 mm) should be sealed in moisture-proof wrapping These print areas are for standard weight media after pre-printing to prevent moisture changes... -
Page 130: Adhesive Labels
Note: Label properties can be changed performance of the envelopes selected. by the manufacturers. NEC has no control The leading edge of an envelope that feeds into over such changes. Thus NEC neither the printer must be straight. The fold must be... -
Page 131: Transparency Film
Appendix A: Selecting Print Media Transparency Film When you are printing on transparency film, always remove the first printed transparency from the output tray before feeding a second one through. This prevents scratching the film surface of the first transparency. The transparency must be able to withstand temperatures of 392˚F (200˚C) for 0.1 second. - Page 132 Appendix A: Selecting Print Media...
- Page 133 Safety Information Overview This chapter provides safety information and product specifications for the SuperScript 870 printer. It covers: • Ozone safety • Laser safety • FCC Declaration of Conformity...
-
Page 134: Appendix B Safety Information
Appendix B: Safety Information As you operate your NEC SuperScript 870 Recommendations for Minimizing printer, please be aware of the following safety Ozone Exposure considerations. Almost all ozone concerns arise from abnormal Ozone Emission site or operating conditions. The following... -
Page 135: Laser Safety
Appendix B: Safety Information Caution! Use of controls, adjustments, or Laser Safety performance of procedures other than those specified in this user’s guide may This printer is certified as a Class 1 laser product result in hazardous radiation exposure. under the U.S. Department of Health and Human Services (DHHS) Radiation Performance Standard FCC Statement according to the Radiation Control for Health and... - Page 136 U.S. Responsible Party: NEC Technologies Inc. If your printer is the NEC SuperScript 870N Address: 1250 N. Arlington Heights Road, model or if you have installed the optional...
- Page 137 Specifications Overview This appendix provides product specifications for your SuperScript 870 laser printer. It covers such information as: • Print speed • Power consumption • Administrative compliance • Technical specifications...
-
Page 138: Appendix C Specifications
Appendix C: Specifications Technical Specifications Accepts parity and non-parity DRAM SIMM of 1,4, or 16 MB Print Speed Printer Languages 8 pages per minute—Letter size Adobe PrintGear 4.5 Resolution PCL 4, HP LaserJet IIP compatible emulation mode 600 dots per inch (dpi) Interface Ports Print Method Bidirectional parallel printer cable connector... - Page 139 Appendix C: Specifications Ozone Emission Less than 0.002 ppm TWA (Time Waited Average) Dimensions with Multi-purpose Tray Width—14 in. (354 mm) Depth—13.75 in. (415 mm) Height—11 in. (279.4 mm) Weight—17.6 lb (8 kg) without Imaging modules Noise Level Operating—48 dB(A) Operating with optional 500-Sheet cassette—50 dB(A) Idle—30 dB(A)
- Page 140 Appendix C: Specifications...
-
Page 141: 870 Status Monitor Icons
870 Status Monitor Icons Overview The following table shows the status icons and sample associated messages as they are displayed on the SuperScript 870 Status Monitor. - Page 142 Appendix D: 870 Status Monitor Icons Table 4-1: Status Monitor Icons— messages will change to reflect current printer conditions Job Complete Energy Saving Ready (green light steady) (green light blinks) Add Paper Print to File Printing (green light blinks) Print to Network Printer Off line Busy (yellow light blinks) Print to Fax...
- Page 143 Glossary discrepancy, memory overflow, or printer A4 A paper size that measures 8.3 x 11.7 inches or overrun. 210 x 279 millimeters. This size paper is widely used in Europe. Autoswitching A setting that allows the printer to detect and use the feeder that has the Adobe Memory Booster An advanced printer appropriate size paper for the print job.
- Page 144 Glossary curl is the curvature resulting from the fusing and booklet printing Booklet printing lets you delivery operations. Any in-ream curl toward the produce booklets in book or tablet form. Booklets side to be printed is undesirable, while a small have two reduced-sized pages on each side of the sheet.
- Page 145 Glossary duplex printing Printing on both sides of paper. This is a library of core functions in Windows that processes graphical data for display and printing. emulation The imitation of another printer language. grain The position of the paper fibers. During the manufacturing process, most fibers are oriented feeder The mechanism that feeds paper and other with their length running parallel to the long...
- Page 146 Glossary icon An image that graphically represents an N-up printing Allows for printing multiple object, concept, or message. reduced size pages on one sheet of paper. indicator lights LED lights on the printer offline The state in which the printer cannot operator panel that communicate the current accept or print out data.
- Page 147 A unit of measurement for sizing type. One PrintGear Adobe’s innovative printing point equals 1/72 inch. technology on which the NEC SuperScript 1260 is built. PrintGear provides unprecedented port A socket on the connector panel of a performance, quality, network ease of use and computer or peripheral device where you can features.
- Page 148 Glossary screen font A font that can be displayed on the test page An informational page the printer monitor screen. issues that displays text and graphic samples for verifying print quality. This page prints out when settings page an informational page that can be you first install your printer software.
- Page 149 Glossary WYSIWYP (What You See Is What You Print) In the Windows environment, the fonts handled by the computer are displayed on the screen and printed on the printer with exactly the same attributes. It means that what is displayed on the screen will be output exactly the same by the printer.
- Page 150 Glossary...
- Page 151 Index Index Bidirectional communication 10, 60 Symbols BIOS 60, 107 Bitmap 42 10/100-BaseT 10 Blank page 115 2-Sided printing 44–46 Blurred image 116 500-Sheet cassette 88, 103 Booklet printing 46–48 installing 88–93 loading paper 89 paper jam 110 paper kind to use in 127 CDRH regulations 135 part number 24 Change printer 63...
- Page 152 Index Demo page print demo page button 66 Face-up output tray 12 Destination tab 50 installing 22 DOS 15 Fanning paper 86 change printer port 74 FCC Statement 135 change printer settings 75 Feeder unit 89 energy saving timeout 75 Fuser area installing software 72–73 paper jams 108...
- Page 153 Index using 85 the Multi-purpose tray 18 Media Interface cable to avoid 128 connecting 22 Memory 10 Interference 136 insufficient disk space 107 Memory currently installed 54 Memory expansion module 88, 90 Jam recovery 56, 57 Memory socket 92 under DOS 76 Microsoft PowerPoint 48 Moving the printer 103 Multi-purpose tray 12, 103...
- Page 154 Index Operator panel button 27 Paper transport roller 101 use 31 Paper type setting 50 Ordering accessories 24 Paper wrinkling 108 Ordering printer supplies 24 Parallel cable 15 Orientation 40 Parallel port 13 Output trays 51 setting 107 Ozone emission 134, 138 Parallel printer port 15 Pause printer 65 Pause printing 81...
- Page 155 Index Printer setup button 65 Printer Printer software 34 accessories 24 Printer status 60 cleaning 103 Printer status area 65 cleaning inside 100 Printer technical support 115 dimensions 139 Prints factory default reset 27 reducing 43–44 front view 11, 12 Proofs 38 hardware error 27 Proprietary notice 2...
- Page 156 Index Icon view in Windows 3.1 63 printing 21 in Windows 3.1x 62 Thumbnails 43 loading the 870 Status Monitor 61 Timeout settings 56 maximized 64 Toner module 101 minimized 69 defective 115 restore defaults button 70 life 13, 96 SuperScript 870 60 ordering 24 Status Monitor settings...
- Page 157 Windows 3.1x Print Manager 66 software installation 36 Windows 95 software installation 35 Windows 98 15 installing software 35 system requirements 15 Windows NT 15 Windows Printer Driver 60 Windows Status Monitor 34 World Wide Web reaching NEC on 119...
- Page 158 Index...