Table of Contents
Advertisement
Quick Links
Advertisement
Table of Contents

Related Manuals for ViewSonic EP4602


Summary of Contents for ViewSonic EP4602
-
Page 6: Table Of Contents
Contents Part 1 Remote Control/Menu Introduction......2 1.1 Use Instructions ........................... 2 1.2 Packing List ............................2 1.3 Function Introduction .......................... 2 1.4 Remote Control............................ 3 1.5 Menu Operation Instructions ....................... 3 Part 2 ePoster Manager Express Software Function Instructions..11 2.1 Installation and Operation Method ....................11 2.2 ePoster Manager Express Network Client Overview ................ -
Page 7: Part 1 Remote Control/Menu Introduction
Part 1 Remote Control/Menu Introduction 1.1 Use Instructions This product can play programs of JPG, MP3 formats. For your convenience, most operations of the product can be done with the remote control and software. To New User: Before turning on the power, please make sure that the power cord and multi-media card are properly installed. -
Page 8: Remote Control
Image play interval and switch effects can be freely set by the software Content encryption to prevent illegal advertising 10. Store multiple playlists and play at scheduled time 11. Easier and more convenient program updating. Send playlist to playback terminal through network or USB automatically. - Page 9 Date Time Version No. Fig. 1-1 When the digital poster is turned on or stops playing advertisement, it will display the current media pack name, memory card capacity, date, time and version No, as shown in Fig. 1-2. Fig.1-2 A. System Setup Press Setup button to enter the menu setup interface.
- Page 10 OSD Language: Chinese, English Fig.1-3 Clock Display: Upper Right, Upper Left, Lower Right, Lower Left, Off Scroll Text Display: Scroll text On or Off. USB: On or Off Restore Default Setting: Restore the menu settings to default default. Default Settings: OSD Language: English Clock Display: Off Scroll Text Display: On...
- Page 11 Fig. 1-4 1. Server IP: Select Server IP menu, and press PLAY button to confirm. If you need to modify the Server IP address, you can press Left arrow to display the numeric soft keyboard. Use the navigation buttons on the remote control to select numbers on the keyboard.
- Page 12 2. Machine ID: Machine ID is the serial number ) of the terminal and can only be viewed. Fig. 1-7 3. MAC Address: This information can only be viewed. 4. Get IP Type: DHCP and Static IP available. The former can obtain an IP address automatically; the latter can be specified through the soft keyboard.
- Page 13 Fig.1-10 D. Power On/Off Timer Setup: Three settings available: Normal On, Normal Off and Time On/Off Normal On: The digital poster will be on when the power is on. Normal Off: The digital poster will be off when the power is on. When you exit the menu after setting the function, it will turn off automatically 5 seconds later and remain off.
- Page 14 “Same Setting”: Use Up and Down buttons to select Same Setting, and press Play button to display Same Setting options. Fig.1-12 “Week Mode”: Press Setup button to enter the menu setup interface. In Main Menu interface, press Up and Down buttons to select On/Off Setup as shown in Fig.
- Page 15 Fig. 1-15 . Display Setup Brightness, Contrast and Saturation can be set in Display Setup as shown in Fig.1-16. Fig.1-16 G. File Management Press Setup button to enter the menu setup interface. Press Up and Down buttons to select File Management, and press Play button to display File Management options.
-
Page 16: Part 2 Eposter Manager Express Software Function Instructions
Part 2 ePoster Manager Express Software Function Instructions Before using this software, you need to install. NET runtime environment. You can download the program from Microsoft website by following the address below or install it directly from the User Manual CD (Dotnetfx.exe). - Page 17 2.1.2 Scroll Text: Create a new xxx.txt file and edit the subtitles you want to display When editing your media package, select the scrolling text checkbox, and click the Browse button to select the path of “.txt” text file You can add a scroll text to each media pack 2.1.3 Menu Introduction: File: New, Open, Close, Save, Save As, Exit.
- Page 18 Account Management: Register user account. Account Assistant: Add common administrator account used for managing one or more terminal groups. (Available when logging in Player Center) The default password is 111111. You can change the password after logging in. Language: English, Chinese .
- Page 19 2.1.4 IMP: Support classic digital poster playlist mode. One image with one sound effect. Automatically judge whether to rotate new images; Views: Picture Display Mode Details mode Thumbnail mode Icon mode New: Add images only Click "Add Images" of the software: add your selected images to the right box, to edit the images added.
- Page 20 Delete: Delete your selected file Up: Sort your selected files in ascending order 10. Down: Sort your selected files in descending order 11. Preview: Preview the list currently being edited, view playback effect 2.1.5 ISS: Music Synchronous Slideshow ISS: ISS: Display images synchronously at the time when music starts to achieve automatic explanation function.
- Page 21 Edit ISS Items: Double-click the images you want to edit, the interface will display as shown below. You can change the image file path Edit the image’s insertion point: 00:00:00 --- 00: 06:24 Transition mode: Change image transition mode Background music mode: Play image and music in a continuous loop separately.
- Page 22 Operation Procedures: Add Images: Add images from the left box. Add music files: Add files directly from music pool Delete: Delete your selected music files directly Up, Down: Sort music playback order Edit ISS Items: Double click the images you want to edit, the interface will display as shown below. You can change the image file path Edit music playback time Transition mode: Change image transition mode...
- Page 23 Configure system parameters checkbox : ①. Check: Write terminal parameters to U disk when creating card. ②. Uncheck: Not write System Parameters Setting: Set the parameters of the terminal without using the remote control. OSD Language: English and Chinese (“中文”) Clock Display: Off, Upper Right, Upper Left, Lower Right, Lower Left, Scroll Text Display: On or Off.
-
Page 24: Eposter Manager Express Network Client Overview
Write to a disk: Single or multiple disks can be chosen. Error will occur when no disk is available. Click “Write to a disk”, information will be written to a disk. Two file folders available in the disk: iMedia and iSystem. iMdia will be used to store IMP and schedule file; iSystem used to store font library. -
Page 25: Content And Use Method
2.3 Content and Use Method In the following we will describe the content and use method of ePoster Manager Express network client in details. 2.3.1. Content ePoster Manager Express Network Client includes the following main parts: Local Folder List, Local File List, Tool Bar, Terminal Quick View, Terminal Information View, Terminal Control /Details Column 2.3.2. - Page 26 Configuration rules on account management serial number (SN) and registration number (KEY): One SN is assigned to each terminal. SN/KEY are required when applying for account registration and creating terminal using EPOSTER MANAGER EXPRESS. One SN/KEY can apply for one account only. SN/KEY with opened accounts should not apply for account registration again;...
- Page 27 Click Config button to pop up the Config interface as shown below. In this interface, set server IP, automatically refresh interval, enter the registered user name and password, and set timeout lock. Click OK to complete the configuration, or click Cancel not to configure.
- Page 28 2.3.5. Button Toolbar The interface will appear as shown below after you log in. New: Create new terminal group or create new terminal in selected terminal group New terminal group: Complete the terminal group name and description as shown in the interface below.
- Page 29 Delete: Delete the selected terminal group or terminal. When one terminal group is deleted, all terminals in this terminal group will also be simultaneously deleted. View: Select terminal list view the window display mode - Grid Mode lists terminal status information - Card Mode displays terminal status information in the way of simple card Refresh: Refresh real-time terminal status information...
- Page 30 As shown in the figure above, the current login administrator account appears on the top of Terminal Quick View box. The main part displays tree view terminal groups managed by the current administrator as shown in "Test 1". The figure 5 in brackets following terminal group name represents the total number of terminal in the terminal group.
- Page 31 2.3.7. Terminal Control/Details Column As shown below, click the terminal group under Terminal Quick View, playback schedule will display in Terminal Control/Details Column. Click to select one schedule from schedule list, the media list corresponding to this schedule will display in left media column. Click Add under Schedule box on the left part of the figure above.
- Page 32 Select one media under the media box to delete, move up/down or to conduct other operations. Click the Save button on the right to show the progress of media uploading. During uploading, the schedule in the schedule column on the left in the figure above will display in yellow font, indicating it has not been saved yet, as shown in the figure above.
-
Page 33: Part 3 Technical Data
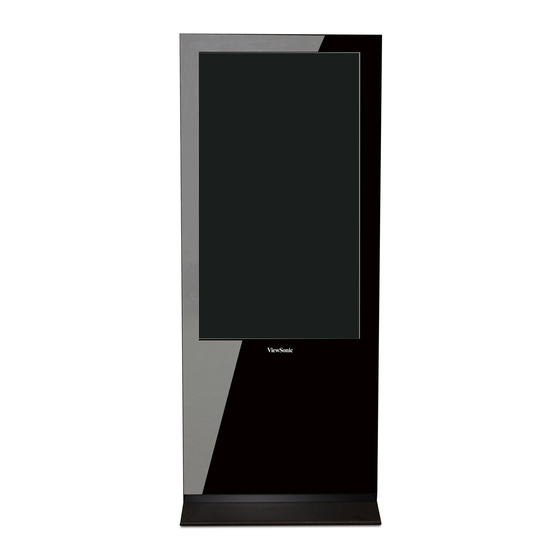
Part 3 Technical Data 3.1 Specifications EP3202r/EP4602r/EP5202r Display and Sound EP3202r 32” TFT LCD 9:16 aspect ratio 768 x 1366 native resolution Built‐in stereo speakers 2W+2W EP4602r 46” TFT LCD 9:16 aspect ratio 1080 x 1920 native resolution Built‐in stereo speakers 5W+5W EP5202r 52” TFT LCD 9:16 aspect ratio 1080 x 1920 native resolution Built‐in stereo speakers 5W+5W Image format support JPG Audio codec support MP3 Software management LAN – ePoster Manager Express USB direct update Network Connectivity and I/O Ethernet: RJ45 Port Ports USB storage host (Type A) Digital Poster Features Remote update content and schedule by Ethernet High definition photo and music playback Real‐time clock for playback scheduling Multiple photo transition effect Scroll ticker ...