
Related Manuals for Panasonic AE3000U - LCD Projector - HD 1080p


Summary of Contents for Panasonic AE3000U - LCD Projector - HD 1080p
-
Page 1: Operating Instructions
Operating Instructions LCD Projector PT-AE3000U Model No. Before operating this product, please read the instructions carefully and save this manual for future use. TQBJ0277-1 NGLISH... -
Page 2: Important Safety Notice
We hope it will help you to get the most out of your new product, and that you will be pleased with your Panasonic LCD projector. The serial number of your product may be found on its bottom. You should note it in the space provided below and retain this booklet in case service is required. -
Page 3: Important Safety Notice
Pursuant to at the directive 2004/108/EC, article 9(2) Panasonic Testing Center Panasonic Service Europe, a division of Panasonic Marketing Europe GmbH Winsbergring 15, 22525 Hamburg, F.R. Germany WARNING: Not for use in a computer room as defined in the Standard for the Protection of Electronic Computer/Data Processing Equipment, ANSI/NFPA 75. -
Page 4: Table Of Contents
Contents Important Information Quick steps Important Safety Notice........2 Precautions with regard to safety ....... 6 1. Set up your projector WARNINGS..............6 See “Setting up” on page 14. CAUTIONS ..............7 Cautions when transporting......... 8 Cautions when installing..........9 Cautions on use ............ - Page 5 Contents Settings Maintenance Menu Navigation ..........29 TEMP and LAMP Indicators ....... 45 Navigating through the MENU ........29 Managing the indicated problems ......45 Main menu and sub-menu ........30 Care and Replacement ........46 PICTURE menu.............32 Cleaning the projector..........46 PICTURE MODE............
-
Page 6: Precautions With Regard To Safety
Precautions with regard to safety WARNINGS If you notice smoke, strange smells or noise coming Insert the power plug securely into the wall outlet. from the projector, disconnect the power plug from If the plug is not inserted correctly, electric shocks or the wall outlet. -
Page 7: Cautions
Precautions with regard to safety Do not touch the leaked liquid from the batteries. Do not place your hands or other objects close to the If you touch the leaked liquid, it may hurt your skin. air exhaust port. Immediately wash away the liquid with water and Heated air comes out of the air exhaust port. -
Page 8: Cautions When Transporting
Precautions with regard to safety Do not short-circuit, heat or disassemble the Do not put your weight on this projector. batteries or place them into water or fire. You could fall or the projector could break, and injury Failure to observe this may cause the batteries to may result. -
Page 9: Cautions When Installing
Precautions with regard to safety Cautions when installing Avoid setting up in places which are subject to If installing the projector to the ceiling, ask a vibration or shocks. qualified technician or an Authorized Service Center The internal parts can be damaged, which may cause to carry out all installation work. -
Page 10: Accessories
Precautions with regard to safety Accessories Make sure the following accessories are provided with your projector. Remote control for Safety cable Lens cover (x1) PT-AE3000U (x1) TTRA0141 TXFKK01VKF5 N2QAYB000316 Attachment screw (x1) (Attached to the projector by default.) Safety cable (x1) Power cord (x1) K2CG3FH00017 3 m (9'10") -
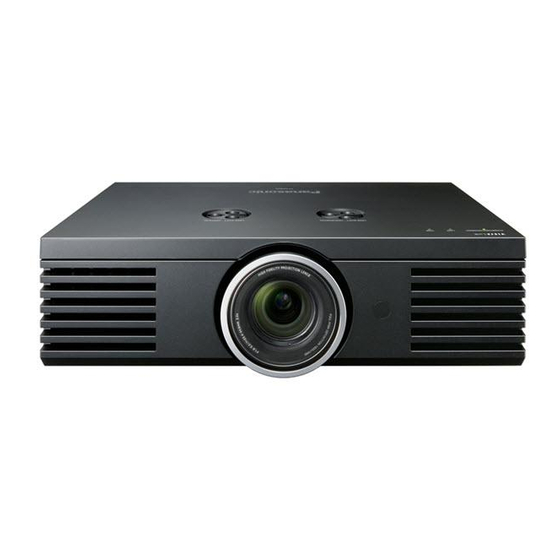
Page 11: About Your Projector
About Your Projector Remote control Power button Button backlight While the MAIN POWER When any button is pressed, the button button is on, switch between backlight is lit. Without any operation, it standby mode and projection gets darker after 5 seconds and goes off mode. -
Page 12: Projector Body
About Your Projector Projector body Top and front view Lens shift dial • Vertical Lens shift dial • Horizontal (page 16) (page 16) Air exhaust port Heated air comes out of this opening. Power/LAMP/TEMP indicators (page 20/page 45) Air filter (page 46) MAIN POWER Switch the projector on/off. - Page 13 About Your Projector Back and bottom view Security lock Attach the commercial shackle lock Air intake port which is provided with the projector. Top cover Compatible with the Kensington Hold the top cover at the back corner and slightly push up to open. MicroSaver Security System.
-
Page 14: Setting Up
Setting up Screen size and throw distance You can adjust the projection size with 2.0x zoom lens. Calculate and define the throw distance as follows. Projected image Screen (Shown as 16:9 size) All measurements and the calculation results bellow are approximate and may differ from the actual measurements. Throw distance (16 : 9) Throw distance (2.35 : 1) Screen Diagonal... -
Page 15: Projection Method
Setting up Projection method You can use the projector with any of the following 4 projection methods. To set the desired method in the projector, See “INSTALLATION” on page 44. Setting on a desk/floor and Setting on a desk/floor and projecting from front projecting from rear INSTALLATION: FRONT/DESK... -
Page 16: Lens Shift And Positioning
Setting up Lens shift and positioning If the projector is not positioned right in front of the center of the screen, you can adjust the projected image position by moving the lens shift dials within the shift range of the lens. Adjusting the lens shift dials Horizontal shift You can place the projector where the projector lens is up to 40% horizontally off-center from the screen and... - Page 17 Setting up Projector location range You can determine where to locate the screen and the projector by considering the lens shift possibilities. When the screen position is fixed Projector Placement Vertical center of screen Center of lens Screen When the projector position is fixed 100% Shift range 100%...
-
Page 18: Connections
Connections Before connecting to the projector Read and follow the operating and connecting instructions of each peripheral device. The peripheral devices must be turned off. Use cables that match each peripheral device to be connected. Confirm the type of video signals. See “List of compatible signals” on page 50. Audio cables must be connected from each peripheral device directly to the audio reproduction system. -
Page 19: Switching The Projector On/Off
Switching the projector on/off Power cord Connecting Disconnecting 1. Make sure the shape of the power plug and the 1. Unplug the power cord from the wall outlet. AC IN terminal on the back of the projector match, 2. Depress the latch and slide the cover off. then push the plug all the way in. -
Page 20: Power Indicator
Switching the projector on/off Power indicator Power indicator informs you the status of the power. When the TEMP indicator is flashing, the power indicator will not light. Power indicator Indicator status Status No illumination or flashing The MAIN POWER button is switched off. The MAIN POWER button is switched on and the projector is in standby mode. -
Page 21: Switching On The Projector
Switching the projector on/off Switching on the projector Power indicator 1. Remove the lens cover from the lens. 3. Press the power button. 2. Switch the MAIN POWER button on. The power indicator lights up in green after flashing for a while. The power indicator lights up in red. -
Page 22: Projecting An Image
Projecting an image Selecting the input signal 1. Switch on the connected devices. NOTE: Press the play button of the required device. 2. Press the INPUT SELECT button to select the • AUTO SEARCH is ON as default and the signal from the connected devices is detected automatically. -
Page 23: Remote Control Operation
Remote control operation Operating range You can operate the projector with the remote control within the remote range 7 m (22'11"). Facing to the projector Ensure the remote control emitter is facing to the remote control signal receptor on front/back of the projector and press the required buttons to operate. -
Page 24: Loading A Saved Setting
Remote control operation Loading a saved setting You can access saved settings instantly. See 1. Select the required setting from MEMORY1 - 16. “MEMORY LOAD” on page 36. Undefined setting will not be displayed. 2. Press the ENTER button to activate the selected setting. - Page 25 Remote control operation Adjustment example 3. Adjust by pressing I H. Adjust the bottom line of the waveform to 0 % (0 or Project a commercial test signal for picture 7.5 IRE). adjustment on the screen and press the Setting range: -32 to +32 WAVEFORM button.
-
Page 26: Setting Your Own Color Profile
Remote control operation Setting your own color profile You can adjust a selected color individually and 3. Select a menu item and the I H to adjust each save and retrieve under the PICTURE MODE item level. setting. Press the COLOR MANAGEMENT The result box is displayed on the right of the cursor and shows the adjusted color. - Page 27 Remote control operation Saving a log setting as a profile Deleting the saved profiles Return to the COLOR MANAGEMENT menu and You can delete the profiles from PROFILE save the stored log as a profile. Make sure that the DELETE menu. PICTURE MODE is not switched.
-
Page 28: Resetting To The Factory Default Settings
Remote control operation Resetting to the factory default settings You can reset most of the customized settings NOTE: to the factory defaults by pressing DEFAULT • Some menu items are not available to reset by pressing button of the remote control. Display the the DEFAULT button. -
Page 29: Settings
Menu Navigation Navigating through the MENU Displaying the main menu Operating procedure Press the MENU button to display the main 1. Press F G to scroll to the required main menu menu and the operating guidance. item and press the ENTER button to select. The selected item is highlighted in orange and the sub-menu is displayed on the right. -
Page 30: Main Menu And Sub-Menu
Menu Navigation Main menu and sub-menu The menu options are structured and categorized. You can navigate through the menu with F G H I buttons. See “Menu Navigation” on page 29. NOTE: • The underlined items are factory default settings. •... -
Page 31: Lens Control
Menu Navigation OPTION OVER SCAN page 39 KEYSTONE page 39 INPUT GUIDE page 43 (Default: 0) DETAILED SIMPLE AUTO SETUP page 39 OSD DESIGN page 43 TYPE1 TYPE2 LANGUAGE TYPE3 OSD POSITION page 43 UPPER LEFT UPPER CENTER UPPER RIGHT CENTER LOWER LEFT LOWER CENTER... -
Page 32: Picture Menu
PICTURE menu CONTRAST Remote control Control panel You can adjust the contrast of the projected image. Adjust the BRIGHTNESS in advance if necessary. Lower Higher See “Navigating through the MENU” on page 29. Setting range: -64 to +64 See “Main menu and sub-menu” on page 30. BRIGHTNESS PICTURE MODE You can adjust the brightness of the projected image. -
Page 33: Color Temperature
PICTURE menu MONITOR POSITION COLOR TEMPERATURE When the FULL SCAN is selected, press F G I You can adjust the white balance of the projected image. H to adjust the position of the monitor. See “Adjusting the signal condition with a waveform” on page 24. -
Page 34: Advanced Menu
PICTURE menu Adjusting the image in a split window ADVANCED MENU 1. Select AREA SELECT and press the ENTER button. You can perform more detailed image adjustment The image will be frozen and the area cursor will be manually. displayed. GAMMA You can adjust linear intensity at 3 levels. -
Page 35: Color Management
PICTURE menu MPEG NR DETAIL CLARITY You can adjust the automatic noise reduction You can switch the automatic detail clarity system system level for MPEG format images. The system on/off. minimise block noise and mosquito noise to Active OFF: Deactive eliminate jagged edges, providing an overall smoother image. -
Page 36: Memory Save
PICTURE menu MEMORY SAVE MEMORY EDIT You can save and name the adjusted PICTURE menu You can edit the named memory settings. settings for instant access from MEMORY LOAD menu. Deleting a memory setting 1. Adjust the items in PICTURE menu. 1. -
Page 37: Position Menu
POSITION menu CLOCK PHASE Remote control Control panel If you require further adjustment for the same reason as the DOT CLOCK adjustment, you can fine adjust the timing of the clock. Press I H to adjust. (Available with signals from COMPUTER IN/COMPONENT IN only) NOTE: See “Navigating through the MENU”... - Page 38 POSITION menu Aspect ratio options and projection example If you apply the aspect ratio options to the projected image, the result will be as follows. The result may differ due to the input signals. See “Switching the aspect ratio” on page 24. VIDEO/S-VIDEO/COMPONENT Not available with 1 125 (1 080)/50i, 1 125 (1 080)/60i, 1 125 (1 080)/50p, 1 125 (1 080)/60p, 1 125 (1 080)/ 24p, 750 (720)/50p and 750 (720)/60p signals.
-
Page 39: Wss
POSITION menu KEYSTONE WSS (Wide Screen Signalling) detects if a PAL/ If the projector is aligned non-perpendicularly to the 625p (576p)/625i (576i) signal is input and that signal screen, or if the projection screen has an angled surface, has an identification signal, and switch the aspect ratio you can correct the keystone vertically. -
Page 40: Lens Control
LENS CONTROL LENS MEMORY LOAD Remote control Control panel You can access the saved lens control settings instantly. 1. Select a setting from LENS MEMORY 1 - 3. 2. Press the ENTER button to activate. NOTE: • The option that contains no saved adjustment will not See “Navigating through the MENU”... -
Page 41: Lens Memory Edit
LENS CONTROL LENS MEMORY EDIT H-AREA POSITION You can edit named lens memory settings. You can move the frame area horizontally, such as aligning the right or left frame edge to the screen edge. Deleting a memory setting Press I H to move the frame. 1. -
Page 42: Function Button
FUNCTION BUTTON Assignable functions Remote control Control panel Functions Refer HDMI 1 IN HDMI 2 IN HDMI 3 IN COMPUTER IN page 28 COMPONENT 1 IN See “Navigating through the MENU” on page 29. COMPONENT 2 IN See “Main menu and sub-menu” on page 30. S-VIDEO IN VIDEO IN BUTTON... -
Page 43: Option Menu
OPTION menu BACK COLOR Remote control Control panel You can choose a screen color from BLUE or BLACK for when the projector is in idle. Press I H to select. STARTUP LOGO You can switch the logo on/off that is displayed when See “Navigating through the MENU”... -
Page 44: Installation
OPTION menu INSTALLATION HIGH ALTITUDE MODE When installing the projector, select the projection If you use the projector at high elevation, the HIGH method according to the projector position. Press I H ALTITUDE MODE setting need to be ON to set the fan to cycle through the options. -
Page 45: Temp And Lamp Indicators
TEMP and LAMP Indicators Managing the indicated problems If a problem should occur with the projector, the LAMP and/or TEMP indicators will inform you. Manage the indicated problems as follows. 1. Confirm the status of all indicators and projector, and switch off the projector in proper way. -
Page 46: Care And Replacement
Care and Replacement Cleaning the projector Before cleaning the projector Switch off the MAIN POWER switch in proper way and disconnect the power plug from the wall outlet. Unplug all the cables from the projector. Cleaning the outer surface of the projector Wipe off dirt and dust gently with a soft cloth. -
Page 47: Replacing The Lamp Unit
Care and Replacement Replacing the lamp unit Before replacing the lamp unit Switch off the MAIN POWER button in proper way and disconnect the power plug from the wall outlet. Wait for more than 1 hour and make sure the lamp unit and the surroundings are cooled enough. Unplug all the cables from the projector. -
Page 48: Resetting The Lamp Runtime
Care and Replacement Removing and replacing the lamp unit 1. Use a Phillips screwdriver to loosen the 3 lamp unit 4. Replace the new lamp unit while making sure that fixing screws until the screws turn freely. the direction of insertion is correct. Press the top of the lamp unit and make sure the unit Lamp unit is installed securely. -
Page 49: Troubleshooting
Troubleshooting Should any problem persist, contact your dealer. Reference Problem Cause page The power cord may not be connected. The MAIN POWER switch is turned off. No electric supply is at the wall outlet. Power does not turn on. TEMP indicator is lit or flashes. LAMP indicator is lit or flashes. -
Page 50: Technical Information
Technical Information List of compatible signals Scanning Display Dot clock frequency Picture resolution Mode Display frequency Terminals quality (MHz) (dots) V (Hz) (kHz) NTSC/NTSC 4.43/ 720 x 480i 15.7 59.9 PAL-M/PAL60 VIDEO/S-VIDEO PAL/PAL-N/SECAM 720 x 576i 15.6 50.0 525i (480i) 525i 720 x 480i 15.7... -
Page 51: Serial Terminal
Technical Information Serial terminal The serial connector which is on the connector panel of the projector conforms to the RS-232C interface specification, so that the projector can be controlled by a personal computer which is connected to this connecter. Connection D-sub 9 pin (male) Serial terminal (female) Computer... -
Page 52: Communication Settings
Technical Information Communication settings Signal level RS-232C Character length 8 bits Sync. method Asynchronous Stop bit 1 bit Baud rate 9 600 bps X parameter None Parity None S parameter None Control commands Command Control contents Remarks In standby mode, all commands other than the PON command are ignored. POWER ON The PON command is ignored during lamp ON control. -
Page 53: Inquiry Commands
Technical Information Inquiry commands Command Control contents Parameter Power status 000 = OFF 001 = ON FREEZE status 0 = OFF 1 = ON CP1 = COMPONENT1 IN CP2 = COMPONENT2 IN SVD = S-VIDEO IN VID = VIDEO IN INPUT signal status HD1 = HDMI1 IN HD2 = HDMI2 IN... -
Page 54: Specifications
Technical Information Specifications Power supply AC 100 - 240 V 50 Hz/60 Hz Less than 240 W Power consumption During standby (when fan is stopped): 0.08 W (at 220 V) Amps 3.0 A - 1.6 A Panel size (diagonal) 0.74 type (17.78 mm) Aspect ratio 16 : 9 LCD panel... - Page 55 Technical Information Ω S-VIDEO IN Single - line, Mini DIN 4p Y: 1.0 V [p-p], C: 0.286 V [p-p], 75 Ω VIDEO IN Single - line, RCA pin jack1.0 V [p-p], 75 Single - line, D - sub HD 15-pin (female) Selectable for input and output by menu operation.
-
Page 56: Ceiling Mount Bracket Safeguards
Technical Information Ceiling mount bracket safeguards The projector and the ceiling mount bracket are designed for sufficiently safety however, make sure the safety cable provided with the projector is installed and attached to the bottom of the projector when mounting on the ceiling for safety and security. -
Page 57: Dimensions
Technical Information Dimensions Unit: mm 300 (11-23/32) 15 (19/6) 147 (5 -25/32) 60 (2 -5/16) 230 (9 -1/32) 17 (-21/32) 460 (18 -3/32) Trademark acknowledgements VGA and XGA are trademarks of International Business Machines Corporation. S-VGA is a registered trademark of the Video Electronics Standards Association. HDMI, the HDMI logo and High-Definition Multimedia Interface are trademarks or registered trademarks of HDMI Licensing LLC. -
Page 58: Index
Index ..........13, 15 Front leg adjusters FUNCTION ..............13 AC IN ........11 Remote control button ..............10 Accessories ........28 Remote control function ...........34 ADVANCED MENU FUNCTION BUTTON ............12 Air exhaust port ............42 Main menu ..............12 Air filter ........11 Remote control buttons ............46 Replacing... - Page 59 Index MENU SERIAL ..........12 ............51 Control panel button Basic format .........11 ........... 51 Remote control button Cable specifications ........29 ........52 Remote control function Communication settings ............51 Menu Connection ............30 ..........52 Main menu Control commands ............29 ..........53 Navigation Inquiry commands ............30...
- Page 60 Printed in Japan S0908-2108C...