
Related Manuals for Asus O!PLAY TV PRO

Summary of Contents for Asus O!PLAY TV PRO
-
Page 1: User Manual
Smart TV Set Top Box O!PLAY TV PRO User Manual E7161_O!Play_TV_PRO_Manual_V2.in1 1 3/2/12 10:36:14 AM... - Page 2 Product warranty or service will not be extended if: (1) the product is repaired, modified or altered, unless such repair, modification of alteration is authorized in writing by ASUS; or (2) the serial number of the product is defaced or missing.
-
Page 3: Table Of Contents
Contents Safety information ..................vi Warning labels ..................vi Important Safety Instructions ............vii CE Mark Warning ..................viii CE marking for devices without wireless LAN/Bluetooth ....viii CE marking for devices with wireless LAN/ Bluetooth ....viii Wireless Operation Channel for Different Domains ......viii Certification and Compliance .............. - Page 4 Connecting to a wireless local area network (WLAN) ....2-4 Configuring the network clients ............2-4 Sharing files over the network ..............2-7 Sharing files under Windows XP OS ..........2-7 ® Sharing files under Windows Vista OS ......... 2-8 ®...
- Page 5 USB storage device ............... 4-4 Remote Control ................4-4 Firmware Updates ................4-4 Wired, Wi-Fi, and Internet connections .......... 4-5 Operation/function failure ............... 4-7 Appendices Notices .......................A-1 GNU General Public License ..............A-2 ASUS contact information ...............A-8 E7161_O!Play_TV_PRO_Manual_V2.in5 5 3/2/12 10:36:15 AM...
-
Page 6: Safety Information
Safety information Use only a dry cloth to clean the device. DO NOT place on uneven DO NOT expose to or use near liquids, rain, or or unstable work surfaces. Seek servicing if the casing moisture. has been damaged. Refer all servicing to qualified service personnel. -
Page 7: Important Safety Instructions
Important Safety Instructions Read these instructions. Keep these instructions. Heed all warnings. Follow all instructions. Do not use this apparatus near water. Clean only with dry cloth. Do not block any ventilation openings. Install in accordance with the manufacturer’s instructions. Do not install near any heat sources such as radiators, heat registers, stoves, or other apparatus (including amplifiers) that produce heat. -
Page 8: Ce Mark Warning
CE Mark Warning CE marking for devices without wireless LAN/Bluetooth The shipped version of this device complies with the requirements of the EEC directives 2004/108/EC “Electromagnetic compatibility” and 2006/95/EC “Low voltage directive”. CE marking for devices with wireless LAN/ Bluetooth This equipment complies with the requirements of Directive 1999/5/EC of the European Parliament and Commission from 9 March, 1999 governing Radio and Telecommunications Equipment and mutual recognition of conformity. -
Page 9: License Notice And Trademark Acknowledgement For Dolby Digital
Chapter 1: Getting started Provides the basic information about your ASUS O!PLAY TV PRO. • Chapter 2: Connecting to a network Provides the information on connecting your ASUS O!PLAY TV PRO to a network. • Chapter 3: Using your O!PLAY TV PRO Provides information on using your ASUS O!PLAY TV PRO. -
Page 10: Conventions Used In This Guide
Download the latest firmwares, drivers, and utilities from the ASUS Support site at http://support.asus.com/. ASUS Forum Get the latest news and information about this product from the ASUS Forum site at http://vip.asus.com/forum/. Optional documentation Your product package may include optional documentation, such as warranty flyers, that may have been added by your dealer. -
Page 11: Chapter 1: Getting Started
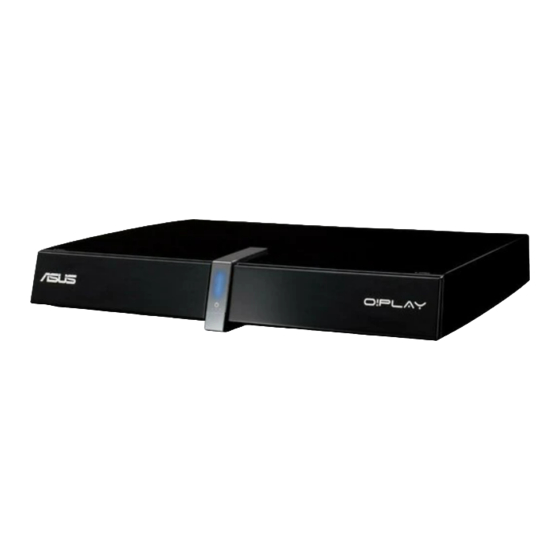
Welcome Thank you for buying the ASUS O!PLAY TV PRO! ASUS O!PLAY TV PRO allows you to enjoy digital audio/video (DVBT) streaming on your TV; view and record TV program guides; share your recorded TV programs and media files on media sites such as Facebook and Youtube; access popular Internet sites;... - Page 12 I/O ports 1 x Power button 1 x Power (DC-In) port 1 x USB 3.0 port 2 x USB 2.0 ports 1 x USB 3.0 port (PC link) 1 x Gigabit LAN port (1000Mbps) 1 x HDMI port (HDMI 1.4) 1 x Component (Y.Pb.Pr) port 1 x Analog video output 1 x Analog audio output...
-
Page 13: Package Contents
Quick Start Guide Support CD (User HDMI cable (Optional)* Quick Start Guide Manual) * Some items may be included in the package depending on the country or region. ASUS O!PLAY TV PRO Smart TV Set Top Box E7161_O!Play_TV_PRO_Manual_V2.in3 3 3/2/12 10:36:30 AM... -
Page 14: Getting To Know Your O!Play Tv Pro
Getting to know your O!PLAY TV PRO System requirements • High-definition TV (HDTV), standard TV, or HDMI monitor • Storage device (USB flash drive / USB HDD) • Memory card (SD/MMC/MS/xD) • RJ-45 cable to connect to a home or an office network ( Optional •... -
Page 15: Rear Panel
Insert the bundled antenna cable into this port. If you use the loop through cable, you do not need to use the antenna cable at the same time. ASUS O!PLAY TV PRO Smart TV Set Top Box E7161_O!Play_TV_PRO_Manual_V2.in5 5 3/2/12 10:36:32 AM... -
Page 16: Remote Control
RF-out port (DVBT Antenna output) Connect one end the bundled loop-through cable into this port and the other end to the RF-in port of your TV. Power (DC-In) input Insert the power adapter into this port. USB 2.0 port Connect a USB 2.0 device into this port. Remote control Use the remote control to power on/off the O!PLAY TV PRO, browse through menus, and select the media file to play, view, or listen to. - Page 17 Press the left/right keys to move through the items in a submenu. Press OK to confirm the selection. Mute Press to disable audio output. Volume up Increases the volume. ASUS O!PLAY TV PRO Smart TV Set Top Box E7161_O!Play_TV_PRO_Manual_V2.in7 7 3/2/12 10:36:36 AM...
- Page 18 Volume down Decreases the volume. Music Shuffle Press to group all your music files in your storage device and then play the music files randomly. Record Press to record a TV program. Rewind Press to rewind the playback. Slow motion Press to playback the currently playing movie in slow motion.
- Page 19 Press to change the language of the virtual keyboard. Eject Press to eject the disc from the external optical disk drive. Power on/off Turn the O!PLAY TV PRO on or off ASUS O!PLAY TV PRO Smart TV Set Top Box E7161_O!Play_TV_PRO_Manual_V2.in9 9 3/2/12 10:36:40 AM...
-
Page 20: Getting Your O!Play Tv Pro Ready
• Go to Setup > System > Scan Storage, and click ON. • Go to Setup > System > Scan Storage > Rescan Storage. • ASUS will not be held liable for any damage/malfunction caused by improper installation of the hard disk drive. - Page 21 HDD bay located on the front panel of your O!PLAY TV PRO. Push back the HDD tray’s bracket lock to secure the hard disk drive in place. ASUS O!PLAY TV PRO Smart TV Set Top Box 1-11 E7161_O!Play_TV_PRO_Manual_V2.in11 11 3/2/12 10:36:41 AM...
-
Page 22: Connecting The Power Adapter
Connecting the power adapter To connect the power adapter: Connect the AC adapter to the DC-in port at the back of your O!PLAY TV PRO. Connect the AC adapter to a power source. Connecting devices to your O!PLAY TV PRO To connect devices to your O!PLAY TV PRO: Do any of the following to connect a display to your O!PLAY TV PRO: •... - Page 23 Insert a memory card such as SD/MMC/MS/xD cards into the card slot in the front panel of your O!PLAY TV PRO. Use an audio cable to connect your audio system to your O!PLAY TV PRO. ASUS O!PLAY TV PRO Smart TV Set Top Box 1-13 E7161_O!Play_TV_PRO_Manual_V2.in13 13...
-
Page 24: Setting Up Your O!Play Tv Pro For Digital Streaming
Setting up your O!PLAY TV PRO for digital streaming Your O!PLAY TV PRO allows you to enjoy high-definition digital audio/video (DVBT) streaming on your TV in .mpeg format. Before using your O!PLAY TV PRO’s digital streaming function, check with your country’s telecommunications agency or your local TV stations if DVB-T (Digital Video Broadcasting - Terrestrial) signals are available in your country or region. -
Page 25: Chapter 2: Connecting To A Network
Chapter 2 Connecting to a network Connecting to a network Wired connection Use an RJ-45 cable to connect your O!PLAY TV PRO to a home or an office network. DC IN EZSETUP RESET ADSL LAN4 LAN3 LAN2 LAN1 To connect to your network: Connect one end of the RJ-45 cable to the LAN port at the back of your O!PLAY TV PRO and the other end to the LAN port of the router. - Page 26 From the Home screen, press From the Home screen, press the left/right keys left/right keys navigate to Setup, then press Select Network > Wired LAN Setup and press Select either DHCP IP (AUTO) or FIX IP (MANUAL) as your setup type: Select either •...
-
Page 27: Wireless Connection
Ensure that the folder containing the files that you want to access to is shared. For more details, refer to the section Sharing files over the network in this chapter. ASUS O!PLAY TV PRO Smart TV Set Top Box E7161_O!Play_TV_PRO_Manual_V2.in3 3 3/2/12 10:36:53 AM... -
Page 28: Connecting To A Wireless Local Area Network (Wlan)
Configuring the network clients Setting an IP address for wired or wireless client To access the ASUS O!PLAY TV PRO, you must have the correct TCP/IP settings on your wired or wireless clients or computers. Ensure that the clients’ IP addresses are within the same workgroup and subnet as the O!PLAY TV PRO. - Page 29 ® Click Start > Control Panel > Network and Sharing Center. Right-click Local Area Connection then select Properties. Select Internet Protocol Version 4(TCP/IPv4), then click Properties. ASUS O!PLAY TV PRO Smart TV Set Top Box E7161_O!Play_TV_PRO_Manual_V2.in5 5 3/2/12 10:36:55 AM...
- Page 30 Select Obtain an IP address automatically if you want the IP settings to be assigned automatically. Click OK when done. Windows 7 OS ® Click Start > Control Panel > Network and Internet > Network and Sharing Center. In the View your active networks item, Click Local Area Connection then select Properties.
-
Page 31: Sharing Files Over The Network
XP OS: ® On your computer, select the folder containing the files that you want to share. Right-click the selected folder, and select Sharing and Security. ASUS O!PLAY TV PRO Smart TV Set Top Box E7161_O!Play_TV_PRO_Manual_V2.in7 7 3/2/12 10:36:57 AM... -
Page 32: Sharing Files Under Windows ® Vista Os
Tick Share this folder. If you want to set permissions for the network users, click Permissions. Click Apply when done. A hand icon appears on the folder indicating that the folder’s contents are shared over the network. Sharing files under Windows Vista OS ®... - Page 33 • Turn on sharing so anyone with network access can open, change, and create files • Turn off sharing (people logged on to this computer can still access this folder) When done, click Apply. ASUS O!PLAY TV PRO Smart TV Set Top Box E7161_O!Play_TV_PRO_Manual_V2.in9 9 3/2/12 10:36:59 AM...
-
Page 34: Sharing Files Under Windows ® 7 Os
Sharing files under Windows 7 OS ® To configure your computer to allow folders to be shared: Click Start > Control Panel > Network and Internet > Network and Sharing Center > Choose homegroup and sharing options > Change advanced sharing settings.. - Page 35 Check the Share this folder item, then click Permissions. Select the network user that you want to share files, and set the access control options. ASUS O!PLAY TV PRO Smart TV Set Top Box 2-11 E7161_O!Play_TV_PRO_Manual_V2.in11 11 3/2/12 10:37:00 AM...
-
Page 36: Sharing Files Under Mac Os X 10.5.Xx
Sharing files under Mac OS X 10.5.xx To share a folder under Mac OS: Choose Apple menu > System Preferences. Click Sharing. Click the + icon to display the available folders. Navigate to the folder that you want to share. Select the user account Everyone. -
Page 37: Sharing Files Under Linux Os
Allow all users, and Share Enabled. Click OK when done. A hand icon appears on the folder indicating that the folder’s contents are shared over the network. ASUS O!PLAY TV PRO Smart TV Set Top Box 2-13 E7161_O!Play_TV_PRO_Manual_V2.in13 13 3/2/12 10:37:01 AM... - Page 38 Chapter 2: Network setup and services 2-14 E7161_O!Play_TV_PRO_Manual_V2.in14 14 3/2/12 10:37:01 AM...
-
Page 39: Chapter 3: Using Your O!Play Tv Pro
Chapter 3 Using your O!PLAY TV PRO The Home screen The Home screen includes these main options: Setup, DTV, Schedule REC, File Manager, Movies, Music, Photo,Online Media, and NAS. File Manager allows you to view all your media files in your storage devices. E7161_O!Play_TV_PRO_Manual_V2.in1 1 3/2/12 10:37:01 AM... -
Page 40: Configuring The O!Play Tv Pro Settings
Configuring the O!PLAY TV PRO settings Configuring the system settings The system setting menu allows you to configure the system settings such as Menu Language, Text Encoding format, and other settings.. To configure the system settings: From the Home screen, press the left/right keys left/right keys to navigate to Setup, then... -
Page 41: Configuring The Audio Settings
Lip Sync: Select this setting to set the lip sync function to Auto, Manual, • or Off. Press the right key Press the right key right key to display the option for your selected audio setting. ASUS O!PLAY TV PRO Smart TV Set Top Box E7161_O!Play_TV_PRO_Manual_V2.in3 3 3/2/12 10:37:04 AM... -
Page 42: Configuring The Video Settings
Configuring the video settings The video setting menu allows you to configure the video settings such as Aspect Ratio, TV System, Video Zoom, Digital Noise Reduction, and 1080P 24Hz. To configure the video settings: From the Home screen, press the left/right keys left/right keys to navigate to Setup, then press... - Page 43 Timeshift: Allows you to pause and record the digital TV program from • the background. For more details, refer to the section Streaming Digital TV programs. ASUS O!PLAY TV PRO Smart TV Set Top Box E7161_O!Play_TV_PRO_Manual_V2.in5 5 3/2/12 10:37:06 AM...
-
Page 44: Playing A Movie
Playing a movie Movie control buttons on the remote control Button Function Press to display the movie’s file information. Press to return to the previous screen. Press to toggle between playback and pause. Press to rewind the playback. Press repeatedly to change the rewinding speed to x1.5, x2, x4, x8, x16, x32, or normal speed (x1) Press to forward the playback. -
Page 45: Playing A Movie
Press to play the movie. You may press the Option key choose the movie effect. ASUS O!PLAY TV PRO Smart TV Set Top Box E7161_O!Play_TV_PRO_Manual_V2.in7 7 3/2/12 10:37:09 AM... -
Page 46: Playing Music
Playing music Movie control buttons on the remote control Button Function Press to display the music’s file information. Press to return to the previous screen. Press to toggle between playback and pause. Press to rewind the playback. Press repeatedly to change the rewinding speed to x1.5, x2, x4, x8, x16, x32, or normal speed (x1) Press to forward the playback. -
Page 47: Playing A Music File
Press the up/down keys up/down keys to select from any of these playback options: Repeat Off, Repeat On, Repeat All, and Shuffle Loop. Press confirm the selection. ASUS O!PLAY TV PRO Smart TV Set Top Box E7161_O!Play_TV_PRO_Manual_V2.in9 9 3/2/12 10:37:12 AM... -
Page 48: Viewing Photos
Viewing photos Photo control buttons on the remote control Button Function Press to display the photo’s file information. Press to return to the previous screen. Press to toggle between playback and pause. Press to rewind the playback. Press repeatedly to change the rewinding speed to x1.5, x2, x4, x8, x16, x32, or normal speed (x1) Press to forward the playback. -
Page 49: Viewing Photos
Home screen and then go to Photo to start the Press photo slideshow. The slideshow plays with the background music. Press instead of while playing music files. Otherwise, the background music will not play. ASUS O!PLAY TV PRO Smart TV Set Top Box 3-11 E7161_O!Play_TV_PRO_Manual_V2.in11 11 3/2/12 10:37:15 AM... -
Page 50: Configuring The Photo Playback Settings
Configuring the photo playback settings The photo playback setting menu allows you to configure the photo settings such as photo rotation, slideshow timing, slideshow transition effect, Ken Burns effect, Repeat options, and Shuffle Loop. To configure the photo playback settings: During playback, press launch the photo playback setting menu. -
Page 51: Streaming Online Media
Flickr, Picasa, RSS News, Mediafly, Yahoo Stock, Weather, Podcast, and others. The online content is constantly added and updated. Visit the ASUS website at http://www.asus.com for the latest information. • Ensure that your O!PLAY TV PRO is connected to the Internet. However, the network connection might be disabled if the internet link is abnormal or blocked. -
Page 52: Online Streaming From Facebook
Online streaming from Facebook Your O!PLAY TV PRO provides you access to Facebook, allowing you to stream photos and videos from your Facebook account to your external display. It also allows you to publish recorded videos from your O!PLAY TV PRO to your Facebook account. -
Page 53: Online Streaming From Dailymotion
Guide (EPG). • While the digital TV program is running, press the Option key to launch the submenu list. From the list, select EPG and press ASUS O!PLAY TV PRO Smart TV Set Top Box 3-15 E7161_O!Play_TV_PRO_Manual_V2.in15 15 3/2/12 10:37:23 AM... -
Page 54: Instant Recording Of A Digital Tv Program
Instant recording of a digital TV program To instantly record a digital TV program, do any of these steps: • While the digital TV program is running, press the Record key to start recording. If you want set the total recording time, press the Record key again for about three seconds, then press the Record key... -
Page 55: Viewing A Recorded Tv Program
Visit the official websites of Youtube and Facebook to know the file size limitation of media contents that you can download to these social networking sites. ASUS O!PLAY TV PRO Smart TV Set Top Box 3-17 E7161_O!Play_TV_PRO_Manual_V2.in17 17 3/2/12 10:37:26 AM... -
Page 56: Using Timeshift
Using Timeshift The Timeshift function allows you to record or save a running digital TV program to the internal hard disk drive. • Before using the Timeshift function, ensure the following: • There is enough space in the internal hard disk drive to save the recorded TV programs. -
Page 57: Managing Your Files
When you have entered the new name, navigate to the OK button on the virtual keyboard to confirm the new file or folder name. ASUS O!PLAY TV PRO Smart TV Set Top Box 3-19 E7161_O!Play_TV_PRO_Manual_V2.in19 19... -
Page 58: Using O!Direct
Follow the onscreen instructions to complete the installation. • If your O!PLAY TV PRO current firmware version does not include O!Direct, download the O!Direct utility. from the ASUS Support site at http://support.asus.com • O!Direct is only available for computers running on Windows ®... -
Page 59: Using O!Mediashare
Using O!MediaShare You can easily share and stream media contents from your Tablet or Smartphone device to a high-definition display via O!PLAY TV PRO. Visit Android market or Apple market to download the free ASUS exclusive “O!MediaShare” application. To use O!MediaShare... -
Page 60: Using Autoplay
Using AutoPlay Your O!PLAY TV PRO allows you to automatically play videos stored on a USB storage device or on a memory card without entering O!PLAY TV PRO’s user interface. To use autoplay: Create a folder named AutoPlay in a USB storage device or in a memory card. - Page 61 This server works like any Bittorrent client you may connect from Download your PC. BT Info This presents the detailed information about all BT functions. ASUS O!PLAY TV PRO Smart TV Set Top Box 3-23 E7161_O!Play_TV_PRO_Manual_V2.in23 23 3/2/12 10:37:33 AM...
- Page 62 Chapter 3: Using your O!PLAY TV PRO 3-24 E7161_O!Play_TV_PRO_Manual_V2.in24 24 3/2/12 10:37:33 AM...
-
Page 63: Chapter 4: Troubleshooting
Troubleshooting This section provides answers to some common problems that you may encounter while installing or using the ASUS O!PLAY TV PRO. These problems require simple troubleshooting that you can perform by yourself. Contact ASUS Technical Support if you encounter problems not mentioned in this section. - Page 64 • Turn off your O!PLAY TV PRO and wait for a few minutes before turning it on again or press the reset button at the back panel. • Ensure that the HDMI resolution of your TV supports 720p, 1080i, or 1080p.
-
Page 65: Audio
If a file is not displayed on the screen, it most likely uses an unsupported bit rate or sample rate. Only use files with supported formats, bit rates, and sample rates. ASUS O!PLAY TV PRO E7161_O!Play_TV_PRO_Manual_V2.in3 3 3/2/12 10:37:34 AM... -
Page 66: Usb Storage Device
USB storage device Q1. I cannot find any of my music, movie, or photo files. • Ensure that your USB storage device (USB Flash/USB HDD ) is not in standby mode. • Ensure that the files are supported file formats. Q2. -
Page 67: Wired, Wi-Fi, And Internet Connections
1. Visit ASUS support site (Drivers and Download) to download the latest firmware: http://support.asus.com/download/download. aspx?SLanguage=en-us • Use an USB flash drive loaded with latest firmware and follow the instructions (Attached PDF) to update. • If you are still unable to update the firmware, reset the system and perform the updating process again. - Page 68 Contact your domain administrator or Microsoft Support for assistance. Q9. Can I access other online media websites? No. You can only access the online media services offered on your ASUS O!PLAY TV PRO. Please note that the content is constantly added and updated.
-
Page 69: Operation/Function Failure
Disconnect the AC adapter from the power source, then plug it in again. • Using a pointed object, press the reset button located at the rear panel. • If you still encounter the same problem, contact the ASUS Technical Support. ASUS O!PLAY TV PRO E7161_O!Play_TV_PRO_Manual_V2.in7 7... - Page 70 Chapter 4: Troubleshooting E7161_O!Play_TV_PRO_Manual_V2.in8 8 3/2/12 10:37:35 AM...
-
Page 71: Appendices
Notices ASUS Recycling/Takeback Services ASUS recycling and takeback programs come from our commitment to the highest standards for protecting our environment. We believe in providing solutions for you to be able to responsibly recycle our products, batteries, other components, as well as the packaging materials. -
Page 72: Gnu General Public License
• Reorient or relocate the receiving antenna. • Increase the separation between the equipment and receiver. • Connect the equipment to an outlet on a circuit different from that to which the receiver is connected. • Consult the dealer or an experienced radio/TV technician for help. Any changes or modifications to this unit not expressly approved by the party responsible for compliance could void the user’s authority to operate this equipment. - Page 73 Program or a portion of it, either verbatim or with modifications and/or translated into another language. (Hereinafter, translation is included without limitation in the term “modification”.) Each licensee is addressed as “you”. ASUS O!PLAY TV PRO E7161_O!Play_TV_PRO_Manual_V2.in3 3 3/2/12 10:37:36 AM...
- Page 74 Activities other than copying, distribution and modification are not covered by this License; they are outside its scope. The act of running the Program is not restricted, and the output from the Program is covered only if its contents constitute a work based on the Program (independent of having been made by running the Program).
- Page 75 License. However, parties who have received copies, or rights, from you under this License will not have their licenses terminated so long as such parties remain in full compliance. ASUS O!PLAY TV PRO E7161_O!Play_TV_PRO_Manual_V2.in5 5 3/2/12 10:37:37 AM...
- Page 76 You are not required to accept this License, since you have not signed it. However, nothing else grants you permission to modify or distribute the Program or its derivative works. These actions are prohibited by law if you do not accept this License. Therefore, by modifying or distributing the Program (or any work based on the Program), you indicate your acceptance of this License to do so, and all its terms and conditions for copying, distributing or modifying the Program or works based on it.
- Page 77 PARTIES OR A FAILURE OF THE PROGRAM TO OPERATE WITH ANY OTHER PROGRAMS), EVEN IF SUCH HOLDER OR OTHER PARTY HAS BEEN ADVISED OF THE POSSIBILITY OF SUCH DAMAGES. END OF TERMS AND CONDITIONS ASUS O!PLAY TV PRO E7161_O!Play_TV_PRO_Manual_V2.in7 7 3/2/12 10:37:37 AM...
-
Page 78: Asus Contact Information
+1-510-739-3777 +1-510-608-4555 Web site usa.asus.com Technical Support Telephone +1-812-282-2787 Support fax +1-812-284-0883 Online support support.asus.com ASUS COMPUTER GmbH (Germany and Austria) Address Harkort Str. 21-23, D-40880 Ratingen, Germany +49-2102-959911 Web site www.asus.de Online contact www.asus.de/sales Technical Support Component Telephone +49-1805-010923*...