Advertisement
Available languages
Available languages
Operator's
Manual
3/4 - 13/" Length
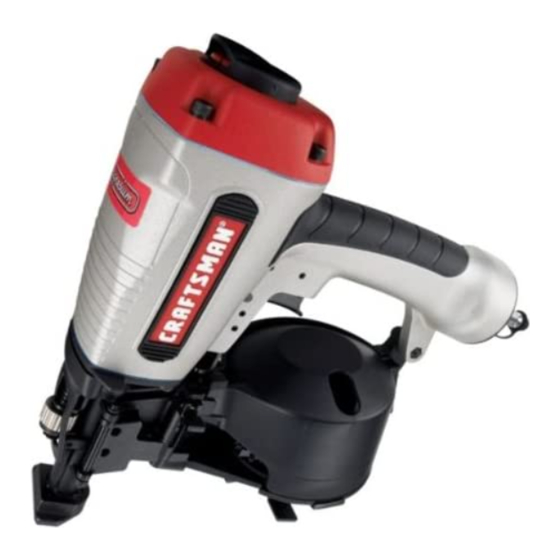
ROOFING NAILER
Model No.
351.1 81800
CAUTION:
Read and follow
all Safety Rules and Operating
Instructions before First Use
of this Product. Keep this
manual with tool.
Sears, Roebuck and Co., Hoffman Estates, IL 60179 U.S.A.
www.sears.com/cra ftsman
21031.00 Draft (06/09/03)
• Safety
• Operation
• Maintenance
• Parts List
• EspaSol
Advertisement
Table of Contents

Related Manuals for Craftsman 18180 - to Coil Roofing Nailer


Summary of Contents for Craftsman 18180 - to Coil Roofing Nailer
- Page 1 Operator's Manual 3/4 - 13/" Length ROOFING NAILER Model No. 351.1 81800 CAUTION: Read and follow • Safety all Safety Rules and Operating • Operation Instructions before First Use • Maintenance of this Product. Keep this • Parts List manual with tool. •...
-
Page 2: Full One Year Warranty
• The tool must have a male, free-flow hose coupling so that all air pressure is removed from the tool when the coupling joint is disconnected. Failure to use proper coupling could Warranty ......... cause accidental discharge, possibly causing injury. Safety Rules ........ -
Page 3: Specifications
150 PSI or 150% DESCRIPTION of maximum system pressure, whichever is greater. The Craftsman Roofing Nailer drives full size, full head roofing • Do not mount swivel connector in air supply line. nails from _/,"to 13/, " long. Magazine holds 120 nails in a coil •... - Page 4 The nail holder must be set to the length of the nails being used. Pull up the spindle of the nail holder and rotate. The arrow indicator that corresponds to the nail size being used must be aligned with the notch in the magazine. Release holder spindle so that it locks in place (see Figure 3).
-
Page 5: Operating Pressure
The air tool is equipped with contact trip safety mechanism that disables tool unless contact trip (Fig. 7) is pushed against work. Hold body firmly and press contact trip on Exhaust workpiece where fastener is to be applied. Pull trigger to drive fastener into workpiece. -
Page 6: Rebuild Kits
Refer to Figure 10. LUBRICATION Lubricate tool daily with quality air tool oil. If no air line lubri- cator is used, place five or six drops of oil into air inlet cap (Figure 10, Key No. 33) of tool everyday. MAGAZINE AND PISTON-RAM •... - Page 7 SYMPTOM POSSIBLE CAUSE(S) CORRECTIVE ACTION Trigger cap leaks air 1. O-ring damaged 1. Check and replace damaged O-ring (Fig. 10, No. 32) 2. O-rings damaged 2. Check and replace damaged O-rings (Fig. 10, Nos. 21,23, 24, 26, 27, 30 and 32) Cap leaks air 1.
- Page 8 Model 351.1 81800 Figure 10 - Replacement Parts Illustration For Nailer _ _j23 • _e..J 24 _p--.-.- 26 i ._.._ 29 ;_ao ._.._ 32 12-..Q _.,,/ .,_..2 82...,_. <3> o¢" -qe-..-67 "_'_'77 59..----_ 64.._" 63.._. 4:, °_"'63...
- Page 9 PART NO. DESCRIPTION QTY. PART NO. DESCRIPTION QTY. 20904.00 Deflector 16232.00 Nose Gasket 05284.00 5-0.8 x 25mm Socket Head Bolt 17896.00 Ram Guide STD852005 5mm Lock Washer* 21047.00 Nose 21035.00 07482.00 5-0.8 x 18mm Socket Head Bolt 06050.00 13,8 x 2.4mm O-Ring 21048.00 Guard 21636.00...
- Page 10 3/4- 13/4"de Iongitud Utilice siempre proteccibn para los ofdos. El _rea de trabajo podrfa estar expuestaa niveles de ruido excesivoslos cuales CLAVADORA PARA TEJADO hardn necesariola utilizaci6nde protecci6npara los ofdos. Algunosentornosrequerirdnprotecci6npara la cabeza;utilice protecci6npara la cabeza conformea ANSI Z89.1. Modelo No. No alters ni modifique esta herramientade ningunamanera.
- Page 11 Se nscesita un sistema de filtro-reguladorqubricador, el cual La clavadorapara tejado Craftsman impulsa clavospara tejado deber& colocarseIo m_.scerca posible de la herramienta. Se de tamado y cabeza natural de '/," a 1'/," de pulgada de largo.
- Page 12 ADVERTENClA: El acoplamientohembra proporcionaun sello El sujetador de olavos deberd estar ajustado a la misma Ion- que evita la p_rdidade aire comprimidodel tanque del compre- gitud de los clavos que se utilizardn. Tire hacia arriba del sor cuandose encuentredesconectadodel acoplamientomacho. husillo def sujetador de clavos y gfrelo.
- Page 13 Realice la "Verificacidn del Mecanismode Seguridad" tel comose describe en la seccibn Mantenimiento (vdase la pdgina 14) antes de utilizer la herramienta pot primeray luego diariamente. La herramienta neumdtica estd equipada con un mecanismo de seguridad de disparo pot contacto que inhabilita la herra- mienta a menos qua el disparo por contacto (Fig.
- Page 14 DEFLECTOR DE ESCAPE El deflector de escape puede colocarse para apuntar en cualquier direoci6n (movimiento total de 360°). Vuelva a colo- car el deflector agarr&ndolo de manera firms y gir&ndolo Consulte la Figura 10 en la pdgina8. hacia la posici6n deseada (v_ase la Figura 8). LUBRICACION Lubrique la herramienta diariamente...
- Page 15 MEDIDAS CORRECTIVAS SINTOMA CAUSA(S) POSIBLE(S) Se fuga airs per la 1, Anillo O dai_ado 1. Revise y cambie los anillos O da_ados (Fig. 10, No. 32) tapa del gatillo 2. Anillos O daSados 2. Revise y cambie los anillos O dahados (Fig. 10, Nos. 21, 23, 24, 26, 27, 30 y 32) 1.
- Page 16 ® Registered Trademark / Trademark / su Service Mark of Sears, Roebuckand Co. ® Marca Registrada / Mama de FSbrica/ Marca de Serviciode Sears, Roebuck and CO. Marque de commerce / Marque ddpos_,e de Sears, Roebuckand Co. © Sears, Roebuckand Co.