Table of Contents
Advertisement
Available languages
Available languages
Section
Before You Start
01
About this manual
Operate this unit with the connected Pioneer
head unit. Instructions in this manual use
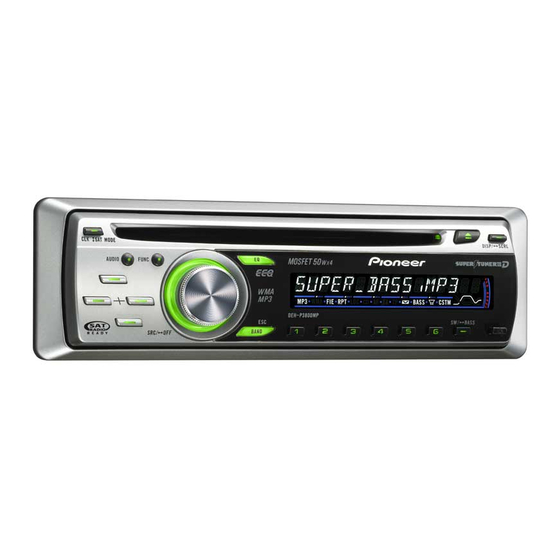
DEH-P4800MP as an example head unit.
When using other head units, refer to Operat-
ing with different Pioneer head units on this
page.
We recommend that you familiarize yourself
with the functions and their operation by read-
ing through the manual before you begin
using this unit.
Operating with different
Pioneer head units
Head units are divided into several groups;
find which group yours falls into and operate it
according to the corresponding function com-
patibility charts on the following pages.
! Select SIRIUS source when using this unit
with head units grouped 1 and 2. Select
EXTERNAL source to use with other head
units. For detailes about EXTERNAL source,
refer to the head unit's manual.
Head unit group 1
Operation of the following head units is the
same as the "DEH-P4800MP". Refer to the in-
struction starting on page 11.
DEH-P3800MP
DEH-P4800MP
Head unit group 2
When using this unit with these head units,
operate while referring to the head unit group
2 function compatibility chart.
DEH-P6800MP
DEH-P680MP
DEH-P780MP
DEH-P880PRS
DEH-P980BT
2
En
Head unit group 3
When using this unit with these head units,
operate while referring to the head unit group
3 function compatibility chart.
DEH-P47DH
DEH-P360
DEH-P560MP
DEH-P7600MP
DEH-P960MP
DEH-P4700MP
DVH-P5000MP
DEH-P5800MP
Head unit group 4
When using this unit with these head units,
operate while referring to the head unit group
4 function compatibility chart.
DEX-P9
Head unit group 5
When using this unit with these head units,
operate while referring to the head unit group
5 function compatibility chart.
DEH-P8600MP
DEH-P8MP
Head unit group 6
When using this unit with these head units,
operate while referring to the head unit group
6 function compatibility chart.
AVH-P7500DVD
DEH-P480MP
AVH-P7600DVD
! * ADD-ON mode (M) only.
Head unit group 7
When using this unit with these head units,
operate while referring to the head unit group
DEH-P7800MP
7 function compatibility chart.
DEH-P9800BT
AVIC-N1
DEH-P77DH
DEH-P3600
DEH-P4600MP
DEH-P460MP
DEH-P6600
DEH-P660
DEH-P760MP
DEH-P9600MP
DEH-P6700MP
DEH-P670MP
DEH-P470MP
DEH-P3700MP
FH-P5000MP
FH-P4200MP
DEH-P580MP
DEH-P860MP
DEH-P80MP
DEH-P7700MP
DEH-P770MP
AVH-P6600DVD
AVX-P8DVD*
AVIC-N2
<SIRIUS_F>2
Advertisement
Table of Contents

Related Manuals for Pioneer SIR-PNR2 - Sirius Satellite Radio Tuner


Summary of Contents for Pioneer SIR-PNR2 - Sirius Satellite Radio Tuner
-
Page 1: Before You Start
DEH-P4800MP as an example head unit. DEH-P47DH DEH-P77DH DEH-P3600 When using other head units, refer to Operat- DEH-P360 DEH-P4600MP DEH-P460MP ing with different Pioneer head units on this DEH-P560MP DEH-P6600 DEH-P660 page. DEH-P7600MP DEH-P760MP DEH-P9600MP We recommend that you familiarize yourself... -
Page 2: Table Of Contents
Section Before You Start Other head units Operation of the following head units is fully explained in the head units’ manual. Refer to the instruction manual that came with your head unit. AVIC-D1 AVIC-D2 AVIC-Z1 AVIC-N3 AVH-P5700DVD AVH-P6800DVD AVH-P7800DVD ! FUNCTION 3 and FUNCTION 4 are not available with head units AVIC-D1, AVIC-D2 and AVH-P5700DVD. -
Page 3: Function Compatibility Charts
Section Before You Start Function compatibility charts Head unit group 2 (DEH-P6800MP, DEH-P680MP, DEH-P7800MP, DEH-P780MP, DEH- P880PRS, DEH-P9800BT, DEH-P980BT) Press SOURCE to select SIRIUS. Selecting the source Push MULTI-CONTROL left or right. Selecting channel Selecting channel directly On the remote control, press DIRECT and 0–9. Then press DIRECT again. - Page 4 Section Before You Start Head unit group 3 (DEH-P47DH, DEH-P77DH, DEH-P3600, DEH-P360, DEH-P4600MP, DEH-P460MP, DEH-P560MP, DEH-P6600, DEH-P660, DEH-P7600MP, DEH-P760MP, DEH-P9600MP, DEH-P960MP, DEH-P6700MP, DEH- P670MP, DEH-P4700MP, DEH-P470MP, DEH-P3700MP, DVH-P5000MP, FH-P5000MP, FH-P4200MP, DEH-P5800MP, DEH-P580MP) Press SOURCE to select an external source for SIRIUS. Selecting the source Selecting channel Press c or d.
-
Page 5: Head Unit Group
Section Before You Start Head unit group 4 (DEX-P9) With this head unit group, you can control this unit by using remote control that came with the head unit. Selecting the source Press AUX repeatedly until an external source for SIRIUS is selected. Selecting channel Press c or d. - Page 6 Section Before You Start Head unit group 5 (DEH-P8600MP, DEH-P860MP, DEH-P80MP, DEH-P8MP, DEH-P7700MP, DEH-P770MP) Selecting the source Press SOURCE to select an external source for SIRIUS. Selecting channel Push MULTI-CONTROL left or right. Press BAND. Changing bands Press and hold 1–6. Storing presets Recalling presets Press 1–6.
- Page 7 Section Before You Start Head unit group 6 (AVH-P7500DVD, AVH-P6600DVD, AVX-P8DVD, AVH-P7600DVD) Selecting the source Press SOURCE to select an external source for SIRIUS. Selecting channel Touch c or d. Changing bands Press BAND. Keep touching one of 1KEY-6KEY. Storing presets Touch one of 1KEY-6KEY.
- Page 8 Section Before You Start Head unit group 7 (AVIC-N1, AVIC-N2) Selecting the source Touch the source icon and touch an external source for SIRIUS. Selecting channel Touch c or d. Changing bands Touch BAND. Touch A.MENU and 1–6KEY. Then, touch one of 1KEY-6KEY. Storing presets Touch one of 1–6.
- Page 9 Section Before You Start Detailed instructions on selecting a team The chart below illustrates the Team Setting menu. Select teams for the Game Alert function referring to this chart and the function compatibility chart for your head unit. ! “The key” referred to in the diagram below varies depending on the head unit. Example: When selecting an NBA team Lakers Menu changes: CH display...
-
Page 10: Remote Control
Section What’s What 7 a/b/c/d buttons Head unit group 1 Press to perform channel select, channel re- (e.g. DEH-P4800MP) call and category select. Also used for con- 1 FUNCTION button trolling functions. Press to select functions. 2 SOURCE button, VOLUME Remote control The head unit is turned on by selecting a source. -
Page 11: Sirius Tuner
Section SIRIUS tuner Selecting SIRIUS source Listening to SIRIUS % Press SOURCE to select SIRIUS. Press SOURCE repeatedly to switch between the following sources: XM tuner—SIRIUS tuner—Tuner—Televi- sion—Built-in CD player—Multi-CD player —External unit 1—External unit 2—AUX1 —AUX2 These are the basic steps necessary to operate Note the SIRIUS. -
Page 12: Storing And Recalling Channels
Section SIRIUS tuner % Press DISPLAY to switch information on ! When you change the channel, the channel name is displayed, followed by the category the selected channel. name. Press DISPLAY repeatedly switch between the followings: Channel number—Channel name—Channel Storing and recalling channels Category—Artist name/feature—Song/pro- gram title—Composer If you press any of the preset tuning buttons... -
Page 13: Selecting A Channel In The Channel Category
Section SIRIUS tuner Introduction of advanced CHNUMBER (channel number select mode)— CATEGORY (channel category select mode) SIRIUS tuner operation # You can also switch the mode by pressing and holding CLOCK. Selecting a channel in the channel category Channels are organized into various program categories, e.g. - Page 14 Section SIRIUS tuner Press and hold a or b to store the se- Note lected team in memory. If you select a channel of another category by The selected team is stored. Game alert on the channel recall, etc., during step 3 and 4, the cate- selected team will start.
-
Page 15: Displaying Game Information
Section SIRIUS tuner Displaying game information An alert will be displayed when the game of a team you selected is about to start (or is cur- rently playing). You can also display game in- formation and changes to the broadcast channel. -
Page 16: Avant De Commencer
DEH-P3600 DEH-P360 DEH-P4600MP DEH-P460MP DEH-P560MP DEH-P6600 DEH-P660 Utilisation avec différents DEH-P7600MP DEH-P760MP DEH-P9600MP appareils centraux Pioneer DEH-P960MP DEH-P6700MP DEH-P670MP DEH-P670MP DEH-P470MP DEH-P3700MP Les appareils centraux sont divisés en plu- DVH-P5000MP FH-P5000MP FH-P4200MP sieurs groupes ; trouvez le groupe auquel ap-... -
Page 17: Avic-D1
Section Avant de commencer AVH-P7500DVD AVH-P6600DVD AVX-P8DVD* AVH-P7600DVD ! * Mode ADD-ON (M) seulement. Appareils centraux du groupe 7 Si vous utilisez cet appareil avec ces appareils centraux, suivez le mode opératoire correspon- dant au tableau de compatibilité des fonctions pour les appareils centraux du groupe 7. - Page 18 Section Avant de commencer Tableaux de compatibilité des fonctions Appareils centraux du groupe 2 (DEH-P6800MP, DEH-P680MP, DEH-P7800MP, DEH-P780MP, DEH- P880PRS, DEH-P9800BT, DEH-P980BT) Appuyez sur SOURCE pour choisir SIRIUS. Sélection de la source Poussez MULTI-CONTROL vers la gauche ou vers la droite. Sélection du canal Sélection directe du canal Sur le boîtier de télécommande, appuyez sur DIRECT et 0–9.
- Page 19 Section Avant de commencer Remarque| Remarques ! Avec certains appareils, appuyer de façon prolongée sur CLOCK peut changer directement le mode de sélection du canal. ! Pour avoir des instructions détaillées sur la fonction Paramétrage de l’Equipe, reportez-vous à la page 29, Instructions détaillées sur la sélection d’une équipe. <SIRIUS_F>20...
- Page 20 Section Avant de commencer Appareils centraux du groupe 3 (DEH-P47DH, DEH-P77DH, DEH-P3600, DEH-P360, DEH-P4600MP, DEH-P460MP, DEH-P560MP, DEH-P6600, DEH-P660, DEH-P7600MP, DEH-P760MP, DEH-P9600MP, DEH-P960MP, DEH-P6700MP, DEH- P670MP, DEH-P4700MP, DEH-P470MP, DEH-P3700MP, DVH-P5000MP, FH-P5000MP, FH-P4200MP, DEH-P5800MP, DEH-P580MP) Appuyez sur SOURCE pour sélectionner une source extérieure pour SI- Sélection de la source RIUS.
- Page 21 Section Avant de commencer Remarque| Remarques ! Pour avoir des informations détaillées sur FUNCTION 3, reportez-vous à la page 29, Instructions détaillées sur la sélection d’une équipe. ! Avec certains appareils centraux, AUTO/MANUAL (A/M) peut s’afficher dans le menu des fonctions, mais cette fonction n’est pas disponible avec la source SIRIUS.
- Page 22 Section Avant de commencer Appareils centraux du groupe 4 (DEX-P9) Avec ce groupe d’appareils centraux, vous pouvez contrôler cet appareil en utilisant le boîtier de télécommande qui a été fourni avec l’appareil central. Sélection de la source Appuyez répétitivement sur AUX jusqu’à ce qu’une source extérieure soit sélectionnée pour SIRIUS.
- Page 23 Section Avant de commencer Suppression de la mémoire de la sélection Dans le mode sélection d’une équipe, et si l’équipe désirée est affichée, d’une équipe (FUNC3) appuyez sur la touche FUNCTION 3 puis appuyez de façon prolongée sur a ou b. Appuyez sur la touche FUNCTION 4 puis appuyez sur a ou b.
- Page 24 Section Avant de commencer Appareils centraux du groupe 5 (DEH-P8600MP, DEH-P860MP, DEH-P80MP, DEH-P8MP, DEH-P7700MP, DEH-P770MP) Sélection de la source Appuyez sur SOURCE pour sélectionner une source extérieure pour SI- RIUS. Poussez MULTI-CONTROL vers la gauche ou vers la droite. Sélection du canal Appuyez sur BAND.
- Page 25 Section Avant de commencer ! Avec certains appareils centraux, AUTO/MANUAL (A/M) peut s’afficher dans le menu des fonctions, mais cette fonction n’est pas disponible avec la source SIRIUS. <SIRIUS_F>26...
- Page 26 Section Avant de commencer Appareils centraux du groupe 6 (AVH-P7500DVD, AVH-P6600DVD, AVX-P8DVD, AVH-P7600DVD) Sélection de la source Appuyez sur SOURCE pour sélectionner une source extérieure pour SI- RIUS. Sélection du canal Touchez c ou d. Appuyez sur BAND. Changement de gamme Touchez de façon prolongée une des touches 1KEY-6KEY.
- Page 27 Section Avant de commencer Appareils centraux du groupe 7 (AVIC-N1, AVIC-N2) Sélection de la source Touchez l’icône de la source et touchez une source extérieure pour SI- RIUS. Sélection du canal Touchez c ou d. Touchez BAND. Changement de gamme Touchez A.MENU et 1–6KEY.
- Page 28 Section Avant de commencer Instructions détaillées sur la sélection d’une équipe Le tableau ci-dessous montre le menu Paramétrage d’une équipe. Sélectionne les équipes pour la fonction Alerte Match en se référant à ce tableau et au tableau de compatibilité des fonctions pour votre appareil central.
- Page 29 Section Description de l’appareil 6 Touche DISPLAY Appareils centraux du Appuyez de façon prolongée pour changer groupe 1 de mode de sélection du canal. (par exemple DEH-P4800MP) 7 Touches a/b/c/d 1 Touche FUNCTION Appuyez pour effectuer une sélection de Appuyez sur cette touche pour choisir des canal, un rappel de canal et une sélection fonctions.
- Page 30 Section Syntoniseur SIRIUS Sélection de la source SIRIUS Ecoute de SIRIUS % Appuyez sur SOURCE pour choisir SI- RIUS. Appuyez de manière répétée sur SOURCE pour choisir l’une après l’autre les sources sui- vantes : Syntoniseur XM—Syntoniseur SIRIUS— Syntoniseur—Télévision—Lecteur de CD intégré—Lecteur de CD à...
- Page 31 Section Syntoniseur SIRIUS ! Si un canal ne peut pas être rappelé à partir Remarques de la mémoire, un message d’erreur est affi- ! Un délai de quelques secondes peut s’écouler ché pendant environ deux secondes. avant que vous entendiez quelque chose, pen- dant que cet appareil acquiert et traite le si- gnal satellite.
- Page 32 Section Syntoniseur SIRIUS Introduction à l’utilisation Appuyez sur c ou d pour sélectionner le mode désiré. avancée du syntoniseur SIRIUS Appuyez de manière répétée sur c ou d pour passer d’un des modes suivants à un autre : CHNUMBER (mode sélection par numéro de canal)—CATEGORY (mode sélection par caté- gorie de canaux) # Vous pouvez aussi changer ce mode en ap-...
- Page 33 Section Syntoniseur SIRIUS # Si vous voulez effacer toutes les sélections Appuyez sur c ou d pour sélectionner le canal désiré à l’intérieur de la catégorie d’équipes, appuyez de façon prolongée sur a ou sélectionnée. b pendant que ClearAll est sélectionné. Le numéro de canal augmente ou diminue Appuyez de façon prolongée sur a ou dans la catégorie de canaux sélectionnée.
- Page 34 Section Syntoniseur SIRIUS ! Si vous voulez passer sur le canal qui dif- Appuyez sur FUNCTION pour choisir TEAMSETTING. fuse le match, changez de canal manuelle- Le numéro du canal que vous écoutez actuel- ment. lement est affiché. Appuyez sur BAND pour revenir à l’affi- chage normal.