
Related Manuals for Cisco SRW224P


Summary of Contents for Cisco SRW224P
-
Page 1: User Guide
® A Division of Cisco Systems, Inc. 24-Port 10/100 + 2-Port Gigabit Switch User Guide with WebView and Power over Ethernet WIRED SRW224P Model No. - Page 2 Specifications are subject to change without notice. Linksys is a registered trademark or trademark of Cisco Systems, Inc. and/or its affiliates in the U.S. and certain other countries. Copyright © 2005 Cisco Systems, Inc. All rights reserved. Other brands and product names are trademarks or registered trademarks of their respective holders.
-
Page 3: Table Of Contents
24-Port 10/100 + 2-Port Gigabit Switch with Webview and Power over Ethernet Table of Contents Chapter 1: Introduction Welcome What’s in this Guide? Chapter 2: Getting to Know the Switch The Front Panel The Back Panel The Side Panel RJ-45 Ports The Gigabit Expansion Ports The Console Port Chapter 3: Connecting the Switch... - Page 4 24-Port 10/100 + 2-Port Gigabit Switch with Webview and Power over Ethernet Help Appendix A: Fast Ethernet and Gigabit Ethernet About Fast Ethernet About Gigabit Ethernet Appendix B: Cabling Overview Twisted Pair Cabling Fiber Optic Cabling Appendix C: Glossary Appendix D: Specifications Appendix E: Warranty Information Appendix F: Regulatory Information Appendix G: Contact Information...
- Page 5 24-Port 10/100 + 2-Port Gigabit Switch with Webview and Power over Ethernet List of Figures Figure 2-1: Front Panel Figure 2-2: Back Panel Figure 2-3: Side Panel Figure 3-1: Typical Network Configuration Figure 3-2: Attaching the Switch’s Rubber Feet Figure 3-3: Attaching Brackets to the Switch Figure 3-4: Mounting the Switch Figure 4-1: Finding Hyperterminal Figure 4-2: Connection Description...
- Page 6 24-Port 10/100 + 2-Port Gigabit Switch with Webview and Power over Ethernet Figure 4-24: Port Configuration Figure 4-25: PoE Main Menu Figure 4-26: Power Configuration Figure 4-27: Power Port Status Figure 4-28: Power Port Configuration Figure 4-29: Logout Figure 5-1: Address Field Figure 5-2: Password Screen Figure 5-3: Sys.
- Page 7 24-Port 10/100 + 2-Port Gigabit Switch with Webview and Power over Ethernet Figure 5-28: QoS - IP Precedence/DSCP Figure 5-29: QoS - IP Port Figure 5-30: QoS - ACL Priority Figure 5-31: QoS - Rate Limit Figure 5-32: DiffServ - Diffserv Class Map Figure 5-33: DiffServ Class Map - Setting Rules Figure 5-34: DiffServ Class Map - Adding a Class Figure 5-35: DiffServ - Diffserv Policy Map...
- Page 8 24-Port 10/100 + 2-Port Gigabit Switch with Webview and Power over Ethernet Figure 5-61: Spanning Tree - Port/LAG Info Figure 5-62: Spanning Tree - Information Figure 5-63: SNMP - SNMP Config Figure 5-64: IGMP - IGMP Conf Figure 5-65: IGMP - IGMP Router Info Figure 5-66: IGMP - IGMP Router Conf Figure 5-67: IGMP - IP Multicast Reg Table Figure 5-68: IGMP - IGMP Member Conf...
-
Page 9: Chapter 1: Introduction
24-Port 10/100 + 2-Port Gigabit Switch with Webview and Power over Ethernet Chapter 1: Introduction Welcome Thank you for choosing the 24-port 10/100 + 2-Port Gigabit Switch with WebView and Power over Ethernet. This Switch will allow you to network better than ever. This new Linksys rackmount Switch delivers non-blocking, wire speed switching for your 10 and 100 megabit network clients, plus multiple options for connecting to your network backbone. -
Page 10: What's In This Guide
24-Port 10/100 + 2-Port Gigabit Switch with Webview and Power over Ethernet What’s in this Guide? This user guide covers the steps for setting up and using the Switch. • Chapter 1: Introduction This chapter describes the Switch’s applications and this User Guide. •... -
Page 11: Chapter 2: Getting To Know The Switch
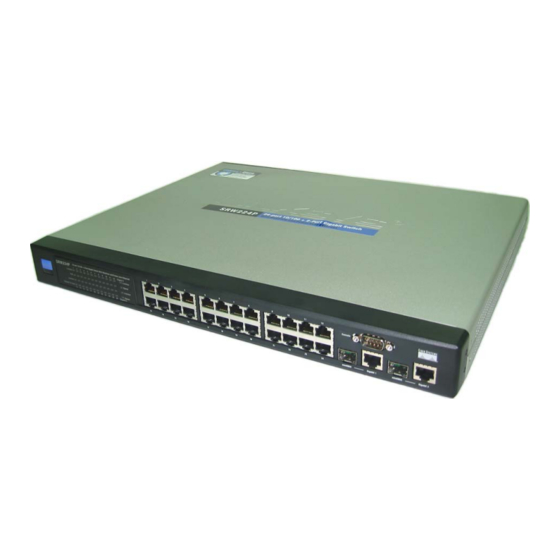
24-Port 10/100 + 2-Port Gigabit Switch with Webview and Power over Ethernet Chapter 2: Getting to Know the Switch The Front Panel The Switch's LEDs and ports are located on the front panel. Figure 2-1: Front Panel LEDs System A green LED indicates that power is being supplied to the Switch. A solid, amber LED indicates that the Switch’s power-on-self-test (POST) is in progress, but when this blinks amber that indicates that the POST has failed. -
Page 12: The Back Panel
24-Port 10/100 + 2-Port Gigabit Switch with Webview and Power over Ethernet Ports LAN (1-24) The LAN ports connect to Ethernet network devices, such as other switches or routers. Gigabit1 (25)/Gigabit 2 (26) The Switch is equipped with two Gigabit RJ-45 ports that are shared with two mini-GBIC ports. -
Page 13: Rj-45 Ports
24-Port 10/100 + 2-Port Gigabit Switch with Webview and Power over Ethernet RJ-45 Ports The Switch is equipped with 24 auto-sensing RJ-45 ports. These RJ-45 ports support network speeds of either 10Mbps or 100Mbps, and can operate in half and full-duplex modes. Auto-sensing technology enables each port to automatically detect the speed of the device connected to it (10Mbps or 100Mbps), and adjust its speed and duplex accordingly. -
Page 14: Chapter 3: Connecting The Switch
24-Port 10/100 + 2-Port Gigabit Switch with Webview and Power over Ethernet Chapter 3: Connecting the Switch Overview This chapter will explain how to connect network devices to the Switch. The following diagram shows a typical network configuration. Figure 3-1: Typical Network Configuration When you connect your network devices, make sure you don’t exceed the maximum cabling distances, which are listed in the following table: Maximum Cabling Distances... -
Page 15: Pre-Installation Considerations
24-Port 10/100 + 2-Port Gigabit Switch with Webview and Power over Ethernet Pre-Installation Considerations Fast Ethernet Considerations If you will be using the Switch for Fast Ethernet (100Mbps) applications, you must observe the following guidelines: Full-Duplex As previously mentioned, the Switch provides full-duplex support for its RJ-45 ports. Full-duplex operation allows data to be sent and received simultaneously, doubling a port’s potential data throughput. -
Page 16: Hardware Installation
24-Port 10/100 + 2-Port Gigabit Switch with Webview and Power over Ethernet Hardware Installation To connect network devices to the Switch, follow these instructions: 1. Make sure all the devices you will connect to the Switch are powered off. 2. Connect a Category 5 Ethernet network cable to one of the numbered ports on the Switch. 3. -
Page 17: Uplinking The Switch
24-Port 10/100 + 2-Port Gigabit Switch with Webview and Power over Ethernet Rack-Mount Placement To rack-mount the Switch in any standard 19-inch rack, follow the instructions described below. 1. Place the Switch on a hard flat surface with the front panel faced towards your front side 2. -
Page 18: Chapter 4: Configuration Using The Console Interface
Select HyperTerminal to run the utility program. 2. Enter a name for this connection. In the example shown, the name of connection is SRW224P. Select an icon for the application. Click OK. -
Page 19: Configuring The Switch Through The Console Interface
24-Port 10/100 + 2-Port Gigabit Switch with Webview and Power over Ethernet Configuring the Switch through the Console Interface Login When you finish configuring HyperTerminal, the Login screen will appear. The first time you open the console interface, use the default username admin, and leave the password blank. You can set a new password later from the Password Setting screen. -
Page 20: Figure 4-6: Switch Main Menu
24-Port 10/100 + 2-Port Gigabit Switch with Webview and Power over Ethernet Switch Main Menu The Main Menu screen displays six menu choices: System Configuration Menu, Port Status, Port Configuration, PoE Configuration, Help, and Logout. Figure 4-6: Switch Main Menu System Configuration Menu System Configuration Menu displays: 1. -
Page 21: Figure 4-8: System Information
24-Port 10/100 + 2-Port Gigabit Switch with Webview and Power over Ethernet System Information In System Information, you can check the Versions and General Information. Figure 4-8: System Information Versions The version screen displays the Boot Version, Software Version, Loader Version and the Hardware Version. Boot Version. -
Page 22: Figure 4-11: Serial Port Configuration
24-Port 10/100 + 2-Port Gigabit Switch with Webview and Power over Ethernet Management Settings The Management Settings screen displays two menu choices: Serial Port Configuration and CPU Performance Serial Port Configuration The Serial Port Configuration screen displays the current setting for the baud rate. The baud rate can be changed by selecting edit then using the spacebar to toggle through the different baud rates. -
Page 23: Figure 4-13: User And Password Settings
24-Port 10/100 + 2-Port Gigabit Switch with Webview and Power over Ethernet User and Password Settings The User & Password Settings screen displays user account information on the Switch. The default account is the administrator account. To add a new user, use the arrow keys to select edit then enter the username of the new account and assign a password to the account. -
Page 24: Figure 4-14: Ip Configuration
24-Port 10/100 + 2-Port Gigabit Switch with Webview and Power over Ethernet IP Configuration The IP Configuration screen displays four menu choices: IP Address Settings, HTTP, SNMP and Network Configuration. IP Address Settings The IP Address Settings screen allows you to set the IP information for the Switch. Figure 4-14: IP Configuration IP Address. -
Page 25: Figure 4-17: Snmp
24-Port 10/100 + 2-Port Gigabit Switch with Webview and Power over Ethernet SNMP The SNMP screen allows you to set the Switch’s SNMP settings. SNMP Server. Enable or Disable the SNMP function for the Switch. SNMP Port. Set the TCP port that will be used for sending and receiving SNMP packets. Figure 4-17: SNMP Network Configuration The Network Configuration Screen allows you to use PING to test network connectivity. -
Page 26: Figure 4-19: File Management
24-Port 10/100 + 2-Port Gigabit Switch with Webview and Power over Ethernet File Management The File Management screen allows you to upload and download files to the Switch using TFTP. Source File. Specify the location of the file to transfer. Select TFTP if the file is on a TFTP server, Image if the file is a local image file, or startup-config if the file is a local configuration file. -
Page 27: Figure 4-20: Restore System Default Settings
24-Port 10/100 + 2-Port Gigabit Switch with Webview and Power over Ethernet Restore System Default Setting To restore the Switch back to the factory default settings, select Restore System Default Setting and press Enter. A confirmation message will appear stating that All User Configuration data will be reset to Default. Continue? [y/ n]. -
Page 28: Figure 4-22: Back To Main Menu
24-Port 10/100 + 2-Port Gigabit Switch with Webview and Power over Ethernet Back to Main Menu Select Back to Main Menu if you want to return to the main menu. Figure 4-22: Back to Main Menu Chapter 4: Configuration using the Console Interface Configuring the Switch through the Console Interface... -
Page 29: Figure 4-23: Port Status
24-Port 10/100 + 2-Port Gigabit Switch with Webview and Power over Ethernet Port Status This screen allows you to view the status of a port. The Port, Enable, Link Status, Spd/Dpx, and Flow Control are displayed. Ports 1 through 24 are ethernet RJ-45 ports and ports 25 and 26 are Gigabit RJ-45 ports, Giga1 and Giga2. Each Gigabit port has a shared mini-Gbic port. -
Page 30: Figure 4-25: Poe Main Menu
24-Port 10/100 + 2-Port Gigabit Switch with Webview and Power over Ethernet PoE Configuration The PoE Main Menu screen displays three menu choices: System PoE Configuration, Port PoE Status and Port PoE Configuration. Figure 4-25: PoE Main Menu System PoE Configuration The Power Configuration screen allows you to set the PoE power allocation from the Switch to connected devices. -
Page 31: Figure 4-28: Power Port Configuration
24-Port 10/100 + 2-Port Gigabit Switch with Webview and Power over Ethernet Port PoE Configuration The Power Port Configuration screen allows you to set the PoE settings for each port. Select the edit action and use the left-right and up-down arrows to select the attribute you would like to set. You can set the Admin Status, the Priority and the Power Allocation. -
Page 32: Chapter 5: Configuring The Switch Through The Web Utility
24-Port 10/100 + 2-Port Gigabit Switch with Webview and Power over Ethernet Chapter 5: Configuring the Switch through the Web Utility Overview Open your web browser and enter 192.168.1.254 into the address field. Press the Enter key and the Password screen will appear. -
Page 33: System Information
24-Port 10/100 + 2-Port Gigabit Switch with Webview and Power over Ethernet System Information The System Information tab includes links to the following screens. • System Description • System Mode • Forwarding Database • Time Synchronization • CPU Performance • Logout System Description The System Description screen displays the following information. -
Page 34: Figure 5-5: Sys. Info - System Mode
24-Port 10/100 + 2-Port Gigabit Switch with Webview and Power over Ethernet System Mode The System Mode screen displays the following information. Jumbo Frames. Shows if jumbo frames are enabled. This switch provides more efficient throughput for large sequential data transfers by supporting jumbo frames up to 9216 bytes. -
Page 35: Figure 5-6: Sys. Info - Forwarding Database
24-Port 10/100 + 2-Port Gigabit Switch with Webview and Power over Ethernet Forwarding Database The Forwarding Database screen displays the following information. Aging Status. This feature, when enabled, discards dynamic MAC addresses after a set amount of time. Aging Interval. This is the amount of time after which dynamic address table entries are discarded. Set the Aging Interval by entering the number of seconds into the text field provided. -
Page 36: Figure 5-7: Dynamic Address Screen
24-Port 10/100 + 2-Port Gigabit Switch with Webview and Power over Ethernet Dynamic Address The Dynamic Address Table contains the MAC addresses learned by monitoring the source address for traffic entering the switch. When the destination address for inbound traffic is found in the database, the packets intended for that address are forwarded directly to the associated port. -
Page 37: Figure 5-9: Sys. Info - Time Synchronization Screen
24-Port 10/100 + 2-Port Gigabit Switch with Webview and Power over Ethernet Time Synchronization Simple Network Time Protocol (SNTP) allows the switch to set its internal clock based on periodic updates from a time server (SNTP or NTP). Maintaining an accurate time on the switch enables the system log to record meaningful dates and times for event entries. -
Page 38: Figure 5-10: Sys. Info - Cpu Performance
24-Port 10/100 + 2-Port Gigabit Switch with Webview and Power over Ethernet CPU Performance The CPU Performance screen displays the current percentage of processor power being used by the switch. Figure 5-10: Sys. Info - CPU Performance Logout To logout, click the Logout hyper-link. Then click OK to proceed or Cancel to cancel. Then click Yes to close the window or No to cancel. -
Page 39: Ip Config
24-Port 10/100 + 2-Port Gigabit Switch with Webview and Power over Ethernet IP Config The IP Config tab includes a link to the following screen. • IP Address IP Address To manually configure IP settings, you need to set an IP address and subnet mask that is compatible with your network. - Page 40 24-Port 10/100 + 2-Port Gigabit Switch with Webview and Power over Ethernet Select the IP Address Mode using the drop-down menu. Selecting Static will allow you to enter a static IP address, subnet mask and default gateway using the text field provided. Selecting BOOTP or DHCP disables these text boxes and auto assigns an IP address.
-
Page 41: Switch Config
24-Port 10/100 + 2-Port Gigabit Switch with Webview and Power over Ethernet Switch Config The Switch Config tab includes links to the following screens. • Port Configuration • VLAN • VLAN Port • LAG Configuration • Port Mirroring • LACP Port Configuration You can manually configure the speed, duplex mode, and flow control used on specific ports, or use auto- negotiation to detect the connection settings used by the attached device. -
Page 42: Figure 5-14: Edit Port Configuration Screen
24-Port 10/100 + 2-Port Gigabit Switch with Webview and Power over Ethernet Flow Control. Indicates the type of flow control currently in use. (IEEE 802.3x, Back-Pressure or None) Auto Negotiation. Shows if auto-negotiation is enabled or disabled. LAG Member. Shows if port is a LAG member. Click Port Configuration to edit the port settings. - Page 43 24-Port 10/100 + 2-Port Gigabit Switch with Webview and Power over Ethernet • 100full - Supports 100 Mbps full-duplex operation • 1000full - Supports 1000 Mbps full-duplex operation • Sym (Gigabit only) - Check this item to transmit and receive pause frames, or clear it to auto-negotiate the sender and receiver for asymmetric pause frames.
-
Page 44: Figure 5-15: Switch Config - Vlan
24-Port 10/100 + 2-Port Gigabit Switch with Webview and Power over Ethernet VLAN A VLAN is a group of ports that can be located anywhere in the network, but communicate as though they belong to the same physical segment. VLANs help to simplify network management by allowing you to move devices to a new VLAN without having to change any physical connections. -
Page 45: Figure 5-16: Adding/Editing Vlan Screen
24-Port 10/100 + 2-Port Gigabit Switch with Webview and Power over Ethernet Create VLAN To create a VLAN, enter the VLAN ID and VLAN name, up to 32 characters long. Mark the Enable checkbox to activate the VLAN, and click Create VLAN. To edit a VLAN, select a VLAN ID and click the Edit icon (which resembles a pen). -
Page 46: Figure 5-17: Switch Config - Vlan Port
24-Port 10/100 + 2-Port Gigabit Switch with Webview and Power over Ethernet VLAN Port You can configure VLAN behavior for specific interfaces, including the default VLAN identifier (PVID), accepted frame types, ingress filtering and mode. VLAN identifier (PVID). VLAN ID assigned to untagged frames received on the interface. (Default: 1) •... -
Page 47: Figure 5-18: Switch Config - Lag Configuration
24-Port 10/100 + 2-Port Gigabit Switch with Webview and Power over Ethernet LAG Configuration You can create multiple links between devices that work as one virtual, aggregate link. An aggregated link offers a dramatic increase in bandwidth for network segments where bottlenecks exist, as well as providing a fault- tolerant link between two devices. -
Page 48: Figure 5-19: Create Lag Screen
24-Port 10/100 + 2-Port Gigabit Switch with Webview and Power over Ethernet Create LAG Enter a lag ID of 1-4 in the Lag field, select any of the switch ports from the scroll-down port list, and click Add. LAG Broadcast Control Figure 5-19: Create LAG Screen Set the threshold for any lag, click Submit. -
Page 49: Figure 5-22: Switch Config - Port Mirroring
24-Port 10/100 + 2-Port Gigabit Switch with Webview and Power over Ethernet Port Mirroring You can mirror traffic from any source port to a target port for real-time analysis. You can then attach a logic analyzer or RMON probe to the target port and study the traffic crossing the source port in a completely unobtrusive manner. -
Page 50: Figure 5-23: Switch Config - Lacp
For static lags, the switches have to comply with the Cisco EtherChannel standard. For dynamic lags, the switches have to comply with LACP. This switch supports up to four lags. For example, a lag consisting of two 1000 Mbps ports can support an aggregate bandwidth of 4 Gbps when operating at full duplex. -
Page 51: Qos
24-Port 10/100 + 2-Port Gigabit Switch with Webview and Power over Ethernet The QoS tab includes links to the following screens. • CoS Settings • Queue Settings • CoS to Queue • IP Precedence/DSCP • IP Port • ACL Priority •... -
Page 52: Figure 5-25: Qos - Cos Settings
24-Port 10/100 + 2-Port Gigabit Switch with Webview and Power over Ethernet Class of Service Settings Class of Service (CoS) allows you to specify which data packets have greater precedence when traffic is buffered in the switch due to congestion. This switch supports CoS with four priority queues for each port. Data packets in a port’s high-priority queue will be transmitted before those in the lower-priority queues. -
Page 53: Figure 5-26: Qos - Queue Settings
24-Port 10/100 + 2-Port Gigabit Switch with Webview and Power over Ethernet Queue Settings This switch prioritizes each packet based on the required level of service, using four priority queues with strict or Weighted Round Robin Queuing. It uses IEEE 802.1p and 802.1Q tags to prioritize incoming traffic based on input from the end-station application. -
Page 54: Figure 5-28: Qos - Ip Precedence/Dscp
24-Port 10/100 + 2-Port Gigabit Switch with Webview and Power over Ethernet IP Precedence/DSCP This switch supports several common methods of prioritizing layer 3/4 traffic to meet application requirements. Traffic priorities can be specified in the IP header of a frame, using the priority bits in the Type of Service (ToS) octet or the number of the TCP port. -
Page 55: Figure 5-29: Qos - Ip Port
24-Port 10/100 + 2-Port Gigabit Switch with Webview and Power over Ethernet IP Port You can also map network applications to Class of Service values based on the IP port number (i.e., TCP/UDP port number) in the frame header. Some of the more common TCP service ports include: HTTP: 80, FTP: 21, Telnet: 23 and POP3: 110. -
Page 56: Figure 5-30: Qos - Acl Priority
24-Port 10/100 + 2-Port Gigabit Switch with Webview and Power over Ethernet ACL Priority Use ACL CoS Mapping to set the output queue for packets matching an ACL rule as shown in the following table. Note that the specified CoS value is only used to map the matching packet to an output queue; it is not written to the packet itself. -
Page 57: Figure 5-31: Qos - Rate Limit
24-Port 10/100 + 2-Port Gigabit Switch with Webview and Power over Ethernet Rate Limit This function allows the network manager to control the maximum rate for traffic transmitted or received on an interface. Rate limiting is configured on interfaces at the edge of a network to limit traffic coming out of the switch. -
Page 58: Diffserv
24-Port 10/100 + 2-Port Gigabit Switch with Webview and Power over Ethernet DiffServ The commands described in this section are used to configure Quality of Service (QoS) classification criteria and service policies. Differentiated Services (DiffServ) provides policy-based management mechanisms used for prioritizing network resources to meet the requirements of specific traffic types on a per hop basis. -
Page 59: Figure 5-32: Diffserv - Diffserv Class Map
24-Port 10/100 + 2-Port Gigabit Switch with Webview and Power over Ethernet DiffServ Class Map A class map is used for matching packets to a specified class. Class Name. Name of the class map. (Range: 1-32 characters) Type. Only one match command is permitted per class map, so the match-any field refers to the criteria specified by the lone match command. -
Page 60: Figure 5-34: Diffserv Class Map - Adding A Class
24-Port 10/100 + 2-Port Gigabit Switch with Webview and Power over Ethernet Add rules to a selected class using the ACL list drop-down menu and the IP DSCP, IP Precedence and VLAN text fields provided then click Add. Adding a Class Class Name. -
Page 61: Figure 5-35: Diffserv - Diffserv Policy Map
24-Port 10/100 + 2-Port Gigabit Switch with Webview and Power over Ethernet DiffServ Policy Map This function creates a policy map that can be attached to multiple interfaces. Modify Name and Description. Configures the name and a brief description of a policy map. (Range: 1-32 characters for the name;... -
Page 62: Figure 5-37: Diffserv Policy Map - Setting Rules
24-Port 10/100 + 2-Port Gigabit Switch with Webview and Power over Ethernet Meter. The maximum throughput and burst rate. • Rate (kbps) – Rate in kilobits per second. • Burst (byte) – Burst in bytes. Exceed Action. Specifies whether the traffic that exceeds the specified rate will be dropped or the DSCP service level will be reduced. -
Page 63: Figure 5-38: Diffserv - Diffserv Service Policy
24-Port 10/100 + 2-Port Gigabit Switch with Webview and Power over Ethernet DiffServ Service Policy This function binds a policy map to the ingress queue of a particular interface. Check Enabled and choose a Policy Map for a port from the drop-down menu. Click Submit to save the changes. -
Page 64: Security
24-Port 10/100 + 2-Port Gigabit Switch with Webview and Power over Ethernet Security The Security tab includes links to the following screens. • ACL Conf. • ACL Port Binding • 802.1xUsers • 802.1xPort Conf. • Radius Server • Port Security •... -
Page 65: Figure 5-40: Acl Conf - Adding/Editing Standard Acl
24-Port 10/100 + 2-Port Gigabit Switch with Webview and Power over Ethernet Standard ACL To configure a standard ACL do the following. Specify the action (that is, Permit or Deny). Select the address type (Any, Host, or IP). If you select “Host,” enter a specific address. - Page 66 24-Port 10/100 + 2-Port Gigabit Switch with Webview and Power over Ethernet Protocol. Specifies the protocol type to match as TCP, UDP or Others, where others indicates a specific protocol number (0-255). (Options: TCP, UDP, Others; Default: TCP) Source/Destination Port (0-65535). Source/destination port number for the specified protocol type. (Range: 0- 65535) Control Code (0-63).
-
Page 67: Figure 5-42: Acl Conf - Adding/Editing Mac Acl
24-Port 10/100 + 2-Port Gigabit Switch with Webview and Power over Ethernet MAC ACL To configure a MAC ACL do the following. Specify the action (that is, Permit or Deny). Specify the source and/or destination addresses. Select the address type (Any, Host, or MAC). If you select “Host,” enter a specific address (for example, 11-22-33-44-55-66). If you select “MAC,”... -
Page 68: Figure 5-43: Security - Acl Port Binding
24-Port 10/100 + 2-Port Gigabit Switch with Webview and Power over Ethernet ACL Port Binding After configuring Access Control Lists (ACL), you should bind them to the ports that need to filter traffic. You can assign one IP access list to any port, but you can only assign one MAC access list to all the ports on the switch. You must configure a mask for an ACL rule before you can bind it to a port. -
Page 69: Figure 5-44: Security - 802.1X Users
24-Port 10/100 + 2-Port Gigabit Switch with Webview and Power over Ethernet This Switch uses the Extensible Authentication Protocol over LANs (EAPOL) to exchange authentication protocol messages with the client, and a remote RADIUS authentication server to verify user identity and access rights. When a client (i.e., Supplicant) connects to a switch port, the switch (i.e., Authenticator) responds with an EAPOL identity request. -
Page 70: Figure 5-45: Security - 802.1X Port Conf
24-Port 10/100 + 2-Port Gigabit Switch with Webview and Power over Ethernet 802.1xPort Conf. When 802.1X is enabled, you need to configure the parameters for the authentication process that runs between the client and the switch (that is, authenticator), as well as the client identity lookup process that runs between the switch and authentication server. -
Page 71: Figure 5-47: Security - Port Security
24-Port 10/100 + 2-Port Gigabit Switch with Webview and Power over Ethernet Port Security Port security is a feature that allows you to configure a switch port with one or more device MAC addresses that are authorized to access the network through that port. When port security is enabled on a port, the switch stops learning new MAC addresses on the specified port when it has reached a configured maximum number. -
Page 72: Figure 5-49: Security - Https Settings
24-Port 10/100 + 2-Port Gigabit Switch with Webview and Power over Ethernet HTTPS Settings You can configure the switch to enable the Secure Hypertext Transfer Protocol (HTTPS) over the Secure Socket Layer (SSL), providing secure access (that is, an encrypted connection) to the switch’s web interface. Mark the HTTPS Status checkbox to enable HTTPS and specify the port number. -
Page 73: Sntp
24-Port 10/100 + 2-Port Gigabit Switch with Webview and Power over Ethernet SNTP The SNTP tab includes links to the Global Settings screen. Global Settings Simple Network Time Protocol (SNTP) allows the switch to set its internal clock based on periodic updates from a time server (SNTP or NTP). -
Page 74: Statistics
24-Port 10/100 + 2-Port Gigabit Switch with Webview and Power over Ethernet Statistics You can display standard statistics on network traffic from the Interfaces Group and Ethernet-like MIBs, as well as a detailed breakdown of traffic based on the RMON MIB. Interfaces and Ethernet-like statistics display errors on the traffic passing through each port. -
Page 75: Figure 5-53: Statistics - Etherlike Statistics
24-Port 10/100 + 2-Port Gigabit Switch with Webview and Power over Ethernet Etherlike Statistics To view the Etherlike statistics for a port or lag, select the required interface from the drop-down menu and click Refresh. Figure 5-53: Statistics - Etherlike Statistics RMON Statistics To view the RMON statistics for a port or lag, select the required interface from the drop-down menu and click Refresh. -
Page 76: Poe
24-Port 10/100 + 2-Port Gigabit Switch with Webview and Power over Ethernet This switch can provide DC power to a wide range of connected devices, eliminating the need for an additional power source and cutting down on the amount of cables attached to each device. Once configured to supply power, an automatic detection process is initialized by the switch that is authenticated by a PoE signature from the connected device. -
Page 77: Figure 5-56: Poe - Power Port Config
24-Port 10/100 + 2-Port Gigabit Switch with Webview and Power over Ethernet Power Port Config If a device is connected to a switch port and the switch detects that it requires more than the power budget of the port, no power is supplied to the device (that is, port power remains off). If the power demand from devices connected to switch ports exceeds the power budget set for the switch, the port power priority settings are used to control the supplied power. -
Page 78: Figure 5-58: Poe - Power Status
24-Port 10/100 + 2-Port Gigabit Switch with Webview and Power over Ethernet Power Status This screen displays the following information. Maximum Available Power System Operation Status Mainpower Consumption Figure 5-58: PoE - Power Status Software Version Chapter 5: Configuring the Switch through the Web Utility... -
Page 79: Spanning Tree
24-Port 10/100 + 2-Port Gigabit Switch with Webview and Power over Ethernet Spanning Tree The Spanning Tree Algorithm (STA) can be used to detect and disable network loops, and to provide backup links between switches, bridges or routers. This allows the switch to interact with other bridging devices (that is, an STA-compliant switch, bridge or router) in your network to ensure that only one route exists between any two stations on the network, and provide backup links which automatically take over when a primary link goes down The Spanning Tree tab includes links to the following screens. -
Page 80: Figure 5-59: Spanning Tree - Information
24-Port 10/100 + 2-Port Gigabit Switch with Webview and Power over Ethernet Information You can display a summary of the current bridge STA information that applies to the entire switch using the Information screen. This screen displays the following information. Spanning Tree State. -
Page 81: Figure 5-60: Spanning Tree - Configuration
24-Port 10/100 + 2-Port Gigabit Switch with Webview and Power over Ethernet Configuration Configure the global settings for STA using this screen. Global settings apply to the entire switch. Modify the required attributes for STA. Click Submit to save the changes. Figure 5-60: Spanning Tree - Configuration Port/LAG Info The Port Information and LAG Information screens display the current status of ports and lags in the Spanning... -
Page 82: Figure 5-62: Spanning Tree - Information
24-Port 10/100 + 2-Port Gigabit Switch with Webview and Power over Ethernet Port/LAG Conf You can configure RSTP attributes for specific interfaces, including port priority, path cost, link type, and edge port. You may use a different priority or path cost for ports of the same media type to indicate the preferred path, link type to indicate a point-to-point connection or shared-media connection, and edge port to indicate if the attached device can support fast forwarding. -
Page 83: Snmp
24-Port 10/100 + 2-Port Gigabit Switch with Webview and Power over Ethernet SNMP Simple Network Management Protocol (SNMP) is a communication protocol designed specifically for managing devices on a network. Equipment commonly managed with SNMP includes switches, routers and host computers. -
Page 84: Igmp
24-Port 10/100 + 2-Port Gigabit Switch with Webview and Power over Ethernet IGMP The Internet Group Management Protocol (IGMP) runs between hosts and their immediately adjacent multicast router/switch. IGMP is a multicast host registration protocol that allows any host to inform its local router that it wants to receive transmissions addressed to a specific multicast group. -
Page 85: Figure 5-64: Igmp - Igmp Conf
24-Port 10/100 + 2-Port Gigabit Switch with Webview and Power over Ethernet IGMP Conf Adjust the IGMP settings as required. IGMP Status. When enabled, the switch will monitor network traffic to determine which hosts want to receive multicast traffic. This is also referred to as IGMP Snooping. (Default: Enabled). Act as IGMP Querier. -
Page 86: Figure 5-65: Igmp - Igmp Router Info
24-Port 10/100 + 2-Port Gigabit Switch with Webview and Power over Ethernet IGMP Router Info Multicast routers that are attached to ports on the switch use information obtained from IGMP, along with a multicast routing protocol such as DVMRP or PIM, to support IP multicasting across the Internet. These routers may be dynamically discovered by the switch or statically assigned to an interface on the switch. -
Page 87: Figure 5-67: Igmp - Ip Multicast Reg Table
24-Port 10/100 + 2-Port Gigabit Switch with Webview and Power over Ethernet IP Multicast Reg Table You can display the port members associated with a specified VLAN and multicast IP address. Select a VLAN ID and the IP address for a multicast service from the drop-down menus. The switch will display all the interfaces that are propagating this multicast service. -
Page 88: Maintenance
24-Port 10/100 + 2-Port Gigabit Switch with Webview and Power over Ethernet Maintenance The Maintenance tab includes links to the following screens. • Reset • File Download • File Upload • Restore Defaults • Save Config • Integrated Cable Test Reset To restart the switch, click the Reset the Device link, then click Yes to restart the switch. -
Page 89: Figure 5-71: Maintenance - File Upload
24-Port 10/100 + 2-Port Gigabit Switch with Webview and Power over Ethernet File Upload Uploads switch firmware or configuration files to a TFTP server. You must specify the file type to transfer, along with TFTP server IP address and file names as required. Saving firmware and configuration files on a TFTP server enables them to be later downloaded to the switch to restore operation. -
Page 90: Help
24-Port 10/100 + 2-Port Gigabit Switch with Webview and Power over Ethernet Integrated Cable Test To test the connection quality of cables, click on the test icon for the port. The following screen will display the last test results. Click the Submit button to start the test. Test results are shown on the Integrated Cable Test Screen. -
Page 91: Appendix A: Fast Ethernet And Gigabit Ethernet
24-Port 10/100 + 2-Port Gigabit Switch with Webview and Power over Ethernet Appendix A: Fast Ethernet and Gigabit Ethernet About Fast Ethernet 1. As the demand for desktop video, multimedia development, imaging, and other speed-intensive applications continues to rise, the need for high performance, fault tolerant LAN technology will become more critical. -
Page 92: Appendix B: Cabling
In Europe, the round ST connector is more prevalent. You must use the Linksys MGBT1, MGBSX1, or MGBLH1 miniGBIC modules with the Linksys SRW224P. The MGBSX1 and the MGBLH1 require fiber cabling with LC connectors. The MGBT1 requires a Category 5 Ethernet Cable with an RJ-45 connector. -
Page 93: Appendix C: Glossary
24-Port 10/100 + 2-Port Gigabit Switch with Webview and Power over Ethernet Appendix C: Glossary This glossary contains some basic networking terms you may come across when using this product. For more advanced terms, see the complete Linksys glossary at http:// www.linksys.com/glossary. - Page 94 24-Port 10/100 + 2-Port Gigabit Switch with Webview and Power over Ethernet Full Duplex - The ability of a networking device to receive and transmit data simultaneously. Gateway - A device that interconnects networks with different, incompatible communications protocols. Half Duplex - Data transmission that can occur in two directions over a single line, but only one direction at a time. HTTP (HyperText Transport Protocol) - The communications protocol used to connect to servers on the World Wide Web.
- Page 95 24-Port 10/100 + 2-Port Gigabit Switch with Webview and Power over Ethernet Switch - 1. A data switch that connects computing devices to host computers, allowing a large number of devices to share a limited number of ports. 2. A device for making, breaking, or changing the connections in an electrical circuit.
-
Page 96: Appendix D: Specifications
24-Port 10/100 + 2-Port Gigabit Switch with Webview and Power over Ethernet Appendix D: Specifications Standards IEEE Std. 802.3-2002 Ports 24 - 10/100 , 2 - 10/100/1000, 2 - MiniGBIC, 1- Console Cabling Type UTP CAT 5e or better LEDs System, Link/Act, PoE, Speed, Gigabit 1, Gigabit 2 Dimensions 16.93"... -
Page 97: Appendix E: Warranty Information
24-Port 10/100 + 2-Port Gigabit Switch with Webview and Power over Ethernet Appendix E: Warranty Information LIMITED WARRANTY Linksys warrants to You that, for a period of five years (the “Warranty Period”), your Linksys Product will be substantially free of defects in materials and workmanship under normal use. -
Page 98: Appendix F: Regulatory Information
24-port 10/100 + 2-Port Gigabit Switch with WebView and Power over Ethernet Appendix F: Regulatory Information FCC STATEMENT This equipment has been tested and found to comply with the limits for a Class A digital device, pursuant to part 15 of the FCC Rules. These limits are designed to provide reasonable protection against harmful interference when the equipment is operated in a commercial environment. - Page 99 24-port 10/100 + 2-Port Gigabit Switch with WebView and Power over Ethernet Safety Compliance Warning: Fiber Optic Port Safety When using a fiber optic port, never look at the transmit laser while it is powered on. Also, never look directly at the fiber TX port and fiber cable ends when CLASS I LASER DEVICE they are powered on.
- Page 100 24-port 10/100 + 2-Port Gigabit Switch with WebView and Power over Ethernet Power Cord Set U.S.A. and Canada The cord set must be UL-approved and CSA certified. The minimum specifications for the flexible cord are: - No. 18 AWG, not longer than 2 meters, or 16 AWG. - Type SV or SJ - 3-conductor.
- Page 101 24-port 10/100 + 2-Port Gigabit Switch with WebView and Power over Ethernet L’appareil fonctionne à une tension extrêmement basse de sécurité qui est conforme à la norme IEC 60950. Ces conditions ne sont maintenues que si l’équipement auquel il est raccordé...
- Page 102 24-port 10/100 + 2-Port Gigabit Switch with WebView and Power over Ethernet Der Betrieb dieses Geräts erfolgt unter den SELV-Bedingungen (Sicherheitskleinstspannung) gemäß IEC 60950. Diese Bedingungen sind nur gegeben, wenn auch die an das Gerät angeschlossenen Geräte unter SELV-Bedingungen betrieben werden. Stromkabel .
- Page 103 24-port 10/100 + 2-Port Gigabit Switch with WebView and Power over Ethernet Recycling of all reusable waste content. Design of products to maximize recyclables at the end of the product’s life span. Continual monitoring of safety standards. End of Product Life Span This product is manufactured in such a way as to allow for the recovery and disposal of all included electrical components once the product has reached the end of its life.
-
Page 104: Appendix G: Contact Information
24-Port 10/100 + 2-Port Gigabit Switch with Webview and Power over Ethernet Appendix G: Contact Information Need to contact Linksys? Visit us online for information on the latest products and updates to your existing products at: http://www.linksys.com or ftp.linksys.com Can't find information about a product you want to buy on the web? Do you want to know more about networking with Linksys products? Give our advice line a call at: 800-546-5797 (LINKSYS)