Table of Contents
Troubleshooting

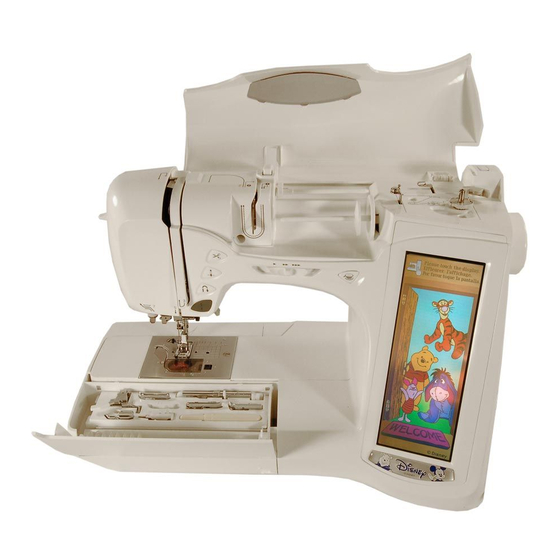
Related Manuals for Brother ULT-2003D


Summary of Contents for Brother ULT-2003D
-
Page 2: Important Safety Instructions
3. Never operate this machine if it has a damaged cord or plug, if it is not working properly, if it has been dropped or damaged, or dropped into water. Return the machine to the nearest authorized dealer or service center for examination, repair, electrical or mechanical adjust- ment. - Page 3 The plug served from the main lead must be destroyed as a plug with bared flexible cords is hazardous if engaged in a live socket outlet. In the event of replacing the plug fuse, use a fuse approved by ASTA to BS 1362, i.e. carrying the mark, rating as marked on plug.
- Page 4 PLEASE READ BEFORE USING THIS MACHINE For safe operation 1. Be sure to keep your eye on the needle while sewing. Do not touch the pulley, thread take-up, needle, or other moving parts. 2. Remember to turn off the power switch and unplug the cord when: •...
-
Page 5: What You Can Do With This Machine
LCD display. Machine sets thread tension automatically - no more bothersome trial sewing. Prepare the bobbin thread for sewing with one touch - no need to pull the bobbin thread up through the needle plate. - Page 6 (sold separately) to increase creativity. Embroidery Select the “Embroidery” function icon to choose a pattern and sew it as it appears on the screen. Embroidery Editing You can combine characters and patterns, or change the configuration of characters easily with the “Embroidery Edit”...
-
Page 7: How To Use This Manual
If, while using the machine, you experience something you do not understand, or there is a func- tion you would like to know more about, refer to the index at the back of the operation manual in conjunction with the table of contents to find the section of the manual you should refer to. -
Page 8: Table Of Contents
WHAT YOU CAN DO WITH THIS MACHINE I Attaching the Presser Foot .... 1-39 Special Features I Attaching the Walking Foot ..1-40 I Reattaching the Presser Foot Holder ... 1-42 HOW TO USE THIS MANUAL Changing the Needle ......1-43 2 —... - Page 9 STITCH PATTERNS ......4-13 I Sewing Sharp Curves ....3-38 I Key Functions ....... 4-14 Shelltuck Stitches ........ 3-39 Changing the Size of the Stitch Patterns . 4-15 Scallop Stitches ........3-41 7 — Changing the Stitch Pattern Length Patchwork Stitches ......3-42 (for 7mm Satin Stitch Patterns Only) ..
- Page 10 I Needle Plate Cover ...... 5-29 Saving Stitch Patterns ......4-27 Basic Embroidery Method ....5-30 I If You Can Not Save the Stitch Pattern 4-28 I Embroidering Order for Pattern Parts .. 5-32 Retrieving Saved Stitch Patterns ... 4-31 Sewing Embroidery Patterns Which Use 2 —...
- Page 11 Appliqué (1) ........5-61 I Moving a Point ....... 7-7 Using a Frame Pattern to Make 2 — I Moving Part or All of the Design ..7-8 Appliqué (2) ........5-62 I Inserting New Points ...... 7-9 Embroidering Small Fabrics or Fabric Edges ..........
-
Page 12: Chapter 1 Setting Up Principal Parts And Their Operation
1 Needle threader lever ..... (P.1-35) 2 Presser foot dial ......(P.1-6) 3 Thread cutter ......(P.1-3) 7 — 4 Presser foot holder ..(P.1-39, 1-42) 5 Presser foot ....... (P.1-8) 6 Feed dogs ......... (P.1-6) 7 Bobbin cover ......(P.1-31) 8 Flat bed attachment with accessory com- 8 —... -
Page 13: I Embroidery Unit
• For U.S.A. only This appliance has a polarized plug (one blade wider than the other). To reduce the risk of elec- trical shock, this plug is intended to fit in a po- 4 — larized outlet only one way. -
Page 14: I Embroidery Unit Carrying Case
When opening the embroidery unit carrying case, be sure to unhook the two latches. When closing the carrying case, press in on the latches until each one clicks twice to make sure that they are fully 2 — secured. 1 Latches 3 —... -
Page 15: I Balance Wheel
START STOP Press this button and the machine will sew a few stitches at a slow speed, then begin sewing at the speed set by the 5 — sewing speed controller. Press the button again to stop the machine. Hold the button down to sew at the machine’s slowest speed. -
Page 16: I Presser Foot Lever
I Sewing Speed Controller 4 — Use this controller to adjust the sewing speed. Move the le- ver to the left to sew at slower speeds. Move the lever to the right to sew at higher speeds. 1 Lever Note 5 —... -
Page 17: I Supplemental Spool Pin
1 (weakest) to 4 (strongest). Use setting “3” for normal sewing. Lower the presser foot lever before turn- ing the presser foot dial. If you adjust the setting, be sure to return it to “3” after sewing. 1 Weak... -
Page 18: I Knee Lifter
If the knee lifter is not pushed into the mounting slot as far as possible, it may come out during use. Use your knee to move the knee lifter to the right in order 4 — to raise the presser foot. Release to the left for the presser foot to lower. -
Page 19: Included Accessories
Included Accessories 1 — Pull the top of the flat-bed attachment towards you to open the accessory compartment. 1 Storage space 2 Presser foot storage space 2 — 3 Bobbin storage space 3 — 4 — 5 — 6 —... - Page 20 SA528 XC1291-002 carrying case Note (For U.S.A. only) Foot controller: Model P This foot controller can be used on this machine model ULT2001/ULT2002D/ULT2003D. The screw of the presser foot holder is available through your authorized dealer (Part code XA4813-051). Setting Up...
-
Page 21: Options
1 Thread guide of the sewing machine 5 — 6 — 7 — • Using the Multi-thread Stand When Placed to the Right of the Sewing Machine : 8 — Do not pass the thread through the thread guide on the multi-thread stand, or through the thread guide on the sewing machine. - Page 22 No. 31 Large Flower II SA331 XA5037-001 No. 32 Musical Instrument SA332 XA5386-001 6 — No. 33 Trees SA333 XA5567-001 No. 35 Cats & Dogs II SA335 XA5629-001 No. 36 Fruits & Vegetables SA336 XA5659-001 No. 37 Appliqué Alphabet SA337 XA5753-001 No. 38 Angel...
-
Page 23: Basic Operation
6 — • Unplug the power cord if the machine is not to be used for a long period of time. Otherwise a fire may result. 1. Insert the power cord into the cord jack, then insert 7 —... -
Page 24: Viewing The Lcd Display
Viewing the LCD Display 1 — When switching on machine, the screen will display the name of the machine. Touch the screen to display the utility stitch. The often used “Straight stitch (left)” (1-01) is automatically selected. 1 Shows the amount of thread remaining in the 2 —... -
Page 25: I Key Functions
Mirror image Press this key to create a mirror image of the selected stitch pattern. If the key display is light gray, a mirror image of the 3-11 selected stitch pattern cannot be sewn. - Page 26 (single/double) mode each time you press the key. If the key display is light gray, the selected stitch pattern can not be sewn in twin nee- 2 — dle mode.
-
Page 27: Using The Lcd Display
8 — • If you are not directly in front of the machine when you view the LCD, the colors may appear to change or the screen may be difficult to see. This is a characteristic of the LCD, and not a sign of damage or malfunction. - Page 28 5 — 6 — 3. On the display, use to adjust the screen brightness. makes the screen darker 7 — makes the screen lighter 4. Once you have adjusted the screen brightness, 8 — press 9 — Setting Up 1-17...
-
Page 29: Choosing The Display Language
7 — * Choose from the following languages: ENGLISH GERMAN FRENCH ITALIAN 8 — DUTCH SPANISH DANISH NORWEGIAN 9 — FINNISH SWEDISH PORTUGUESE JAPANESE 1 Shows the selected display language 4. When the desired language is displayed, press 1-18 Setting Up... -
Page 30: Checking The Application
Checking the Application The application can be started up from the floppy disk. 1 — If the machine is turned on with the floppy disk inserted, the machine imports the application from the floppy disk, then starts it up. 1. Press to open the screen at left. -
Page 31: Using The Machine Settings Key
Using the Machine Settings Key Press to change the default machine settings (needle stop position, embroidery speed, 1 — opening display, etc.) Note This function will be available in future technology upgrades. 1 Select the needle stop position (the needle posi- 2 —... -
Page 32: Using The Machine Operations Key
Using the Machine Operations Key 6 — Press to open the screen shown below. Five categories are displayed at the top of the screen. Press a key to see more information about that category. displays information about the main parts of the machine and their func- 7 —... - Page 33 Use the arrow keys to scroll downward for more information. = to scroll slowly 7 — = to scroll quickly If you select bobbin winding, setting the bobbin, or upper thread- ing, is displayed. Press to see a video of the displayed 8 —...
-
Page 34: I Contents Of Other Categories
1 — I Contents of Other Categories 2 — 3 — 4 — 5 — 6 — 7 — 8 — 9 — Setting Up 1-23... -
Page 35: Using The Pattern Explanation Key
Using the Pattern Explanation Key 1 — If you want to know more about the uses for a stitch pattern, select the pattern and press to see an explanation of the stitch selection. Example: Displaying information about 2 — 1. Press . -
Page 36: Bobbin Winding/Lower Threading
➜ Press in that order to display a video example of bobbin winding on the LCD (see page 1-22). Follow the steps explained below to complete the operation. CAUTION 2 — Use only bobbins recommended by the manufacturer of this machine (see page 1-8). - Page 37 2 Thread spool (cross-wound thread) 3 Space 3 — 5. Hold the thread from the spool in both hands, and pass the thread behind the thread guide cover on top of the machine. Use both hands to set the thread around the thread 4 —...
- Page 38 9. Wind the thread clockwise around the bobbin 4-5 times (as shown in the illustration). 6 — 7 — 10.Pass the end of the thread through the guide slit in the bobbin winder seat, and pull the thread to the right. The cutter will cut the thread. 8 —...
- Page 39 1 — 11. Set the bobbin holder to the left, until it clicks into place. 1 Bobbin holder 2 — 3 — 12.Press the “Bobbin Winder” button to start winding the bobbin. 4 — 5 — 13.The bobbin will stop rotating automatically when it is done winding, and the bobbin holder will return to the original position.
-
Page 40: I Winding The Bobbin During Sewing1-29
1 — I Winding the Bobbin During Sewing With this machine, you can wind the bobbin during sewing. It will be convenient to wind the bobbin embroidery thread while sewing embroidery. The threading process is different from the earlier section, so read and follow the instructions carefully. - Page 41 Make sure to set the thread securely under the preten- sion disk. 4 — 1 Thread guide shaft 2 Pretension disk 6. Follow steps 9 - 14 from the previous section (see pages 5 — 1-27, 1-28). 6 — 7 —...
-
Page 42: Setting The Bobbin
➜ Press in that order to display a video example of the operation on the LCD (see page 1-22). Follow the steps explained below to complete the operation. CAUTION 2 — Setting the bobbin improperly may cause the thread tension to loosen, breaking the needle and resulting in injury. -
Page 43: Upper Threading
➜ Press in that order to display a video example of the operation on the LCD (see page 1-22). Follow the steps explained below to complete the operation. 2 — CAUTION Be sure to thread the machine properly. Improper threading can cause the thread to tangle and break the needle, leading to injury. - Page 44 1 — 3. Pivot the spool pin so that it angles toward the front of the machine. Set the thread spool on the spool pin so that the thread unrolls from the front of the spool. 4. Push the spool cap onto the spool pin as far as possi- ble, then return the spool pin to its original position.
- Page 45 2 — 3 — 4 — 5 — 7. To thread the take-up lever, pass the thread from the back right side to the front left side. 1 Threading the take-up lever 6 — 7 — 8. Set the thread behind the needle clamp thread guide on the needle bar.
- Page 46 1 — 9. Set the thread securely into the slit of the disk in the thread guide. Be sure that the thread catches the cor- ner of the thread guide. 1 Corner of the thread guide 2 — 3 —...
- Page 47 90/14-100/16 can be used. 6 — 15.Pass the thread under the presser foot, and pull it about 100 mm (3 inch - 4 inch) toward the back of the ma- chine. 7 — 1 100 mm (3 inch - 4 inch) CAUTION •...
-
Page 48: I Using The Spool Net
If using transparent nylon thread, metallic thread, or other strong thread, place the included spool net over the spool before using. If the spool net is too long, fold it once to match it to the spool size before placing it over the spool. 2 —... -
Page 49: Pulling Up The Bobbin Thread
Pulling Up the Bobbin Thread 1 — There may be some sewing applications when you want to pull up the bobbin thread, for example, when making gathers, darts, free motion quilting or embroidery. 1. Guide the bobbin thread through the groove, follow- ing the arrow in the illustration. -
Page 50: Changing The Presser Foot
Changing the Presser Foot 1 — CAUTION • Always turn off the power before changing the presser foot. If the power is on and the “Start/Stop” button or another button is pressed, the machine will start and may cause injury. -
Page 51: I Attaching The Walking Foot
Only select straight or zigzag stitch patterns with reinforce- ment stitches. 3 — * To use the walking foot, you need the low shank adapter and the screw (large) for the walking foot. 4 —... - Page 52 1 — 5. Set the low shank adapter for the walking foot that came with your machine on the presser foot shaft, and push it up as far as possible. Tighten the screw securely with the screwdriver. 2 — CAUTION Use the screwdriver to tighten the screw securely.
-
Page 53: I Reattaching The Presser Foot Holder
1 — I Reattaching the Presser Foot Holder 1. Push the “Needle Position” button to raise the needle, then turn the main power switch to OFF. 2. Raise the presser foot lever. 2 — 3 — 3. Loosen the screw with the screwdriver, and remove the walking foot. -
Page 54: Changing The Needle
• Never sew with a bent needle. A bent needle will easily break and cause injury. To Check the Needle Correctly: 8 — To check the needle, place the flat side of the needle on a flat surface. Check the needle from the top and the sides. Throw away any bent needles. 1 Parallel space 2 Level surface (bobbin cover, glass, etc.) - Page 55 3 Flat side of needle 8 — CAUTION Be sure to push in the needle until it touches the stopper, and securely tighten the needle 9 — clamp screw with a screwdriver. If the needle is not completely inserted or the needle clamp screw is loose, the needle may break or the machine may be damaged.
-
Page 56: I About The Needle
(i.e., denim) with a small needle (i.e., 65/9 - 75/11), may cause the needle to bend or break, and lead to injury. Also, the seam may be uneven, the fabric may pucker, or the machine may skip stitches. - Page 57 1 — 2 — 3 — 4 — 5 — 6 — 7 — 8 — 9 — 1-46 Setting Up...
-
Page 58: Chapter 2 Getting Ready To Sew Trial Sewing
1 — Basic Sewing CAUTION • To avoid injury, pay special attention to the needle while the machine is in operation. 2 — Keep your hands away from moving parts while the machine is in operation. • Do not stretch or pull the fabric during sewing. Doing so may lead to injury. - Page 59 CAUTION • Do not press the “Thread Cutter” button when there is no fabric set in the machine or during machine op- 8 — eration. The thread may tangle, resulting in damage. • When cutting thread thicker than #30, nylon thread, or other decorative threads, use the thread cutter on the side of the machine.
-
Page 60: Sewing Reinforcement Stitches
4 — Stop the machine. Leave the needle in the fabric, and raise the presser foot. Using the needle as a pivot, turn the fab- ric so that you can sew in the new direction. Lower the presser foot lever and start sewing. -
Page 61: Sewing Heavyweight Fabrics
3 — If the presser foot lever is in the up position, and you are sewing heavyweight or multiple layers of fabric which does not fit easily under the presser foot, raise the presser foot 4 —... -
Page 62: Using The Twin Needle Mode
The twin needle can only be used for patterns that show after being selected. Before you select a stitch pattern, make sure the stitch can be sewn in the twin needle mode (see page 3-1 “Quick Reference Table”). 2 —... - Page 63 1 — 4. Pull up the supplemental spool pin and set it in the up position. 2 — 5. Place additional spool of thread on the supplemental 3 — spool pin, so that the thread unrolls from the back. Then insert a spool cap onto the spool pin all the way in, to secure the thread spool.
- Page 64 1 — 8. Do not set the thread in the needle clamp thread guide on the needle bar. Thread the needle on the right side. CAUTION The needle threader can not be used. Thread the twin 2 — needle by hand, from front to back. Using the needle threader may result in damage to the machine.
-
Page 65: Stitch Settings
2 — Note It is not possible to change the width of some stitches (see page 2-10 for reference ). Press to narrow the zigzag stitch pattern width. The value in the display gets smaller. -
Page 66: Setting The Stitch Length
Your machine automatically sets the stitch length when you select a stitch. However, there may be times when you want to change the stitch length. With this machine, you can change the length of each individual stitch in a seam. -
Page 67: I Stitch Pattern Width/Stitch Length Settings Table
I Stitch Pattern Width/ Stitch Length Settings Table 1 — Stitch width [mm (inch.)] Stitch length [mm (inch.)] Stitch width [mm (inch.)] Stitch length [mm (inch.)] Pattern Pattern Auto. Manual Auto. Manual Auto. Manual Auto. Manual 0.0 - 7.0 0.2 - 5.0 0.0 - 7.0... - Page 68 1 — Stitch width [mm (inch.)] Stitch length [mm (inch.)] Stitch width [mm (inch.)] Stitch length [mm (inch.)] Pattern Pattern Auto. Manual Auto. Manual Auto. Manual Auto. Manual 0.0 - 7.0 0.2 - 4.0 1.5 - 7.0 1.5 - 4.0...
- Page 69 — (3/16) (0 - 15/64) (1/16) (1/64 - 3/16) 5 — 3.0 - 7.0 0.3 - 1.0 *— : Non - adjustable (1/4) (1/8 - 1/4) (1/32) (1/64 - 1/16) 3.0 - 7.0 0.3 - 1.0 (1/4) (1/8 - 1/4)
-
Page 70: Setting The Thread Tension
Setting the Thread Tension 1 — Your machine will automatically set the thread tension when you select a stitch. However, you may need to change the thread tension, depending on the fabric and thread being used. I Proper Thread Tension The upper and lower threads should cross near the center 2 —... -
Page 71: Machine Function Settings
Automatic Reinforcement Stitching 1 — After selecting a stitch pattern, turn on the automatic reinforcement stitching function before sew- ing, and the machine will automatically sew reinforcement stitches (or reverse stitches, depending on the stitch pattern) at the beginning and end of sewing. -
Page 72: Using The Automatic Thread Cutter
(or reverse stitches, depending on the stitch pattern) at the beginning and end of sewing, and trim the threads at the end of sewing. This function is useful when sewing buttonholes and bar tacks. -
Page 73: Locking The Screen
Locking the Screen 1 — If the screen is locked before starting to sew, the various settings, such as the stitch width and stitch length, are locked and cannot be changed. This prevents settings on the screen from accidentally being changed or the machine from being stopped during sewing when large pieces of fabric or projects are being sewn. -
Page 74: Chapter 3 Sewing Utility Stitches
8 — sewn while pressing “Reverse/Reinforcement Stitch” ( J ) button. Zigzag stitch (right) Start from right needle position, zigzag sew at left. ( J ) 9 — Zigzag stitch (left) Start from left needle position, zigzag sew at right. - Page 75 3 — Overcasting stitch Reinforced seaming of stretch fabric ( J ) Overcasting stitch Reinforcing of medium stretch fabric and heavyweight 4 — fabric, decorative stitching ( J ) Overcasting stitch Reinforcement of stretch fabric or decorative stitch- ( J ) 5 —...
- Page 76 Name of pattern presser possi- foot bility 2 — Hand-look quilting Quilting stitch made to look like hand quilting stitch Quilting appliqué zigzag Zigzag stitch for quilting and sewing on appliqué stitch quilt pieces 3 — Quilting appliqué stitch Quilting stitch for invisible appliqué or attaching...
- Page 77 2 — Fagoting cross stitch Fagoting, bridging and decorative stitching ( J ) Tape attaching Attaching tape to seam in stretch fabric ( J ) 3 — Ladder stitch Decorative stitching Rick-rack stitch Decorative top stitching 4 —...
- Page 78 Hemstitching Heirloom, decorative hems 8 — Hemstitching Heirloom, decorative hems ( J ) 9 — Hemstitching Decorative hems and bridging stitch ( J ) Hemstitching Decorative hems. Fagoting, attaching ribbon ( J ) Hemstitching Decorative hems, smocking Hemstitching Decorative hems, smocking...
- Page 79 Buttonholes for heirloom and stretch fabrics 9 — Bound buttonhole The first step in making bound buttonholes Keyhole buttonhole Buttonholes in heavyweight or thick fabrics for larger flat buttons Tapered keyhole buttonhole Buttonholes in medium to heavy weight fabrics for larger flat buttons...
- Page 80 4 — Eyelet For making eyelet, holes on belt, etc. 5 — Diagonally left up (Straight) For attaching appliqué on tubular pieces of fabric and mitering corners Reverse (Straight) For attaching appliqué on tubular pieces of fabric and 6 —...
- Page 81 For attaching appliqué on tubular pieces of fabric and (Zigzag) mitering corners 3 — CAUTION Make sure to use the correct presser foot for each stitch pattern. Otherwise, the needle 4 — may strike the presser foot and bend or break, causing injury. 5 — 6 —...
-
Page 82: Selecting Utility Stitches
3 — tern you want. 1 Preview of the selected stitch 2 Stitch selection screen 3. Touch the key of the stitch pattern you want to 4 — sew to select it. 5 — 6 —... -
Page 83: I Stitch Selection Screens
1 — I Stitch Selection Screens Straight/Overcasting/Quilting Stitches Decorative Stitches 2 — 3 — 4 — 5 — Press to go to the next page. 6 — Heirloom Stitches Buttonholes/Bar tacks Multi-directional Sewing 7 — 8 — 9 — 3-10... -
Page 84: I Using The Mirror Image Key
Depending on the type of utility stitch you select, you may be able to sew a horizontal mirror image of the stitch pattern. is lit when you select a pattern, it will be possible to make a mirror image of the pattern. 2 —... -
Page 85: I Saving Your Preferred Stitch Settings
The settings for zigzag stitch width, stitch length, thread tension, automatic thread cutting or auto- matic reinforcement stitching, etc., are preset by the computer for each stitch pattern. If you want to change those settings, input the new settings and press for each pattern you want to 2 —... -
Page 86: Using The Sewing Type Selection Key
For example, if you want to sew overcasting, but you do not know which stitch to use or how to sew the stitch, you can use this screen to get advice. We recommend that beginners use this method to select patterns. - Page 87 1 — 3. The upper part of the screen displays a selection of overcasting stitches with explanations. Read the explanations and select the appropriate stitch. 2 — 3 — 4 — 5 — 6 — 4. The screen displays directions for sewing the selected stitch.
- Page 88 5. Press to scroll the screen in the direction of arrow selected, and see the next part of the instructions. Press to scroll the screen 1 line at a time, in the direction of the arrow selected. 2 — Press to scroll a larger section of the screen in the direc- tion of the arrow selected.
-
Page 89: Sewing The Stitches
“Reverse/Reinforcement Stitch” button. If the stitch which you select has a dot mark “ ” at the 2 — top of the key display, you can sew reinforcement stitches holding the “Reverse/Reinforcement Stitch”... - Page 90 1 — 2. Attach presser foot “J”. Hold the thread tails and fabric with your left hand, and turn the balance wheel with your right hand to insert the needle into the fabric. This is the sewing start position. 2 —...
-
Page 91: I Changing The Needle Position (Left Needle Position Patterns Only)
Match the distance from the 2 — right edge of the presser foot to the needle with the stitch width, then align the edge of the presser foot with the edge of the fabric during sewing for an attractive finish. -
Page 92: Basting
Stitch” button to sew reinforcement stitches, then continue sewing. Note • If you do not want to use a reinforcement stitch at the 7 — beginning, you should lift the presser foot, rotate the balance wheel, pull up the bobbin thread and pull a length of top and bobbin thread out from the rear of the machine. -
Page 93: Zigzag Stitches
2 — ing the “Reverse/Reinforcement Stitch” button. If the stitch which you select has a dot mark “ ” at the top of the key display, you can sew reinforcement stitches holding the “Reverse/Reinforcement Stitch” button (see page 2-3). -
Page 94: I Appliqué (Using A Zigzag Stitch)
2 — 3 — I Patchwork (for Crazy Quilt) Turn back the desired width of fabric and position it over the lower fabric, then sew so that the stitch bridges both 4 — pieces of fabric. -
Page 95: Elastic Zigzag Stitches
Elastic Zigzag Stitches 1 — Use elastic zigzag stitches for tape attaching, overcasting, darning, or a wide variety of other uses. 1. Select a stitch pattern, and attach presser foot “J”. 2 step elastic zigzag 2 — 3 step elastic zigzag 3 —... -
Page 96: Overcasting
Overcasting 1 — Use for the beginning and end of seams in skirts or trousers, and the beginning and end of all cuttings. Use presser foot “G”, presser foot “J”, or the side cutter attachment depending on the kind of overcasting stitch you select. -
Page 97: I Overcasting Using Presser Foot "J
4 — For sewing stretch fabrics For sewing stretch fabrics 5 — 6 — 2. Attach presser foot “J”. Sew with the needle dropping slightly off the edge of the fabric. 7 — 1 Needle drop position 8 — 9 —... -
Page 98: I Overcasting Using The Side Cutter
1 — I Overcasting Using the Side Cutter By using the side cutter, you can do overcasting while cutting the fabrics. 1. Push the “Needle Position” button to raise the needle, then turn off the power. 2. Raise the presser foot lever. - Page 99 (side cutter). 2 — 3 — 6. Select a stitch pattern. If there is an “S” in the bottom of the key display, the indicated stitch pattern can be sewn with the side cut- ter. 4 — Normal sewing Zigzag stitch 5 —...
- Page 100 8 — Note • The fabric will not be cut if the whole fabric is simply spread out underneath the presser foot guide plate. Set the fabric as explained in step 8, and then start sewing.
-
Page 101: Quilting
1 — You can make beautiful, quilts quickly and easily with this machine. When making a quilt, you will find it convenient to use the knee lifter and foot controller (see pages 1-7) to free your hands for other tasks. -
Page 102: I Piecing
1 — I Piecing Sewing two pieces of fabric together is called piecing. When cutting pieces for quilt blocks make sure the seam allowance is 6.5 mm (1/4 inch). 2 — 1. Select , and attach presser foot “J”. 3 —... -
Page 103: I Quilting
Your walking foot has a set of feed dogs that match the reaction of the feed dogs that rise above the surface of the needle plate as you sew. -
Page 104: I Appliqué
1 Seam allowance : 3 to 5 mm (1/8 to 3/16 inch) 3 — 2. Place a piece of thick paper cut to the finished size of the appliqué design onto the fabric, and then fold over the seam margin using an iron. Clip curves when nec- essary. - Page 105 1 — 5. Use the quilting appliqué stitch to attach the appliqué. Sew around the edge, while dropping the needle as close to the edge as possible. 2 — 3 — 4 — CAUTION Be careful that the needle does not strike a bast- ing pin during sewing.
-
Page 106: I Quilting With Satin Stitches
1 — I Quilting with Satin Stitches Use the foot controller to sew with satin stitch. If you set the speed control lever to control the stitch width, you can make subtle changes in the stitch width during sewing. 1. Attach the foot controller. - Page 107 5. In the display, change the set- 2 — ting to “ON.” During this process: * You can use the speed control slide to adjust the stitch 3 — width. * Use the foot controller to adjust the sewing speed. 6. Press to return to the original screen.
-
Page 108: Blind Hem Stitches
Blind Hem Stitches 1 — Select from these stitches to sew the hems or cuffs of dresses, blouses, pants, or skirts. 1. Select a stitch pattern. For woven fabrics 2 — For stretch fabrics (jersey, knit fabrics) 3 — 4 —... -
Page 109: I If The Needle Does Not Catch The Fold
1 — 4. Sew the fabric, keeping the folded edge in contact with the presser foot. 1 Needle position 2 — 3 — 5. Remove the basting stitches and turn over the fabric. 1 Wrong side of fabric 2 Right side of fabric 4 —... -
Page 110: Appliqué
Appliqué 1 — 1. Use a temoprary spray adhesive, fabric glue or a bast- ing stitch to attach the appliqué to the fabric. This will keep the fabric from moving during sewing. 1 Appliqué 2 Fabric glue 2 — 3 —... -
Page 111: I Sewing Sharp Curves
Stop the machine with the needle in the fabric outside the appliqué. Raise the presser foot and turn the fabric a little 4 — bit at a time while sewing, for an attractive finish to the seam. Note Placing a lightweight tear away stabilizer beneath stitch- 5 —... -
Page 112: Shelltuck Stitches
Shelltuck Stitches 1 — Shelltuck stitches give an attractive appearance of shells along the curve of a collar. This stitch pattern can be used for edging the neckline or sleeves of dresses or blouses. 1. Select 2 — 3 —... - Page 113 5. Unfold the fabric, and iron the tucks to one side. 4 — Note To make shell tucks at edge of a collar or neckline follow the pattern's instructions and then use this stitch to make a decorative finish on the collar or neckline.
-
Page 114: Scallop Stitches
Scallop Stitches 1 — This wave shaped running stitch pattern is called the scallop stitch pattern. Use this stitch pattern to decorate the edges of blouse collars and handkerchiefs or use it as an accent at a hem. A temporary spray adhesive may be necessary for lightweight fabrics. Test sew before sewing on project. -
Page 115: Patchwork Stitches
Patchwork Stitches 1 — For a decorative look called “Crazy Quilting” the following stitches can be sewn on top of a pressed seam allowance. 1. Select , and attach presser foot “J”. 2 — 3 — 4 — 5 —... - Page 116 2 — 3 — 4 — 5 — 4. Place the fabric right side up in the machine. Center 6 — the presser foot over the seam, and sew over the seam. 1 Right side of the fabric 7 —...
-
Page 117: Smocking Stitches
3 — 4 — 5 — 6 — 2. Set the stitch length to 4.0, loosen the upper thread tension, and sew the seams, leaving about 10 mm (3/8 inch) between the seams. 7 — About 10 mm (3/8 inch) 8 —... - Page 118 1 — 4. Select 2 — 3 — 4 — 5 — 5. Sew the spaces between the straight seams. 6 — 7 — 8 — 6. Pull out the straight stitch threads. 9 — Sewing Utility Stitches 3-45...
-
Page 119: Fagoting
Fagoting 1 — When there is a space between two fabrics, with thread sewn over the space to join the fabrics together, it is called fagoting. Use this stitch when sewing blouses or children's clothes. 1. Baste two pieces of fabric onto thin paper, leaving a space of 4 mm (3/16 inch) between the fabrics. -
Page 120: Tape Or Elastic Attaching
3 — 4 — 5 — 6 — 7 — 2. Sew 2 rows of straight stitches on the right side of the fabric, then pull the bobbin thread to gain the neces- sary gather. 8 — Note Before sewing the straight stitch, rotate the balance wheel... - Page 121 5 — 5. Sew over the tape (or elastic). 6 — CAUTION Be sure the needle does not strike a basting pin, or any other objects, during sewing. The thread 7 — could tangle or the needle could break, causing injury.
-
Page 122: Heirloom
Heirloom 1 — I Hemstitching (1) (Daisy stitch) Use for sewing tablecloths, decorative hems, and decorative stitching on shirt fronts. 1. Use a light to medium weight homespun fabric with a little stiffness. 2 — 2. Insert needle type 130/705H, size 100/16 Wing nee- dle. -
Page 123: I Hemstitching (2) (Drawn Work)
1 — I Hemstitching (2) (Drawn work) 1. Pull out several threads from one area on a piece of fabric to open the area. Pull out 5 or 6 threads to leave a 3 mm (1/8 inch) area open. 2 —... - Page 124 2 — 3 — 4 — 5 — 6 — 7 — 5. Sew the opposite side to keep the pattern symmetrical. 8 — 9 — 6. Illustration of finished product. Sewing Utility Stitches 3-51...
-
Page 125: I Hemstitching (3)
1 — I Hemstitching (3) 1. Pull out several threads from both sides of the 4 mm (3/16 inch) area which is not yet open. (Pull out four threads, leave five threads and then pull out four threads, the width of five threads is approximately 4 2 —... -
Page 126: Buttonholes
Buttonholes 1 — Buttonholes will sew from the front to back of the buttonhole foot. For best results, place horizon- tal positioned buttonhole to sew on the garment from the center to the edge of the placket. 1. Select a stitch pattern, and attach buttonhole foot “A”. - Page 127 * The size of the buttonhole is decided by the button holder plate holding the button. 1 Button holder plate 5 — 4. Align the presser foot with the mark on the fabric, and lower the presser foot lever. 1 Mark on the fabric 6 —...
- Page 128 If the fabric does not feed (for example, because it is too thick), increase the stitch length setting. 7. Insert a pin along the inside of one of the bar tacks, 6 — and then insert the seam ripper into the center of the buttonhole and cut towards the pin.
-
Page 129: I Sewing Stretch Fabrics
After using the seam ripper to cut open the threads over the buttonhole, trim off the threads. 7 — I Odd Shaped Buttons/Buttons that do not Fit into the Button Holder Plate Use the markings on the presser foot scale to set the size 8 —... -
Page 130: Darning
For heavyweight fabrics 3 — 4 — 5 — 6 — 2. Attach buttonhole foot “A” and set the scale to the de- sired length of the darning. Note 7 — The maximum length of darning is 30 mm (1-3/16 inch). - Page 131 1 Metal bracket 2 — 3 — 5. Gently hold the end of the upper thread, and then press the “Start/Stop” button to start the machine. Once sew- ing is completed, the machine automatically sews re- inforcement stitches, and then stops.
-
Page 132: Bar Tacks
Bar Tacks 1 — Use bar tacks to reinforce areas that will be subject to strain, such as pocket corners. 1. Select 2 — 3 — 4 — 5 — 6 — 2. Attach buttonhole foot “A” and set the scale to the length of the bar tack you wish to sew. - Page 133 1 Metal bracket 4 — 5 — 6. Gently hold the end of the upper thread and begin sew- ing. When sewing is completed, the machine will sew reinforcement stitches and stop automatically. 6 —...
-
Page 134: Button Sewing
Button Sewing 1 — CAUTION Do not use the automatic thread cutting function when sewing buttons. Otherwise, you will lose the thread ends. 1. Select 2 — 3 — 4 — 5 — 6 — 2. Raise the presser foot lever and detach the flat bed ta- ble attachment. -
Page 135: I Attaching 4 Hole Buttons
3 — Note • To attach the button more securely, repeat the process. • If the needle does not reach the holes on the left side, adjust the stitch width. 4 — 5. From the wrong side of the fabric, pull the end of the bobbin thread to pull the upper thread through to the wrong side of the fabric. -
Page 136: I Attaching A Shank To The Button
1. Pull the shank lever toward you before sewing. 1 Shank lever 2 — 3 — 2. Pull the two ends of the upper thread between the but- ton and the fabric, wind them around the shank, and then tie them firmly together. 4 —... - Page 137 4 — finished, the machine sews reinforcement stitches and stops automatically. 1 Needle drop position 5 — 4. Use the eyelet punch to make a hole in the center of the stitching. 6 — 7 — 8 — 9 —...
-
Page 138: Multi-Directional Sewing (Straight Stitch And Zigzag Stitch)
Multi-directional Sewing (Straight Stitch and Zigzag Stitch) 1 — To attach patches or emblems to pant legs, shirt sleeves, etc. 1. Remove the flat bed attachment to create the free arm function. 2 — 3 — 2. Select , and attach monogramming foot “N”. - Page 139 1 — 3. Set the needle in the fabric at the sewing start point, and sew seam “1” as shown. 1 Start Point 2 — 3 — 4. Select and sew seam “2” as shown. * The fabric will move sideways, so guide the fabric by 4 —...
-
Page 140: Zipper Insertion
3 End of zipper opening 4 Reverse side 8 — 3. Press the seam allowance open and attach the zipper with a basting stitch in the middle of each side of the 9 — zipper tape. 1 Basting stitches 2 Zipper... -
Page 141: I Inserting A Side Zipper
4 — 5. Topstitch 7 to 10 mm (1/4 to 3/8 inch) from the seamed edge of the fabric, then remove the basting. CAUTION 5 —... - Page 142 8 — needle to break and possible leading to injury. 5. Set the presser foot in the 3 mm (1/8 inch) margin. Start- ing from the end of the zipper opening sew to a point 9 —...
- Page 143 2 Left 3 Needle drop position 5 — 8. Set the fabric so that the left edge of the presser foot touches the edge of the zipper teeth. Sew reverse stitches at the top of the zipper, then continue sewing.
-
Page 144: Chapter 4 Sewing Character/Decorative Stitches
9 — Cross stitch Utility decorative stitch Stitch width is less than 7 mm for these patterns. You can set stitch length and width. Retrieving saved stitch patterns (see page- 4-31) Retrieving “MY CUSTOM STITCH ”. Create your own stitches with this function (see page 7-3). -
Page 145: Decorative Stitch Patterns
3 — 4 — 5 — 6 — 3. Press the key of the stitch pattern you want to sew. To select a different stitch pattern, press . When the current stitch pattern is erased, select the new stitch pattern. -
Page 146: 7Mm Decorative Stitch Patterns
7mm Decorative Stitch Patterns 1 — 1. Press then press to display the screen at left. 2. The stitch pattern selection method is the same as for decorative stitch patterns. 2 — 3 — 4 — 5 — 6 —... -
Page 147: 7Mm Satin Stitch Patterns
7mm Satin Stitch Patterns 1 — 1. Press then press to display the screen at left. 2. The stitch pattern selection method is the same as for decorative stitch patterns. 2 — 3 — 4 — 5 — 6 —... -
Page 148: Utility Decorative Stitch Patterns
Utility Decorative Stitch Patterns 1 — 1. Press then press to display the screen at left. 2. The stitch pattern selection method is the same as for decorative stitch patterns. 2 — 3 — 4 — 5 — 6 —... -
Page 149: Alphabetical Characters
Alphabetical Characters 1 — There are three types of fonts for alphabetical character stitches. The selection process is the same for all three fonts. We are using the Gothic font in the example below. 1. Press then press to display the screen at left. -
Page 150: I If You Make A Mistake Selecting The Character
I If You Make a Mistake Selecting the Character Press to delete the selected character. When you are combin- ing patterns, the patterns are deleted in order, starting from the last selected character entered, each time you press the key. 2 —... -
Page 151: Sewing Attractive Finishes
Fabric When sewing on stretch fabrics, lightweight fabrics, or fabrics with coarse weaves, at- tach stabilizer material as an option. If you do not wish to do so, place the fabric on a thin paper such as tracing paper. 1 Fabric 4 —... -
Page 152: Basic Sewing Of Character/Decorative Stitches
(See “Set- ting the Stitch Length”.) 5 — * If the fabric is pulled or pushed during sewing, the pat- tern may not turn out correctly. Also, depending on the pattern, there may be movement to the left and 6 —... - Page 153 At such times, a clicking sound different from the sound generated during sewing will be heard. This sound is normal and is not the sign of a malfunction. 3 —...
-
Page 154: Making Stitch Pattern Adjustments
Your stitch pattern may sometimes turn out poorly, depending on the type or thickness of fabric, the stabilizer material used, sewing speed, etc. If your sewing does not turn out well, sew trial stitches using the same conditions as the real sewing, and adjust the stitch pattern as explained below. - Page 155 9 — ➡ 6. Sew the stitch pattern again. * You can sew with the screen at left on the display. 7. If the stitch pattern still comes out poorly, make adjust- ments again. Adjust until the stitch pattern comes out correctly.
-
Page 156: Editing Character/Decorative Stitch Patterns
EDITING CHARACTER/DECORATIVE STITCH PATTERNS You can create just the finish you want using the editing functions. Make patterns larger or smaller, make mirror images, etc. 1 — 1 Use this key to check large combination pat- terns. 2 Stitch editing keys: 2 —... -
Page 157: I Key Functions
6 — mirror image key zontal mirror image of the stitch pattern. Size selection Use this key to select the size of the stitch pattern (large, me- 4-15 dium, small). Delete key When you make a mistake selecting a stitch pattern, use this 4-2, 7 —... -
Page 158: Changing The Size Of The Stitch Patterns
Select a stitch pattern, then press to change the size of the stitch pattern. The stitch pattern will be sewn in the size highlighted on the key. If you continue entering stitch patterns after changing the size, those patterns will also be sewn in that size. -
Page 159: Changing The Stitch Pattern Length (For 7Mm Satin Stitch Patterns Only)
Changing the Stitch Pattern Length (for 7mm Satin Stitch Patterns Only) 1 — When stitch patterns are selected, press to choose from 5 automatic length settings, without changing the stitch zigzag width or stitch length settings. 2 — 3 —... -
Page 160: Sewing Pattern Continuously
, return the thread density to . If you continue sewing when the stitches are bunched, the needle may bend or break. * Even if you select a new pattern after changing the thread density, the thread density remains the same until you change it. -
Page 161: Combining Stitch Patterns
When changing sizes, creating mirror images, or making other adjustments to a combined stitch pattern, be sure to edit the selected stitch pattern before selecting the next one. You can not edit a stitch pattern once the next stitch pattern is selected. - Page 162 1 — 3. Return to the stitch selection screen. * The screen displays the presser foot for the selected stitch. 4. Select the character stitch design (for example, press 2 — 3 — 4 — 5 — 6 — 5. Select the characters (example; TREE).
-
Page 163: Combining Large And Small Stitch Patterns
Combining Large and Small Stitch Patterns 1 — 1. Press to select the stitch pattern (the stitch will be selected in large size). 2 — 3 — 4 — 5 — 6 — 2. Press again, then press to select the small size. -
Page 164: Combining Horizontal Mirror Image Stitch Patterns
4 — 5 — 6 — 2. Press again, then press to create a horizontal mirror 7 — image of the stitch pattern. * If you want to sew the pattern continuously, press 8 — 9 — Sewing Character/Decorative Stitches 4-21... -
Page 165: Combining Stitch Patterns Of Different Lengths
4 — 5 — 6 — 3. Select again. 7 — 4. Press 3 times to select a stitch pattern length setting of 8 — * If you want to sew the pattern continuously, press 9 — 4-22 Sewing Character/Decorative Stitches... -
Page 166: Making Step Stitch Patterns (For 7Mm Satin Stitch Patterns Only)
1 — You can use the keys with 7mm satin stitch pat- terns to create a step effect. Stitch patterns sewn so that they create a step effect are called step stitch patterns. 2 — Press to move the stitch pattern a distance equal to half of the stitch pattern’s size to the left. - Page 167 1 — 3. Press again. 2 — 4. Press to move the next stitch pattern to the left. 5. Press to sew the pattern continuously. 3 — 4 — 5 — 6 — 7 — 8 — 9 — 4-24...
-
Page 168: I More Examples
I More Examples 1 — 2 — 3 — 4 — 5 — 6 — 7 — 8 — 9 — Sewing Character/Decorative Stitches 4-25... -
Page 169: Checking Combined Stitch Patterns
1. Press 2 — 3 — 4 — 5 — 6 — 2. The entire selected stitch pattern appears on the LCD. 3. After checking the combined pattern, press to return to the original screen. 7 — 8 — 9 —... -
Page 170: Memory Functions
MEMORY FUNCTIONS Saving Stitch Patterns 1 — You can save often used stitch patterns for easy retrieval. The machine memory can hold up to 20 stitch patterns. Example: Saving “Happy birthday” 1. Create the pattern combination (see the previous section). -
Page 171: I If You Can Not Save The Stitch Pattern
I If You Can Not Save the Stitch Pattern If you see this screen after pressing , the machine’s memory is full and can not save the currently selected stitch pattern. To save the stitch pattern in the machine’s memory, you have to delete a 2 —... - Page 172 1 — 3. Press to choose a stitch pattern to delete. * If the entire saved stitch pattern is not displayed by touching , press to view the entire stitch pattern. 2 — 4. Press 3 — 4 — 5 —...
- Page 173 1 — 6. The machine deletes the stitch pattern, then automatically saves the new stitch pattern. 2 — 3 — 4 — 5 — 6 — 7 — 8 — 9 — 4-30 Sewing Character/Decorative Stitches...
-
Page 174: Retrieving Saved Stitch Patterns
1 — 1. Press 2 — 3 — 4 — 5 — 6 — 2. The screen at left appears on the LCD. represents a pocket holding a saved stitch pattern. 7 — 8 — 9 — Sewing Character/Decorative Stitches 4-31... - Page 175 2 — 3 — 4 — 5 — 6 — 4. The pattern will be recalled, and the sewing screen will be dis- played. 7 — 8 — 9 — 4-32 Sewing Character/Decorative Stitches...
-
Page 176: Chapter 5 Embroidery
• Do not touch the inner connector of the embroidery unit. The pins on the embroidery unit connection may be damaged. • Do not apply strong force to the embroidery unit carriage, or pick up the unit by the carriage. 5 —... -
Page 177: I About Floppy Disks
6 — • Do not create folders on the floppy disks. If a folder is created and a pattern is stored in the folder, the machine will not be able to display the pattern. -
Page 178: Basic Embroidery
BASIC EMBROIDERY Attach the presser foot, embroidery unit, and follow the other steps below to prepare the machine for embroidery. 1 — Step 11 Step 12 2 — 3 — Step 2, 3 Step 6 4 — 5 — 6 —... -
Page 179: Attaching Embroidery Foot "Q
1 — CAUTION • Always turn off the main power switch when attaching a presser foot. You may acci- dentally press the “Start/Stop” button, resulting in injury. • Be sure to use embroidery foot Q when doing embroidery. The needle may strike the 2 —... -
Page 180: Attaching The Embroidery Unit
• Do not push on the carriage when installing the em- 8 — broidery unit onto machine. Moving the carriage may damage the embroidery unit. 4. Turn on the main power switch. The screen at left will display. 9 — Embroidery... - Page 181 Keep your hands and foreign objects away from the carriage. Otherwise, injuries may result. Also, if the embroidery unit could not be initialized correctly, a buzzer will sound. If this happens, go through the initialization process again. This is not 3 —...
-
Page 182: I Removing The Embroidery Unit
5 — ill 6_09 6 — 2. Turn off the main power switch. Hold the back left side of the embroidery unit. Hold down the release button, and pull the embroidery unit away from the machine 7 —... -
Page 183: Selecting Patterns
8 — Floppy disk Note 9 — If your machine did not come furnished with a built-in floppy disk drive, you can receive an upgrade service for your machine, so that it can use floppy disks at your authorized dealer. Embroidery... -
Page 184: One Point Patterns
4. The selected pattern is displayed in the top part of the screen. 7 — * Press to create a mirror image of the pattern. * If you make a mistake selecting the pattern, press the key of the pattern you want to sew. 8 — 5. After selecting the pattern, press 9 —... - Page 185 1 — 6. The sewing screen is displayed. * To go to the next step, see page 5-19, “Viewing the Sewing Screen.” * To return to the previous screen to select another pattern, press 2 — 3 — 4 —...
-
Page 186: Character Patterns
Character Patterns 1 — 1. Press to open the screen at the left. 2. The method for selecting character patterns is the same for each font. Press the key of the font you want to embroider. 2 — 3 —... - Page 187 1 — Example: Selecting “Bus” 1 Press * If you want to change the size of the characters, select the char- acter and then press to change the size. Every time pressing 2 — the key, the size changes from large, medium, then small.
-
Page 188: Floral Alphabet Patterns
Press 2 — to see the previous screen of pattern selections. 3 — 3. Press the key of the pattern you want to embroider. 4 — 5 — 6 — 4. The screen displays the pattern. - Page 189 1 — 6. The sewing screen is displayed. * To go to the next step, see page 5-19, “Viewing the Sewing Screen.” * To return to the previous screen to select another pattern, press 2 — 3 — 4 —...
-
Page 190: Frame Patterns
1 — 1. Press to open the screen at left. 2. Press the key of the frame pattern shape you want to sew in the top part of the screen. 2 — 3. Various frame patterns display on the bottom part of the screen. - Page 191 4 — 5 — 6 — 7. The sewing screen is displayed. * To go to the next step, see page 5-19, “Viewing the Sewing Screen.” 7 — * To return to the previous screen to select another pattern, press 8 —...
-
Page 192: Selecting Patterns From An Embroidery Card
2 — * Insert the card completely into the slot on the right side of the machine. Insert the embroidery card so that the end with a printed arrow is facing the front. 3 —... -
Page 193: Selecting A Pattern From A Floppy Disk (Only For Machines With Floppy Disk Drives)
Selecting a Pattern from a Floppy Disk (Only for Machines with Floppy Disk Drives) 1 — 1. When the screen at left is displayed, you can insert the floppy disk. * If a different screen is showing, press to display the screen at left. -
Page 194: Viewing The Sewing Screen
(26 × 16 cm (10-1/4 × 6-1/4 inch)). 5 Shows a preview of the selected pattern. 4 — 6 Shows how far the sewing position is from the center (when you move the default sewing position). 7 Press this key to return to the pattern type selection screen. -
Page 195: Preparing The Embroidery Frame
Always use stabilizer material for embroidery when sewing embroidery projects, espe- cially when embroidering on lightweight or stretch fabrics. Otherwise, the needle may break and cause injury. Not using a stabilizer material may result in a poor finish to your 2 —... -
Page 196: Setting The Fabric In The Embroidery Frame
Frames that can be used are highlighted. Frames that can not be used are light gray. 8 — CAUTION If you use a frame that is too small, the presser foot may strike the frame during sewing and cause injury. 9 — Embroidery... -
Page 197: I Inserting The Fabric
CAUTION If the fabric is placed loose in the embroidery frame the embroidery design will sew out poorly. Insert the fabric on a level surface, and gently stretch the fabric tight in the frame. 2 — Follow the steps below to insert the fabric correctly. -
Page 198: I Using The Embroidery Sheet
1 — I Using the Embroidery Sheet When you want to embroider the pattern in a particular place, use the embroidery sheet with the frame. 1. With a chalk pen, mark the area of the fabric you want to embroider. -
Page 199: Attaching The Embroidery Frame
Attaching the Embroidery Frame 1 — CAUTION Wind and set the bobbin before attaching the embroidery frame. Use embroidery thread in the bobbin. 1. Raise the presser foot lever. 2 — 3 — 4 — 2. Align the embroidery frame guide with the right edge of the embroidery frame holder. -
Page 200: I Removing The Embroidery Frame
1 — I Removing the Embroidery Frame While pressing the embroidery frame holder to the left, pull the embroidery frame toward you. 2 — 3 — 4 — 5 — 6 — 7 — 8 — 9 — Embroidery 5-25... -
Page 201: Determining The Pattern Position
Press to center the pattern. 2 — CAUTION Make sure the needle is up when the embroidery frame is moving. If the needle is down, it could break and result in 3 — injury. 4 — 5 — 6 —... -
Page 202: Checking The Pattern's Position
4 — 5 — 6 — The embroidery frame moves and shows the boundaries of the embroidery. Watch the frame closely to make sure the pattern will be sewn in the right place. 7 — CAUTION Make sure the needle is up when the embroidery frame is moving. -
Page 203: Previewing The Completed Pattern
2 — 3 — 4 — 5 — 6 — 2. You can view an image of the completed pattern within the em- broidery frame. * Press to select the frame used in the pre- 7 — view. Frames displayed a light gray color can not be selected. -
Page 204: Sewing An Embroidery Pattern
There are many factors that go into sewing beautiful embroidery. Using the appropriate stabilizer fabric (see page 5-20) and setting the fabric in the frame (see page 5-21) are two important factors mentioned earlier. Another important point is the appropriateness of the needle and thread being used. -
Page 205: Basic Embroidery Method
“Q”. 7 — 8 — 2. Grasp the end of the thread that is passed under the embroidery foot gently in your left hand. Be sure you leave enough slack in the thread. 9 —... - Page 206 “Start/Stop” button again to stop the machine. 2 — 3 — 4. Trim the excess thread at the end of the seam. If the end of the seam is under the presser foot, raise the presser foot lever, then trim the excess thread.
-
Page 207: I Embroidering Order For Pattern Parts
1 — 9. Follow the same steps for embroidering the remaining colors. 10.When the last color is sewn, the display returns to the original screen 2 — 3 — 4 — 5 — 6 — 11. When the pattern is finished, trim the excess thread jumps (thread linking part of the pattern, etc.). -
Page 208: Sewing Embroidery Patterns Which Use Appliqué
Sewing Embroidery Patterns Which Use Appliqué 1 — There are some patterns which call for an appliqué inside the pattern. When sewing an embroidery pattern with an appliqué, the color sewing order display shows “Appliqué Material,” “Appliqué Position,” “Appliqué”, and then the sewing or- 2 —... - Page 209 5. Apply a thin layer of fabric glue or temporary spray adhesive to the back of the appliqué material cut out in step 2, and place it on the base fabric, aligning the appliqué with the “Appliqué Position” pattern from step 4 —...
-
Page 210: Adjustments During The Embroidery Process
1 — When the bobbin begins to run out of thread during sew- ing, the message shown at left will display. If the pattern is nearly complete at this time, you can finish the pattern safely without changing the bobbin thread. If there is a large portion of the pattern left to finish, it is recommended 2 —... -
Page 211: The Thread Breaks During Sewing
2. Press the “Needle Position” button to raise the needle, and raise the presser foot lever. 2 — 3. If the upper thread is broken, redo the upper thread- ing. If the bobbin thread is broken, follow the direc- tions on page 5-35 to reset the bobbin. - Page 212 4 — next color (character) without sewing. * Press to return to the original screen. If you can not move back to the spot where the thread 5 — broke, press to move to the beginning position of the selected color, then use...
-
Page 213: Sewing Again From The Beginning
1 — 1. Press 2. Press . The embroidery frame moves, returning the needle 2 — to the pattern's beginning position. 3. Lower the presser foot lever and begin sewing. 3 — 4 — 5 — 6 — 7 —... -
Page 214: Continuing Embroidery After Turning Off The Power
4. Lower the presser foot lever and start sewing. 4 — CAUTION To continue a pattern that has had its position changed (see page 5-26), move the pattern the same amount in the layout display screen, then follow the steps above. In this case, you need to 5 —... -
Page 215: Making Embroidery Adjustments
5 — Note • If you turn off the power or select a different pattern, the thread tension will reset to the auto- matic setting. • When you retrieve a saved pattern, the thread tension setting will be the same as when the pattern was saved. -
Page 216: I If The Upper Thread Tension Is Too Weak
I If the Upper Thread Tension is Too Weak The upper thread will become loose. The embroidery thread on the right side of the fabric will loosen, the thread locks may loosen, or loops may appear on the right side of the fabric. -
Page 217: Changing The Thread Color Display
3. When embroidery data containing custom thread colors speci- 9 — fied with the PE-Design Ver. 5.0 is saved on a floppy disk, the stored custom thread colors are read as those from the sewing machine if “ON” is selected for this setting. -
Page 218: Creating Custom Thread Number
1 — Customized 4-digit numbers, for example, thread numbers specified by the thread manufacturer, can be specified for the embroidery thread colors, and these customized numbers can be dis- played. Two customized thread numbering sets can be created. I Creating a Custom Thread Numbering Set 2 —... - Page 219 1 Press to apply the entered number to the selected color. 6. Repeat steps 3 through 5 until all desired thread color 8 — numbers are specified. To change a specified thread color number, perform the steps described above to enter the new number.
-
Page 220: Changing The Embroidery Frame Display
4 Medium frame em- broidering area 5 Small frame em- broidering area 5 — 6 Grid lines 6 — Example 7 — 8 — 9 — 3. When you have finished selecting the embroidery frame dis- play, press Embroidery 5-45... -
Page 221: Revising The Pattern
REVISING THE PATTERN Using these keys, you can change the size of the pattern, rotate the pattern, etc. 1 — 2 — Pattern Revision Keys CAUTION 3 — If the key display is light gray, that function or op- eration can not be used with the selected stitch. -
Page 222: Changing The Size Of The Pattern
8 — * Some patterns or characters can be enlarged more than others. 9 — * Some patterns or characters can be enlarged to a greater degree if they are rotated 90 degrees. CAUTION When you have changed the size of the pattern, check the display of available embroidery frames and use an appro- priate frame. -
Page 223: Rotating The Pattern
When you have rotated the pattern, check the display of 4 — available embroidery frames and use an appropriate frame. If you use an embroidery frame not displayed as available for use, the presser foot may strike the frame and cause injury. 5 — 6 —... -
Page 224: Changing The Density Of A Pattern (Character And Border Patterns Only)
Changing the Density of a Pattern (Character and Border Patterns Only) 1 — 1. Press 2 — 3 — 4 — 5 — 6 — 2. The screen at left is displayed. Press to make the pattern less dense. 7 —... -
Page 225: Changing The Colors Of Character Patterns
1 — Press so that it appears as . The machine will stop after sewing each character, so you change the color of each character. Press the key again to return to the original setting. 2 — 3 — 4 —... -
Page 226: Memory Function
You can save embroidery patterns that you have customized and will use often; for example, your name or other combined character patterns, patterns that have been rotated or had the size changed, patterns that have had the sewing position changed, etc. -
Page 227: I If You Can Not Save The Pattern
I If You Can Not Save the Pattern If the screen at left displays, the maximum number of patterns have been saved, or the pattern you want to save takes a lot of memory, and the machine can not save it. If you delete a previously saved 7 —... - Page 228 1 — 3. Select the pattern you want to delete. 1 Shows the amount of memory used by the pattern selected to be deleted. 2 — 2 Shows the amount of memory needed to save the current pattern. 3 —...
- Page 229 6 — 6. If there is enough memory available after deleting the pattern, the pattern you want to save will be saved automatically. If there is not enough memory available after deleting the pattern, repeat the steps above to delete another pattern from the machine's 7 —...
-
Page 230: Retrieving Patterns From Memory
1. Press 2 — 3 — 4 — 5 — 6 — 2. The machine displays the patterns currently in the memory. Press the key of the pattern you want to sew. 7 — 8 — 9 — Embroidery 5-55... - Page 231 1 — 3. Press * If you decide not to retrieve the pattern from memory, press . The machine returns to the original screen. 2 — 3 — 4 — 5 — 6 — 4. The machine retrieves the pattern and prepares to embroider it.
-
Page 232: Embroidery Applications
EMBROIDERY APPLICATIONS Aligning the Left Side of a Pattern and Sewing 1 — 1. Mark the embroidery start position on the fabric, as shown. 2 — 3 — 2. Press so it appears as The needle position moves to the bottom left corner of the pattern (the embroidery frame moves so that the 4 —... -
Page 233: Connecting Characters
Connecting Characters 1 — Follow the steps below when all the characters in the pattern do not fit in the embroidery frame at once. Example: Connecting the letters “ABCDE” with “FGHI” 2 — A B C D E F G H I 1. - Page 234 1 — 6. Enter the letters “FGHI.” 7. Press to move the needle start position to The needle start position moves to the bottom left cor- 2 — ner of the pattern. 3 — 4 — 5 — 6 —...
-
Page 235: Embroidering An Outline Of A Pattern
Embroidering an Outline of a Pattern 1 — You can embroider the outline of a pattern to create different finishes. 1. Press 2 — 3 — 4 — 5 — 6 — 2. Press to advance the sewing order to the color of the outline. -
Page 236: Using A Frame Pattern To Make Appliqué (1)
Using a Frame Pattern to Make Appliqué (1) 1 — You can use framed patterns of the same size and shape, to create an appliqué. Embroider one pattern with a straight stitch and one pattern with a satin stitch. 1. Select a straight stitch frame pattern. Embroider the pat- tern onto the appliqué... -
Page 237: Using A Frame Pattern To Make Appliqué (2)
Using a Frame Pattern to Make Appliqué (2) 1 — A second method to make appliqué using the embroidery patterns. You do not have to change the fabric in the embroidery frame using this method. Embroider one pattern with a straight stitch and one pattern with a satin stitch. - Page 238 CAUTION Do not remove the fabric from the embroidery frame 2 — to cut. Also, do not pull strongly on the fabric. Other- wise, the fabric may loosen in the frame. 3 — 5. Select the satin stitch border pattern of the same shape as the appliqué.
-
Page 239: Embroidering Small Fabrics Or Fabric Edges
Embroidering Small Fabrics or Fabric Edges 1 — Use an embroidery stabilizer material to provide extra support. After embroidering, remove the stabilizer fabric carefully. Attach the stabilizer as shown in the examples below. We recommend using a stabilizer material for embroidery. Embroidering Small Fabrics 2 —... -
Page 240: Chapter 6 Embroidery Edit Functions Explanation Of The Editing Functions
3 — Move Patterns Within the 26 cm × 16 cm (10-1/4 inch × 6-1/4 inch) wide embroi- dery area, you can change -the position of patterns, and check the position on the LCD. 4 —... -
Page 241: Selecting Patterns To Edit
If your machine did not come furnished with a built-in floppy disk drive, you can receive an upgrade service for 8 — your machine, so that it can use floppy disk at your au- thorized dealer. 9 — Embroidery Edit Functions... - Page 242 1 — The method of selecting patterns without alphabetical characters is the same as selecting patterns for embroidery. 1. Select the type of pattern you want to sew. 2 — 3 — 4 — 5 — 6 — 2. Press the key of a pattern to select it.
- Page 243 6 — 5. The embroidery edit screen (at left) will appear. * See page 6-8 for more information about editing the pattern. 1 The pattern selected for editing is outlined in red on the em- 7 — broidery edit display.
-
Page 244: Selecting Character Patterns
Selecting Character Patterns 1 — When you select character patterns from the embroidery edit screen, you can edit the appearance of the pattern at the same time. 1. Press to select character patterns. 2 — 3 — 4 — 5 —... - Page 245 1 — 3. Enter the letters (Example: A B C D) * See page 5-11 for more information about selecting characters * Press to check the pattern when the selected characters are too small to see clearly. 2 — 4. Press to select the appearance of the pattern.
- Page 246 7. After you finish your selections, press 2 — 3 — 4 — 5 — 6 — 8. The embroidery edit screen will appear. See page 6-8 for more information about editing the patterns. 7 — 8 — 9 — Embroidery Edit Functions...
-
Page 247: Editing Embroidery Patterns
Rotate key Press this key to rotate the pattern. In the embroidery edit screen, 6-10 you can rotate a pattern one degree or ninety degrees at a time. 7 — Delete key Press this key to delete the selected pattern (the pattern out- 6-12 lined by the red box). -
Page 248: Moving The Pattern
Press to return the pattern to its original position. 2 — 3 — 4 — 5 — 6 — 1 Shows how far from the original position the pattern is now. 7 — 8 — 9 — Embroidery Edit Functions... -
Page 249: Rotating The Pattern
3 — 4 — 5 — 6 — 2. Press to rotate the pattern 90 deg. to the left. Press to rotate the pattern 90 deg. to the right. 7 — Press to rotate the pattern 1 deg. to the left. -
Page 250: Changing The Size Of The Pattern
Press to return the pattern to its original appearance. 7 — 8 — 9 — 1 Shows the size of the pattern being edited. 3. After changing the pattern’s size, press Embroidery Edit Functions 6-11... -
Page 251: Deleting The Pattern
Deleting the Pattern 1 — 1. Press 2 — 3 — 4 — 5 — 6 — 2. The pattern is deleted from the screen. 7 — 8 — 9 — 6-12 Embroidery Edit Functions... -
Page 252: Changing The Thread Color
2 — 3 — 4 — 5 — 6 — 2. The thread color palette screen displays. There are 61 colors to choose from. 3. Press to change the sewing order of the colors. Put 7 — the color you want to change at the top of the display. - Page 253 1 The color on top changes to the selected color. 2 — 2 The thread spool display of the selected color is larger. 5. After changing the colors, press 3 —...
-
Page 254: Changing The Configuration Of Character Patterns
2 — 3 — 4 — 5 — 6 — 2. Press the key of the layout you want to sew. 1 The display will show the selected layout. 7 — 3. After making your selections, press 8 — 9 —... -
Page 255: Changing Character Spacing
6 — 2. Press to widen the character spacing. Press to compact the character spacing. 7 — Press to return the pattern to its original appearance. 8 — 9 — 3. When finished changing the appearance, press 6-16 Embroidery Edit Functions... -
Page 256: Changing The Color Of Each Character In A Pattern
3 — 4 — 5 — 6 — 2. You can sew each character in a different color. The screen auto- matically displays each color as “Black.” 7 — * Press to change the color of the pattern (see page 6-13). -
Page 257: Adjusting Patterns After Editing
1. Press 2 — 3 — 4 — 5 — 6 — 2. If you plan to sew the pattern at that time, press to call the pattern preview screen. 7 — * Press to return to the embroidery edit screen. - Page 258 1 — 3. See page 5-29 for more information about sewing the patterns. * When you want to revise edited patterns, see page 6-30. 2 — 3 — 4 — 5 — 6 — 7 — 8 — 9 —...
-
Page 259: Combining And Editing Patterns
COMBINING AND EDITING PATTERNS 1 — Example 2 — 3 — 1. Attach the embroidery unit, and prepare the machine for embroidery (see page 5-3). 4 — 5 — 2. Press to call the screen at left. 6 — 3. Select a border. - Page 260 1 — 2 Press 2 times, then press to select the border. 2 — 3 — 4 — 5 — 6 — 4. Press 7 — 8 — 9 — Embroidery Edit Functions 6-21...
- Page 261 1 — 5. Press 2 — 3 — 4 — 5 — 6 — 6. Select the characters “Happy.” 1 Press 7 — 8 — 9 — 6-22 Embroidery Edit Functions...
- Page 262 * If you want to change the size, select , then use to change 7 — the size. * If you want to change the appearance of the letter part of the pattern, press 8 — 7. After selecting the characters, press 9 —...
- Page 263 1 — 8. Use to move the letters. 2 — 9. Press 3 — 4 — 5 — 6 — 10. Press again. 7 — 8 — 9 — 6-24 Embroidery Edit Functions...
- Page 264 1 — 11. Select the same font, then enter “Birthday”. The letters will ap- pear in the middle of the embroidery area display. 12. Press 2 — 3 — 4 — 5 — 6 — 13. Use to move the letters.
- Page 265 2 Press and enlarge the border. 4 — 3 Press to return to the Embroidery Edit screen. * If the characters or the entire pattern can not be seen clearly, press , then use to check the pattern. Press 5 —...
- Page 266 1 — 16. If you plan to sew the pattern at that time, press Press to re-edit the pattern. To combine the pattern with another pattern, select the new pat- 2 — tern type from this screen. 3 — 4 —...
-
Page 267: Sewing Combined Embroidery Patterns
4 — 5 — 6 — 2. When the border is finished, the green “cross” cursor will change to the “Happy” part of the pattern. Sew this part of the pattern next. 7 — 8 — 9 —... - Page 268 1 — 3. When “Happy” is embroidered, the green “cross” cursor will change to the “Birthday” part of the pattern. Sew this part of the pattern next. 2 — 3 — 4 — 5 — 6 — 7 — 8 —...
-
Page 269: Adjusting Edited Patterns
ADJUSTING EDITED PATTERNS 1 — 1. Press 2 — 3 — 4 — 5 — 6 — 2. Press 7 — 8 — 9 — 6-30 Embroidery Edit Functions... - Page 270 1 — 3. The machine will return to the embroidery edit screen. 4. Press to choose the section of the combined pattern to edit, and change the pattern. 2 — 3 — 4 — 5 — 6 — 7 —...
-
Page 271: Memory Functions
Note 8 — If your machine did not come furnished with a built-in floppy disk drive, you can receive an upgrade service for your machine, so that it can use floppy disk at your authorized dealer. -
Page 272: I If You Can Not Save The Pattern
I If You Can Not Save the Pattern If the screen shown at left displays, the maximum number of pat- terns have been saved, or the pattern you want to save takes a lot of memory, the machine can not save it. If you delete a previously 7 —... - Page 273 2. Previously saved patterns are displayed. 3. Select the pattern you want to delete. 1 Shows the amount of memory the selected pattern uses. 2 — 2 Shows how much memory you need to clear to save the current pattern. 3 — 4 —...
- Page 274 6 — 6. If there is enough memory available after deleting the pattern, the pattern you want to save will be saved automatically. If there is not enough memory available after deleting the pattern, repeat the steps above to delete another pattern from the machine’s 7 —...
-
Page 275: Retrieving Saved Patterns
Retrieving Saved Patterns 1 — 1. Press 2 — 3 — 4 — 5 — 6 — 2. The machine displays the patterns saved in the memory. Select a pattern to retrieve. 7 — 8 — 9 — 6-36 Embroidery Edit Functions... - Page 276 1 — 3. Select the pattern you want to retrieve, and press * If you decide not to retrieve a pattern, press . You will return to the embroidery edit screen. 2 — 3 — 4 — 5 — 6 —...
- Page 277 1 — 5. Press 2 — 3 — 4 — 5 — 6 — 6. The machine retrieves the pattern and prepares to embroider it. 7 — 8 — 9 — 6-38 Embroidery Edit Functions...
-
Page 278: Chapter 7 My Custom Stitch
2 End point 4 — 3 Intersection Note • Simplify the design so that it can be sewn as a continuous line. For a more attractive stitch, close the design by intersecting lines. 5 — • If the design will be repeated and linked, the start point and end point of the design should be at the same height. - Page 279 1 — Stitch Stitch 16 2 — Stitch 31 3 — Stitch 4 — Stitch 16 5 — Stitch 31 6 — Stitch 7 — Stitch 16 Stitch 31 8 — Stitch 9 — Stitch 16 Stitch 31 My Custom Stitch...
-
Page 280: Entering Stitch Data
8 — 5 Press this key to select whether one stitch or three stitches are sewn between two points. 6 Press this key to erase the last point that has been 9 — set. 7 Press this key to add the point indicated... - Page 281 4. Use the keys to move to the coordinates of the first 3 — point that was made on the grid sheet (from step 2 on page 7-1). 5. Press to add the point indicated by 4 — 5 —...
- Page 282 4 — 1 Linking stitches Note If you have entered points that are too close together, the fabric may not feed properly. Edit the stitch data to leave a 5 — larger space between points. 6 — 7 —...
-
Page 283: Editing Stitch Data
4 Press this key to move end point. 9 — 5 Press this key to move part of or all of the design. (Refer to page 7-8 for more details.) 6 Press this key to insert a point. (Refer to page 7-9 for more details.) -
Page 284: I Moving A Point
7 — 3. When finished revising the pattern, press so it ap- pears as 8 — 4. Press to go to the sewing screen. (See page 4-9 for instruc- tions on sewing the stitch). 9 — My Custom Stitch... -
Page 285: I Moving Part Or All Of The Design
2 — 2. Press . The selected point and all points that come after it are surrounded by a box. (This indicates the area that is to be moved.) 3 — 4 — 5 —... -
Page 286: I Inserting New Points
4 — 5 — 6 — I Inserting New Points 1. Press to move to point at the beginning of the line that you wish to add a new point to. 7 — 8 — 9 — My Custom Stitch... - Page 287 7 — 4. When finished revising the pattern, press so it ap- pears as 5. Press to go to the sewing screen. (See page 4-9 for instruc- 8 — tions on sewing the stitch). 9 — 7-10 My Custom Stitch...
-
Page 288: Memory Functions
MEMORY FUNCTIONS Storing the custom design 1 — Stitch patterns created using the MY CUSTOM STITCH function can be stored for later use. 1. Press from the stitch editing keys. 2 — 3 — 4 — 5 — 6 —... -
Page 289: I If The Stitch Pattern Cannot Be Saved
1 — 3. The screen shown at the left appears. If the stitch was saved suc- cessfully, the previous screen automatically appears. * Saving as stitch pattern takes approximately 10 seconds. CAUTION 2 — Do not turn off the machine while the “Saving” message is displayed, otherwise the stitch pattern data being saved may be lost. -
Page 290: Retrieving A Stitch Design That Has Been Saved
1. Press 6 — 2. To retrieve a stitch pattern saved in the machine’s memory, press To retrieve a stitch pattern saved on a floppy disk, in- 7 — sert the floppy disk, and then press CAUTION • Only insert or remove floppy disks while is displayed, or when 8 —... - Page 291 1 — 3. A list of saved stitch patterns is displayed. 4. Select the stitch pattern that you wish to retrieve. 1 Press to quit trying to retrieve the stitch pattern. 2 — 3 — 4 — 5 — 6 —...
- Page 292 1 — 6. The sewing screen for that stitch will then be displayed. 2 — 3 — 4 — 5 — 6 — 7 — 8 — 9 — My Custom Stitch 7-15...
- Page 293 1 — 2 — 3 — 4 — 5 — 6 — 7 — 8 — 9 — 7-16 My Custom Stitch...
-
Page 294: Chapter 8 Care And Maintenance
CHANGING THE LIGHT BULB 1 — CAUTION • Turn off the main power switch and unplug the machine before changing the light bulb. If the machine is on and the “Start/Stop” button is pressed accidentally, injuries may result. 2 —... -
Page 295: Cleaning The Machine
I Cleaning the Race and Shuttle If dust or bits of dirt collect in the race or shuttle, the machine will not run well, and the bobbin thread detection function may not operate. Keep the machine clean for best results. - Page 296 4 — 2 Brush 5 — 6. Check that the notch on the shuttle is in the same posi- tion as when you removed the race. Position the race so that the shelf and spring are aligned, and insert the 6 —...
-
Page 297: Cleaning The Floppy Disk Drive Heads
CLEANING THE FLOPPY DISK DRIVE HEADS If the heads of the floppy disk drive become dirty, the data on the disks may not be read normally. We suggest that you use a cleaning disk for 3.5 inch floppy disk drives regularly. -
Page 298: Chapter 9 Troubleshooting
ADJUSTING THE SCREEN 1 — If the screen is difficult to see when you turn on the power, follow the steps below. 1. Press your finger anywhere on the screen. Holding your finger on the screen, turn the main power switch off and back on. -
Page 299: Adjusting The Touch Panel
ADJUSTING THE TOUCH PANEL If the screen does not respond correctly when you touch a key (the machine does not perform the operation or performs a different operation), follow the steps below to make the proper adjust- 1 — ments. - Page 300 Do not press strongly on the screen. Otherwise, 5 — damage may result. 6. Press the numbers in order 1 - 5. If the buzzer sounds one time after you press number 5, the operation is 6 — finished. If the buzzer sounds twice, there was an er- ror.
-
Page 301: Using The "Troubleshooting" Function
USING THE “TROUBLESHOOTING” FUNCTION Use the troubleshooting key for advice about minor sewing problems during sewing. 1 — 1. Press to call the screen at left. 2. Press * Press at any time to return to the original screen. 2 —... -
Page 302: Making Minor Machine Adjustments
MAKING MINOR MACHINE ADJUSTMENTS If you have a minor problem with your sewing machine, check the following solutions. If the solutions suggested do not correct the problem, contact your authorized dealer. 1 — Problem Cause Solution Page 1 Machine is not threaded correctly (used Rethread the machine correctly. - Page 303 1 — Problem Cause Solution Page 1 There is a mistake in the upper or bob- Check the steps for threading the 1-32 bin threading. machine and rethread it correctly. 2 Spool cap is set incorrectly. Check the method for attaching the...
- Page 304 1 Thread is twisted. Use scissors, etc., to cut the twisted thread and remove it from the race, etc. 2 Fabric was not inserted into the frame If the fabric is not stretched tight in 5-21 2 — correctly ( fabric was loose, etc.).
- Page 305 Lengthen the stitch length setting. not feed 3 Wrong presser foot was used. Use the correct presser foot. through the 4 Needle is turned, bent or the point is dull. Replace the needle. 1-43 7 — machine 5 Thread is entangled.
- Page 306 • This machine is equipped with a thread detection device. If the “Start/Stop” button is pushed before the upper threading is done, the machine will not operate properly. Also, depending on the pattern selected, the machine may feed the fabric even if the needle is raised. This is 8 —...
-
Page 307: Error Messages
If the machine is not properly set and the “Start/Stop” button or the “Reverse/Reinforcement Stitch” button is pressed, or if the operation procedure is incorrect, the machine does not start. An alarm sounds and an error message is displayed on the LCD. If an error message displays, follow the instructions in the message. - Page 308 This message is dis- This message is played when the “Start/ displayed when the Stop” button is pushed embroidery unit is while the machine is in attached, and embroidery edit mode 4 — and a pattern is being is pressed.
- Page 309 6 — pattern is too large for the embroidery unit tries to embroidery frame. You can initialize while the rotate the pattern 90 embroidery frame is degrees and continue attached.
- Page 310 1 — This message is dis- This message is dis- played when the floppy played when you try to disk is not formatted or save a pattern onto a is not formatted prop- write-protected floppy erly. disk. 2 — 3 —...
- Page 311 This message is dis- played when a previ- played when there is ously saved pattern is not enough space on deleted. the floppy disk to save a 4 — selected pattern. 5 — This message is dis- This message is dis-...
-
Page 312: I Alarm Sounds
If the operation proce- dure was incorrect, the machine will beep twice 6 — or four times. Note If you want to turn the alarm off, press See page 1-20 for more details. 7 — 8 — 9 —... - Page 313 1 — 2 — 3 — 4 — 5 — 6 — 7 — 8 — 9 — 9-16 Troubleshooting...
-
Page 314: Appendix
Appendix SPECIFICATIONS 1 — Item Specification 47.0 cm (W) × 30.8 cm (H) × 25.3 cm (D) Sewing Machine Dimensions 50.0 cm (W) × 31.5 cm (H) × 27.0 cm (D) Case Dimensions Weight 11 kg (25 lb.) (with case: 12.5 kg (28 lb.)) - Page 315 1 — 2 — 3 — 4 — 5 — 6 — 7 — 8 — 9 — Appendix...
-
Page 316: Index
Bobbin 7mm satin stitch patterns 4-4 pulling up bobbin thread 1-38 changing length 4-16 runs out of thread 5-35 90 degree rotation key 5-46, 5-48 setting 1-31 2 — winding 1-25, 1-29 Bobbin thread sensor 1-13, 5-19 Bobbin winder button 1-5... - Page 317 5-46 sizes 3-64 ribbons or tape 5-64 selecting patterns 5-8 small fabrics 5-64 Fabric using a frame pattern to make appliqué 5-61, needle/fabric/thread combinations 1-45 5-62 setting in an embroidery frame 5-22 Embroidery basic operation key 1-21, 1-23 Index...
- Page 318 Maintenance key 1-21, 1-23 cleaning 8-4 Manual memory key 1-15, 3-12 Floral alphabet patterns 5-13 Memory key 4-14, 4-27, 5-46, 5-51, 6-32 Foot controller 1-7 Mirror image key 1-14, 3-11, 4-14, 4-16, Frame patterns 5-15, 5-61, 5-62 4-21, 5-46, 5-48, 6-8 Free arm 1-6 3 —...
- Page 319 2-10 embroidery patterns 5-51 thread tension 2-13 MY CUSTOM STITCH designs 7-11 Stitch width and stitch length key 1-15, 2-8, utility stitch settings 3-12 2-9, 4-14 Scallop stitches 3-41 Straight stitches 3-16, 3-65 Screen see LCD...
- Page 320 Thread density key 4-14 Thread palette key 6-8, 6-13 Thread tension 4 — embroidery 5-40 utility stitches 2-13 Thread tension key 1-15, 2-13, 4-14, 5-40, 5-46 Top cover 1-5 5 — Trial key 5-27, 5-46 Troubleshooting 9-1, 9-4, 9-5 Troubleshooting key 1-21, 1-23 Twin needle 2-5 6 —...
- Page 321 ENGLISH 114-230 XC3200-001 0205 Printed in Japan...