Table of Contents
Advertisement
Advertisement
Table of Contents

Related Manuals for Fagor FDO800X


Summary of Contents for Fagor FDO800X
- Page 1 USERS MANUAL oven...
-
Page 2: Table Of Contents
How to use the timer P.19 Changing a Light Bulb P.20 Cooking mode P.21-22 HOW DO YOU CLEAN THE CAVITY OF YOUR OVEN? What is pyrolysis? P.23 In what situations should pyrolysis be used? P.23 How do you use the pyrolysis function? P.23-24... -
Page 3: Introduction
Dear Customer, You have just acquired a F F A A G G O O R R o o v v e e n n and we would like to thank you. Our research teams have created this new generation of appliances for you so that cooking is a pleasure every day. -
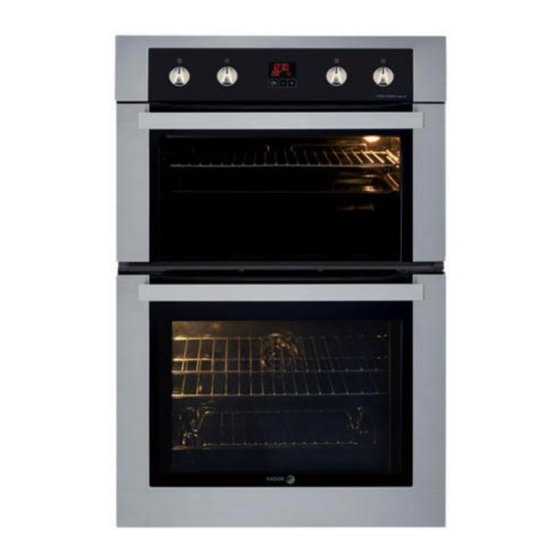
Page 4: Your Lower Oven
YOUR OVEN Lower oven Upper oven Feature selector Temperature control Programmable clock(Lower) Light Rail positions... -
Page 5: Accessories
ACCESSORIES • • Anti-tip safety shelf Food can either be placed on the shelf in a dish or cake tin for cooking or browning. • • Sloped 45 mm dish equipped with a special grid for grilling It serves to collect juices and fat from cooking meat or fish placed directly on the grid during a grill or pulsed grill sequence. -
Page 6: Safety Recommendations
— WARNING: accessible parts may become hot when the grill is used. It is advisable to — Do not use your oven as a larder or to store keep children away from the apppliance. any items after use. -
Page 7: Caring For The Environment
This appliance complies with the following European directives: - Low Voltage Directive 2006/95/CE for affixing the CE mark. - Electromagnetic Compatibility Directive 89/336/CEE modified by directive 93/68/CEE for attaching the CE mark. - CE regulation 1935/2004 concerning materials and objects intended for contact with food substances. -
Page 8: How To Install Your Oven
We cannot be held responsible for any accident resulting from inexistent, defective or incorrect earthing. If the electrical installation in your residence requires any changes in order to hook up your appliance, contact a professional electrician. If the oven malfunctions in any way, unplug the appliance or remove the fuse corresponding to the sector where the oven is hooked up. -
Page 9: St Connection Or Change Of The Power Cable
— — Loosen the screws from the terminal board and remove the power cord to be replaced. — — Insert the power cable through the side of the cover into the cable clip located to the right of the terminal board. -
Page 10: Choice Of Location
The oven can be installed in a cabinet column the mounting holes. (open* or closed) that has the appropriate di- 2) Drill a hole in the cabinet panel to avoid split- mensions for built-in installation (see diagram ting the wood. -
Page 11: How To Cook Straightaway
The walls of the upper oven are covered with normal enamel, the oven is best used : - With a thermostat setting of 50 to 250 for dishes which cause little or no spitting or soi- ling, such as small and large cakes, etc. - Page 12 • Once the temperature reached don’t forget to select the desired cooking mode. C C O O N N V V E E N N T T I I O O N N A A L L O O V V E E N N •The food is cooked by top and bottom elements.
-
Page 13: How To Change A Bulb
The lamp is accessible: I I n n s s i i d d e e t t h h e e o o v v e e n n . . The bulb is located on the ceiling of your oven’s cavity. -
Page 14: How To Use Your Lower Oven
HOW TO USE YOUR LOWER OVEN 1. CLOSE-UP OF YOUR PROGRAMMER Display for temperatures, times, cooking duration and timer. Temperature display indicator. Cooking time display indicator. Cooking end time display indicator. Independent timer display indicator. Touch controls for accessing various programmer settings. - Page 15 , , t t h h e e s s e e t t t t i i n n g g w w i i l l l l b b e e a a u u t t o o m m a a t t i i c c a a l l l l y y r r e e c c o o r r d d e e d d a a f f t t e e r r a a f f e e w w s s e e c c o o n n d d s s . .
-
Page 16: How Do You Program For Immediate Cooking
P P l l a a c c e e y y o o u u r r d d i i s s h h i i n n t t h h e e o o v v... - Page 17 The display flashes 0:00 to indicate that you can now adjust the set- ting. 3 3 . . Move the setting selector toward + + or - - to choose the desired tem- perature. Example: 25 min cooking time, 210°C.
- Page 18 A A f f t t e e r r t t h h e e s s e e s s t t e e p p s s , , the oven heating is delayed so that cooking...
-
Page 19: How To Use The Timer
. -
Page 20: How Do You Change The Bulb
D D i i s s c c o o n n n n e e c c t t y y o o u u r r o o v v e e n n b b e e f f o o r r e e p p e e r r f f o o r r m m i i n n g g a a n n y y t t a a s s k k o o n n t t h h e e b b u u l l b b t t o o a a v v o o i i d d t t h h e e r r i i s s k k o o f f e e l l e e c c t t r r i i c c s s h h o o c c k k a a n n d d , , i i f f n n e e c c e e s s s s a a r r y y , , l l e e t t t t h h e e a a p p p p l l i i a a n n c c e e c c o o o o l l d d o o w w n n . . - Page 21 •Slide the drip tray onto the bottom shelf support. •Recommended for all r r o o a a s s t t s s on the spit, for sealing and thoroughly cooking l l e e g g , c c u u t t s s o o f f b b e e e e f f .
- Page 22 OVEN COOKING MODES C C O O M M B B I I N N E E D D H H E E A A T T (recommended temperature 2 2 0 0 5 5 ° ° C C min 35°C max 275°C) •Cooking controlled by the upper and lower heating elements and by the fans.
-
Page 23: How Do You Clean The Cavity Of Your Oven
HOW DO YOU CLEAN THE CAVITY OF YOUR OVEN 1. WHAT IS PYROLYSIS? - Pyrolysis is a cycle during which the oven cavity is heated to a very high temperature in order to eliminate soiling from splattering and spills. The smoke and odours released are destroyed as they move through catalyse - Pyrolysis is not necessary after each cooking cycle, but simply when the dirtiness warrants it. - Page 24 Return the function selector to the 0 position 0. e) When the oven is cool, use a damp cloth to remove the white ashes. The oven is clean and once again ready for the cooking application of your choice.
-
Page 25: Troublesooting
125°C. - Call After-Sales Service • If it does not stop after one hour. Department. • The door is not properly closed. - Verify that the door is locked. • The locking system is defective. -
Page 26: Service Calls
AFTER-SALES SERVICE • SERVICE CALLS Any repairs that are made to your appliance must be handled by a qualified professional authorised to work on the brand. When you call, mention your appliance’s complete refer- ence (model, type, serial number). This infor- mation appears on the manufacturer’s name-... - Page 27 CZ5700389 04/10...