Advertisement
FEATURES

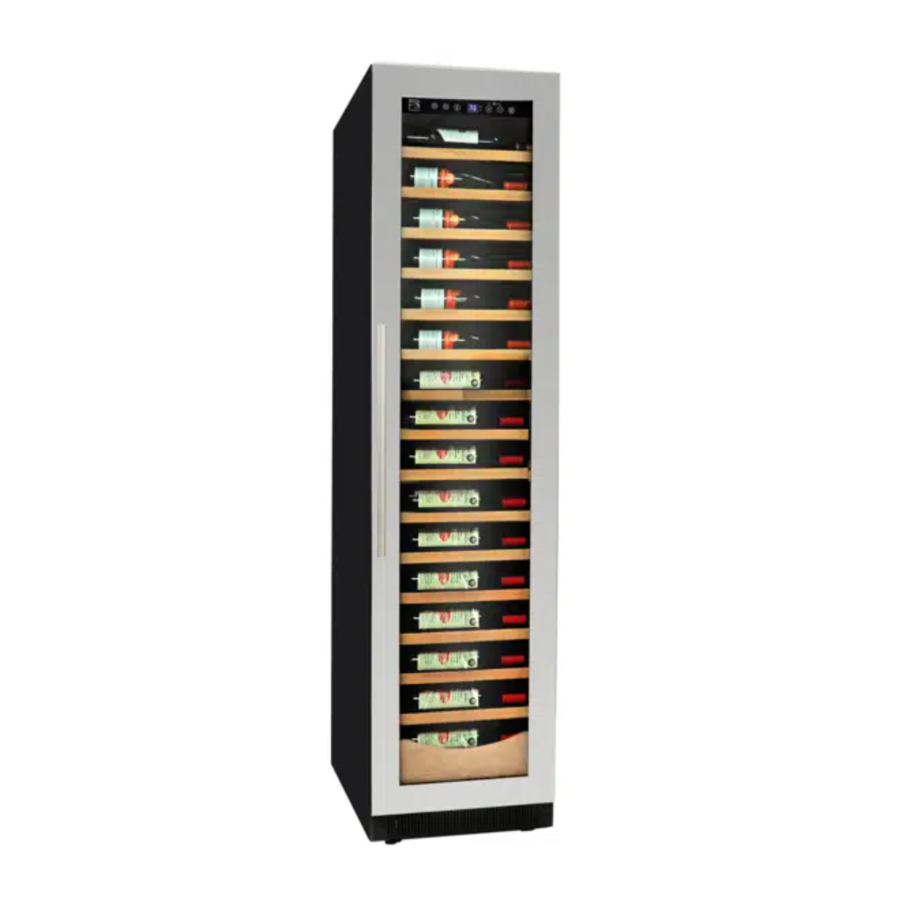
- Single Zone Wine Fridge made for those who love to entertain
- Capacity: 112 bottles
- Touch pad temperature control with LED Display
- Temperature range: 5-20°C / 41-68°F
- Reversible dual pane glass door
- LED interior surround lighting
- Front venting allows for built-in or freestanding installation
- Compressor based cooling system with fans
- 15 beechwood shelves, smooth rolling on ball-bearing tracks

- 1 beechwood drawer


BEFORE FIRST USE
- Carefully remove the exterior and interior packing and check that all parts and accessories are present. Remove any promotional labels or stickers and safely dispose of plastic bags or small pieces that could present a suffocation or choking hazard.
- Let the wine cellar stand upright for at least 6 hours before connecting it to a power source. This will reduce the possibility of a malfunction in the cooling system from handling during transit.
- Wipe the interior surfaces with a clean, damp cloth to remove any dirt or dust and dry thoroughly. Do not use abrasive cleansers or scouring pads.
- When deciding where to place the wine cellar, observe the following safeguards:
- Make sure the floor is strong enough to support it when it is filled to capacity.
- The electrical plug must be accessible and an extension cord must not be used.
- Place it away from heat sources and out of direct sunlight.
- Avoid placing it where it will be exposed to moisture or extreme cold.

The wine cellar is extremely heavy. To reduce the risk of injury, two people are needed to move the unit and/or reverse the door.
- Measure the space carefully when preparing for built-in installation.

- Once the wine cellar is in place, adjust the front leveling foot to stabilize the unit.

REVERSING THE DOOR
- Gather the following items before starting:
- flat head screwdriver
- 3/32" hex key / Allen key
- Phillips head screwdriver
- stepstool
The door is very heavy. Two people are needed to remove or replace the door assembly. To reduce the risk of injury or damage, one person should hold the door while the other removes the hinges.
NOTE - All parts removed must be saved to do the reinstallation of door
- Open the wine cellar door and locate the upper and lower hinge covers. Using a flat head screwdriver, pry off the hinge covers to expose the hinge pins and set aside.
![]()
- Carefully pry up the lower hinge pin with the screwdriver, remove and set aside.
![]()
- With one person holding the door securely, locate the opening for the upper hinge pin on the top edge of the door. Using a 3/32" hex key/Allen key, unscrew and remove the upper hinge pin.

- Pull the door away from the cabinet straight towards you to remove it and set it aside on a padded surface.

- Using a hex key/allen key, remove the six mounting screws and detach the hinges from the cabinet. Carefully pry off the plastic hole covers on the opposite side of the cabinet and replace them in the holes left by the mounting screws you just removed.
- Exchange the hinges and reinstall them on the diagonally opposite side of the cabinet (the upper hinge from the right side will become the lower hinge on the left and vice versa).
![]()

- Unscrew the magnetic latch from the bottom of the door. Flip the door over so the bottom is now the top and vice versa and install the magnetic latch over the guide holes on the new bottom.
![]()
- Align the notches in the door with the hinges and push the door straight back towards the cabinet into place.

- Install the upper door hinge pin and tighten it with a hexagon wrench.

- Install the lower door hinge pin then replace the hinge covers.


INSTALLING THE DOOR HANDLE

- Locate the screw holes on the inside of the door and carefully pull the rubber gasket out to expose them completely.
- Align the door handle with the screw holes. Loosely attach the first screw and washers. Attach the second screw and washers, tightening fully, and then tighten the first set. Do not overtighten, as this could damage the handle and the door frame.
- Return the door gasket to its original position, using a flat screwdriver to gently push it into place if needed.
REMOVING SHELVES
- Pull the shelf out as far as it will go.
- Using a slim stick or flat head screwdriver, press the plastic strip on the left side up and pull the left side of the shelf slightly outwards. Press the plastic strip on the right side down and pull the right side of the shelf slightly outwards.

- Carefully remove the shelf.

To avoid damaging the door gasket, make sure the door is completely open when removing shelves from the cabinet.
LOADING THE UNIT
Your wine cellar was designed to hold up to 112 standard Bordeaux bottles, 7 on each shelf. Larger and irregularly shaped bottles can be accommodated by removing shelves, which will reduce the total capacity.

For best results when loading the wine cellar:
- Spread the bottles out evenly so the weight is not concentrated in one area.
- Do not group bottles at either the top or bottom of the cabinet.
- Make sure the bottles do not touch the interior walls of the cabinet.
CONTROL PANEL

- Power ON/OFF : Press and hold for 3 seconds to power the wine cellar on or off.
- °C/°F Selector : Touch to change the temperature display between Celsius and Fahrenheit.
- Set / Change Temperature : Touch to display the current programmed temperature and enter temperature setting mode. After 5 seconds without a button being pressed, the display will change back to the actual interior temperature.
- Temperature Display : LED display shows either the selected temperature (in temperature setting mode) or actual interior temperature.
- Temperature +/- : During temperature setting mode, touch + to increase and - to decrease by 1 degree from a minimum of 5° to a maximum of 20°. The control panel will automatically lock after 3 minutes without a button being pressed. Press and hold the + and - buttons at the same time for 3 seconds to unlock.
- Light ON/OFF : Touch to turn the interior light on or or off. The light will also turn on automatically when the door is opened.
CARE & MAINTENANCE
CHARCOAL FILTRATION SYSTEM
Wine is a living object that breathes through the cork of its bottle. In addition to maintaining wines at an optimal temperature, this wine cellar is equipped with a charcoal filtration system to ensure air purity, cooling efficiency, and to maintain an odor free cabinet. To keep the filtration system working at peak efficiency, the filter should be changed every 12 months. The filter assembly is located at the rear panel inside your cellar.
To replace the filter:
- Remove the bottles of wine from the two shelves in front of the filter. Remove the two shelves and set them aside.
- Rotate the filter 45 degrees counterclockwise to unlock and remove it.
- Position the new filter in the opening and rotate 45 degrees clockwise to lock it in place.

- Replace the shelves and wine that you removed.

CLEANING THE PRODUCT
- Power off and unplug the wine cellar and then remove all bottles and shelves.
- Wash the interior surfaces with a soft cloth or sponge and a mixture of warm water and baking soda (approximately 2 tbsp of baking soda to 1 qt of water). Wring out any excess water before wiping the control panel. Dry thoroughly.
- Wash the shelves with a soft cloth or sponge and a mild dish soap. Rinse and dry thoroughly.
- Wipe the exterior with a soft cloth or sponge and a mild dish soap, being extremely careful to avoid liquid contacting any electrical components. Rinse well and wipe dry with a clean soft cloth.
- Replace the shelves and bottles that you removed.
POWER INTERRUPTIONS
Most power failures are corrected within a few hours and will not affect the temperature of the wine cellar, especially if you avoid opening the door while the power is off. Wait 3-5 minutes before restarting the wine cellar after it has been unplugged, powered off, or experienced a power failure; the wine cellar will not operate if you attempt to restart it before that time.
NOTE - If the power is going to be out for an extended period, you may need to find alternate storage for your wine.
MOVING THE PRODUCT
To reduce the risk of property damage or damage to the wine cellar while moving it, observe the following safeguards:
- Remove all bottles of wine. Moving the wine cellar while loaded could distort the body.
- Remove shelves or place foam between them to prevent them from moving during transit.
- Turn the adjustable leg up to the base.
- Tape the door shut.
- Protect the outside of the wine cellar with a blanket or similar items.
- If possible, keep the wine cellar in an upright position during transit.
The wine cellar is extremely heavy. To reduce the risk of injury, two people are needed to move the unit and/or reverse the door.
TROUBLESHOOTING
You can solve many common appliance problems easily, saving you the cost of a possible service call. Try the suggestions below to see if you can solve the problem before calling the servicer.
| PROBLEM | POSSIBLE CAUSES |
The unit does not operate | Power cord is not plugged in. Wine cellar is powered off. Tripped circuit breaker or blown fuse. |
The unit is not cold enough | Temperature is set too high. High ambient temperature. Door is being opened too frequently. Door is not closed completely. Door gasket does not seal properly. |
The unit turns off and on frequently | Ambient temperature is higher than usual. Cabinet overloaded. Door is being opened too frequently. Door is not closed completely. Door gasket does not seal properly. |
Interior light does not turn on | Light is turned off. Bulb is burnt out. Power cord is not plugged in. Wine cellar is powered off. Tripped circuit breaker or blown fuse. Door gasket does not seal properly. |
Excessive vibration | Wine cellar is not level. |
Excessive noise | Wine cellar is not level. Rattling sounds from the ow of refrigerant are normal. Gurgling sounds as each cycle ends are normal. Popping and/or crackling noises may be caused by contraction and expansion of the inside walls. |
Door does not close properly | Wine cellar is not level. Door was reversed but not properly reinstalled. Dirt or debris caught in the door gasket. One or more shelves are out of position. |
IMPORTANT SAFEGUARDS
- READ ALL INSTRUCTIONS BEFORE USE.
- Do not attempt to operate the appliance by any method other than as described in this manual. The warranty is invalid if the appliance is not used according to instructions.
- Before using the wine cellar for the first time, remove any packaging material, promotional labels, and stickers. Safely dispose of plastic bags or small pieces that could present a suffocation or choking hazard to young children.
- This wine cooler is intended to be used exclusively for the storage of wine or beverages. It is recommended only for indoor household use.
- This wine cellar is not intended for use by persons, including children, with reduced physical, sensory or mental capabilities, or lack of experience and knowledge, without supervision and instruction by a person responsible for their safety. Never allow children to operate, play with, or crawl inside the appliance.
- RISK OF CHILD ENTRAPMENT AND SUFFOCATION: Junked, abandoned, and improperly stored appliances pose a significant danger to children at all times. To reduce the risk, before disposing of or storing your wine cellar:
- REMOVE THE DOOR; and
- leave all shelves in place to prevent children from easily climbing inside.
- Before using, check that the voltage of the wall outlet corresponds to the one shown on the rating plate. Never attempt to use the wine cellar with a voltage converter or an extension cord.
![burn hazard]()
![shock hazard]()
GROUNDING PLUG: This wine cellar is equipped with a 3-prong grounding plug which must be used with a properly grounded 3-hole receptacle. DO NOT attempt to alter the plug for use in a 2-prong receptacle or alter a 2-prong receptacle to make the 3-prong plug fit. Doing so will void your warranty and could cause fire or electrical shock. If the plug will not fit into your outlet, have the proper receptacle installed by a qualified electrician.- Do not attempt to operate the wine cellar if there is damage to the cord or plug, after it has malfunctioned or been damaged in any way, or if it is not operating properly. Contact the nearest authorized service facility for examination and adjustment or repair.
- The electrical plug must be accessible at all times. To ensure the plug is accessible, release theelectric cord before moving the wine cellar to its final location.
![shock hazard]() To protect against electrical shock, avoid contact between any electrical components and water or any other liquid. Never touch the plug with wet hands. Always unplug the wine cellar from the power source before cleaning. To unplug, grasp the plug and pull it from the electrical outlet. Never unplug by pulling on the power cord.
To protect against electrical shock, avoid contact between any electrical components and water or any other liquid. Never touch the plug with wet hands. Always unplug the wine cellar from the power source before cleaning. To unplug, grasp the plug and pull it from the electrical outlet. Never unplug by pulling on the power cord.![burn hazard]() This wine cellar contains a flammable refrigerant. To reduce the risk of fire or explosion, observe the following safeguards:
This wine cellar contains a flammable refrigerant. To reduce the risk of fire or explosion, observe the following safeguards: - Use extreme caution during transportation to avoid damaging the cooling pipework.
- Never place flammable or explosive items (ie. aerosol cans) in, on, or near the wine cellar.
- Do not store or use flammable vapors or liquids (ie. gasoline) near the wine cellar.
![burn hazard]() Never clean the wine cellar body or parts with flammable fluids as residual fumes could create a risk of fire or explosion.
Never clean the wine cellar body or parts with flammable fluids as residual fumes could create a risk of fire or explosion.
- Ensure the floor on which the wine cellar is placed is strong enough to support the total weight of the unit when it is fully loaded.
- The wine cellar should be positioned to prevent people from touching the compressor.
- Place the wine cellar away from heat sources (ie. stove, heater, radiator) as these may increase electricity consumption and away from direct sunlight which could affect the acrylic coating.
![shock hazard]() To protect against electric shock or damage to the unit, avoid placing the wine cellar in a moist or very humid area.
To protect against electric shock or damage to the unit, avoid placing the wine cellar in a moist or very humid area.- Extreme cold ambient temperatures may cause the wine cellar to not perform properly.
- Once the wine cellar is in place, adjust the front leveling leg to stabilize the unit.
- Before connecting the wine cellar to a power source, let it stand upright for at least 6 hours to reduce the possibility of a malfunction in the cooling system from handling during transportation.
- Keep all ventilation openings clear of obstruction at all times.
- Do not cover shelves with aluminum foil or any other material that could impair air circulation.
- Do not move the wine cellar while loaded with wine as this could distort the body.
- DO NOT OVERLOAD: Maximum capacity of this wine cellar is 111 standard Bordeaux bottles.
![shock hazard]() To protect against electrical shock or damage to the unit, store wine sealed bottles.
To protect against electrical shock or damage to the unit, store wine sealed bottles.- Open the door all the way before pulling out shelves to avoid damaging the door gasket. Never try to pull out more than one shelf at a time.
![burn hazard]()
![shock hazard]()
Do not use mechanical devices or other means to accelerate the defrosting process and do not use electrical appliances inside the wine cellar, other than those recommended by the manufacturer. Aftermarket attachments or accessories not recommended by Kenmore will void your warranty and may cause fire, electrical shock, or injury.- For any maintenance other than cleaning, call or email Koolatron Customer Assistance.


SAVE THESE INSTRUCTIONS!
Customer Assistance
1-800-265-8456
www.koolatron.com

Documents / Resources
References

Download manual
Here you can download full pdf version of manual, it may contain additional safety instructions, warranty information, FCC rules, etc.
Download Kenmore Elite KKEWCBDZ112 - 112-bottle Wine Fridge Single Zone Manual
Advertisement
Thank you! Your question has been received!


Need Assistance?
Do you have a question about the Elite KKEWCBDZ112 that isn't answered in the manual? Leave your question here.