Advertisement
- 1 PRECAUTIONS
- 2 DESCRIPTION
- 3 USE
- 4 CLEANING AND MAINTENANCE
- 5 INSTALLATION
- 6 Documents / Resources
PRECAUTIONS
General safety instructions
Risk of personal injury
![]()
During use, the appliance and its accessible parts become very hot. Children must be kept away from the appliance.![]()
During use, the appliance and its accessible parts become very hot. Never touch the heating elements during use.- Do not touch the interior walls during use of hot functions.
- Protect your hands by wearing oven gloves when moving food inside the appliance.
- Wear oven gloves when handling hot trays or other containers to prevent burns.
- Do not touch the appliance with damp or wet hands or feet.
- Never try to put out a fire or flames with water: turn off the appliance and smother the flames with a lid or a fire blanket.
- This appliance may be used by children aged at least 8 and by people of reduced physical, sensory or mental capacity, or lacking in experience in the use of electrical appliances, provided that they are supervised or instructed by adults who are responsible for their safety.
- Children must not play with the appliance.
- Keep children below the age of 8 away from the appliance unless they are constantly supervised.
- Do not allow children to approach the appliance when it is in operation.
- Cleaning and maintenance must not be carried out by unsupervised children.
- The cooking process must always be monitored. A short cooking process must be continuously monitored.
- Never leave the appliance unattended during cooking operations where fats or oils could be released, as these could then heat up and catch fire. Be very careful.
- Do not place trays or containers on the bottom of the appliance.
- Ensure that the containers are suitable for use at low temperatures.
- Avoid using plastic containers, we recommended using silicone containers.
- Arrange the food carefully inside the appliance so that air can circulate correctly.
- Do not stack the foods on top of each other.
- Take great care when handling and consuming raw food, in particular fresh fish and cephalopods, as there is the risk of contamination from Anisakis, a parasite which is hazardous to human health. This risk can be eliminated by cooking to a minimum temperature of 65°C, or by deep-freezing to -18°C and then holding at -18°C for at least 96 hours.
- In order to retain the properties of hot foods, do not allow them to remain at room temperature before blast chilling or deepfreezing them.
- Do not touch frozen foods (especially with wet hands), nor put them in your mouth.
- Keep the door closed when performing any operation on the appliance.
- Do not insert pointed metal objects (cutlery or utensils) into the slots in the appliance.
- Switch off the appliance immediately after use.
- DO NOT USE OR STORE FLAMMABLE MATERIALS NEAR THE APPLIANCE.
- DO NOT USE AEROSOLS IN THE VICINITY OF THIS APPLIANCE WHILST IT IS IN USE.
- DO NOT MODIFY THIS APPLIANCE.
- Do not try to repair the appliance yourself or without the assistance of a qualified technician.
- Do not pull the cable to unplug the appliance.

Risk of damaging the appliance
- Do not damage the coolant circuit.
- Do not use mechanical devices or other means to speed up the defrosting process other than those recommended by the manufacturer.
- Do not use electrical equipment inside the appliance.
- To prevent hazards due to instability of the appliance, this must be fastened in accordance with the instructions.
- Never rest sharp metal objects such as knives, forks, spoons and lids on the appliance during use.
- Do not use abrasive or corrosive detergents (e.g. scouring powders, stain removers and metallic sponges), rough or abrasive materials or sharp metal scrapers on glass parts as this could scratch the surface and break the glass. Use wooden or plastic utensils.
- Do not sit on the appliance.
- Do not use cleaning products containing chlorine, ammonia or bleach on parts made of steel or that have metallic surface finishes (e.g. anodizing, nickel- or chromium-plating).
- Do not use rough or abrasive materials or sharp metal scrapers.
- Do not use sharp metal objects to remove excess ice build-up in the freezer compartment.
- Do not use adaptors for plugs.
![]()
Do not place portable multiple sockets or portable power supply units at the back of the appliance.- Do not place heavy objects on the top of the appliance.
- Do not use sharp objects when removing ice and frost in order not to damage the appliance's walls.
- Racks and trays should be inserted as far as they will go into the side guides. The mechanical safety locks that prevent them from being removed must face downwards and towards the back of the oven cavity.
![]()
- Do not use steam jets to clean the appliance.
- Do not spray any products near the appliance.
- Do not obstruct ventilation openings and heat dispersal slots.
- Fire hazard: never leave objects in the cavity.
- The appliance is able to guarantee optimum performance at ambient temperatures not exceeding 32°C.
- DO NOT USE THE APPLIANCE TO HEAT OR COOL ROOMS FOR ANY REASON.
- Do not use plastic cookware or containers for cooking.
- Do not put sealed tins or containers in the appliance.
- Do not remove the seal on the face of the appliance.
- Remove all trays and racks which are not required during the function from the oven cavity.
- Do not use the open door to rest pans or trays on the internal glass pane.
- Never use the oven door to lever the appliance into place when fitting.
- Avoid exerting too much pressure on the door when open.
- Do not use the handle to lift or move this appliance.
- Always disconnect the appliance from the mains in the event of a breakdown, maintenance, when replacing the light bulb or during cleaning.

Installation and maintenance
- THIS APPLIANCE MUST NOT BE INSTALLED IN A BOAT OR CARAVAN.
- The appliance must not be installed on a pedestal.
- Position the appliance into the cabinet cut-out with the help of a second person.
- To prevent any possible overheating, the appliance should not be installed behind a decoration door or a panel.
- Installation and servicing should be carried out by qualified personnel in accordance with current standards.
- Have the electrical connection performed by authorised technical personnel.
- The appliance must be connected to earth in compliance with electrical system safety standards.
- Use cables withstanding a temperature of at least 90°C.
- The tightening torque of the screws of the terminal supply wires must be 1.5 - 2 Nm.
- If the power cable becomes damaged, contact technical support immediately to arrange for it to be replaced in order to avoid possible hazards.
![]()
While positioning the appliance, make sure that the power supply cable is not caught or damaged.- Always use any necessary/ required personal protective equipment (PPE) before performing any work on the appliance (installation, maintenance, positioning or movement).
- Before performing any work on the appliance, switch off the power supply.
- Allow the appliance to be disconnected after installation, via an accessible plug or a switch in the case of a fixed connection.
- Fit the power line with an allpole circuit breaker with a contact separation distance sufficient to provide complete disconnection in category III overvoltage conditions, pursuant to installation regulations.
- This appliance can be used up to a maximum altitude of 2,000 metres above sea level.

For this appliance
![]()
Risk of fire, flammable materials.
![]()
- Do not damage the cooling circuit (if this is accessible).
- Follow applicable legislation on the consumption of raw food. Raw fish should be deep-frozen to -18°C and kept at that temperature for at least 96 hours.
- Carefully clean the parts of the appliance which come into direct or indirect contact with food to prevent any kind of contamination.
- Use food-safe detergents.
- Do not use flammable or harmful products.
- Use only the temperature probe supplied with the appliance.
- Keep the appliance door closed during all operations.
- Do not stack food items on top of each other, but rather arrange them so that the air is able to circulate correctly inside the appliance.
- Use aluminium or stainlesssteel containers.
- Do not cover trays with insulating covers or films.
- Do not rest any weight or sit on the open door of the appliance.
- Take care that no objects are stuck in the doors.
- Do not install/use the appliance outdoors.
- Only use the temperature probe provided or recommended by the manufacturer.
- If the appliance is to remain unused for an extended period of time, unplug it and clean the interior and exterior.
- The electrical cable and socket must remain easily accessible once the appliance is installed.

Temperature probe (where present)
- Handle the temperature probe with care as it has a sharp point.
- Do not touch the rod or the tip of the temperature probe after use.
- Wear oven gloves when handling the temperature probe.
- Use only the temperature probe supplied with the appliance.
- Take care not to scratch or damage enamelled or chromeplated surfaces with the tip or the plug of the temperature probe.
- Do not insert the temperature probe into openings and slots on the appliance.
- Do not pull the cable to remove the temperature probe from the socket or from the food.
- Make sure that the temperature probe or its cable do not get caught in the door.
- Make sure that the temperature probe or its cable do not come into contact with heating elements inside the oven.
- No part of the temperature probe should be allowed to come into contact with the walls of the oven cavity, the heating elements, the racks or the trays when they are still hot.
- The temperature probe should not be kept inside the appliance.
Appliance purpose
This appliance is designed for blast chilling, deep-freezing, preservation and proving of food, and for chilling drinks, in a residential environment. It may be used to rapidly lower the temperature of cooked or raw foods in order to retain their nutritional properties. It also allows food to be cooked at low temperatures in order to enhance their quality, flavours and aromas, and dishes to be warmed up to serving temperature.
Every other use is considered improper.
This appliance may also be used:
- In kitchenettes in shops, offices and other workplaces;
- In farms/farmhouse facilities;
- By guests in hotels, motels and residential environments;
- In bed and breakfasts.
The appliance is not designed to operate with external timers or with remote-control systems.
To save energy
- Perform a pre-cooling cycle of a minimum of 15 minutes with the appliance empty before placing the food to be chilled inside.
- Perform a pre-cooling cycle to reduce power consumption and the time taken.
- Do not cover trays or containers with insulating films or covers.
- Ensure that the containers are suitable for use at low temperatures.
- Arrange the trays or containers evenly inside the appliance, ensuring you do not stack them or place them on top of each other in order to allow air to circulate.
- Do not allow hot food to sit at ambient temperature before blast chilling or deepfreezing in order to retain its desirable properties.
- Reduce any opening of the door to a minimum to avoid temperature dispersal.
- Keep the appliance clean at all times.
Light sources
- This appliance contains light sources which cannot be replaced by the user and must only be replaced by the technical assistance service.
![]()
- This appliance contains light sources of efficiency class "G".

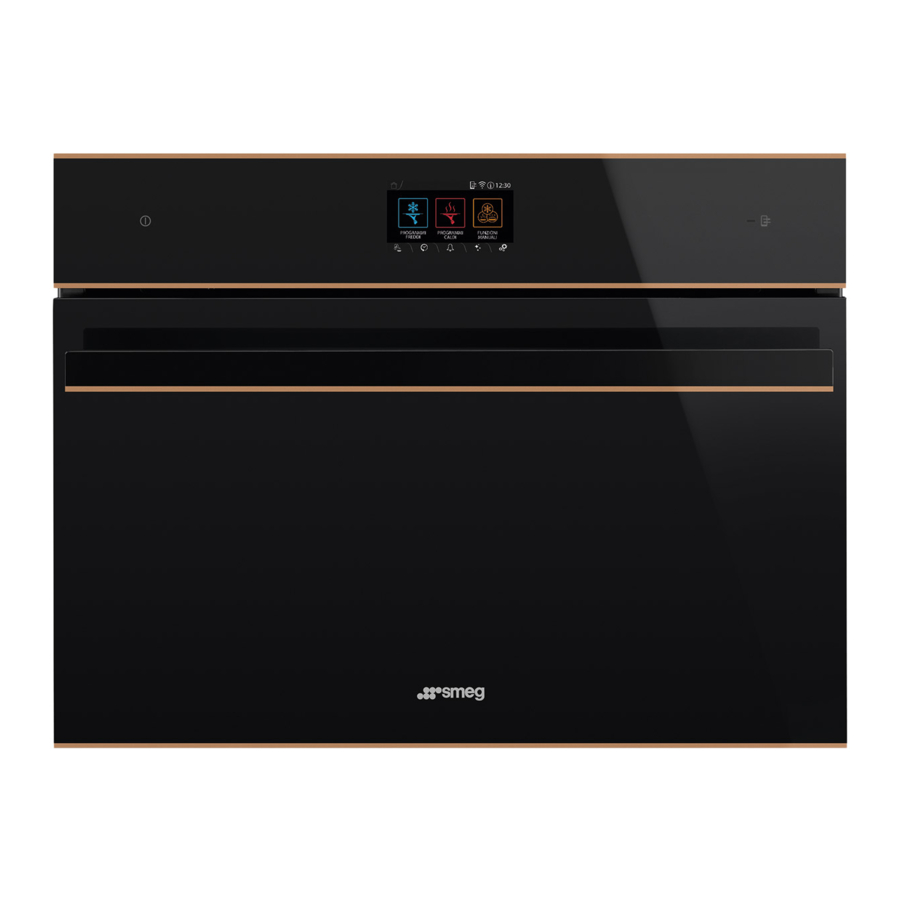
DESCRIPTION
General description

- Control panel
- Seal
- Light bulb
- Door
- Fan
- Temperature probe socket
![]() Frame shelf
Frame shelf
 Frame shelf
Control panel

- ON/OFF BUTTON (on some models only)
The ON/OFF button turns the appliance on or off. - Display
The touch-screen display allows you to interact with the appliance. Touch the icons to access the various functions. All the operating parameters will be shown on the display. - Remote control indicator light (on some models only)
When lit it indicates that the appliance can be controlled remotely via a smartphone or tablet (see the "Blast chiller connectivity" user manual).
SmegConnect (on some models only)
The appliance is equipped with SmegConnect technology that allows the user to control the appliance operation via an App on his/her smartphone or tablet.
For further information, refer to the supplied brochure and/or visit the site www.smeg.com
Other parts
Shelves
The appliance features shelves to position trays and racks at different heights. The insertion heights are indicated from the bottom upwards.
Cooling fan
The cooling fan distributes the air evenly inside the appliance, helping it reach the set temperature more quickly.
Chamber lighting
The internal light of the appliance comes on when the door is opened.
 When the door is open, it is not possible to switch off interior lighting.
Accessories
- Not all accessories are available on some models.
- The accessories intended to come into contact with food are made of materials that comply with the provisions of current legislation.
- Original supplied and optional accessories can be requested to Authorised Assistance Centres. Use only original accessories supplied by the manufacturer.
Multifunctional rack
Useful for supporting containers or, if rotated, for holding bottles.

Temperature probe
With the temperature probe, you can perform blast chilling or cook according to the temperature measured at the centre of the food.

Optional accessories (can be purchased separately)
Rack
Used for supporting containers with food during cooking.

Tray
Useful for cooking cakes, pizzas, oven-baked desserts and biscuits.

Deep tray
Useful for collecting fat from foods placed on the rack above and for cooking pies, pizzas, baked desserts, biscuits, etc.

Tray rack
To be placed over the top of the tray; for cooking foods which may drip.

Blast chiller advantages

- Take great care when consuming raw food, especially fresh fish and cephalopods, as there is the risk of contamination from Anisakis, a parasite which is hazardous to human health. This risk can be eliminated by cooking to a minimum temperature of 65°C, or by deepfreezing to -18°C and then holding at -18°C for at least 96 hours.
- In order to retain the properties of hot foods, do not allow them to remain at room temperature before blast chilling or deep-freezing them.
Your blast chiller allows you to quickly cool food and to deep-freeze them rapidly in order to retain their freshness and guarantee them a long lifetime.
Blast chilling and rapid deep-freezing help preserve the flavour, aroma, colour and nutritional properties of food.
Blast chilling cooked foods to an internal temperature of +3°C minimises bacterial proliferation, which is at its maximum between 65°C and 8°C.
Rapid deep-freezing to -18°C allows frozen food to be preserved for a longer period - usually several months more. It also prevents the formation of large ice crystals that damage and break the cell walls of the food. When defrosted, the food will not lose liquid and will retain their consistency and taste.
Without blast chiller:
- bacteriological risk;
- evaporation and dehydration;
- food weight loss;
- loss of flavours, aromas, colours;
- rapid spoiling;
- formation of large ice crystals which damage the fibres of the food.
With blast chiller:
- food safety;
- retention of original consistency;
- no food weight loss;
- retention of original properties;
- longer preservation time;
- formation of micro-crystals of ice that do not damage the food, allowing its properties to be preserved.
USE
Preliminary operations
See General safety instructions.
- Remove any protective film from the outside or inside of the appliance, including accessories.
- Remove any labels (apart from the technical data plate) from the accessories and inside of the appliance.
- Remove and wash all the appliance accessories (see chapter "CLEANING AND MAINTENANCE").
- To remove any manufacturing residue, clean the inside of the appliance thoroughly with a soft cloth and neutral, non-abrasive detergent.
Using the accessories
Racks and trays
Racks and trays have to be inserted into the side guides until they come to a complete stop.
- The mechanical safety locks that prevent the rack from being accidentally removed must face downwards and towards the back of cavity.


Gently insert racks and trays into the cavity until they come to a stop.
Clean the trays before using them for the first time to remove any residues left by the manufacturing process.
Multifunctional rack
Depending on the dimensions, the multifunctional rack can accommodate various bottle rack configurations. Here are some examples:

If turned, it can be used as a normal rack for supporting containers.
Application of the temperature probe
- Place the food on a tray.
- Insert the tip of the temperature probe inside the food to be blast chilled or cooked outside the cavity.

![information]() For best results, make sure that the temperature probe is placed transversely in the thickest part of the food and for least 3/4 of its length.
For best results, make sure that the temperature probe is placed transversely in the thickest part of the food and for least 3/4 of its length.
Make sure that it does not touch the tray underneath and that it does not protrude from the food.
![information]() In order for the probe to measure the core temperature of the food precisely, its tip must not be in contact with bones or fat.
In order for the probe to measure the core temperature of the food precisely, its tip must not be in contact with bones or fat. - Open the door.
- Insert the dish to be blast chilled or cooked into the cavity.
- Connect the temperature probe plug to the socket on the inside of the appliance.

- Tighten the ring nut to secure the plug firmly in the socket.

- Close the door.


If the temperature probe is not connected to the appliance when required, the appliance proceeds with a timed function.
Display

The parameters and values for the currently selected function will be indicated on the display. To use it, simply touch the "virtual" buttons and/or scroll through the values shown (the picture shows the main menu screen).
- Information area
Information regarding the menus and sub-menus of the functions in progress in the main area are shown in this area.
The following are also present in this area:- HOME
![]() button: touch this button to return to the main menu;
button: touch this button to return to the main menu; - INFORMATION
![]() button: touch this button to display the following screen:
button: touch this button to display the following screen:
![]()
![information]() The INFORMATION
The INFORMATION ![]() button is replaced by the symbol
button is replaced by the symbol ![]() to warn that the door is open.
to warn that the door is open. - current time display.
- HOME
- Main area
The various functions of the appliance can be set in this area. Touch the buttons and values to set the required function.
In addition, depending on the screen, dots may appear at the bottom of this area to indicate that there are other function pages, which can be reached by scrolling horizontally.
![]() first page,
first page,
![]() second page,
second page,
![]() etc...
etc... - Lower area
There are various shortcut function buttons in this area, which vary according to the functions set in the main area:
![]() MULTISTEP
MULTISTEP
![]() HISTORY
HISTORY
![]() TIMER MENU
TIMER MENU
![]() CLEANING
CLEANING
![]() SETTINGS
SETTINGS
In addition, depending on the page displayed, there will also be other buttons assigned to the function being used.
![information]() Press and hold the HOME
Press and hold the HOME ![]() button for a few seconds to stop the function immediately at any time and return to the main menu.
button for a few seconds to stop the function immediately at any time and return to the main menu.
To access the main menu.- Touch the time indicated on the display.
![]()
- Touch the time indicated on the display.
 button: touch this button to return to the main menu;
 button: touch this button to display the following screen:
 to warn that the door is open.
 first page,
 second page,
 etc...
 MULTISTEP
 HISTORY
 TIMER MENU
 CLEANING
 SETTINGS
 button for a few seconds to stop the function immediately at any time and return to the main menu.
Connectivity (on some models only)
Connectivity requirements:
- Smartphone or PC tablet with IOS or Android operating system. The minimum versions of the operating systems are available at the following link: www.smeg.com/smegconnect/
- Wi-Fi network (2.4 GHz band, WPA2 protected) active and available in the place where the appliance is installed.
- Internet connection.
- Name and password of the home Wi-Fi network or WPS (Wi-Fi Protected Setup) mode available.
For further information, please refer to the "Built-in oven connectivity" manual.
First use
The following instructions are also valid in the case of a prolonged power failure.
To switch on the appliance:
- Connect the appliance to the mains power supply.
The manufacturer's logo will display for a few seconds.
![information]() After the appliance is switched on, you will need to wait a few seconds before you can use it.
After the appliance is switched on, you will need to wait a few seconds before you can use it.
Next, the display shows the setting screen for the current time.
To be able to start any cooking function, the current time must be set. - Scroll up and down through the hours and minutes to set the current time.
![]()
- Touch the CONFIRM
![]() button (at the right in the lower area
button (at the right in the lower area ![]() ) to set the current time.
) to set the current time.
![information]() To change the current time (e.g. due to summer/winter time), touch the time shown on the display (located in the information area
To change the current time (e.g. due to summer/winter time), touch the time shown on the display (located in the information area ![]() on the right).
on the right).
![information]() When the current time is displayed, after 2 minutes from the last user operation, the display shifts to low brightness.
When the current time is displayed, after 2 minutes from the last user operation, the display shifts to low brightness.
When first used, the appliance may be set to a different language from yours. It is recommended that you set the required language at this point. - Touch the SETTINGS
![]() button on the display (at the right in the lower area
button on the display (at the right in the lower area ![]() ).
). - Touch the DISPLAY
![]() button.
button. - In the Language
![]() option (on the left), scroll through the available languages (on the right) to select the required language.
option (on the left), scroll through the available languages (on the right) to select the required language. - Touch the CONFIRM
![]() button.
button.

 ) to set the current time.
 button.
 option (on the left), scroll through the available languages (on the right) to select the required language.
Reactivating the display
When the " Show the time" mode is set to Off, if the time display is shown, the display will switch off automatically after 2 minutes.
To reactivate the display when it is off:
- Open the door.
The appliance emits a sequence of sounds and the display lights up after a few seconds. The display shows the main menu when it is switched on again.
Display deactivation (only models with ON-OFF button)
To deactivate the display manually:
- Press and hold the ON-OFF
![]() button for a few seconds until you hear a sound.
button for a few seconds until you hear a sound.
Display reactivation (only models with ON-OFF button)
When the " Show the time" mode is set to Off, if the time display is shown, the display will switch off automatically after 2 minutes.
To reactivate the display when it is off:
- Press and hold the ON-OFF
![]() button for a few seconds until you hear a series of sounds.
button for a few seconds until you hear a series of sounds.
The display turns on after a few seconds. The display shows the main menu when it is switched on again.
In some cases, the ON-OFF  button does not deactivate the display.
For example, when:
- there is a blast chilling, deepfreezing or cooking function in progress (the button stops the function);
- the door is open;
- a minute minder timer is active;
- the
![]() Showroom and/or
Showroom and/or ![]() Demo modes are active.
Demo modes are active.
 Showroom and/or
  Demo modes are active.
Minute minder timer
This function only activates the buzzer, without stopping the function in progress.
The Timer can be set from a minimum of 1 minute to a maximum of 12 hours and 59 minutes.
- Touch the TIMER
![]() button (in the lower area
button (in the lower area ![]() ) to access the Timer menu.
) to access the Timer menu.
Up to 2 minute minder Timers can be set: - Touch the button of the TIMER
![]() that you intend to use.
that you intend to use. - Scroll through the values and select the required duration.
![]()
- Touch the CONFIRM
![]() button to confirm the selected duration.
button to confirm the selected duration.
![information]() The DELETE
The DELETE ![]() button appears in the lower area
button appears in the lower area ![]() that can be used to delete a timer if one has been selected.
that can be used to delete a timer if one has been selected. - Repeat the procedure for the other Timers that you intend to use.
- When finished, touch the CONFIRM
![]() button again to confirm the selected timers.
button again to confirm the selected timers.
![information]() To cancel the operation, touch the RETURN
To cancel the operation, touch the RETURN ![]() button.
button.
![information]() The counter must be set to zero in order to remove the minute minder timer.
The counter must be set to zero in order to remove the minute minder timer.
![information]() The display cannot be switched off using the ON-OFF
The display cannot be switched off using the ON-OFF ![]() button when a timer is active.
button when a timer is active.
In the following display, the lit TIMER![]() button indicates that one or more minute minder timers have been activated.
button indicates that one or more minute minder timers have been activated. - Wait for the buzzer to indicate that the time has finished.
 button (in the lower area
  that you intend to use.
 button appears in the lower area
  button.
 button indicates that one or more minute minder timers have been activated.
Cold programs
See General safety instructions.
- Each time the door is opened, the function in progress will stop and then automatically restart when the door is closed again.
- The initial temperature of the food (especially if it is cooked) can vary the times indicated in the programs.
- Foods of equal weight but different thickness may require different times from those indicated in the programs.
- It is recommended not to stack food or make several layers.
- Preferably carry out a pre-cooling stage.
- Do not deep-freeze or blast chill food in lidded containers.
- On the rack, use a container slightly larger than the food to allow optimal airflow into the cavity.
- Do not fill the container to the brim to enable it to be closed better later.
- Touch the COLD PROGRAMS
![]() button in the "main menu" (in the main area
button in the "main menu" (in the main area ![]() ).
).
 button in the "main menu" (in the main area
 THINGS TO KNOW
PRE-COOLING
Some cold functions (BLAST CHILLING  and DEEP-FREEZING
  ) are preceded by a pre-cooling stage
  which allows the appliance to reach the preset temperature more quickly.
This stage is indicated by a progressive increase in the temperature level reached.

It is recommended not to introduce food into the cavity of the appliance during the pre-cooling stage.
After pre-cooling, a buzzer will sound and a message is displayed to indicate that the dish can be put in the appliance cavity.

Function start
At the end of pre-cooling:
- Open the door
- Insert the dish into the cavity.
- Close the door.
- Touch the CONFIRM
![]() button to start the function.
button to start the function.
This stage is indicated by a progressive increase in the horizontal bar.

Touch the STOP  button to start the function at any time.
BLAST CHILLING
This function allows you to quickly chill raw or recently cooked foods to +3°C. After blast chilling, food can be kept in the refrigerator (+4°C).
Blast chilling stops bacteriological proliferation and retains the properties of food.
- Touch the BLAST CHILLING button.
- Select the type of food to be blast chilled (e.g. VEGETABLES AND SIDE DISHES).
- Select the cut of the food to be blast chilled (e.g. WHOLE VEGETABLES).
- Select the status of the food to be blast chilled (RAW FOOD
![]() or COOKED FOOD
or COOKED FOOD ![]() ).
).
![information]()
- RAW FOOD
![]() : refers to food that is at room temperature or cold from the fridge or that otherwise needs to be cooked and/or reheated.
: refers to food that is at room temperature or cold from the fridge or that otherwise needs to be cooked and/or reheated. - COOKED FOOD
![]() : this is food that has just been cooked and is still hot.
: this is food that has just been cooked and is still hot.
- RAW FOOD
- Scroll through the values to set the weight of the food to be blast chilled.
![]()
- Touch the CONFIRM
![]() button (at the right
button (at the right ![]() in the lower area) to confirm the selected value.
in the lower area) to confirm the selected value. - Touch the START
![]() button to start the precooling stage and subsequent blast chilling function (see chapter THINGS TO KNOW).
button to start the precooling stage and subsequent blast chilling function (see chapter THINGS TO KNOW).
 or COOKED FOOD
  ).
).
End of the function
At the end of the function, the appliance automatically switches to the PRESERVATION condition  and remains in this condition until the STOP
  button is pressed.
The state of preservation keeps food at the correct temperature according to the function used.
Tips for blast chilling food
- Before introducing hot food to be blast chilled, it is always recommended to run the pre-cooling cycle of the (empty) cavity to reduce time and energy consumption.
- During blast chilling do not cover trays or containers with insulating films or covers.
- Ensure that the containers are suitable for use at low temperatures.
- Arrange the trays or containers evenly inside the appliance, ensuring you do not stack them or place them on top of each other in order to allow air to circulate.
- Avoid keeping hot food at room temperature before blast chilling in order to retain correct properties.
- Blast chilled food should be kept in the refrigerator at a constant temperature of +4°C.
- Blast chilled food must not be stored inside the appliance.
BLAST CHILLING (using the temperature probe)
Some foods can be blast chilled with the help of the temperature probe.
- After selecting the BLAST CHILLING function select the type of food to be blast chilled (e.g. MEAT).
- Select the cut of the food that can be blast chilled using the temperature probe (e.g. WHOLE MEAT).
- Select the status of the food to be blast chilled (RAW FOOD
![]() or COOKED FOOD
or COOKED FOOD ![]() ).
). - Scroll through the values to set the weight of the food to be blast chilled.
- Touch the CONFIRM
![]() button to confirm the selected value.
button to confirm the selected value.
![information]() The symbol
The symbol ![]() indicates that the probe is not connected to the appliance.
indicates that the probe is not connected to the appliance. - Touch the PROBE
![]() button in the lower area
button in the lower area ![]() .
. - Scroll through the target temperature values and select the required temperature.
![]()
- Touch the CONFIRM
![]() button to confirm the selected probe temperature.
button to confirm the selected probe temperature. - Touch the START
![]() button to start the precooling stage.
button to start the precooling stage. - When pre-cooling is complete, insert the tip of the temperature probe into the food and connect the plug to the socket on the inside of the appliance (as described above).
- Touch the CONFIRM
![]() button to start the function.
button to start the function.
 ).
). indicates that the probe is not connected to the appliance.
 button to start the precooling stage.
Blast chilling stage
This stage is indicated by a progressive increase in blast chilling.

Touch the STOP button to start the function at any time.
Blast chilling end with the temperature probe
The function ends when the instantaneous temperature reaches the target temperature.
- Open the door.
- Remove the probe from the food.
- Unscrew the ring nut and disconnect the temperature probe plug from the socket on the inside of the appliance.
- Take out the food from the cavity.
- Close the door.
DEEP-FREEZING

This function allows the temperature of food to be rapidly brought down to a temperature of -18°C.
During deep-freezing do not cover trays or containers with insulating films or covers.
It is recommended to grease the pan or container before deep-freezing the food.
- Touch the DEEP-FREEZING
![]() button.
button. - Select the type of food to blast chill (e.g. DESSERTS).
- Select the type of food to be deep-frozen (e.g. SOFT CAKES).
- Scroll through the values to set the weight of the food to be deep-frozen.
- Touch the CONFIRM
![]() button to confirm the selected value.
button to confirm the selected value. - Touch the START
![]() button or start the precooling phase and subsequent deepfreezing function (see chapter THINGS TO KNOW).
button or start the precooling phase and subsequent deepfreezing function (see chapter THINGS TO KNOW).
End of the function
At the end of the function, the appliance automatically switches to the PRESERVATION condition  and remains in this condition until the STOP button is pressed.
The state of preservation keeps food at the correct temperature according to the function used.
Tips for storage of deep-frozen food
- Deep-frozen food must not be stored inside the appliance.
- Cover and protect food with cling film, tight and sealed or vacuum covers in the refrigerator or freezer.
- Label deep-frozen food to be stored in the freezer for 6-12 months with their content, date of preparation and expiry date.
- Deep-frozen food should be kept in the freezer at a constant temperature of -18°C.
Deep-frozen foods storage life table
| Foodstuff | Time |
| Fruit, beef | max 10-12 months |
| Vegetables, veal, poultry | max 8-10 months |
| Game | max 6-8 months |
| Pork | max 4-6 months |
| Mince | max 4 months |
| Bread, desserts, cooked foods, oily fish | max 3 months |
| Offal | max 2 months |
| Sausages, lean fish | max 1 month |
DRINKS COOLING

This function allows you to chill different kinds of beverages down to the perfect drinking temperature.
- Open the door.
- Insert the multifunctional rack in an upside down position inside the chamber.
![]()
![information]() Stems with bends must face upwards while mechanical safety blocks must face the rear of the appliance compartment.
Stems with bends must face upwards while mechanical safety blocks must face the rear of the appliance compartment. - Place the bottles to be chilled on the multifunctional rack.
![information]() It is recommended inserting the bottles from the middle position.
It is recommended inserting the bottles from the middle position. - Close the door.
- On the display, in the cold function screen, press the DRINKS COOLING
![]() button.
button. - Press on the name of the drink you want, (for example RED WINE).
- Choose the number of bottles to be chilled, scrolling from 1 to 10.
![]()
- Touch the CONFIRM
![]() button to confirm the selected value.
button to confirm the selected value.


Changing the cooling temperature and time
- Touch the TARGET TEMPERATURE
![]() button or the relevant value.
button or the relevant value. - Scroll through the values and select the required cooking temperature.
![]()
- Touch the CONFIRM
![]() button to confirm the selected cooking temperature.
button to confirm the selected cooking temperature. - Touch the DURATION
![]() button or the relevant value.
button or the relevant value. - Scroll through the values and select the required duration.
![]()
- Touch the CONFIRM
![]() button to confirm the settings.
button to confirm the settings.
![information]() Time values of less than 15 minutes cannot be entered.
Time values of less than 15 minutes cannot be entered.

 button or the relevant value.
Cooling stage
- Touch the START
![]() button to start the function.
button to start the function.
This stage is indicated by a progressive increase in cooling.

Touch the STOP button to start the function at any time.
End of the function
At the end of cooking, "Function ended" displays and a buzzer sounds briefly, which can be deactivated by touching any point of the display or by opening the door.

- Touch the HOME
![]() button to exit from the function.
button to exit from the function.
 button to exit from the function.
Types of beverages
RED WINE
- Young red wines
- Mature rosé wines
- Cask-matured white wines
STILL WHITE WINE
- Young white wines
- Complex, mature white wines
- Straw wines (white)
- White fortified wines
- Young rosé wines
- Young grappa
SPARKLING DRINKS
- Champagne
- Sparkling wines
- Lightly sparkling wines
BEER
- Porter
- Blanche-Witbier
- APA (American Pale Ale)
- Pilsner
- Strong Belgian Ale
- Trappist
- IPA (Indian Pale Ale)
- Weiss
- Bock
- Stout
LIQUEUR (SPIRITS)
- Grappa
- Eau de vie
- Gin
- Cognac
- Tequila
- Vodka
- Whisky
- Rum
LIQUEUR (FORTIFIED WINES)
- Port wine
- Marsala wine
- Madeira wine
- Sherry (Xeres wine)
DRINKS
- Carbonated drinks
- Fruit juices
- Smoothies and juice extracts
WATER
- Mineral
- Sparkling
- Flavoured
- Iced coffee
- Teas, herbal teas and cold infusions
PRESERVATION

This function keeps food at the required temperature.
- On the display, in the cold function screen, press the PRESERVATION
![]() button.
button. - Select the type of food to preserve (e.g. ICE CREAM).
- Scroll through the values to set the weight of the food to be preserved.
- Touch the CONFIRM
![]() button to confirm the selected value.
button to confirm the selected value.
Modifying the preservation temperature
- Touch the TARGET TEMPERATURE
![]() button or the relevant value.
button or the relevant value. - Scroll through the values and select the required cooking temperature.
![]()
- Touch the CONFIRM
![]() button to confirm the selected cooking temperature.
button to confirm the selected cooking temperature.

Preservation stage
- Open the door.
- Insert the dish to be preserved into the cavity.
- Close the door.
- Touch the START
![]() button to start the function.
button to start the function.
End of preservation
To end the preservation function.
- Touch the STOP
![]() button to start the function at any time.
button to start the function at any time. - Touch the HOME
![]() button to exit from the function.
button to exit from the function.
 button to start the function at any time.
 button to exit from the function.
Hot programs
See General safety instructions.
- Each time the door is opened, the function in progress will stop and then automatically restart when the door is closed again.
- It is recommended not to stack food or make several layers.
- Preferably carry out a pre-heating phase.
- Touch the HOT PROGRAMS
![]() button in the "main menu" (in the main area
button in the "main menu" (in the main area ![]() ).
).
 button in the "main menu" (in the main area
  ).
).THINGS TO KNOW
PRE-HEATING
Some hot functions (SLOW COOKING  and YOGHURT
  ) are preceded by a preheating stage
  which allows the appliance to heat to the cooking temperature more quickly.
Furthermore, in some functions, this stage is set at 65°C to promote effective sanitising of the appliance cavity.
This stage is indicated by a progressive increase in the temperature level reached.

Unless otherwise indicated in the recipe, it is not recommended to place food in the oven during the preheating stage.
You can skip the pre-heating stage touching the dedicated button  .
.
After pre-heating, a buzzer will sound and a message will appear on the display to indicate that the dish can be put in the oven cavity.

Function start
At the end of preheating:
- Open the door
- Insert the dish into the cavity.
- Close the door.
- Touch the CONFIRM
![]() button to start the function.
button to start the function.
This stage is indicated by a progressive increase in the horizontal bar.

Touch the STOP  button to start the function at any time.
SLOW COOKING (with the temperature probe)
Low-temperature preparations are long-lasting cooking processes for food that retain their juices inside, with the result that they do not dry out or harden.
For best results, it is recommended browning the food for a few minutes in a frying pan or by means of the oven grill before or after cooking at a low temperature (depending on the recipe).
- Touch the SLOW COOKING
![]() button.
button. - Select the type of food to cook (e.g. FISH).
- Select the cut of the food to be blast chilled (e.g. SALMON ).
- Touch the PROBE
![]() button in the lower area
button in the lower area ![]() .
. - Scroll through the target temperature values and select the required temperature.
![]()
- Touch the CONFIRM
![]() button to confirm the selected probe temperature.
button to confirm the selected probe temperature.
![information]() The symbol
The symbol ![]() indicates that the probe is not connected to the appliance.
indicates that the probe is not connected to the appliance. - Touch the START
![]() button to start the precooling stage and subsequent slow cooking function (see chapter THINGS TO KNOW).
button to start the precooling stage and subsequent slow cooking function (see chapter THINGS TO KNOW).
 button in the lower area
 indicates that the probe is not connected to the appliance.
End of low-temperature cooking
The function ends when the instantaneous temperature reaches the target temperature.
- Open the door.
- Remove the probe from the food.
- Unscrew the ring nut and disconnect the temperature probe plug from the socket on the inside of the appliance.
- Take out the food from the cavity.
- Close the door.
DEFROST BY WEIGHT

Automatic defrosting function. Choose the dish, the oven calculates the time necessary for proper defrosting.
If the internal temperature is greater than the one required, the function will be stopped immediately and "Internal temperature unsafe, please wait until the oven is cool" will display. Allow the appliance to cool down before activating the function.
It is not possible to change the default temperature for the Defrost by weight function.
- Open the door.
- After weighing the dish, place it in the cavity.
- Close the door.
- Select DEFROST BY WEIGHT
![]() .
. - Select the type of food to defrost from the categories MEAT - FISH - BREAD - DESSERTS - FRUIT.
- Scroll through the values to set the weight of the food to be defrosted.
- Touch the CONFIRM
![]() button to confirm the settings.
button to confirm the settings. - Touch the START
![]() button to start the defrost by weight function.
button to start the defrost by weight function.
When finished, a buzzer sounds briefly, which can be deactivated by touching any point of the display or by opening the door.
Preset parameters:
| Type | Weight (kg) | Time |
| MEAT | 0.5 | 2h 40m |
| FISH | 0.4 | 1h 40m |
| BREAD | 0.1 | 1h 10m |
| DESSERTS | 0.1 | 2h 10m |
| FRUIT | 0.1 | 1h 10m |
Defrosting times may vary on the basis of the shape and size of the food to be defrosted.
When defrosting heavy and/or irregularly shaped food (e.g. chicken, fish, etc.), it is advisable to turn it inside the oven cavity at least once by 180°.
PROVING

This function is particularly suitable for proving dough.
If the internal temperature is greater than the one required, the function will be stopped immediately and "Internal temperature unsafe, please wait until the oven is cool" will display. Allow the appliance to cool down before activating the function.
For successful proving, a container of water should be placed in the bottom of the oven.
- Open the door
- Position the dough to prove on the second level.
- Close the door.
- Select PROVING
![]() .
. - Select the type of proving (6H or 24H).
![information]() 6H PROVING: ideal for doughs with a substantial amount of yeast and needing a fairly short resting time.
6H PROVING: ideal for doughs with a substantial amount of yeast and needing a fairly short resting time.
![information]() 24H PROVING: ideal for doughs with minimal amounts of yeast and requiring a rather long resting process.
24H PROVING: ideal for doughs with minimal amounts of yeast and requiring a rather long resting process.
![information]() Note: time and temperature cannot be changed in this function. To set values at will, select PROVING from the MANUAL FUNCTIONS menu.
Note: time and temperature cannot be changed in this function. To set values at will, select PROVING from the MANUAL FUNCTIONS menu. - Touch the CONFIRM
![]() button to confirm the settings.
button to confirm the settings. - Touch the START
![]() button to start the proving cycle.
button to start the proving cycle.
When finished, a buzzer sounds briefly, which can be deactivated by touching any point of the display or by opening the door.
Tips for optimal proving
- Use metal or ceramic containers, or other materials suitable for temperatures up to 80°C.
- For flours with a high W index, use a smaller quantity of dough and set a longer proving time.
- Use smaller quantities of yeast, for example 4 grams in 1 kg of dough and prove the dough for longer to make it more fragrant and digestible.
- Cover the dough with cling film.
- Use a sourdough starter to obtain fluffier, lighter and more digestible doughs.
- Reduce the quantity of yeast used and prove at a constant temperature for the best dough proving results.
- If a fast proving (between 60 and 120 minutes) is desired, it is recommended using the MANUAL PROVING function and setting a temperature of 35°C.
YOGHURT

This long-time function (14 hours) is dedicated to yoghurt production.
Preparing the mixture
- Pour one litre of milk into a saucepan and heat it over low heat to a temperature of about 38-45°C.
- Meanwhile, pour 125 grams of yoghurt (or a sachet of commercially available freezedried lactic ferments) into a container.
- When the milk has reached temperature, remove it from the heat and pour it a little at a time into the container with the yoghurt (or cultures), stirring with the help of a whisk.
- When finished, distribute the mixture into 5-6 jars and seal them hermetically or cover with cling film.
Using the yoghurt function
- Open the door
- Place the jars inside the cavity.
- Close the door.
- Select the YOGHURT
![]() function.
function. - Touch the START
![]() button or start the preheating phase and subsequent yoghurt function (see chapter THINGS TO KNOW).
button or start the preheating phase and subsequent yoghurt function (see chapter THINGS TO KNOW).
When finished, a buzzer sounds briefly, which can be deactivated by touching any point of the display or by opening the door.
Yoghurt preparation tips
- Use pasteurised whole UHT milk and a pot of white yoghurt.
- For a low-fat yoghurt, use skimmed or partly skimmed UHT milk and a pot of low-fat yoghurt.
- To make fruit yoghurt, it is preferable to use firm, seasonal fruit.
- We recommend peeling and cutting the fruit into small cubes and cooking it in a saucepan for about 15 minutes, stirring often. For a sweeter taste, brown sugar can be added during cooking or agave syrup after cooking.
- For a creamier mixture, you can blend the previously cooked fruit.
- Allow the resulting fruit mixture to cool before adding it to the yoghurt.
- Add the (cooled) fruit mixture to the yoghurt before placing it in the cavity of the appliance.
- Alternatively, flavour the yoghurt with a few drops of flavouring (lemon, orange, tangerine, etc.). added to the milk just before putting it in the jar. The recommended dose is 2 spoons of flavouring per litre of milk.
Manual functions
See General safety instructions.
Each time the door is opened, the function in progress will stop and then automatically restart when the door is closed again.
Most of the cold and hot functions we have already examined are grouped in this menu, but with the possibility of freely choosing certain settings such as the temperature and duration of use of the function.
- Touch the MANUAL FUNCTIONS
![]() button in the "main menu" (in the main area
button in the "main menu" (in the main area ![]() ).
).
 button in the "main menu" (in the main area
 Using a manual function
- From the manual functions menu, scroll to the right or left and select the desired function.
![information]() There are two sub-menus for the BLAST CHILLING
There are two sub-menus for the BLAST CHILLING ![]() function.
function. - Depending on the function chosen, the following parameters can be set:
- TIME COUNT
![]() button (disabled): indicates the time progress of a function.
button (disabled): indicates the time progress of a function. - DURATION
![]() button: to set a duration for the function.
button: to set a duration for the function. - END OF FUNCTION
![]() button: to set the end time of the function.
button: to set the end time of the function.
![information]() It is not possible to set an END OF FUNCTION time
It is not possible to set an END OF FUNCTION time ![]() if no DURATION
if no DURATION ![]() time has been set.
time has been set. - CURRENT TEMPERATURE
![]() button (deactivated): indicates the temperature inside the cavity in real time.
button (deactivated): indicates the temperature inside the cavity in real time. - CAVITY TEMPERATURE
![]() button: to set the temperature to be reached inside the cavity.
button: to set the temperature to be reached inside the cavity. - CURRENT PROBE TEMPERATURE
![]() button (deactivated): indicates the temperature inside the food in real time.
button (deactivated): indicates the temperature inside the food in real time. - TEMPERATURE PROBE
![]() button (on some functions only): to set the target temperature
button (on some functions only): to set the target temperature ![]() to be reached within the food.
to be reached within the food.
![information]() The grey-coloured buttons are deactivated.
The grey-coloured buttons are deactivated.
- TIME COUNT
- Touch the CONFIRM
![]() button to confirm the selected value.
button to confirm the selected value. - Touch the START
![]() button to start the function.
button to start the function.
 function.
 button (disabled): indicates the time progress of a function.
 button: to set the end time of the function.
 button (deactivated): indicates the temperature inside the cavity in real time.
 button: to set the temperature to be reached inside the cavity.
 button (deactivated): indicates the temperature inside the food in real time.
 to be reached within the food.
THINGS TO KNOW
PRE-COOLING or PRE-HEATING
Some functions are preceded by a pre-cooling stage  or pre-heating stage
  (depending on the function selected) which allows the appliance to reach the preset temperature more quickly.
This stage is indicated by a progressive increase in the temperature level reached.

or

It is recommended not to introduce the dish into the cavity of the appliance during the pre-cooling stage.
You can skip the pre-cooling stage touching the dedicated button  or
or  .
.
After pre-cooling or pre-heating, a buzzer will sound and a message is displayed to indicate that the food can be put in the appliance cavity.

Function start
At the end of pre-cooling or pre-heating:
- Open the door
- Insert the dish into the cavity.
- Close the door.
- Touch the CONFIRM
![]() button to start the function.
button to start the function.
This stage is indicated by a progressive increase in the horizontal bar.

or

Touch the STOP  button to start the function at any time.
Timed function
Timed function is the function which allows a cooking operation that ends after a specific time set by the user.
For some functions, it is not possible to set the duration.
- After selecting a function, touch the DURATION
![]() button or the related value.
button or the related value. - Scroll through the values and select the required duration.
![]()
- Touch the CONFIRM
![]() button to confirm the selected duration.
button to confirm the selected duration.
![information]() The hours and minutes can be selected separately.
The hours and minutes can be selected separately.
The time expected for the end of function displays under the duration. - Touch the START
![]() button to start the timed function.
button to start the timed function.

Programmed function
Programmed cooking is the function of time-controlled cooking operation to be stopped at a preset time depending on the time set by the user, after which the appliance will switch off automatically.
For safety reasons, it is not possible to set the end of cooking time by itself without setting the cooking duration.
- After setting a timed function, touch the END OF FUNCTION
![]() button or the relevant value.
button or the relevant value. - Scroll through the values and select the required end of function time.
![]()
![information]() The hours and minutes can be selected separately.
The hours and minutes can be selected separately. - Touch the CONFIRM
![]() button to confirm the selected end of function time.
button to confirm the selected end of function time.
 button or the relevant value.
Manual functions list
STANDARD BLAST CHILLING

This function allows you to quickly chill raw or recently cooked foods to +3°C. After blast chilling, food can be kept in the refrigerator (+4°C).
SOFT BLAST CHILLING

This function allows you to quickly chill raw or recently cooked foods to -5°C. After soft blast chilling, food can be kept in the freezer.
Blast chilling stops bacteriological proliferation and retains the properties of food.
The blast chilling functions also include the use of the temperature probe.
DEEP-FREEZING

This function allows the temperature of food to be rapidly brought down to a temperature of -28°C.
DRINKS COOLING

This function allows you to cool different kinds of beverages down to the required drinking temperature -10°C and +20°C.
PRESERVATION

This function keeps food at the required temperature between -18°C and +20°C.
PRE-COOLING

This function cools the appliance cavity to the required temperature (between - 28°C and +5°C) in preparation for a subsequent cooling function.
SLOW COOKING

This long-lasting function is useful for the preparation of food that retain their juices inside, with the result that they do not dry out or harden.
Slow cooking involves the use of the temperature probe.
REHEATING

This function reheats food that has already been cooked and stored in the refrigerator.
The appliance cavity can be set to a temperature ranging from 65°C to 80°C.
PROVING

This function is particularly suitable for proving dough.
The appliance cavity can be set to a temperature ranging from 4°C to 40°C.
DEFROST BY TIME

Manual defrosting function. Select the length of time required for defrosting, when the set time has elapsed, the function will stop.
If the internal temperature is greater than the one required, the function will be stopped immediately and "Internal temperature unsafe, please wait until the oven is cool" will display. Allow the appliance to cool down before activating the function.
The duration of the Defrost by time function can be from a minimum of 1 minute to a maximum of 12 hours and 59 minutes.
It is not possible to change the default temperature (30°C) for the Defrost by time function.
READY TO EAT

This function allows you to bring ready cooked food (between 40°C and 70°C) to serving temperature at a set time.
It is recommended to only warm pre sliced or portioned food with a maximum weight of 1 kg.
History
This menu is particularly useful for viewing and reusing the last functions used.
- Touch the HISTORY
![]() button on the "main menu" (at the left
button on the "main menu" (at the left ![]() in the lower area).
in the lower area). - Select the function you wish to reuse and activate them as described in the previous sections.
 button on the "main menu" (at the left
 Deleting the history
If you wish to delete the history:
- Touch the HISTORY
![]() button on the "main menu".
button on the "main menu". - Touch the BASKET
![]() button to delete the history.
button to delete the history.
![]()
- Touch the CONFIRM
![]() button to confirm that you wish to delete the history (or the CANCEL
button to confirm that you wish to delete the history (or the CANCEL ![]() button to cancel the operation).
button to cancel the operation).
 button to delete the history.
 button to cancel the operation).
Multistep functions
Multistep functions mean the possibility of sequencing two different functions set by the user.
- Touch the MULTISTEP
![]() button on the "main menu" (at the left
button on the "main menu" (at the left ![]() in the lower area).
in the lower area). - Touch the ADD STEP
![]() button.
button. - Select the desired function for the first step (hot or cold function).
- As described in the previous chapters, touch the TEMPERATURE
![]() , DURATION
, DURATION ![]() buttons (depending on the selected function) to select the parameters you want to change.
buttons (depending on the selected function) to select the parameters you want to change. - Scroll through the values and select the required settings.
- Touch the CONFIRM
![]() button to confirm the selected values.
button to confirm the selected values. - Touch again the ADD STEP
![]() button.
button. - Select the required function for the second step (hot or cold function).
- Set the required parameters for the second function.
![information]() It is not possible to add a further step if a duration or target temperature of the temperature probe has not been set (if available for the selected function).
It is not possible to add a further step if a duration or target temperature of the temperature probe has not been set (if available for the selected function).
![information]() It is not possible to start a cooking process if a duration or a temperature or a target temperature of the temperature probe (if available for the selected function) of all steps has not been set.
It is not possible to start a cooking process if a duration or a temperature or a target temperature of the temperature probe (if available for the selected function) of all steps has not been set.
![information]() It is not possible to set a total duration of more than 13 hours.
It is not possible to set a total duration of more than 13 hours.
![information]() It is not possible to select the BLAST CHILLING function as a second step.
It is not possible to select the BLAST CHILLING function as a second step. - Touch the CONFIRM
![]() button to confirm the selected values.
button to confirm the selected values. - Touch the START
![]() button to start the Multistep function.
button to start the Multistep function.
 button on the "main menu" (at the left
  button.
 , DURATION
 Discover the recipes
To consult the recipes created for various categories of food and for more information on blast chilling, deep-freezing, cooking suggestions, we recommend visiting the dedicated page on the www.smeg.com website, which can be reached using the QR code on the leaflet supplied with the appliance.
In the event of a blackout
Following a power failure during a function, the appliance automatically resumes the function it was performing, maintaining all the previous settings and discounting the time already elapsed of the function only if the duration of the power failure is less than or equal to 60 seconds.
If the power failure occurs in a different condition, the appliance remains waiting for manual consent by the user to continue or not the function, for a while.
If the function is reactivated, settings remain as they were before the power failure, taking into account the time already elapsed.
If there is no intervention by the user, the appliance cancels the function and the display shows the current time again.
(SmegConnect models only) A notification also appears in the app when you reconnect.
Blackout during a programmed function
If the power failure occurs while a programmed cooking process is set:
- If the blackout is restored within the set start time, the appliance remains in standby mode updating the time until start.
- If the blackout is restored after the set start time, the device waits for the function to start and, if after a certain time there is no intervention by the user, the appliance cancels the function and the display shows again the current time.
Settings
In the event of a temporary power cut, all personal settings will remain stored.
The product configuration can be set using this menu.
- Touch the SETTINGS
![]() button on the main menu (at the right in the lower area
button on the main menu (at the right in the lower area ![]() ).
).
EXHIBITION
Dedicated menu for exhibitors.
- In the "settings menu
![]() " touch the EXHIBITION
" touch the EXHIBITION ![]() button
button
 button
Show Room (for showrooms only)
This mode deactivates all the appliance's heating elements, while keeping the control panel active.
During normal operation, it is indicated by the  indicator light turning on in the information area
  .
.
To use the appliance normally, set this mode to Off.
- Select
![]() Show Room.
Show Room. - Select On.
- Touch the CONFIRM
![]() button to activate the Show Room mode.
button to activate the Show Room mode.
Demo Mode (for showrooms only)
The same as Show Room, when this mode is activated, after a certain period of inactivity, a demonstration of the various screens that illustrate the potential of the appliance is shown on the display.
To use the appliance normally, set this mode to Off.
- Select
![]() Demo Mode.
Demo Mode. - Select On.
- Touch the CONFIRM
![]() button to activate the demo mode.
button to activate the demo mode.
 Demo Mode.
CLOCK
Menu where the time and type of display can be set.
- In the "settings menu
![]() " touch the CLOCK SETTINGS
" touch the CLOCK SETTINGS ![]() button.
button.
 " touch the CLOCK SETTINGS
  button.
Digital clock
Displays the current time in digital format.
In the event of a temporary power cut, the digital version will remain selected.
- Select
![]() Digital clock.
Digital clock. - Select On.
 Digital clock.
Touch the CONFIRM  button to activate the Digital clock mode.

Clock display in stand-by
Activates/deactivates the clock display when the appliance is switched off.
The Clock display in stand-by function is factory set to Off.
If the Clock display in stand-by function is set to On, when the appliance is in stand-by it displays the current time at low brightness.
When the Clock display in stand-by function is set to On, the appliance consumes more power than in stand-by mode.
Only for SmegConnect models: If the Clock display in stand-by function is set to Off, the connectivity switches off automatically when the clock sets into stand-by.
- Select
![]() Show the time.
Show the time. - Select On.
- Touch the CONFIRM
![]() button to activate the time display.
button to activate the time display.
 Show the time.
Clock format
Activates/deactivates the clock display in the 12 or 24 hour format.
The Time format function is factory set to 24h.
- Select
![]() Time format.
Time format. - Select 12h or 24h.
- Touch the CONFIRM
![]() button to activate the required time format.
button to activate the required time format.
 Time format.
DISPLAY
Menu where you can change the language and modify the display settings of some parameters.
- In the "settings menu
![]() " touch the DISPLAY SETTINGS
" touch the DISPLAY SETTINGS ![]() button.
button.
 button.
Language
Allows you to select the language of the display.
- Select
![]() Language.
Language. - Scroll through the available languages to select the required language.
- Touch the CONFIRM
![]() button to confirm the language.
button to confirm the language.
 Language.
Controls lock
Allows the appliance to automatically lock the controls after one minute of normal operation without any intervention from the user.
- Select
![]() Controls lock.
Controls lock. - Select Yes.
- Touch the CONFIRM
![]() button to activate the Controls lock mode.
button to activate the Controls lock mode.
![information]() During normal operation, it is indicated by the
During normal operation, it is indicated by the ![]() indicator light turning on in the information area
indicator light turning on in the information area ![]() .
.
To temporarily disable the lock during cooking: - Touch one of the values that you wish to modify.
A message appears on the display that indicates how to temporarily disable the Controls lock mode.
![]()
- Touch the
![]() icon for 3 seconds.
icon for 3 seconds.
 Controls lock.
Sound
Whenever one of the display symbols is pressed, the appliance beeps. This setting disables these sounds.
- Select
![]() Sound.
Sound. - Select Off.
- Touch the CONFIRM
![]() button to disable the sound associated with the touching of the symbols on the display.
button to disable the sound associated with the touching of the symbols on the display.
 Sound.
Temperature Format
Allows you to set the temperature scale to degrees Celsius (°C) or degrees Fahrenheit (°F).
The Temperature format function is factory set to °C.
- Select
![]() Temperature format.
Temperature format. - Select °C or °F.
- Touch the CONFIRM
![]() button to activate the required temperature format.
button to activate the required temperature format.
 Temperature format.
Display brightness
This allows the display brightness level to be selected.
The Display brightness function is factory set to High.
- Select
![]() Display brightness.
Display brightness. - Select from the options High - Medium - Low.
- Touch the CONFIRM
![]() button to confirm the selection.
button to confirm the selection.
 Display brightness.
Weight type
Allows you to set the unit of measurement to display the weight value in kilograms (kg) or in ounces (oz).
The Weight type function is factory set to kg.
- Select Weight type
![]() .
. - Select kg or oz.
- Touch the CONFIRM
![]() button to activate the desired weight unit.
button to activate the desired weight unit.
 .
.System info
Menu displaying information about serial number and software versions.
- In the "settings menu
![]() " touch the SYSTEM INFO
" touch the SYSTEM INFO ![]() button (at the right in the lower area
button (at the right in the lower area ![]() ).
).
 " touch the SYSTEM INFO
  button (at the right in the lower area
 Restore settings
This restores all settings to the original factory settings.
The operation also deletes personal recipes.
- Touch the FACTORY RESET
![]() button on the "settings menu
button on the "settings menu ![]() " (at the centre of the lower area
" (at the centre of the lower area ![]() ).
).
 button on the "settings menu
 - Touch the Yes button if you want to restore the original factory operations.
or - Touch the No button to cancel the operation.
CONNECTION (SmegConnect models only)
Menu where connectivity parameters are displayed.
- In the "settings menu
![]() " touch the CONNECTION
" touch the CONNECTION ![]() button.
button.
For CONNECTION-related settings  refer to the "Built in blast chiller connectivity" user manual.
CLEANING AND MAINTENANCE
Cleaning the appliance
See General safety instructions.
Cleaning the surfaces
To keep the surfaces in good condition, they should be cleaned regularly after use. Let them cool first.
Ordinary daily cleaning
Always and only use specific products that do not contain abrasives or chlorine-based acids.
Pour the product onto a damp cloth and wipe the surface, rinse thoroughly and dry with a soft cloth or a microfibre cloth.
Food stains or residues
Do not use steel sponges and sharp scrapers as they will damage the surface.
Use normal, non-abrasive products and a wooden or plastic tool, if necessary. Rinse thoroughly and dry with a soft cloth or a microfibre cloth.
Do not allow residues of sugary foods (such as jam) to set inside the oven. If left to set for too long, they might damage the enamel lining of the oven.
Cleaning the cavity
For the best upkeep of the cavity, clean it regularly after each use.
Avoid letting food residue dry inside, as this could damage the surfaces.
Take out all removable parts before cleaning.
Always remove solid residues.
In the event you are using specific cleaning products, we recommend running the oven at maximum temperature for 15-20 minutes in order to eliminate any residue.
At the end of each use, two automatic cleaning cycles are recommended to ensure optimal sanitising of the cavity.
Drying
Cooking and blast chilling/deep-freezing food generates moisture inside the cavity. This is a normal phenomenon and does not affect the appliance operation in any way.
Each time you finish use:
- let the appliance cool down;
- remove dirt from the cavity;
- dry the cavity with a soft cloth;
- leave the door open until the inside of the appliance has dried completely.
Removing rack/tray support frames
Removing the rack/tray support frames enables the sides to be cleaned more easily.
To remove the rack/tray support frames:
- Using a medium-sized slotted screwdriver, unscrew the pins that secure the frame to the side panel of the compartment.


Special cleaning functions
- From position 0, turn the function knob to the left by one position. The
![]() button flashes.
button flashes.
Automatic cleaning

The automatic cleaning function has the task of sanitising the inside of the cavity from unpleasant odours generated during operation.
- Touch the
![]() button in the "main menu" (in the lower area
button in the "main menu" (in the lower area ![]() ).
). - Open the door.
- Press the START
![]() button to start the automatic cleaning.
button to start the automatic cleaning.
![information]() Automatic cleaning does not start if the door is closed.
Automatic cleaning does not start if the door is closed.
![information]() If the door is accidentally closed during the function, the appliance interrupts the function while waiting for the door to reopen.
If the door is accidentally closed during the function, the appliance interrupts the function while waiting for the door to reopen. - At the end of the automatic cleaning, dry the inside of the appliance thoroughly.
- Close the door.
 button in the "main menu" (in the lower area
 Extraordinary maintenance
Seal maintenance tips
The seal should be soft and elastic.
- To keep the seal clean, use a non-abrasive sponge and wash with lukewarm water.
INSTALLATION
Electrical connection
See General safety instructions.
General information
Check the mains characteristics against the data indicated on the plate.
The identification plate bearing the technical data, serial number and brand name is visibly positioned on the appliance.
Do not remove this plate for any reason.
The appliance must be connected to ground using a wire that is at least 20 mm longer than the other wires.
The appliance can work in the following modes:
- 220-240 V~
![]()
3 x 1.5 mm² three-core cable.
![information]() The values indicated above refer to the cross section of the internal lead.
The values indicated above refer to the cross section of the internal lead.
![information]() The aforementioned power cables are sized taking into account the coincidence factor (in compliance with standard EN 60335-2-6).
The aforementioned power cables are sized taking into account the coincidence factor (in compliance with standard EN 60335-2-6).

Fixed connection
Fit the power line with an all-pole circuit breaker with a contact separation distance sufficient to provide complete disconnection in category III overvoltage conditions, pursuant to installation regulations.
For the Australian/New Zealand market:
The circuit breaker incorporated in the fixed connection must comply with AS/NZS 3000.
Connection with plug and socket
Make sure that the plug and socket are of the same type.
Avoid using adapters, gang sockets or shunts as these could cause overheating and a risk of burns.
Positioning
See General safety instructions.
Position of the power cable

Fastening bushings

- Remove the bushing covers on the front of the appliance.
- Mount the appliance into the recess.
- Secure the appliance to the cabinet through screws.
- Cover the bushings with the previously removed covers.
Appliance overall dimensions (mm)

Mounting into a column (mm)

* Make sure that the cabinet top/rear section has an opening approx. 60 mm deep.
Documents / Resources
References
Download manual
Here you can download full pdf version of manual, it may contain additional safety instructions, warranty information, FCC rules, etc.
Download Smeg SBC4604WNR - Blast chiller 45cm Compact Manual
Advertisement
Thank you! Your question has been received!

Need Assistance?
Do you have a question about the SBC4604WNR that isn't answered in the manual? Leave your question here.