Advertisement
- 1 Safety Precautions
- 2 Product Components
- 3 Opening the Door from Outside (Master/User Password)
- 4 Opening the Door from Outside (Fingerprint)
- 5 Opening the Door from Outside (Mobile Key)
- 6 Opening the Door from the Inside
- 7 Locking the Door from the Inside
- 8 Menu
- 9 Registration Mode
- 10 Change the master password
- 11 Adding/ Deleting User Password/ Deleting All User Passwords
- 12 Adding/ Deleting Fingerprint/ Deleting All Fingerprints
- 13 Managing Wireless Module (OPTION)
- 14 Register a WiFi (OPTION)
- 15 Initialization
- 16 Setting Mode
- 17 Welcome Function
- 18 Multi-Leveled Security Code Entry Mode
- 19 Double Authorization Mode
- 20 Door Lock Time Setup Function
- 21 Voice Guide Setting
- 22 WiFi Use
- 23 Automatic/Manual Locking Setting
- 24 Volume Setting
- 25 Door Bell Function
- 26 Security Assurance Mode Activation/Deactivation
- 27 Away Mode and Anti unlock Activation/Deactivation
- 28 Intrusion Detection Function
- 29 Prank Prevention Function
- 30 Alarm Sound Deactivation
- 31 High Temperature Alarm Function
- 32 Battery Replacement
- 33 Emergency Power Use
- 34 Emergency Key Use
- 35 Product Specifications
- 36 Documents / Resources
Safety Precautions

This section contains important information to ensure the user's safety and prevent potential damage to property.
Please, read this section carefully and use the product accordingly.
- The user shall not install or repair the product without authorization.
- Do not install the product in the place where the gap between the door and the frame is 5 mm or more.
- Long-term exposure to direct sunlight may cause a crack on its touch pad. Avoid exposure to direct sunlight.
- Do not use the excessive force or sharp objects to push the lock buttons, as this can damage the product.
- Do not operate the product with wet hands, and keep liquids such as water or drinks away from the product, or the product may malfunction or be damaged.
- Do not use water, benzene or alcohol when cleaning the product, but use a soft dry cloth.
- Make sure that the door is completely closed when going outside.
- Make sure that no unauthorized person has the access to the password. Change it regularly.
- Be sure to correctly match the battery polarities (+/-) when installing the batteries. Wrong direction of battery polarities may cause the battery liquid leakage or the burst of them.
- When the battery replacement alarm melody is generated, use all new batteries instead of the existing batteries.
- According to the wireless communication environment, its battery may consume much.
- Interference in wireless communication may occur when this product is used, or radio interference may occur from other devices.
- As this radio system may have radio interference during the operation, it cannot provide a service for human lives.
- Much dew condensation may affect the performance of this product.
- Keep 20 cm or longer away from this product when using it.
- The information of this user manual is subject to change without any notices to improve the performance of this product.
- Customer's improper installation may result in a additional service costs.
We highly recommend professional installation.
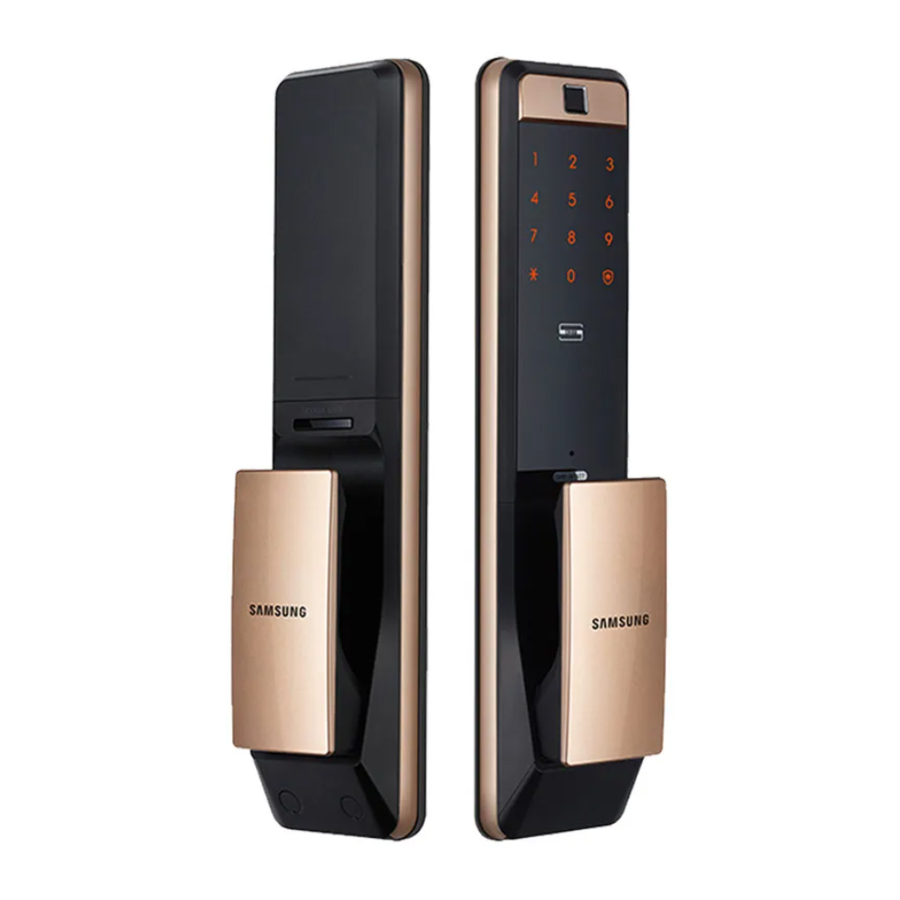
Product Components
The product components may vary depending on the installation environment.

- User Manual, Emergency Key
- 'AA' Batteries (LR6)
- Handle Shaft Spring
- Handle Shaft, Installation Screws
- Spacer
- Installation Manual
Outer Body Parts

Inner Body Parts

Mortise

Opening the Door from Outside (Master/User Password)
When purchased, the product is set to Multi-leveled Security Code Entry Mode initially. Please, refer to 'Multi-leveled Security Code Entry Mode setting' for Common Mode setting.
- Silent Mode
Before entering the master/user password, press the [*] button and enter the master/ user password, then both the sound of the key entering and the door opening will be muted. It is a useful function if you do not want to disturb neighbors when you go in and out at night.
Multi-leveled Security Code Entry Mode
Accessing the door lock or touching the number pad (in the Welcome Function mode) will light up the number pad.

When two arbitrary buttons are lighted, press the buttons.

Success: "Ding dong deng dong↑"
Fail: "This password is incorrect."
When the numbers on the number pad are lighted, enter the master/user password and press the [*] button.
Common Mode
Accessing the door lock or touching the number pad (in the Welcome Function mode) will light up the number pad.
Success: "Ding dong deng dong↑"
Fail: "This password is incorrect."
Enter the password when the number pad is lighted, and press the [*] button.
Note
- Master/User password must be entered after the light is on. If not, touch the number pad and re-enter the password.
- To cancel the password entry, press the [
![]() ] button and re-enter the password.
] button and re-enter the password. - If the password is wrong 5 times, the "You entered the wrong information five times." alarm will sound. In about 10 seconds, the "The input block mode will be activated for three minutes." alarm will sound, and the system will shut-down for about 3 minutes. If the correct password is entered before the 3-minute entry block mode alarm is generated, the entry block mode will not be activated.
 ] button and re-enter the password.
Opening the Door from Outside (Fingerprint)
A locked door can be opened from outside by using a fingerprint.
Place the registered fingerprint on the fingerprint detector.

Success: "Ding dong deng dong↑"
Fail: "Please try it again."
When put a fingerprint to the fingerprint recognition part, the Number door will be opened after 1 second.
Opening the Door from Outside (Mobile Key)
A locked door can be opened from outside by using a mobile key.
Place the mobile key issued through WiFi on the mobile key sensor.

Success: "Ding dong deng dong↑"
Fail: "This mobile key is not registered."
Place the mobile key. The door will be opened after 1 second.
Note
- When the Welcome function is deactivated, touch the number pad to open the door.
- A mobile key can be used after a user subscribes to the service through WiFi. For details, refer to the App guide.
- Opening the door with Mobile Key is available only for NFC enabled Android terminals and NFC USIM chip users.
Opening the Door from the Inside
Opening the Door by Pulling the Inside Handle (Pull-Push)
")
- Please be careful not to trap your hand during use.
Locking the Door from the Inside
Automatic Locking Setting
New Master The door is automatically locked 1 second after the Password Password Change the master password door is closed. User
Manual Locking Setting

The door is locked when the [DOUBLE LOCK] button from the inside is pressed.
- If you want to check the door status in the house, shortly touch the Double Lock button. If the door is locked, the red LED blinks. If not, the green LED blinks. Note
Menu
Registration Mode

Setting Mode

Initialization Mode

WiFi Registration Mode

Number pad Guide
The number pad of the door lock shows diverse settings.

Successful registration and setting ( O )

Failed registration and setting ( X )

Additional registration ( + )

Individual deletion ( - )
- All registration and setting are activated only when the door is opened.
(WiFi connection is activated only when the door is closed.)
Registration Mode
A user can change a master password, or register and delete a user password or fingerprint or delete all user passwords or fingerprints.
In addition, a wireless connection can be registered as an option.
In the Registration mode, select a function.
(For the details of each function, refer to instructions.)
- In the Registration mode, be careful that the door is not locked even though it is closed during the registration time (60 seconds). To cancel the Registration mode, press the Register button of the inner body.
Register Button

"Ding dong" →
"Press the password and the asterisk sign to manage an authentication tool. Press the Security button for the environment setting. Press the Register button to end this process."
Open the battery cover of the inner body and press the [Register] button shortly.
Existing Master Password

"Ding dong deng" →
"Press "0" and the asterisk sign to change a password. Press "1" and the asterisk sign to manage a user password. Press "3" and the asterisk sign to manage a fingerprint. Press "4" and the asterisk sign to set up a wireless connection."
Press the existing master password and the [*] button.
Change the master password
A user can register a master password (4 to 12 digits), and only one master password can be registered, The default master password is "1234."
Enter Registration Mode
Select the Registration mode.
(Refer to the Registration mode.)
Select Master Password Change
"Password Change mode"

Press the [0] button.
- To hear the announcement again, press a number button before pressing the [*] button.

"Press a new password and the asterisk sign."
Press the [*] button.
Press New Master Password

"Ding dong deng" →
Success: "It was changed."
Fail: "Wrong information was entered."
Press a new master password and the [*] button.
Check Changed Password

Press the [Register] button, the new password, and the [ * ] button, consecutively, and check if the Registration mode is accessed.
- To prevent an intrusion, it is recommended to make a password with 6 or more digits. (Each digit number ranges from 0 to 9.)
- Manage your master password with care so that unauthorized people will not have access to it. Regularly changing your password can reduce the risk of it being leaked.
- A registered master password cannot be deleted. Register a new master password.
- To make sure the password has been properly registered, check the new password and close the door.
- If checking the new password fails, initialize the key information. to initialize the password, and change the password again.
Adding/ Deleting User Password/ Deleting All User Passwords
A user can register a user password (4 to 12 digits).
Up to 100 user passwords can be registered.
A user password registered can be deleted, or all user passwords can be deleted.
Enter Registration Mode
Select the Registration mode.
(Refer to the Registration mode.)
Select User Password Management

"User Password Management mode"
Press the [1] button.
- To hear the announcement again, press a number button before pressing the [*] button.

"Press "1" and the asterisk sign for additional registrations.
Press "2" and the asterisk sign for individual deletions.
Press "3" and the asterisk sign for all deletions."
Press the [*] button.
Add a user password
Select Additional Registration

"Additional Registration mode"
Press the [1] button.
- To hear the announcement again, press a number button before pressing the [*] button.

"Press a user password and the asterisk sign."
Press the [*] button.
Press New User Password

"Ding dong deng" →
Success: "It is registered. If you need to register it more, press a new user password and the asterisk sign."
Fail: "Wrong information was entered." or "It already exists."
Press a new user password and the [*] button.
Exit Registration Mode

If you want to end this process, press the [Register] button of the inner body shortly.
Delete a user password
Select Individual Deletion

"Individual Deletion mode"
Press the [2] button.
- To hear the announcement again, press a number button before pressing the [*] button.

"Press the user password and the asterisk sign."
Press the [*] button.
Press User Password to Delete

"Ding dong deng" →
Success: "It is deleted. If you need to delete more, press the user password and the asterisk sign."
Fail: "This password is not registered."
Press the user password registered and the [*] button.
Exit Registration Mode

If you want to end this process, press the [Register] button of the inner body shortly.
Delete all user passwords
Select All Deletion

"All deletion mode"
Press the [3] button.
- To hear the announcement again, press a number button before pressing the [*] button.

"Ding dong deng" → "All deleted."
Press the [*] button.
Note
- Continuously, a user password can be registered or deleted.
When a user enters a user password within 60 seconds after a new user password is registered or deleted, the registration or deletion continues to be performed. - To make sure the password has been properly registered or deleted, check the password and close the door.
Adding/ Deleting Fingerprint/ Deleting All Fingerprints
Max 100 fingerprints can be registered.
A fingerprint registered can be deleted, or all fingerprints can be deleted.
Enter Registration Mode
Select the Registration mode.
(Refer to the Registration mode.)
Select Fingerprint Management

"Fingerprint Management mode"
Press the [3] button.
- To hear the announcement again, press a number button before pressing the [*] button.

"Press "1" and the asterisk sign for additional registrations. Press "2" and the asterisk sign for individual deletions. Press "3" and the asterisk sign for all deletions."
Press the [*] button.
Add a fingerprint
Select Additional Registration

"Additional Registration mode"
Press the [1] button.
- To hear the announcement again, press a number button before pressing the [*] button.

"Input a new fingerprint three times to the fingerprint recognition part."
Press the [*] button.
Contact Fingerprint to Add

"beep" → "Ding dong deng" →
Success: "It is registered. If you need to register it more, input your fingerprint three times to the fingerprint recognition part."
Fail: "Please try it again."
Put a fingerprint to add to the fingerprint recognition part. (In registering your fingerprint, change its position gradually until it is recognized.)
When "beep" sound is generated and the recognition count is displayed on the number pad, remove the finger from the recognition part and contact it again. (Total three times)
Exit Registration Mode

If you want to end this process, press the [Register] button of the inner body shortly.
Note
- In registering your fingerprint, it is recommended to register your thumb or index finger.
- If the quality of the fingerprint image is bad, fingerprint registration may be refused.
Delete a fingerprint
Select Individual Deletion

"Individual Deletion mode"
Press the [2] button.
- To hear the announcement again, press a number button before pressing the [*] button.

"Input the fingerprint to the fingerprint recognition part."
Press the [*] button.
Contact Fingerprint to Delete

"Ding dong deng" →
Success: "It is deleted. If you need to delete more, input the fingerprint to the fingerprint recognition part."
Fail: "Please try it again."
Contact the fingerprint to delete to the fingerprint recognition part.
Exit Registration Mode

If you want to end this process, press the [Register] button of the inner body shortly.
Delete all fingerprints
Select All Deletion

"All deletion mode"
Press the [3] button.
- To hear the announcement again, press a number button before pressing the [*] button.

"Ding dong deng" → "All deleted."
Press the [*] button.
Note
- Continuously, a fingerprint can be registered or deleted. When a user contacts a fingerprint within 60 seconds after a new fingerprint is registered or deleted, the registration or deletion continues to be performed.
- To make sure the password has been properly registered or deleted, check the password and close the door.
Managing Wireless Module (OPTION)
You can purchase a Wi-Fi/wireless module sold by Samsung and mount it into the Wi-Fi/wireless module mounting part.
However, even though you purchase a proper Samsung Wi-Fi/wireless module, it may not be used in a model that does not support the module. Thus, please, contact the store before purchasing a Wi-Fi/wireless module to inquire the module type of your model.
Mount WiFi or Wireless Module

Open the battery cover and remove the batteries.

Open the module cover and mount a Wifi/wireless module into the WiFi/wireless module connection part.

Insert the batteries and close the battery cover.
Enter Registration Mode
Select the Registration mode.
(Refer to the Registration mode.)
Select Wireless Connection Setting

"Wireless module management mode"
Press the [4] button.
- To hear the announcement again, press a number button before pressing the [*] button.

"Press "1" and the asterisk sign to manage a wireless module."
Press the [*] button.
Wireless module connection/disconnection
Enter Connection/Disconnection Mode from Controller
The Connection/Disconnection mode is activated from the controller.
(Refer to the user manual of the controller.)
Select Wireless Module Management

"Wireless Module Management mode"
Press the [1] button.
- To hear the announcement again, press a number button before pressing the [*] button.

"A wireless module is being set up."
Press the [*] button.
Wireless Module Connection

"Ding dong deng" →
Success: "It was normally processed."
Fail: "Failed."
The wireless module is connected.
- A wireless module not sold by Samsung cannot be arbitrarily connected and used.
- For the wireless module, it may be impossible to purchase depending on the situation by country.
- When a wireless module is linked, up to 20 user passwords can be registered.
Register a WiFi (OPTION)
When connecting a WiFi, a user can use App based various user services through WiFi.
WiFi connection is activated only when the door is closed.
(WiFi band: 2.4 GHz)
App Installation and Use
Install the 'Samsung Smart Doorlock' app from Google Play/App Store.
(Chinese users can install the Android app from Baidu, Tencent, or Qihoo360.) After becoming a member, a WiFi can be connected.


- For the information on the registration and the use method, refer to the guide provided from the app.
Note
- If you separately purchase a Samsung Wi-Fi module, see instruction to mount it into the door lock.
Initialization
All registered data are deleted.
Press and Hold [Register] Button

"Ding dong" → "Ding ding" →
"Press the password and the asterisk sign for interworking initialization.
Press "4560852580" and the asterisk sign for the initialization of the key information."
While the door is opened, Open the battery cover of the inner body and press the [Register] button for 5 seconds.
Initialize the linked information
- WiFi linkage: Initialize the mobile key and WiFi registration information.
- The master/user passwords and the fingerprint information are maintained.
Enter Master Password

Success: "The reset has been completed."
Fail: "Wrong information was entered."
When the number pad is lighted, enter the master password and press the [*] button.
Initialize the key information
The master/user passwords and the fingerprint information can be initialized.
- WiFi linkage: The mobile key is initialized and the WiFi registration information is maintained.
- Link of a wireless module: The linked information is maintained.
Enter Initialization Number of Key Information.

Success: "The reset has been completed."
Fail: "Wrong information was entered."
When the number pad is lighted, enter "4560852580" and press the [*] button.
Setting Mode
You can set various functions of the door lock.
In the Setting mode, select a function.
(For the details of each function, refer to instructions)
- In the Setting mode, be careful that the door is not locked even though it is closed during the setting time (60 seconds). To cancel the Setting mode, press the Register button section of the inner body.
Register Button

"Ding dong" →
"Press the password and the asterisk sign to manage an authentication tool.
Press the Security button for the environment setting. Press the Register button to end this process."
Open the battery cover of the inner body, and press the [Register] button shortly.
Security Button

"Setting mode.
Press "1" and the asterisk sign for the Welcome function.
Press "2" and the asterisk sign for the Randomizer.
Press "3" and the asterisk sign for the Dual authentication.
Press "4" and the asterisk sign for the Door close time.
Press "5" and the asterisk sign for the Voice guidance.
Press "9" and the asterisk sign for Wi-Fi."
Press the [ ] button.
Welcome Function
When a user approaches a door lock, the door lock gets automatically in the authentication standby status even though the user does not touch the number pad or the fingerprint authentication part.
By default, the Welcome function is set, and the Security mode is deactivated. In addition, the detection distance is set to Middle distance.
Enter Setting Mode
Select the Setting mode.
(Refer to the Setting mode.)
Select Welcome Function Setting Mode

"Welcome Function Setting mode"\
Press the [1] button.
- To hear the announcement again, press a number button before pressing the [*] button.

"Press "1" and the asterisk sign to activate the welcome function and the security mode.
Press "2" and the asterisk sign to activate the welcome function.
Press "3" and the asterisk sign to deactivate the welcome function.
Press "4" and the asterisk sign to set the identification range."
Press the [*] button.
Set the welcome function and the security mode
- Welcome function setting: When a user approaches to the door lock, the authorization standby mode will automatically activate.
- Security mode setting: When someone is in front of the door lock for a minute or longer, an alarm sound is generated.
Set the welcome function and the security mode

"Welcome function and Security mode setting"
Press the [1] button.
- To hear the announcement again, press a number button before pressing the [*] button.

"Ding dong deng" → "It is set."
Press the [*] button.
Set the welcome function and deactivate the security mode
Select Welcome Function Setting and Security Mode Cancellation

"It activates the welcome function."
Press the [2] button.
- To hear the announcement again, press a number button before pressing the [*] button.

"Ding dong deng" → "It is set."
Press the [*] button.
Deactivate the Welcome function
- Welcome function deactivation Even though a user approaches a door lock, the door lock does not get automatically in the authentication standby status. Touch the number pad or contact your fingerprint the fingerprint authentication part to use the door lock.
Select Welcome Function Cancellation

"It deactivates the welcome function."
Press the [3] button.
- To hear the announcement again, press a number button before pressing the [*] button.

"Ding dong deng" → "It is deactivated."
Press the [*] button.
Set the detection distance
A user can set the distance that can detect a user who approaches the door.
(Short distance: About 40 cm, middle distance: About 60 cm, long distance: About 80 cm)
Select Detection Distance Setting

"Identification range setting mode"
Press the [4] button.
- To hear the announcement again, press a number button before pressing the [*] button.

"Press "1" and the asterisk sign for a close range.
Press "2" and the asterisk sign for a middle range.
Press "3" and the asterisk sign for a long range."
Press the [*] button.
Set Detection Distance
- Select the short distance setting

"It is set to a close range."
Press the [1] button.
- To hear the announcement again, press a number button before pressing the [*] button.

"Ding dong deng" → "It is set."
Press the [*] button.
- Select the middle distance setting

"It is set to a middle range."
Press the [2] button.
- To hear the announcement again, press a number button before pressing the [*] button.

"Ding dong deng" → "It is set."
Press the [*] button.
- Select the long distance setting

"It is set to a long range."
Press the [3] button.
- To hear the announcement again, press a number button before pressing the [*] button.

"Ding dong deng" → "It is set."
Press the [*] button.
Note
- The detection distance may change if the door lock is directly exposed to the sunlight or lighting.
- It is recommended to limitedly use the security mode setting because an alarm sound may be generated in case of row houses (or apartments) where lighting is always turned on or apartment houses of corridor access directly exposed to the sunlight.
Multi-Leveled Security Code Entry Mode
By pressing a password in order after two arbitrary numbers are inputted, a user can prevent password leak.
By default, the multi-leveled security code entry mode is set.
Enter Setting Mode
Select the Setting mode.
(Refer to the Setting mode.)
Select Multi-Leveled Security Code Entry Mode Setting.

"Randomizer setting mode"
Press the [2] button.
- To hear the announcement again, press a number button before pressing the [*] button.

"Press "1" and the asterisk sign for activation.
Press "3" and the asterisk sign for deactivation."
Press the [*] button.
Select Activation/Deactivation
- Select the setting

"Setting mode"|
Press the [1] button.
- To hear the announcement again, press a number button before pressing the [*] button.

"Ding dong deng" → "It is set."
Press the [*] button.
- Select the deactivation (common mode)

"Deactivation mode"
Press the [3] button.
- To hear the announcement again, press a number button before pressing the [*] button.

"Ding dong deng" → "It is deactivated."
Press the [*] button.
Double Authorization Mode
Double authorization mode requires both password and fingerprint to open the door, enhancing more security.
To set the double authorization mode, one or more fingerprints need to be registered. When purchased, the door lock is not set to double authorization mode initially.
Enter Setting Mode
Select the Setting mode.
(Refer to the Setting mode.)
Select Double Authorization Mode.

"Dual authentication setting mode"
Press the [3] button.
- To hear the announcement again, press a number button before pressing the [*] button.

"Press "1" and the asterisk sign for activation.
Press "3" and the asterisk sign for deactivation."
Press the [*] button.
Select Activation/Deactivation
- Select the setting

"Setting mode"
Press the [1] button.
- To hear the announcement again, press a number button before pressing the [*] button.

"Ding dong deng" → "It is set."
Press the [*] button.
- Select the deactivation (common mode)

"Deactivation mode"
Press the [3] button.
- To hear the announcement again, press a number button before pressing the [*] button.

"Ding dong deng" → "It is deactivated."
Press the [*] button.
Door Lock Time Setup Function
This function sets the time interval between the moment the door DOUBLE LOCK sensor recognizes the door as closed and the moment the deadbolt is locks the door.
In an environment that the door closes slowly and the deadbolt jams before the door is fully closed, the situation can be fixed by adjusting the door lock time. By default, the door lock time is set to 1 second.
Enter Setting Mode
Select the Setting mode.
(Refer to the Setting mode.)
Select Door Lock Time Setting Mode

"Door closing time-setting mode "
Press the [4] button.
- To hear the announcement again, press a number button before pressing the [*] button.

"Press "1" for one second and "2" for two seconds.
Press a number from one to nine and the asterisk sign."
Press the [*] button.
Set Time

"It is set to 1 second." ~ "It is set to 9 second."
Press [1] ~ [9] button.
- To hear the announcement again, press a number button before pressing the [*] button.

"Ding dong deng" → "It is set."
Press the [*] button.
Voice Guide Setting
Door lock functions are guided by voice. By default, the voice guide is set.
Enter Setting Mode
Select the Setting mode.
(Refer to the Setting mode.)
Select Voice Guide Setting

"Voice guidance setting mode"
Press the [5] button.
- To hear the announcement again, press a number button before pressing the [*] button.

"Press "1" and the asterisk sign for activation. Press "3" and the asterisk sign for deactivation."
Press the [*] button.
Select Activation/Deactivation
- Select the setting

"Setting mode"
Press the [1] button.
- To hear the announcement again, press a number button before pressing the [*] button.

"Ding dong deng" → "It is set."
Press the [*] button.
- Select the deactivation
Even though this voice guide is deactivated, if an abnormal/emergency situation occurs, an alarm sound is generated. The voice guide for the low voltage notification, security assurance mode, and away security mode are not deactivated.

"Deactivation mode"
Press the [3] button.
- To hear the announcement again, press a number button before pressing the [*] button.

"Ding dong deng"
Press the [*] button.
WiFi Use
By default, the WiFi Use is set.
Enter Setting Mode
Select the Setting mode.
(Refer to the Setting mode.)
Select WiFi Use Setting Mode

"Wi-Fi setting mode"
Press the [9] button.
- To hear the announcement again, press a number button before pressing the [*] button.

"Press "1" and the asterisk sign for activation.
Press "3" and the asterisk sign for deactivation.
Press "5" and the asterisk sign for WPS mode."
Press the [*] button.
Activation/Deactication Wi-Fi Use
Select Activation/Deactivation
- Select the setting

"Setting mode"
Press the [1] button.
- To hear the announcement again, press a number button before pressing the [*] button.

"Ding dong deng" → "It is set."
Press the [*] button.
- Select the deactivate

"Deactivation mode"
Press the [3] button.
- To hear the announcement again, press a number button before pressing the [*] button.

"Ding dong deng" → "It is deactivated."
Press the [*] button.
Note
- When WiFi Use is deactivated, a user cannot use various other services provided by the App.
- If you do not use the app, it is recommended to cancel the use of WiFi.
WPS mode
When an AP is changed while a WiFi is used after its registration, this WPS mode allows convenient setting from the connection to the security setting without complex process.
This mode can be used only when an AP supporting the WPS.
For the information on how to use the WPS of an AP refer to the AP user manual.
Select WPS of Changed AP
Select the WPS of a changed AP.
Select WPS

"WPS mode"
Press the [5] button.
- To hear the announcement again, press a number button before pressing the [*] button.

"The WPS mode is being activated."
Press the [*] button.
Connect to AP

"Ding dong deng" →
Success: "Doorlock is normally registered. Please wait for a while."
Fail: "Failed to set WiFi. Please try it again from the beginning."
The AP is being connected.
Note
- WPS: WiFi Protected Setup
- If an AP does not support the WPS, take the WiFi registration procedure again to use the changed AP.
- For the information on the WiFi registration, refer to the instructions.
Automatic/Manual Locking Setting
The Automatic Locking mode allows for automatic locking of the door when it is closed.

Open the battery cover of the inner body.
Set the [Automatic/Manual Locking] toggle switch of the inner body to A/M position.
| Automatic | The door is automatically locked 1 second after the door is closed. If the battery low voltage voice message and an alarm sound are heard, replace the batteries. If the voltage of the door lock continues to be low, the door may not be locked. |
| Manual | The door does not automatically lock, and the [DOUBLE LOCK] button must be pressed from the inside or touch [number pad] to close the door. |
Note
- Regardless of the automatic/manual locking setting, the door is automatically locked 7 seconds after the door is not opened after the door locking is released.
Volume Setting
The sound that is generated when the number buttons are pressed, when the door is locked, or when the locked door is unlocked, can be set according to the user's preference.
When purchased, all sounds are set to be generated initially. (1 level)

Open the battery cover of the inner body. Set the [Sound Control] switch to [0]~[2].
- [0]: The sounds of door opening/closing and key touching are not deactivated (except an alarm sound).
- [1]~[2]: All sounds are activated, and the sounds get bigger as the step becomes higher.
Door Bell Function
Appoaching the door lock or touching the number pad (in the Welcome Function mode) when the door is closed will light up the number pad. Pressing the door bell LED in the number pad LED generates a bell sound to let a user in the house know there is a guest.
Security Assurance Mode Activation/Deactivation
At-home security mode is to prevent opening of the door from outside while someone is inside.
Security Assurance Mode Activation

"Anti-picking mode is activated."
Press the [DOUBLE LOCK] button on the indoor side for 3 seconds to prevent the door from opening with the smart detection while the door is locked.
Security Assurance Mode Deactivation

DING DONG DENG DONG
Pull the inner body handle to open the door, and it will deactivate.
Security Assurance Mode Operation

Rapid beeping
Inside: Press the [DOUBLE LOCK] button or opening the door through WiFi generates the sound for action-unavailable.
Outside: Touch the [number pad], recognize the fingerprint, or touch with a mobile key to open the door. Then, the sound for action-unavailable is generated.
- When the security assurance function is activated, the door cannot be unlocked from the outside, so please be careful. Be especially careful not to allow children to set this mode accidently from the inside.
Away Mode and Anti unlock Activation/Deactivation
Away Mode
To prevent intrusion when a user goes out, this function triggers an alarm sound when someone tries to open the door from the inside.
In Away mode, if someone tries to open the door from the inside, "beep- beep-" sound is triggered for 5 minutes.
Anti unlock
When this function is activated, the internal handle will become tightened to prevent bypass attempts through door edge tools will be minimized.
Away Mode Activation

"Away mode is activated."
Once the door is locked, the [ ] button of the number pad is lighted. Press the [] button within 3 seconds to activate the Away mode.
Anti unlock Activation

DING DONG DENG
Press [*] and hold. After 3 seconds, the alarm will be come active.
Away Mode Deactivation

Enter the master/user password, touch a registered mobile key, recognize a fingerprint, or use WiFi, and open the door to deactivate the Away mode.
Anti unlock Deactivation

BEEP BEEP BEEP~
Press the [ DOUBLE LOCK lease the internal handle from Anti-Bypass function.
When this function is active, it may be harder to pull the internal handle for elderly or children to open the door from inside.
- Anti unlock function should only be set up when there is no one inside.
Intrusion Detection Function
This function triggers an alarm sound when an attempt is made to forcefully open the door from the inside or the outside.
(It is a basic function, and cannot be activate/deactivated by the user.) If the door is forcefully opened while locked, the Open/Close opening sensor detects it and triggers an alarm sound for 5 minutes.
Prank Prevention Function
This function triggers an alarm sound and deactivates lock operation when the door lock is improperly handled from the outside.
If a fingerprint/mobile key that are not registered or a wrong password are used five times, an alarm sound is generated and the door lock is deactivated for 3 minutes.
Alarm Sound Deactivation
Open the battery cover on the inner body and press the [Register] button, or open the battery cover and separate the batteries. Authenticate a registered fingerprint or mobile key or pressing the master/user password and press the [*] button.
High Temperature Alarm Function
If the room temperature abnormally increases, the temperature sensor detects it and an alarm is triggered. (It is a basic function, and cannot be activate/deactivated by the user.)
This high temperature alarm function is activated at about 70 ℃±10 ℃. Depending on the installation environment, the temperature may be different.
When a high temperature occurs, the temperature sensor detects it. The LED of the [DOUBLE LOCK] button on the inner body flashes while an alarm sound is generated for 15 seconds. After the alarm sound stops, the door is automatically opened.
(If the room temperature decreases to below a certain temperature, the door lock is normally operated.)
Battery Replacement
Melody for low battery notification is triggered
When the door is opened by pressing a master/user password or recognizing a fingerprint, if the voice message, "Replace the batteries." is heard, the batteries should be replaced.
(If the battery replacement alarm melody sounds, the battery replacement [ ![]() ] LED is lighted on the number pad.)
] LED is lighted on the number pad.)
Battery Replacement
When the battery replacement alarm voice is heard, immediately replace all batteries with new ones.
- The unit will stop operating suddenly if the batteries are not replaced.
- Depending on battery manufacturer, date of manufacture, and the user environment, the duration of use may vary. (In the case of average use, given as 10 times a day, 8 AA alkaline 1.5V batteries can last for 10 months).
- Liquid leaks from batteries can damage the product. Check the batteries regularly (about every 6 months).
- Before the batteries are replaced after the battery replacement melody sounds, a menu function such as activating the registration/setting mode cannot be used.
Emergency Power Use
If batteries are not replaced on time, they will be completely discharged and the lock will not operate.
How to open the door Using Emergency Power
By connecting the Micro USB 5-pin cable of a smartphone portable charger, an extra power can be used for the door lock.

![]()
To open the door, connect a Micro USB 5-Pin cable from a smartphone portable charger to the Micro USB power input on the bottom of the outer body, and then authenticate the fingerprint or enter the password.
Emergency Key Use
An emergency key is used when the door lock does not work because the battery replacement time comes or a circuit is wrong.
There is the emergency key hole on the emergency key insertion part on the bottom of the outer body.
Insert the emergency key and turn the key to release the lock.
- If you lose an emergency key, it is recommended to replace the entire key cylinder body.
(Replacing the entire key cylinder body is paid by a user.)
Product Specifications
| Item | Specifications | |
| Voltage | Four AA Alkaline 1.5 V batteries (LR6) (DC 6 V) | |
| Emergency Power Source | Smartphone portable charger with Micro-USB 5-pin connector (sold separately) | |
| Operation Method | Authentication method (password, fingerprint, NFC, WiFi) | |
| Weight | 3.430 kg (including both inner and outer bodies) | |
| Product | Outer Body | 88mm (W) x 392.1mm (H) x 63.8mm (D) |
| Dimensions (including the handle) | Inner Body | 86.2mm (W) x 391mm (H) x 68.5mm (D) |

Documents / Resources
References
Download manual
Here you can download full pdf version of manual, it may contain additional safety instructions, warranty information, FCC rules, etc.
Advertisement
Thank you! Your question has been received!


Need Assistance?
Do you have a question about the SHP-DP608 that isn't answered in the manual? Leave your question here.