Tally T2265 SprintPro Operator's Manual
Tallygenicom t2265: user guide
Hide thumbs
Also See for T2265 SprintPro:
- Reference manual (217 pages) ,
- Maintenance manual (178 pages) ,
- Maintenance manual (44 pages)
Table of Contents
Advertisement
Advertisement
Table of Contents

Related Manuals for Tally T2265 SprintPro


Summary of Contents for Tally T2265 SprintPro
- Page 1 ® Operator’s manual Matrix printer...
- Page 2 Office, Washington DC 20402 Stock No. 004.000.00345.4. WARNING: To comply with FCC regulations on electromagnetic interference for a class B computing device, the printer cable must be shielded. To assure compliance with FCC regulations for a computing device, use a shielded interface cable with a metal shell connector.
-
Page 3: Table Of Contents
Table of contents Introduction Symbols used Important safety instructions Using the Online-CD-ROM Contents of the Online CD-ROM Hardware requirements Troubleshooting Printer at a glance Installation Unpacking the printer Placing your printer Connecting the printer Switching on the printer Control panel Online mode... -
Page 4: Introduction
Keep this Operator’s Manual in a place which is easily accessible at all times. Place the printer on a solid base so that it cannot fall down to the ground. Do not expose the printer to high temperatures or direct sunlight. -
Page 5: Using The Online-Cd-Rom
The Online CD-ROM contains Online CD-ROM – the Reference Manual: A detailed description of the printer and its impressive features – Drivers: For Windows 3.1, Windows 95/98, Windows ME, Windows 2000, Windows NT4 – Additional documentation: Programming instructions and descriptions of the available options If your CD-ROM is be defective or missing, please consult your dealer. -
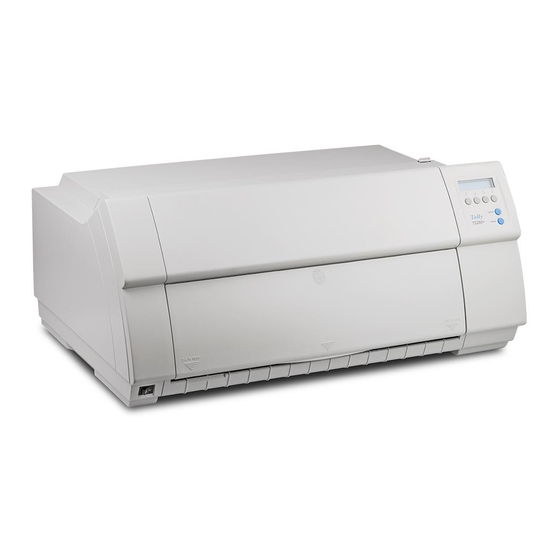
Page 6: Printer At A Glance
Printer at a glance Printer at a glance View from the front Control panel Soundproofing cover Top cover Front cover Power switch Bottom cover View from the rear Interface connectors Power cord connector Quick start-up Printer in tractor mode Tractors... -
Page 7: Installation
Make sure that the “Up” symbols point in the correct direc- tion. Open the packaging, take out the accessory cassette and un- pack it. Pull the printer out of the cardboard box towards you and remove the remaining packaging material. Check the printer for any visible transport damage and mis- sing items. -
Page 8: Placing Your Printer
Installation Placing your printer Place the printer on a solid, flat, surface, ensuring that the printer is positioned in such a way that it can not topple, and that there is easy access to the control panel and paper input devices. -
Page 9: Connecting The Printer
Switching on the printer Installation Make sure that the printer is set to the correct voltage (e.g. 230 V in Europe, 120 V in the U.S.A.). To do this, check the plate above the power inlet at the rear of the printer. -
Page 10: Control Panel
Control panel The control panel and the keys are used for controlling the printer operation. The upper line of the display shows whether the printer is in Online or Offline mode and the paper path selected (Tractor1 or Single). Online mode After switching on, the printer is automatically set to online mode. -
Page 11: Changing The Ribbon Cassette
Quick start-up Changing the Before opening the cover, make sure that the printer is switched on so that it can execute auto- ribbon cassette matic preparations for ribbon changing (widening the print head gap). Changing the ribbon cassette Move the paper to the park position. - Page 12 Changing the ribbon cassette Quick start-up Move the coloured friction tab to the left (direction of the arrow) as shown in the figure and raise the friction mechan- ism. Remove the used cassette. We recommend use of genuine ribbon cassettes only.
- Page 13 Quick start-up Changing the ribbon cassette Raise the coloured insertion tongue A. Insert the coloured ribbon tension knob into the right-hand front location of the new ribbon cassette. Turn the knob in the direction of the arrow in order to take up the slack of the rib- bon.
- Page 14 Changing the ribbon cassette Quick start-up Insert the coloured tension knob into one of the two locations. Turn the tension knob to take up slack in the ribbon until it is seated correctly at the bottom in the ribbon support. Press down the coloured insertion tongue A.
- Page 15 Quick start-up Changing the ribbon cassette Move the print head carriage backwards and forwards several times. If the ribbon is correctly seated, there must be no per- ceptible resistance. The ribbon should be transported during the travel from left to right. If this is not the case, you should check that the ribbon cassette is correctly inserted on the right.
-
Page 16: Paper Handling
Park Load Online Press the Park (1) key. If fanfold paper is loaded in the printer, it is fed to the tear position. The text tear paper off appears in the display. Then press any Setup key. If a single sheet is loaded in the printer, it is ejected. -
Page 17: Loading Paper
Your printer can process both fanfold paper and single sheets. For information on the supported paper sizes, please refer to page 25 (Paper specifications). You should only use those paper types which are approved for this printer. For more infor- mation, please refer to the Reference Manual on the Online CD-ROM. - Page 18 Tractor1 Lower the front cover. Load Online Switch the printer on. The active paper source (Traktor1) appears in the dis- play. The paper is automatically loaded when the printer is in online mode Setup and receives data from the computer.
-
Page 19: Single Sheets
Quick start-up Single sheets Some printer models are designed for fanfold paper operation only and therefore do not featu- re a single sheet feeder. The front cover can therefore not be opened on these models. Paper handling Make sure that the printer is set to single sheet mode. If necessary, change the paper type (see page 14, Changing the paper type). -
Page 20: Paper Transport
Paper handling Paper transport Loaded paper (fanfold paper/single sheets) can be transported in the printer in several ways. Make sure that the printer is in offline mode; press the Online key, if Offline Tractor1 necessary. Park LF/FF Online Setup Short keypress: Paper is transported upwards step by step. -
Page 21: Moving The Paper To The Tear Position
(see below). The display alternates between Tear position Tractor1 Online Setup After having torn off the paper, press the Exit (4) key. The printer returns the Online Tear paper to the first printing position. Online Exit If a print job is active, the printer automatically returns the paper to the first printing position. -
Page 22: Settings
This section describes how to set the tear position, the first printing line, the print head gap as well as the font selection and the character density. Setting the tear If the tear position of the paper is not aligned with the tear edge of the top cover of the printer, position you can adjust it. -
Page 23: Setting The First Printing Line (Tof)
Menu Char Online Press the Adjust (2) key. Setup Press the TOF (3) key. The printer performs a form feed. Head Tear Online Setup Press the < (2) or > (3) key to move the first printing line to the desired posi- FormAdj= 12/72"*... -
Page 24: Setting The Print Head Gap
> Exit Setup The setting made will be retained after switching off the printer. For more details, please re- fer to the Reference Manual on the Online CD-ROM. Setting the print The printer features automatic print head gap adjustment to the thickness of the paper used. In... -
Page 25: Selecting Character Density And Font
Online key. The printer then changes directly to online mode. Menu Char Online Setup The selection made will not be retained after switching off the printer. For more details on how to set the character density permanently, please refer to the Reference Manual on the On- line CD-ROM. Settings... -
Page 26: Technical Data
Weight Power supply Power consumption Ambient conditions Print head Approvals For more information on printer specifications as well as interface specifications, refer to the Reference Manual on the Online CD-ROM. Quick start-up T2265 T2280 Serial with 24-needle print head 136 characters at 10 cpi... -
Page 27: Paper Specifications
Quick start-up Paper Fanfold paper Tractor1 specifications Continuous single forms Single set of forms (requires individual testing) Single sheet feeder Single sheets Single set of forms (requires individual testing) Sets of forms For more information on general paper specifications as well as paper specifications for the optional tractor units and the automatic sheet feeder, refer to the Reference Manual on the Online CD-ROM. -
Page 28: Accessories
Accessories Accessories Ribbon cassettes Black ribbon cassette Ribbon cassette 1 x red, 3 x black Ribbon cassette with yellow, magenta, cyan, black Ribbon cassette with red, green, blue, black For additional accessories, please refer to the Reference Manual on the Online-CD-ROM. Quick start-up Order no. - Page 29 “All rights reserved. Translations, reprinting or copying by any means of this manual complete or in part or in any different form requires our explicit approval. We reserve the right to make changes to this manual without notice. All care has been taken to ensure accuracy of information contained in this manual. However, we cannot accept responsibility for any errors or damages resulting from errors or inaccuracies of information herein.”...
- Page 30 TALLY REPRESENTATIVES GERMANY U.S.A. Tally Computerdrucker GmbH Tally Corp. Postfach 2969 P.O.Box 97018 D-89019 Ulm 8301 South, 180th Street Deutschland Kent, WA 98032 Tel.: +49 7308 80 0 U.S.A. Fax: +49 7308 5903 Phone:+1 425 25155 00 http://www.Tally.de Fax: +1 425 25155 20 http://www.Tally.com ITALY Tally S.R.L.