Table of Contents
Advertisement
Quick Links
Advertisement
Table of Contents

Related Manuals for Samsung BT07PS


Summary of Contents for Samsung BT07PS
- Page 1 BT07PS...
-
Page 2: Installation
Using and Safety Symbols Power Installation Cleaning Safety Symbols Make sure to follow the directions below to prevent accidents and damage to the product. Failure to follow the accompanying directions may lead to serious injury or death. Failure to follow the accompanying directions may lead to minor personal injury or property damage. Using and Safety Symbols Power... - Page 3 Do not connect more than one appliance to a single outlet, as an overheated outlet may cause fire. Do not use force to pull the power cord. Don't place anything heavy on the power cord, as this may cause electric shock or fire. Make sure to turn the power off and disconnect the power plug from the outlet before moving the product.
-
Page 4: Safety Symbols
Using and Safety Symbols Power Installation Cleaning Installation When installing the product on a cabinet or shelf, do not let the front end of the product project beyond its front edge. Failing to do so, may cause the product to fall, resulting in a product malfunction or personal injury. - Page 5 Using and Safety Symbols Power Installation Cleaning Using and Cleaning Do not insert any metal objects such as forks, wire, or gimlets, or flammable items such as paper or matches into the ports at the back of the product, as this may cause electric shock or fire.
- Page 6 disconnect the power plug. Using the product without verifying that it has not been damaged may cause electric shock or fire. Please contact a service center. Correct Disposal of This Product (Waste Electrical & Electronic Equipment) - Europe only (Applicable in the European Union and other European countries with separate collection systems) This marking shown on the product or its literature, indicates that it should not be disposed with other household waste at the end of its working life.
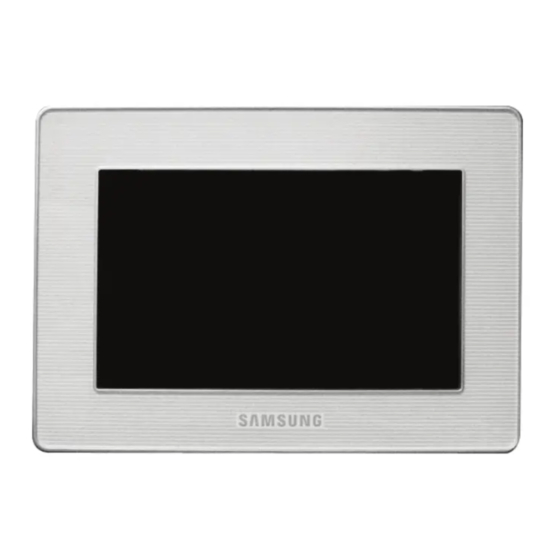
- Page 7 Side Features Components Front Back (Buttons) Features Expand the memory capacity with a memory card. Enjoy stored images immediately. By connecting a SD or MMC/MS/XD memory card of your digital camera to your digital photo frame, you can enjoy images quickly and easily. This also provides a way to expand the memory capacity of the frame. Stylish design With its sleek and clean, high class design, your digital photo frame doubles as an ornament for your desk or table.
- Page 8 (Colors may differ for each product.) Manual Warranty Quick Start User Manual (Not available in all locations) Cables USB cable Power cord Power Adapter (A-B type) Side Features Components Front Back (Buttons) Front Side Features Components Front Back (Buttons) Back...
-
Page 9: Side (Buttons)
The Kensington lock is a device used to physically secure the system when using it in a public place. (The locking device has to be purchased separately.) Kensington lock For using a locking device, please contact where you purchased it. Connect a PC or an external device using a USB cable. - Page 10 Turns the product on or off. ] Power Button Hold down the power button at the right of the product for about 2 seconds. Power Indicator Shows the power status. When the product is powered on, the power light turns [MENU] Menu Button Displays the menu window at the bottom left corner of the screen.
-
Page 11: Memory Card
Power Memory Card Connecting the Power Connect the power adapter to the terminal at the back of the product. Connect the power cord to the power adapter. Plug the power cord for the product into a nearby outlet. Press the button on the side of the product to turn the product on. -
Page 12: Folder Structure
When connecting an external device to the down stream port, use the USB cable provided with the external device. Samsung carries no liability for external device malfunctions caused by using any cable except the standard cables specified for each device. -
Page 13: Connecting A Memory Card
Favorites Mainly stores photos. Recent Temporarily stores the last displayed photo. imagecashe Stores as many Web Photos (photos from the Windows Live or RSS) to the cache as were used in the images folder. If you copy your photos from your PC to the imagecashe, they are invisible and cannot be viewed with your Digital Photo Frame. - Page 14 Buttons Photos, Web Photos Music Video Settings Buttons Control Buttons Button Description Turns the product on or off. Hold down the power button on the side of the product for about 2 seconds. MENU Opens the on-screen menu and exits from the menu. VOL +, VOL - Push the button to adjust volume.
- Page 15 Thumbnail List Menu When pressing the MENU button, the on-screen menu is displayed on the screen. Sub OSD Upper OSD Description Start Slide Show Start Slide Show Copy File, Copy All Files Copy You can copy the selected file to other connected storage devices. Yes, No Delete Delete the file.
- Page 16 While a slide show is in progress, stars (★) are displayed according to the grade set by Windows Media Player. Rate Photos -. You can only use images shared by Windows Media Player on your PC while your digital photo frame is connected to it.
- Page 17 You can copy the selected file to other connected storage devices. Delete Delete the file. Play Menu When pressing the MENU button, the on-screen menu is displayed on the screen. Sub OSD Upper OSD Description Once, Repeat, Repeat Once, Shuffle Playback Mode Select to playback music files either Once, repeatedly or randomly.
- Page 18 connected. Once, Continuous Playback Mode You can playback movie files either Once or Continuously. Copy File, Copy All Files Copy You can copy the selected file to other connected storage devices. Delete Delete the file. Play Menu When pressing the MENU button, the on-screen menu is displayed on the screen. Sub OSD Upper OSD Description...
- Page 19 Wireless Network Code Displays the password required if the access point has a security setting. Managment Web Address Displays the webpage address to connect to Samsung Photo Frame Web Configuration. Displays the password required to connect to Samsung Photo Frame Web Configuration.
-
Page 20: Management Web
You can check the size of the photos in the addresses listed in Web Photos. Basic, Administrator Password, Date and Time, Network Settings Settings You can enter and change the product name, administrator password, time, and network proxy server, etc. Help Displays the help section for using Samsung Photo Frame Web Configuration. -
Page 21: Initial Settings
1. Choose Your Language Turn on your Digital Photo Frame and select a language. The selected language is used as the OSD language and for the “Samsung Photo Frame Web Confi guration” which is embedded in your Digital Photo Frame. You can change the language via Settings -> Language. - Page 22 Installing Frame Manager Frame Manager Frame Manager is a program needed to use Samsung Photo Frame Web Configuration. You can find the installed Frame Manager in C:/Program Files/Samsung/Frame Manager. To run Frame Manager, click Start and point to Programs, and then click Frame Manager > Frame Manager.
- Page 23 Click [Add To Library] in the [Library] tab. In the [Add To Library] window, select [My personal folders] under the [Select the folders to monitor] section and select the folder containing photos and click [Add]. Select the folder to share and click [OK] to add When you click [OK], the [Add To Library] window is closed and the [Add to Library by Searching Computer] is displayed.
- Page 24 Sharing Settings for Accepting Connections from Your Photo Frame In the [Library] tab, click on [Media Sharing]. In the [Media Sharing] window, check the [Share my media] checkbox under [Sharing settings]. If no [Available device] is displayed in the [Media Sharing] window, proceed to steps 4.
- Page 25 In the [Media Sharing] window, click [Settings]. The [Media Sharing-Default Settings] window is displayed. In the [Media Sharing-Default Settings] window, set the [Media Type] to [Picture], both [Star ratings] and [Parental ratings] to [All ratings] or a required rating under the [Default Settings] section.