
Related Manuals for Philips Alpha Series


Summary of Contents for Philips Alpha Series
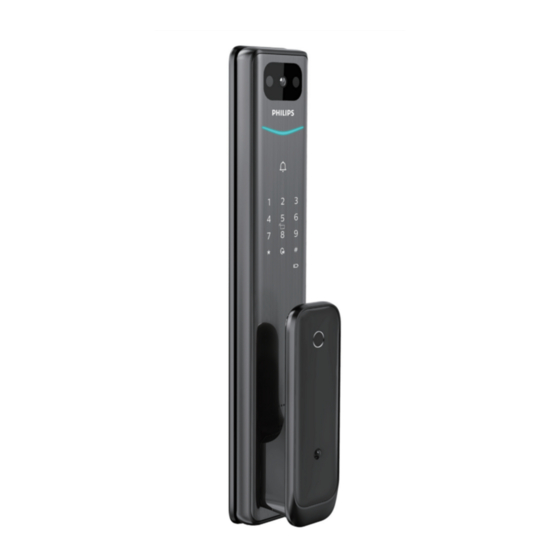
- Page 1 Easy Key Alpha series Smart Video Door Lock Alpha-V-5HWS User manual Register your produc t(s) to get support from below link : ww w. philips.com/support...
-
Page 3: Table Of Contents
Indoor infrared sensor unlock Rear escutcheon indicator 4. How to set up your Easykey 8. Troubleshooting Alerts on Philips Easykey Before setup How to charge EasyKey in an Enter master mode emergency Change master PIN code How to replace batteries... -
Page 4: Important Information
◆ Do not hang objects on the handle, in case it might affect the normal use of the lock. ◆ You can have your locks reclaimed at Philips authorized service centers. You will receive ◆ Please clean the product with a soft cloth. -
Page 5: Installation
2. Installation Packaging list The pictures are for reference only, please refer to the actual packaging items. ① Front escutcheon ② Rear escutcheon ③ Drilling template ④ Mortise with sillicone pad with sillicone pad Easy Key Quick Start Warranty EasyKey Guide Card EasyKey... -
Page 6: Exploded Views
Exploded views 12 12 11 11 10 10 13 13 Plastic battery cover x1 Mounting plate x1 Lithium battery x1 Mortise x1 M6 anchor screw x2 M5 threaded pipe x2 Rear escutcheon x1 M6 threaded pipe x2 Compressed spring x2 Front escutcheon x1 Square shaft x2 Screw cap x1... -
Page 7: Before Installation
Before installation This product is is suitable for the door going in four directions: left outward, right inward, right outward and left inward. Left-handed door Right-handed door Left inward Right inward Left outward Right outward Attention 1. Please choose the proper installation kit to suit your door thickness. 2. -
Page 8: Instructions
Instructions The following installation steps only apply to right-handed door. For left-handed door, please read [Before installation] carefully and make necessary adjustments. Mark the hole for drilling with drilling Install threaded pipes on the front template and drill the marked hole, escutcheon and put the compressed then mount the mortise into the hole spring and square shaft accordingly... - Page 9 Put the compressed spring and Connect the connector of escutcheon square shaft into the hole of the rear and mortise as well as the wi-fi escutcheon accordingly. antennas to the connector port of rear escutcheon. Then insert the square shaft into the hole on the mortise, making sure the rear escutcheon is flush against the door.
-
Page 10: Get To Know Your Easykey
3. Get to know your EasyKey The pictures are for reference only, please refer to the actual packaging items. Front escutcheon Door lock status indicator ① Doorbell ② Keypad ③ Mute key ④ Fingerprint sensor ⑤ Camera ⑥ Push-pull handle ⑦... -
Page 11: How To Set Up Your Easykey
4. How to set up your EasyKey Pre-setup instructions Philips EasyKey comes with two modes: General mode and Dual verification mode. ◆ General mode Unlock with any registered identity information Dual verification mode Unlock with the combination of two different verifications among PIN code, Key tag and fingerprint. -
Page 12: Enter Master Mode
How to enter master Attention mode 1. Product in factory mode does not come with master fingerprint, please enroll a master fingerprint first before operation. 2. It is recommeded that the master fingerprint and user fingerprint should not share the same finger. User settings Add a new user PIN code Wake up the keypad and enter [#] twice... -
Page 13: Change Master Pin Code
Add a one-time PIN code Change master PIN code Enter [*] twice followed by master PIN code Enter [*] twice followed by master PIN code and confirm with [#]. and confirm with [#]. Enter [1] to go to user settings and enter [2] Enter [1] to go to user settings and enter [5] to add a one-time PIN code. -
Page 14: System Settings
System settings Attention The default volume is "high volume". Language settings Eco mode 节能设置 Enter [*] twice followed by master PIN code and confirm with [#]. Enter [*] twice followed by master PIN code and confirm with [#]. Enter [2] to go to system settings and enter [1] to set language. - Page 15 Attention will automatically exit the master mode. Philips Easykey is only compatible with a router with dedicated 2.4 Hz (5G Hz Wi- Fi is not supported). Please make sure the distance between the door lock and the...
-
Page 16: How To Use Easykey
With an infrared button sensor Philips EasyKey adopts indoor Double press the [OPEN] Philips Easykey has an infrared sensor on the handle. When fast opening mortise. You can functional button within one the sensor is triggered, you unlock the door from inside by... -
Page 17: Lock From Outside Or Inside
Lock from outside or inside The latch bolt will pop up automatically as soon as the door is close and there will be a voice prompt of “Door Close”. Interior lockout When the door lock is locked, long press the [CLOSE] button and there will be a voice prompt of "inside deadlock enabled"... -
Page 18: Other Functions
Once the indoor infrared sensor is enabled, you could easily unlock the door from inside. How to use: Philips Easykey has an infrared sensor on the handle. Once the sensor is triggered, you can Infrared sensor touch the sensing area on the rear and front... -
Page 19: Mute Mode
Mute mode Function: Turning off the voice guide with only one key, which is applicable to the scenes where you don't want to disturb your families. How to use: 1. Mute: When the system is awake, long press the [Mute] key for 2 seconds to enter mute mode and there will be a voice prompt of "Mute mode". -
Page 20: Doorbell
Doorbell Function: When the doorbell make sound, it indicates that someone comes in the door. How to use: When the visitor press the doorbell on the keypad, the indoor chime will produce a dingdong bell sound. Meanwhile, the camera of smart lock will capture a video clip of the visitors and send it straight to the paired app. -
Page 21: Indicators Meaning And Usage
7. Indicators meaning and usage Door lock status indicator Blue: When the system wakes up and the light glows blue, it means you can operate the lock. Green: When the door is unlocked and Door lock the light glows green, it means the status indicator door is open. -
Page 22: Interior Lockout Indicator
Interior lockout indicator When the door is under inside deadlock mode, the keypad will lock. If you wake up the system manually, the keypad will show the combination of “15937 (X)” with a voice prompt of "inside deadlock enabled". System lockup indicator If there are consecutive incorrect Number key "2"... -
Page 23: Troubleshooting
8. Troubleshooting Alerts on Philips Easykey Alert to unlock from inside under outside forced lock mode Way to trigger: Under outside forced lock mode, an alert will be triggered when the door is unlocked from inside. Way to be alerted: Repeat alerts Way to turn off: The alert will be turned off once the identity verification is successful. - Page 24 Anomalous deadbolt alert Way to trigger: The deadbolt works abnormally and causes a failure in locking or unlocking the door. Way to be alerted: Repeat alerts Way to turn off: The alert will be automatically turned off. Motion sensor alert Way to trigger: When an unexpected person enters the detected area and stays there over the given time, an alert will be triggered.
-
Page 25: How To Charge Easykey In An
5V power bank and the system will reboot itself automatically. Reboot and USB interface How to replace battery Philips Easykey is powered by a 5000mA/h lithium battery. The battery compartment is in the upper part of the rear escutcheon. Push the battery cover upward and remove it, then replace the battery. - Page 26 Philips and the Philips Shield Emblem are registered trademarks of Koninklijke Philips N.V. and are used under license. This product has been manufactured by and is sold under the responsibility of Shenzhen Conex Intelligent Technology Co., Ltd, and Shenzhen Conex...