
Related Manuals for Toro Recycler 22287


Summary of Contents for Toro Recycler 22287
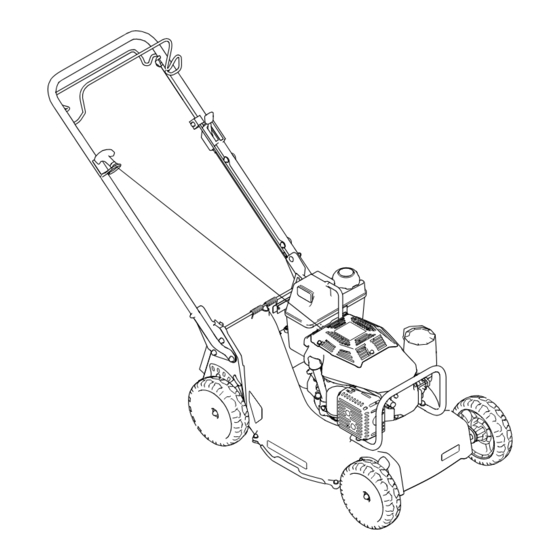
- Page 1 Form No. 3440-166 Rev B 21in Heavy-Duty Recycler ® /Rear Bagger Lawn Mower Model No. 22287—Serial No. 400000000 and Up *3440-166* Register at www.Toro.com. Original Instructions (EN)
- Page 2 Section 4442, maintained in additional information, contact an Authorized Service effective working order or the engine is constructed, Dealer or Toro Customer Service and have the model equipped, and maintained for the prevention of fire. and serial numbers of your product ready.
-
Page 3: Table Of Contents
Contents Safety Safety ............... 3 This machine has been designed in accordance with General Safety ........... 3 ANSI B71.4-2017. Safety and Instructional Decals ......4 Setup ................ 6 General Safety 1 Removing the Cable Guard......6 2 Installing the Handle ........6 This product is capable of amputating hands and 3 Installing the Cable Guard........ -
Page 4: Safety And Instructional Decals
Safety and Instructional Decals Safety decals and instructions are easily visible to the operator and are located near any area of potential danger. Replace any decal that is damaged or missing. decaloemmarkt Manufacturer's Mark 1. This mark indicates that the blade is identified as a part from the original machine manufacturer. - Page 5 decal130-6722 130-6722 1. Attention—read the Operator's Manual. decal130-9670 130-9670 1. Severing hazard of hand or foot; mower blade—keep away from moving parts. decal125-8404 125-8404 1. Push the primer once. 2. Pull the recoil-start handle. decal133-8062 133-8062 decal125-8406 125-8406 1. Choke 3.
-
Page 6: Setup
Setup Important: Remove and discard the protective plastic sheet that covers the engine and any other plastic or wrapping on the machine. Removing the Cable Guard No Parts Required Procedure g234471 Figure 3... -
Page 7: Installing The Handle
Installing the Handle No Parts Required Procedure g324197 Figure 4... -
Page 8: Installing The Cable Guard
Installing the Cable Guard No Parts Required Procedure g234486 Figure 5 Installing the Recoil-Starter Rope in the Rope Guide No Parts Required Procedure g230180 Figure 6... -
Page 9: Adding Oil To The Engine
Adding Oil to the Engine No Parts Required Procedure Important: If the oil level in the engine is too low or too high and you run the engine, you may damage the engine. g222533 Figure 7... -
Page 10: Assembling The Grass Bag
Assembling the Grass Bag No Parts Required Procedure g238450 Figure 8 Adjusting the Self-Propel Drive No Parts Required Procedure Important: You must adjust the self-propel-drive cable before you operate the machine for the first time. Refer to Adjusting the Self-Propel Drive (page 24). -
Page 11: Product Overview
Specifications Product Overview Model Weight Length Width Height 54 kg 156 cm 56 cm 95 cm 22287 (120 lb) (61.3 (22 inches) (37.3 inches) inches) g323460 Figure 9 1. Handle 7. Fuel-tank cap 2. Self-propel-drive bar 8. Air cleaner 3. Blade-control bar 9. -
Page 12: Before Operation
Operation – Avoid prolonged breathing of vapors. – Keep your hands and face away from the nozzle and the fuel-tank opening. Note: Determine the left and right sides of the machine from the normal operating position. – Keep fuel away from your eyes and skin. Before Operation Filling the Fuel Tank Before Operation Safety... -
Page 13: Checking The Engine-Oil Level
g230458 Figure 11 Checking the Engine-Oil Level Service Interval: Before each use or daily Important: If the oil level in the crankcase is too low or too high and you run the engine, you may damage the engine. g231765 Figure 12 Adjusting the Handle Height You can raise or lower the handle in 1 of 3 positions that is more comfortable for you (Figure... -
Page 14: Adjusting The Cutting Height
Remove both handle bolts and corresponding nuts. Move the handle to the desired height position. Secure the handle with the previously removed bolts and corresponding nuts. Adjusting the Cutting Height CAUTION If the engine has been running, the muffler will be hot and can burn you. Keep away from the hot muffler. - Page 15 • Check the grass catcher components and the discharge chute frequently for any wear or deterioration and replace them with genuine Toro parts when necessary. Slope Safety • Mow across the face of slopes; never up and down.
-
Page 16: Starting The Engine
Starting the Engine g323304 Figure 15 Shutting Off the Engine Release the blade-control bar and move the throttle-control lever to the S position. Close the fuel-shutoff valve and disconnect the wire from the spark plug if you do not use the machine or leave it unattended. -
Page 17: Recycling The Clippings
g240765 Figure 17 1. Self-propel-drive bar Recycling the Clippings This machine comes from the factory ready to recycle grass and leaf clippings back into the lawn. To prepare the machine to recycle: • If the grass bag is on the machine, remove it (A of Figure 18). -
Page 18: Bagging The Clippings
A worn grass bag could allow small stones and other similar debris to be thrown toward you or bystanders, resulting in serious personal injury or death. Check the grass bag frequently. If it is damaged, install a new Toro replacement bag. WARNING The blades are sharp;... - Page 19 Installing the Grass Bag Shut off the engine and wait for all moving parts to stop. Raise and hold up the rear deflector (A of Figure 19). Remove the rear-discharge plug by pushing in the latch with your thumb and pulling the plug out from the machine (B and C of Figure 19).
-
Page 20: Operating Tips
Sharpen the blade. • Replace the blade when necessary with an original • Walk at a slower pace while mowing. Toro replacement blade. • Raise the cutting height on your machine. • Mow only dry grass or leaves. Wet grass and leaves tend to clump on the yard and can cause •... -
Page 21: Cleaning Under The Machine
• Note: Secure the machine from rolling. The blade will draw in water and wash out the clippings. Let the water run until you • Close the fuel valve before loading the machine no longer see clippings being washed out from for hauling. -
Page 22: Maintenance
• To ensure optimum performance of the machine, use only genuine Toro replacement parts and Remove the foam pre-filter from the paper filter accessories. Replacement parts and accessories (Figure 22), and replace the paper filter if it is made by other manufacturers could be dangerous, excessively dirty. -
Page 23: Changing The Oil Filter
Remove the dipstick by rotating the cap oil-fill tube, wait 3 minutes, and repeat steps counterclockwise and pulling it out (Figure 23). through until the oil level on the dipstick is correct. • If the oil level on the dipstick is too high, drain the excess oil until the oil level on the dipstick is correct. -
Page 24: Servicing The Spark Plug
g000533 Figure 27 g002805 1. Center-electrode insulator Figure 26 2. Side electrode 1. Gasket 3. Air gap (not to scale) Install the new filter until the gasket contacts Carefully install the spark plug by hand (to avoid the filter base, then hand tighten the filter an cross threading) until it is hand tight. -
Page 25: Maintaining The Blade
Maintaining the Blade knob (Figure 28) clockwise 1 turn and repeat steps through 6. Always mow with a sharp blade. A sharp blade cuts cleanly and without tearing or shredding the grass blades. Shut off the engine and wait for all moving parts to stop. - Page 26 Inspecting the Blade Service Interval: Before each use or daily—Inspect the mower blades for wear or damage. Carefully examine the blade for sharpness and wear, especially where the flat and the curved parts meet (Figure 30A). Because sand and abrasive material g027496 Figure 31 can wear away the metal that connects the flat and...
-
Page 27: Cleaning Under The Belt Cover
Installing the Blade Install a sharp, balanced Toro blade, the accelerator, the lock washer, and the blade bolt. The sail of the blade must point toward the top of the mower housing for proper installation. -
Page 28: Cleaning The Wheels
Cleaning the Wheels Storage Service Interval: Every 40 hours To prepare the machine for off-season storage, Remove the rear wheels and clean any debris perform the recommended maintenance procedures; from the wheel-gear area. refer to Maintenance (page 22). Store the machine in a cool, clean, dry place. Cover the machine to keep it clean and protected. -
Page 29: Removing The Machine From Storage
Service the air filter; refer to Servicing the Air Filter (page 22). Tighten all nuts, bolts, and screws. Touch up all rusted or chipped paint surfaces with paint available from an Authorized Service Dealer. Removing the Machine from Storage Check and tighten all fasteners. Remove the spark plug and spin the engine rapidly using the starter to blow out the excess oil from the cylinder. -
Page 30: Troubleshooting
Troubleshooting Problem Possible Cause Corrective Action The engine does not start. 1. The fuel tank is empty or the fuel 1. Drain and/or fill the fuel tank with fresh system contains stale fuel. fuel. If the problem persists, contact an Authorized Service Dealer. - Page 31 Notes:...
- Page 32 While the exposure from Toro products may be negligible or well within the “no significant risk” range, out of an abundance of caution, Toro has elected to provide the Prop 65 warnings. Moreover, if Toro does not provide these warnings, it could be sued by the State of California or by private parties seeking to enforce Prop 65 and subject to substantial penalties.