
Related Manuals for Taiden HCL-404


Summary of Contents for Taiden HCL-404
- Page 1 Professional conference sound reinforcement system Installation and Operating Manual V 2.1...
- Page 2 To protect your hearing, avoid high pressure level on earphones. Adjust to a lower and convenient level. If any detailed information is needed, please contact your local agent or TAIDEN service center in your region. Any feedback, advice and suggestion about the products is appreciated TAIDEN is the registered trademark of TAIDEN Co.
- Page 3 Follow all instructions. Service Center. The apparatus shall not be exposed to dripping or 19. All TAIDEN products are guaranteed for definite time splashing and that no objects filled with liquids, such as (see the WARRANTY CARD for details) excluding the vases, shall be placed on the apparatus.
- Page 4 Important Safety Instructions The exclamation mark within an equilateral triangle is intended to alert the user to the presence of important operating and maintenance (servicing) instructions in the literature accompanying the appliance. WARNING: To reduce the risk of fire or electric shock, DO NOT expose units to rain or moisture.
-
Page 5: Table Of Contents
2.7.5 System Delay ............................. 9 2.7.6 System EQ ............................... 10 2.7.7 Beam Setting ............................11 2.7.8 Import Factory Preset..........................18 Chapter 3: HCL-404 series 4 Units Two-way Column Loudspeaker ................ 19 3.1 Overview ................................. 19 3.2 Features ................................19 3.3 Specifications ..............................19 3.4 Functions and instructions .......................... - Page 6 7.2 Specifications ..............................66 7.3 Functions and instructions ..........................67 7.4 Dimensions ..............................68 Chapter 8 Working Environment and Maintenance ....................69 8.1 System specifications ............................. 69 8.2 Environment requirement ..........................69 8.3 Ventilation ............................... 69 8.4 Cleaning ................................69 8.5 Storage ................................
-
Page 7: Installation & User Guide
Detailed descriptions of the functions and indications, installation and connection, the use of audio controller software of the HCL-804A. Chapter 3: HCL-404 series 4 Units Two-way Column Loudspeaker Detailed descriptions of the functions, installation and connection of the HCL-404 series 4 Units Two-way Column Loudspeaker. - Page 8 12×0.75" tweeters, 8 Ω, 200 W, 40° vertical direction, can be 6.5-inch Ceiling Loudspeaker (1×6.5"+1×1.4" coaxial drive units, combined with HCL-404, supports fixed wall mounting, optional 8 Ω, 150 W, 110° wide coverage angle, magnetic mask, white) HCL-404BKT swivel (pan)/tilt wall bracket, black)
-
Page 9: Chapter 1: Introduction
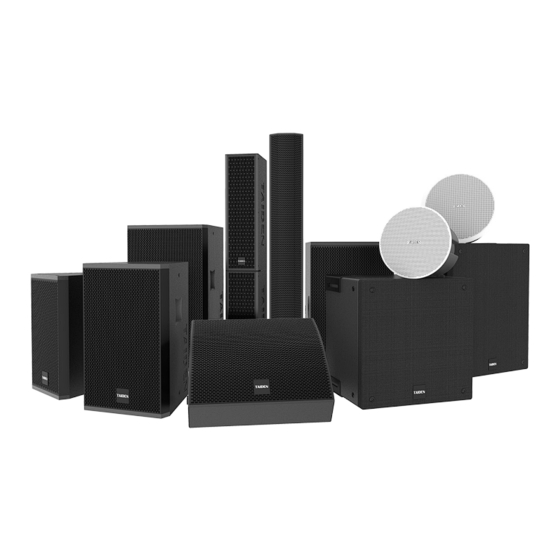
HCL-404 HCL-404J HCL-804A HCL-112M HSP-108/108A HSP-110/110A... -
Page 10: Chapter 2: Hcl-804A 8 Units Two-Way Directivity Controllable Column Loudspeaker
Chapter 2: HCL-804A 8 Units Two-way Directivity Controllable Column Loudspeaker 2.1 Overview 2.2 Features Two-way directivity controllable column loudspeaker Vertical pointing angle and width adjustable comes with 8×4" midwoofers and 24×0.75" tweeters. Dual beam adjustable Built-in multi-channel DSP engine and high-performance Independent switch for beam sidelobe suppression class D digital amplifier can control each array element Beam center point adjustable... -
Page 11: Functions And Instructions
2.4 Functions and instructions 1. Working indicator Normal state: green Clipping state: red 2. AES IN: digital signal input interface 3. Power input interface 4. Control interface, RJ45 5. ANALOG IN: analog signal input interface 6. Bracket mounting positions 7. The top connecting plate, reserved, can be docked with another sound column 8. -
Page 12: Dimensions
2.5 Dimensions Dimensions for HCL-804A (unit: mm) -
Page 13: Installation
2.6 Installation 1. Swivel (pan) wall bracket (standard) Loudspeaker-mount section Assembled bracket Wall-mount section The bracket is shipped after being assembled by default, so the bracket you receive is one piece. After removing the nut and screw at the fixed point, as well as the movable stud and buckle, the bracket is decomposed into two parts as shown in the figure below, the left section is installed on the back of the sound column. -
Page 14: Audio Controller
Win10 operating system is recommended. 2.7.2 Running Double-click "TAIDEN Audio Controller.exe" to run the software, for the first time, please create a new project on the computer. Figure: Create or open a project... - Page 15 After creating or reading a local project, scans the device, and the software automatically queries and connects to all of the HCL-804A in the network. HCL-804A does not have static IP address, and its IP address is assigned automatically by the router.
-
Page 16: Input Gain
Send: synchronizes the parameter settings from the current project file to HCL-804A; Delete: delete HCL-804A; SynSystemData: including Send and Receive operations Receive: synchronizes the parameter settings from all HCL-804A to the current project file Send: synchronizes the parameter settings from the current project file to all HCL-804A which included in the project file;... -
Page 17: Input Delay
2.7.4 Input Delay HCL-804A supports AES / EBU + analog signal input. When one channel fails, the sound amplification system works completely without breakpoint. Therefore, before mixing, adjust the delay difference between the analog input and the digital input, align the two sets of signals before mixing. Method of adjusting the delay (optional): The overall time delay parameters of the system are obtained from the equipment manufacturer, that is, the time delay from the audio input to the audio output. -
Page 18: System Eq
2.7.6 System EQ Supports 8-segment EQ setting. Note: setting takes effect when the main switch is "ALL ON". Figure:System EQ setting... -
Page 19: Beam Setting
2.7.7 Beam Setting The TAIDEN Audio Controller.exe software provides a visual beam setting and simulation interface to visually view the sound pressure level at different locations in the venue area (the software assumes that the environment is a free sound field). - Page 20 2.7.7.2 Simulation Current Device: display the current device information and set the location information for the HCL-804A X: the horizontal axis position of HCL-804A, such as: a rectangular conference room, HCL-804A is installed on the front, X can be set to 0; if a conference room contains the podium, HCL-804A is installed on both sides of the podium, X value needs to be set according to the actual distance;...
- Page 21 Figure: Beam 1 ON (aiming angle: 30°), Beam 2 OFF Figure: Beam 1 ON (aiming angle: 30°), Beam 2 ON (aiming angle: -30°) Aiming Angle: vertical coverage pattern, -45°~ + 45° (accuracy of 0.1 degree) Figure: Aiming angle 0°...
- Page 22 Figure: Aiming angle 15° Beam with: 12°~90°, set as a percentage; Figure: Beam width (0) Figure: Beam width (50)
- Page 23 Sidelobe Optimized: sidelobe optimized switch, if acoustic environment is good, close sidelobe optimized function to get more reverberation sound, improve hearing fullness, or else, open sidelobe optimized function, reduce reflected acoustic energy, in order to obtain better articulation of speech; Figure: Sidelobe optimized (ON) Figure: Sidelobe optimized (OFF) Center: 2 beams, the central position can be adjusted independently, according to the percentage setting, the...
- Page 24 Figure: Center (50) Figure: Center (0) Figure: Center (100)
- Page 25 Delay: set beam delay (0~10ms); Trim: set beam attenuation; Figure: Trim (0) Figure: Trim (-5) Filters: set HPF&LPF&EQ for beams. 2.7.7.3 SPL In SPL simulation state, right click mouse in the upper right area can directly mark the sound pressure level of the point. In the lower right area, displays the sound pressure level corresponding to the height of the seat ear.
-
Page 26: Import Factory Preset
Drag and drop Figure: SPL simulation 2.7.7.4 Frequency Frequency simulation interface, the lower right area shows the frequency response curve of each location. Drag and drop Figure: Freq simulation 2.7.8 Import Factory Preset Used for upgrade factory preset, import the preset file and then restart HCL-804A. -
Page 27: Chapter 3: Hcl-404 Series 4 Units Two-Way Column Loudspeaker
Chapter 3: HCL-404 series 4 Units Two-way Column Loudspeaker 3.1 Overview 3.2 Features HCL-404 series Units Two-way Column Two-way column loudspeaker system with line array Loudspeaker consists of two products, HCL-404 and characteristics HCL-404J. The HCL-404J column loudspeaker can be... -
Page 28: Functions And Instructions
Accessories 2 x wall screw Optional accessories HCL-404BKT Swivel (pan)/tilt wall bracket Note: The HCL-404BKT wall bracket is also suitable for the HCL-404+HCL-404J column loudspeaker. 3.4 Functions and instructions HCL-404 1. Connecting groove, connect to another HCL-404 4. Wall mounting bracket, spacing 214mm 2. - Page 29 HCL-404J 1. Connecting groove, connect to HCL-404 4. Fixed wall mounting brackets, spacing 298 mm (refer to 2. Top speaker connection fixings (when the top the dimension) loudspeaker is not connected, the connection fixings also 5. Mounting holes for HCL-404BKT wall bracket (bracket...
-
Page 30: Connection
3.5 Connection HCL-404 series column loudspeaker can be used independently or in parallel. 1. HCL-404J (8Ω, 200W) 2. HCL-404+HCL-404J (parallel, 4Ω, 400W) - Page 31 3. HCL-404J+HSP-210BA 4. (HCL-404+HCL-404J)+HSP-210BA...
-
Page 32: Dimensions
3.6 Dimensions Dimensions for HCL-404 (unit: mm) - Page 33 Dimensions for HCL-404J (unit: mm)
-
Page 34: Installation
(unit: mm) 2. Fixed installation for HCL-404+HCL-404J 1) Take out HCL-404 and HCL-404J, place them horizontally on the desktop, and connect the tenon-and-mortise structure as shown in the figure below. 2) After docking, as shown in the figure below, loosen the screw 1, remove the screw 2, pull out the fixing plate and rotate it to the 2 position, reinstall the screw 2, and tighten the screws 1 and 2 to complete the assembly of the column loudspeaker. - Page 35 (unit: mm) 4) Connect the audio cables; 5) Pull up the column loudspeaker and snap the screw into the installation positions. Note: Be sure to use 4 screws for combined installation. 3. HCL-404BKT Swivel (pan)/tilt wall bracket (optional) Loudspeaker-mount section Assembled bracket Wall-mount section...
- Page 36 The HCL-404BKT bracket is shipped after being assembled by default, so the bracket you receive is one piece. After removing the nut and screw at the fixed point, as well as the movable stud and buckle, the bracket is decomposed into two parts as shown in the figure below, the left section is installed on the back of the sound column and the right section is installed on the wall using standard screw fittings.
- Page 37 5. Bracket wall mounting for HCL-404+HCL-404J 1) Take out HCL-404 and HCL-404J, place them horizontally on the desktop, and connect the tenon-and-mortise structure as shown in the figure below. 2) After docking, remove screws 1 and 2, and remove the fixing plate as shown in the figure below;...
- Page 38 5) Install the wall-mount section using the standard screws; 6) Connect the audio cables; 7) Pull up the column loudspeaker, reassemble the loudspeaker-mount section and wall-mount section according to the introduction of HCL-404BKT, and set the required swivel angle and tilt angle.
-
Page 39: Chapter 4: Hsp Series Loudspeaker
Chapter 4: HSP series Loudspeaker TAIDEN conference professional sound reinforcement system specially designed and developed a dual 10-inch woofer to further expand the bass of the system, the lowest frequency can reach 35 Hz. It is widely used in large, medium and small conference venues/hotels/banquet halls/multi-functional halls/report halls. - Page 40 The top and back of HSP-210B are equipped with rod sockets, which can be directly used with HCL-404J or HCL-404+HCL404J column loudspeaker through the support rod (optional MA-75P2 support rod is required) , and can also be used with HSP-108/110/112 two-way speakers (optional MA-75P1 support rod is required). It is suitable for mobile use places.
- Page 41 Note: when using with HCL-404+HCL-404J through a support rod, HSP-210B must be placed horizontally...
-
Page 42: Hsp-108 8-Inch Two-Way Loudspeaker
4.2 HSP-108 8-inch Two-way Loudspeaker Overview HSP-108 8-inch Two-way Loudspeaker is composed of which effectively improves the transmission and coupling 1×8" woofer and 1×2" tweeter. Loaded by gradient efficiency, transmission distance and the sound quality, waveguide horn technology, its 50°~100° gradient and also reduces the interference between each horn. - Page 43 1. Treble horn 9. Rod socket (Ø35mm) 2. Woofer 10. Mesh fixing screws 3. Input/parallel interface (2×Speakon) Note: Installation accessories need to be purchased 4&5&6&7&8. Hanging points (M8) separately 7&8. Points for HSP-108BKTU bracket Dimensions and Installation Dimensions of HSP-108 (unit: mm) HSP-108 8-inch Two-way Loudspeaker The bottom comes with a Ø35mm support rod socket, which is suitable for support installation;...
- Page 44 Before rotation Rotate to maximum Angle (40°) Installation diagram (back) The HSP-108BKTU comes standard with three M12×100 mm expansion bolts and two M8 flat head screws: Three M12×100 mm expansion screws are used to lock the U-bracket firmly on the load-bearing wall surface. Note: if hoisting is selected, the U-bracket can be firmly suspended by threading rods of appropriate length through the three Ø13.0 holes of the U-bracket;...
-
Page 45: Hsp-110 10-Inch Two-Way Loudspeaker
4.3 HSP-110 10-inch Two-way Loudspeaker Overview Features HSP-110 10-inch Two-way Loudspeaker is composed of Composite carbon fiber diaphragm + nano carbon 1×10" woofer and 1×2" tweeter. Loaded by gradient fiber diaphragm waveguide horn technology, its 50°~100° gradient Gradient rotatable pointing horn horizontal coverage and 60°... - Page 46 Functions and instructions 1. Treble horn 10. Rod socket (Ø35mm) 2. Woofer 11. Mesh fixing screws 3. Input/parallel interface (2×Speakon) Note: Installation accessories need to be purchased 4&5&6&7&8&9. Hanging points (M8) separately 7&8. Points for HSP-110BKTU bracket Dimensions and Installation Dimensions of HSP-110 (unit: mm)
- Page 47 HSP-110 10-inch Two-way Loudspeaker The bottom comes with a Ø35mm support rod socket, which is suitable for support installation; The speaker box is arranged with twelve M8 hanging points; Optional HSP-110BKTU bracket, wall or ceiling mount, support 40° rotation. ...
- Page 48 Reinstall the M6 screws removed by 3), and lock the M6 screws after rotating the loudspeaker box to an appropriate angle (supporting angle adjustment of 40°); Lock the other two M8 screws, and the installation is completed. The loudspeaker can be installed horizontally or vertically. Select a proper installation mode based on site requirements. The LOGO of the HSP-110 loudspeaker supports rotation adjustment.
- Page 49 4.4 HSP-112 12-inch Two-way Loudspeaker Overview Features HSP-112 12-inch Two-way Loudspeaker is composed of Composite carbon fiber diaphragm + nano carbon 1×12" woofer and 1×3" tweeter. Loaded by gradient fiber diaphragm waveguide horn technology, its 50°~100° gradient Gradient rotatable pointing horn horizontal coverage and 60°...
- Page 50 Functions and instructions 1. Treble horn 10. Rod socket (Ø35mm) 2. Woofer 11. Mesh fixing screws 3. Input/parallel interface (2×Speakon) Note: Installation accessories need to be purchased 4&5&6&7&8&9. Hanging points (M8) separately 7&8. Points for HSP-112BKTU bracket...
-
Page 51: Hsp-112 12-Inch Two-Way Loudspeaker
Dimensions and Installation Dimensions of HSP-112 (unit: mm) HSP-112 12-inch Two-way Loudspeaker The bottom comes with a Ø35mm support rod socket, which is suitable for support installation; The speaker box is arranged with twelve M8 hanging points; Optional HSP-112BKTU bracket, wall or ceiling mount, support 40° rotation. ... - Page 52 Before rotation Rotate to maximum Angle (40°) Installation diagram (side) Before rotation Rotate to maximum Angle (40°) Installation diagram (back) The HSP-112BKTU comes standard with three M12×100 mm expansion bolts and two M8 flat head screws: Three M12×100 mm expansion screws are used to lock the U-bracket firmly on the load-bearing wall surface. Note: if hoisting is selected, the U-bracket can be firmly suspended by threading rods of appropriate length through the three Ø13.0 holes of the U-bracket;...
- Page 53 Operation: Use a tool (M6 Allen key) to remove the mesh fixing Rotate horn inorder to keep on the top and screws on the top and bottom; on the bottom (as shown in the figure above); Remove the mesh; Re-tighten the horn fixing screws, and reinstall the ...
-
Page 54: Chapter 5 Hsp Series Active Loudspeaker
HSP-210BA Dual 10-inch Powered Woofer (2×10" woofers, 4 Ω, 800 W, built-in 2000W class D power amplifier, with FIR algorithm, DSP adjustable, can be connected to HCL-404 series column loudspeaker or HSP seired two-way loudspeaker directly, black) TAIDEN conference professional sound reinforcement two-way powered loudspeaker provides different sizes and different... - Page 55 10. RS485 interface ×2, reserved 4. Audio output interface, Note: Support rod can be used to support HSP series can be connected to passive loudspeaker directly two-way loudspeaker and HCL-404 series column, 5. Clip/Signal/Power indicators needs to be purchased separately. 6. Audio input interface×2,...
- Page 56 For non-fixed use places, the top and back of HSP-210B are equipped with rod sockets, which can be directly used with HCL-404J or HCL-404+HCL404J column loudspeaker through the support rod (optional MA-75P2 support rod is required) , and can also be used with HSP-108/110/112 two-way speakers (optional MA-75P1 support rod is required).
- Page 57 Note: When using with HCL-404+HCL-404J through a support rod, HSP-210BA must be placed horizontally...
-
Page 58: Chapter 6 Hsc Series Ceiling Loudspeaker
Chapter 6 HSC Series Ceiling Loudspeaker TAIDEN conference professional sound reinforcement ceiling loudspeakers provide different size and different power products to choose from, which are: HSC-106W 6.5-inch Ceiling Loudspeaker (1×6.5"+1×1.4" coaxial drive units, 8 Ω, 150 W, 110° wide coverage angle,... - Page 59 Specifications Frequency Range 90Hz-18kHz(±3dB)/80Hz-20kHz(-10dB) Sensitivity 94dB Nominal Impedance 8 Ω Noise Power: 150W(AES) Power PGM Power: 300W Peak Power: 600W Woofer Unit 1×6.5" Tweeter 1×1.4" Coverage Pattern 110°(H)×110°(V) Max SPL 116dB SPL,122dB SPLpeak Pluggable Terminal Blocks Input Interface Enclosure Material ABS panel + metal box Dimensions (H ×...
- Page 60 Dimensions and Installation Dimensions of HSC-106W (unit: mm) This product is easy to install on the ceiling, please confirm the installation point first, the ceiling opening size is Ø221mm, and the top reserved height is greater than 224mm (including safety rope hanger component). Rotate the plastic mounting key to lock the product in a specific place.
-
Page 62: Hsc-108W 8-Inch Series Ceiling Loudspeaker
6.2 HSC-108W 8-inch Series Ceiling Loudspeaker close to the acoustic coaxial as possible, and the sound is Overview Different from other normal ceiling loudspeakers, HSC smoother. It is suitable for small and medium-sized Series are comprised of professional coaxial units which conference rooms with low ceiling height (recommended have higher sensitivity and better headroom design. - Page 63 Functions and instructions 1. Loudspeaker box 5. Input/parallel interface 2. Woofer 6. Rotatable mounting key 3. Tweeter 7. Hanger component 4. Magnetic mesh cover Dimensions and Installation This product is easy to install on the ceiling, please confirm the installation point first, the ceiling opening size is Ø296mm, and the top reserved height is greater than 266mm.
-
Page 65: Hsc-112 12-Inch Series Ceiling Loudspeaker
6.3 HSC-112 12-inch Series Ceiling Loudspeaker and vertical directions, with more accurate directivity and Overview Different from other normal ceiling loudspeakers, HSC more uniform coverage. Series are comprised of professional coaxial units which It is suitable for meeting places, lecture halls, banquet have higher sensitivity and better headroom design. - Page 66 Function and instruction 1. Woofer 4. Input/parallel interface 2. Tweeter horn 5. Side view of hanger component 3. Cover 6. Bottom view of hanger component with Ø9mm hole...
- Page 67 Dimensions Dimensions of HSC-112 (unit: mm) Installation HSC-112 ceiling loudspeaker is heavy and needs to be a tool (M8 Allen key) to loosen the screws between the hung on the ceiling with ropes or booms. The four corners hanger component and the loudspeaker box, slide the of the back of the HCS-112 loudspeaker are equipped with hanger component to the other end of the chute, and then hanger components as standard.
- Page 68 HSC-112 Figure of Hoisting Installation precautions: Covering Angle in direction A: 90° Covering Angle in direction B: 70°...
-
Page 69: Hsc-115 15-Inch Ceiling Loudspeaker
6.4 HSC-115 15-inch Ceiling Loudspeaker and vertical directions, with more accurate directivity and Overview Different from other normal ceiling loudspeakers, HSC more uniform coverage. Series are comprised of professional coaxial units which It is suitable for meeting places, lecture halls, banquet have higher sensitivity and better headroom design. - Page 70 Functions and instructions 1. Woofer 5. Side view of hanger component 2. Tweeter horn 6. Bottom view of hanger component with Ø9mm hole 3. Cover 4. Input/parallel interface...
- Page 71 Dimensions and Installation Dimensions of HSC-115 (unit: mm)
- Page 72 HSC-115 ceiling loudspeaker is heavy and needs to be a tool (M8 Allen key) to loosen the screws between the hung on the ceiling with ropes or booms. The four corners hanger component and the loudspeaker box, slide the of the back of the HCS-115 loudspeaker are equipped with hanger component to the other end of the chute, and then hanger components as standard.
- Page 73 Installation precautions: Covering Angle in direction A: 90° Covering Angle in direction B: 70°...
-
Page 74: Chapter 7 Hsm-112 12-Inch Passive Coaxial Monitor Loudspeaker
Chapter 7 HSM-112 12-inch Passive Coaxial Monitor Loudspeaker 7.1 Product Introduction High-quality 12" coaxial speaker effectively solves the main sound reinforcement of various types of conference problems of the different transmission path between the and music scenes. drivers and at the same time has a smooth off-axis Composite carbon fiber diaphragm + nano carbon response and uniform near-field hearing. -
Page 75: Functions And Instructions
7.3 Functions and instructions 1. Coaxial drive units 5.Fixing points for cabinet feet / HSM-112BKT bracket 2. Input/parallel interface (2×Speakon, PIN: 1+, 1-) Note: Installation accessories need to be purchased 3. Rod socket (Ø35mm) separately 4. Cabinet feet (adjustable, factory default) -
Page 76: Dimensions
7.4 Dimensions... -
Page 77: Chapter 8 Working Environment And Maintenance
Suitable working environment and proper maintenance by qualified service personnel. If any repair or methods can effectively extend service life of the maintenance is required, contact the TAIDEN equipment. For maintenance please read the contents of service center in your region. - Page 78 TAIDEN INDUSTRIAL CO., LTD. 6/F, Block B, Future Plaza, 4060 Qiaoxiang Rd, Nanshan District, Shenzhen, China P.C.: 518053 Copyright by TAIDEN Website: http://www.taiden.com Last Revision: 11/2022...