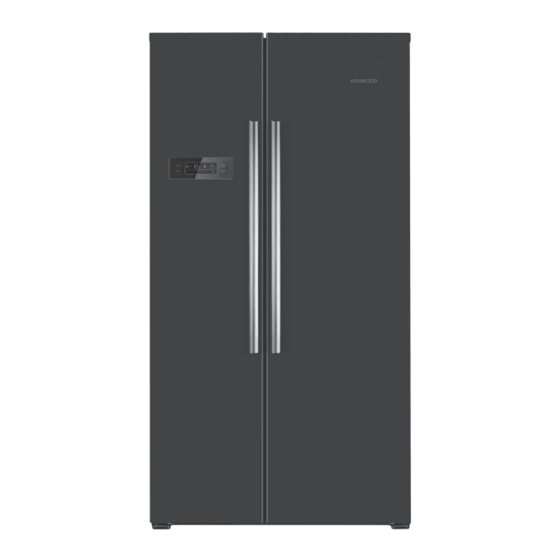
Summary of Contents for Kenwood KSBSB15
- Page 1 American Style Fridge Freezer KFF2DW14 / KFF2DS14 / KSBSB15 installation / instructions manual...
-
Page 3: Table Of Contents
Contents safety warnings ........................4 unpacking ..........................6 installation ........................... 7 location ..........................7 levelling and anchoring the unit ..................7 installing the spacers ....................... 7 free space requirements ....................7 removing the door handles ....................8 removing the doors ......................9 cleaning before use ......................11 before using your unit .....................11 product overview ...................... -
Page 4: Safety Warnings
safety warnings For your continued safety and to reduce the risk of injury or electric shock, please follow all the safety precautions listed below. • Read all instructions carefully before using the unit and keep them for future reference. • Retain the manual. If you pass the unit onto a third party, make sure to include this manual. - Page 5 • Do not store bottles or glass containers in the freezer compartment. Contents can expand when frozen (fizzy drinks) which may break the bottle and damage your freezer compartment. (If applicable) WARNING • Keep ventilation openings in the unit enclosure or in the built- in structure clear of obstructions.
-
Page 6: Unpacking
Thank you for purchasing your new Kenwood Fridge Freezer. These operating instructions will help you use it properly and safely. We recommend that you spend some time reading this installation/instruction manual in order that you fully understand all the operational features it offers. -
Page 7: Installation
installation installation location When selecting a position for your unit you should make sure the floor is flat and firm, and the room is well ventilated with an average room temperature of between 16°C and 38°C. Avoid locating your unit near a heat source, e.g. cooker, boiler or radiator. Also avoid direct sunlight as it may increase the electrical consumption. -
Page 8: Removing The Door Handles
installation removing the door handles tool required: Hex wrench • Ensure the unit is unplugged and empty. • All parts removed must be saved to do the reinstallation of the door. 1. Unscrew handles with Hex wrench. 2. Pull to remove the handles. 3. -
Page 9: Removing The Doors
installation removing the doors tool required: Philips style screwdriver / Flat bladed screwdriver • Ensure the unit is unplugged and empty. • To take the door off it is necessary to tilt the unit backwards. You should rest the unit on something solid, e.g. - Page 10 installation 3. Unscrew top hinge. 4. Lift the door and place it on a soft pad. Repeat the above steps to remove the other door. 5. Unscrew bottom hinges. 6. After the unit is positioned, install and screw back the doors.
-
Page 11: Cleaning Before Use
installation cleaning before use Wipe the inside of the unit with a weak solution of bicarbonate soda. Then rinse with warm water using a sponge or cloth. Wipe completely dry before replacing the drawers. Clean the exterior of the unit with a damp cloth. If you require more information refer to the Cleaning section. -
Page 12: Product Overview
product overview main unit Freezer Upper Glass Shelf Balcony With Cover Fridge Glass Shelf Freezer Balcony Lower Balcony Freezer Salad Bin Cover Drawer Cover Freezer Drawer Salad Bin Levelling and Anchoring Feet... -
Page 13: Display And Control Panel
display and control panel Fridge Freezer Lock Mode 3 sec. button 1. Freezer button: Press to adjust temperature of freezer compartment from -14˚C to -22˚C. 2. Fridge button: Press to adjust temperature of fridge compartment from 2˚C to 8˚C and “OFF”. If “OFF” is selected, the fridge compartment will turn off. 3. Mode button: Press to select mode from SMART mode, ECO mode, SUPER COOLING mode, SUPER FREEZING mode and user’s setting (no symbol in display). 4. -
Page 14: Operation
operation Before changing any setting, ensure the Lock has been disabled. temperature setting • Fridge temperature setting 1. Temperature range: 2°C to 8°C. 2. Press the Mode button to select user’s setting (no symbol in display). 3. Press the Fridge button repeatedly to set the temperature. • Freezer temperature setting 1. -
Page 15: Noises Inside The Unit
noises inside the unit! You may notice that your unit makes some unusual noises. Most of these are perfectly normal, but you should be aware of them! These noises are caused by the circulation of the refrigerant liquid in the cooling system. It has become more pronounced since the introduction of CFC free gases. -
Page 16: Defrosting Frozen Food
defrosting frozen food 1. Take the frozen food out from the unit and uncover the frozen food. Let it defrost at room temperature. Don’t forget that defrosting in a warm area encourages the growth of bacteria and low temperature cooking may not destroy dangerous bacteria. 2. -
Page 17: Maintenance
maintenance care when handling / moving your unit Hold the unit around its sides or base when moving it. Under no circumstances should it be lifted by holding the edges of the top surface. servicing The unit should be serviced by an authorised engineer and only genuine spare parts should be used. -
Page 18: Specification
Model KSBSB15 / KFF2DW14 / KFF2DS14 Appliance Category Category 7 (Refrigerator – Freezer) Overall Dimension (H x W x D) 1780 x 900 x 700 mm Total Gross Volume 546L Fresh Food Storage Volume 335L Frozen Food Storage Volume... - Page 20 Need Help with your product? Your product is supported by Knowhow under a Trademark Licence from Fisher & Paykel Appliances Italy SpA. For help or spare parts please call us on: 0344 561 1234 The symbol on the product or its packaging indicates that this product must not be disposed of with your other household waste.


