Table of Contents
Advertisement
Quick Links
Advertisement
Table of Contents

Related Manuals for RAMBO R750B-ST-BLC

Summary of Contents for RAMBO R750B-ST-BLC
- Page 1 BUSHWACKER: R750B-ST-BLC / BUSHWACKER: R750B-ST-ODG Assembly Operation Scan the QR code for a video of step-by-step assembly and operation Rambo Bikes 22844 230 Centerville, IA 52544 First Edition, April 2023, Published by Rambo Bikes, Centerville Iowa. All rights reserved.
-
Page 3: Table Of Contents
TABLE OF CONTENTS GENERAL WARNINGS……………………………………………………………………………… 4 RULES FOR SAFE RIDING………………………………………………………………………… 5-8 GENERAL RIDING INFORMATION……………………………………………………………… 8,9 IDENTIFYING BIKE PARTS…………………………………………………………………………. 10 FEATURES OF YOUR BIKE…………………….…………………………………………………… 11,12 ASSEMBLY………………………………………………………………………………………………… 12-17 OPERATING INSTRUCTIONS……………………………………………………………………… 17-19 BATTERY CHARGING AND STORAGE………………………….……………………………… 19-22 INSPECTION BEFORE EVERY RIDE……………………………………………………………… 22,23 MAINTENANCE AND CARE…………………………………………………………………….…. 24,25 TROUBLESHOOTING GUIDE………………………………………………………………………. -
Page 4: General Warnings
GENERAL WARNINGS: Should you have any questions about the assembly and/or use of this product, or any other Rambo Bikes product(s) do not hesitate to call one of our customer service representatives at (952) 283-0777 or visit Rambo Bikes online at rambobikes.com. Our customer service representatives will answer any questions you may have about any of the complete line of Rambo Bike’s products. -
Page 5: Rules For Safe Riding
Recommended Rider Size: No rider under the age of 18 should be permitted to use the bike. It is up to your discretion to know and understand if you can ride the bike safely. No person should ride the bike if they cannot reach the ground while seated. If you are not comfortable on the bike, they should not attempt to ride the bike. - Page 6 - Obey all traffic laws and regulations - Watch for parked car doors opening unexpectedly - Watch for pedestrians stepping out, pets and children playing near roadways - Never carry a passenger - Never ride with earbuds or headphones - Always obey traffic signals - Use caution when crossing railroad tracks and carefully cross at a 90-degree angle - Mount a horn or bell on to your bike to signal others of your approach - Before riding fast or in more difficult conditions, try riding at slower speeds in a flat, open area to test the...
- Page 7 Night Riding and Poor Visibility Riding at dawn, dusk, during poor visibility or night riding is extremely dangerous. Your reflectors are not a substitute for the required bike lights. Motorists and pedestrians may not be able to see a bicyclist during poor visibility conditions.
-
Page 8: General Riding Information
Off-Road or Backcountry Riding Always take special care when riding off-road or in remote areas. If you are unfamiliar with off-road riding start out on moderate terrain and slowly build your skills until you are confident you can ride on trails and unimproved roads. - Page 9 Before riding your bike for the first time please follow the "Brake Burn in Procedure" in your owner’s packet. Replacement Pads and Rotors are available from Rambo Bikes. Always replace pads and rotors at the same time to ensure maximum performance and lifetime.
-
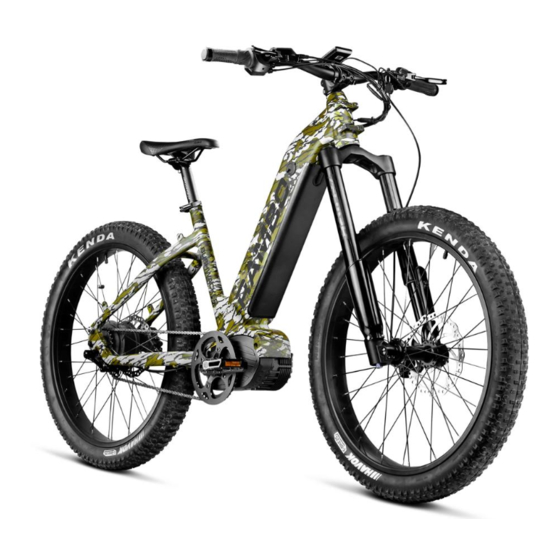
Page 10: Identifying Bike Parts
IDENTIFYING BIKE PARTS... -
Page 11: Features Of Your Bike
FEATURES OF YOUR BIKE Mid Drive Motor: With your bike having a mid-dive motor, the power of the motor is transferred from the motor to the rear set of gears, then to the rear wheel, this acts as a transmission for your bike. When climbing hills or going slow, you will want to use a lower gear (larger sprocket). -
Page 12: Assembly
With the battery installed from the bottom of your bike frame, you can install a secondary battery on the top of your bike frame. The additional battery is a 48v 14ah battery. Contact Rambo Bikes for more information. Suspension Fork, Your bike has front suspension that is mainly set and adjusted by air pressure. - Page 13 BEFORE DOING ANY WORK ON YOUR BIKE ALWAYS BE SURE TO REMOVE THE BATTERY. First remove the bike from the box and remove all protective packaging and zip ties using side cutting pliers. BE SURE NOT TO CUT ANY ELECTICAL WIRES OR BRAKE CABLES. Once the packaging material is removed from the bike, remove the Allen bolts from the handlebar clamp using a 4mm Allen wrench.
- Page 14 Then flip the bike upside down so that the bike is resting on the seat and the handlebars. Loosen the four axle pinch bolts from the axle, then loosen the axle nut and axle. Slide the axle out of the fork. Then apply grease to the axle and install the wheel into the fork making sure the brake rotor is aligned in between the brake caliper.
- Page 15 Attach the pedals to the bike by using a 15mm wrench, be sure to identify the correct pedal for the correct side, there is an R or L marked on the end of the pedal bolt. Be sure to note that the left pedal is reverse threaded.
- Page 16 After the pedals are installed flip the bike over onto the wheels and be sure to check that the handlebars are aligned with the front tire. Then tighten both sides of the stem to the fork using a 5mm Allen wrench, tighten to 45 IN-LBS or 5 Nm.
-
Page 17: Operating Instructions
Then Check the tires for proper air pressure, the minimum and maximum air pressure should be between 10psi-25psi. Once the bike is assembled, fully charge the battery, and install the battery into the bike frame, being sure to insert the key and turn clockwise to open the battery latching system. OPERATING INSTRUCTIONS Before operating be sure the rider can keep balance by testing the bike without using the motor to ensure the rider is capable. - Page 18 Each PAS (Pedal Assist Level) is approximately 20% motor power. Level 1 is 20%, Level 2 is 40%, Level 3 is 60%, Level 4 is 80% and Level 5 is 100% motor power.
-
Page 19: Battery Charging And Storage
RANGE ESTIMATES The range that you can get on a single charge depends on many variables such as terrain, hills, windy conditions, rider weight, rider assistance. To extend your range you can ride at a lower assist level, use pedal assist instead of throttle only, pedal when starting from a complete stop. - Page 20 Checking Battery Level: Installing/Removing Battery: Insert the key into the keyhole, then turn the key clockwise as indicated on the keyhole, this will unlock the battery latch and allow the battery to drop down to the second safety latch. Then turn the safety latch on the battery and lower the battery out of the frame.
- Page 21 The battery can be charged while on the bike, make sure to turn the bike off before charging the battery and/or removing the battery. Install the charging plug into the battery charging port, as shown below. When charging the charger will display red, and once fully charged the charger will turn green. Charging will take approximately 4hrs depending on the battery level.
-
Page 22: Inspection Before Every Ride
Storage: Always store the battery in a dry place with temperature above freezing and below 113 degrees Fahrenheit (45 Celsius) It is best practice to store the battery with a charge above 50% To extend the life of your battery it is best to discharge and charge every 3 months. INSPECTION BEFORE EVERY RIDE Before every ride, inspect the bike with the following check list. - Page 23 Brake Reach Some bikes have adjustable brake levers. These can be adjusted to fit each individual rider’s specific needs. For example, if you have a short reach, you may need the levers adjusted closer to the handlebar. This adjustment or brake lever replacement should be done by a qualified bike technician or bike shop. DISC BRAKES AND DISCS CAN GET VERY HOT DURING USE AND COULD BURN SKIN.
-
Page 24: Maintenance And Care
MAINTENANCE AND CARE MOTOR AND CONTROLLER CAN BE VERY HOT, CAUSING BURNS AND SEVERE INJURY. BE SURE THESE COMPONETS HAVE HAD TIME TO COOL BEFORE ATEMPTING TO DO ANY MAINTENANCE. BEFORE DOING ANY WORK ON YOUR BIKE ALWAYS BE SURE TO REMOVE THE BATTERY. Service: Before every ride complete the bike inspection outlined in the section “Inspection Before Every Ride”. - Page 25 IF ANY SIGNS OF WEAR, DAMAGE OR FATIGUE, DO NOT RIDE YOUR BIKE. TAKE YOUR BIKE IMMEDIATELY TO A LOCAL BIKE SHOP FOR REAIR AND SERVICE! Replacement parts can be purchased by contacting Rambo bikes at: rambobikes.com. A list of Certified Repair Centers can also be found at:...
-
Page 26: Troubleshooting Guide
24 - Light sensor fault (24H) 25 - Torque sensor torque signal fault (25H) 26 - Torque sensor speed signal fault (26H) 30 - Communication fault (30H) Rambo 2 LCD Manual Adjusting your brakes Bafang Troubleshooting Guide General Tips and Information... -
Page 27: Standard Limited Warranty
This warranty does not extend to any failures associated with this type of riding, or to any Rambo products that have been subject to misuse, neglect, abuse, or improper storage, or if the product is modified or altered in any way other than as directed by official Rambo Bike instructions. - Page 28 Rambo Bikes 22844 230 Centerville, IA 52544 First Edition, April 2023, Published by Rambo Bikes, Centerville Iowa. All rights reserved...