Table of Contents
Advertisement
Quick Links
Advertisement
Table of Contents

Related Manuals for RCA DRC510N


Summary of Contents for RCA DRC510N
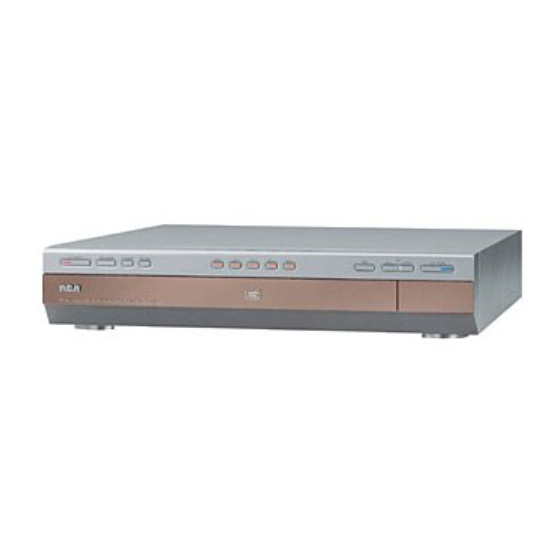
- Page 1 5-Disc DVD Player User’s Guide Changing entertainment. Again. DRC510N...
- Page 2 Product Registration: Please fill out the product registration card (packed separately) and return it immediately. For U.S. customers: Your RCA Consumer Electronics product may also be registered at www.rca.com/productregistration Registering this product allows us to contact you if necessary.
-
Page 3: Table Of Contents
Chapter 1: Setup and Connections Things to consider before you connect ...2 Install batteries in the remote control ...2 Back of the DVD Player: Explanation of jacks and cables...3 Front of the DVD Player ...5 Connect the DVD Player ...6 Point the remote in the right direction ...8 Turn on the TV and the DVD player ...8 Loading discs...8... -
Page 4: Chapter 1: Setup And Connections
Chapter 1 Things to consider before you connect Protect components from overheating • Don’t block ventilation holes on any of the components. Arrange the components so that air can circulate freely. • Don’t stack components. • If you place components in a stand, make sure you allow adequate ventilation. •... -
Page 5: Back Of The Dvd Player
VIDEO SELECTION - REGULAR CONNECTION (VIDEO, S-VIDEO COMPONENT) - PROGRESSIVE SCAN ONLY Back of DVD Player: Explanation of Jacks and Cables There are several ways to connect your DVD Player to your TV depending upon the cables you have and the jacks that are on the back of your TV. Different jacks and cables provide a different level of performance.The jacks on the back of your DVD Player and the cables used to connect them are explained below. -
Page 6: Connections And Setup
Connections and Setup AUDIO OUT Audio Jacks and Cables AUDIO R and L jacks AUDIO L (left) and R (right) 1 and 2 These jacks send the audio from the disc you’re playing to the TV.The audio jacks and cables are often color-coded (red for right audio, and white for left Audio/ audio).You must connect audio cables to the AUDIO L and R jacks on the Video... -
Page 7: Front Of The Dvd Player
ON / STANDBY OPEN / CLOSE EXCHANGE DISC SKIP Front of the DVD Player (buttons appear left to right below) 1 ON/STANDBY - Turns the player on and off. 2 OPEN/CLOSE - Opens and closes disc tray. 3 EXCHANGE - Enables you to add/remove 2 discs at a time without interrupting playback. 4 DISC SKIP - Rotates the disc tray to add additional discs. -
Page 8: Connect The Dvd Player
Representative who will visit your home for a fee to install your electronic entertainment system and to instruct you in its operation. For details about this service, call 1-888-206-3359. For additional assistance while using your RCA product, please visit www.rca.com/customersupport Graphics throughout this User’s Guide are for representation only. - Page 9 Connection: DVD + TV + VCR Connect the audio cables to the AUDIO OUT L (left – white) and R (right – red) jacks on the back of your DVD player, and to the corresponding Audio Input jacks on your TV (sometimes labeled AUDIO IN L and R).
-
Page 10: Point The Remote In The Right Direction
DVD Player. English Select a Menu Language Select langue de menu Francais Selecione Idioma Menu Español DRC510N (top view) Only place disc in the slot that is fully visible (shown in gray above). DRC510N (top view) During playback, press EXCHANGE to add/remove discs. -
Page 11: How To Find Your Tv's Video Input Channel
Channel that corresponds to the jacks you used to connect the DVD Player to the TV.The Video Input Channel(s) varies for different brands and different models of TVs. If your TV is an RCA, GE, or Proscan brand, the DVD’s remote probably operates it. Just press the TV button, and then press the INPUT button until you see the DVD’s main menu, screen saver, or the disc you’re... -
Page 12: Chapter 2:The Remote Control
Chapter 2 Button Descriptions for DVD Mode In addition to operating your DVD Player, the remote that came with it will operate most RCA, GE, and Proscan TVs and VCRs. However, this page only describes the buttons on the remote that you will use with your DVD Player. -
Page 13: Button Description For Tv And Vcr Modes
SPEED In VCR mode, accesses the timer recording menu in some models. TIMER Puts the remote in TV mode so it operates the TV (RCA, GE, and Proscan TVs only). Functions as a TV/VCR button in VCR mode. TV•VCR Puts the remote in VCR mode so it operates the VCR (RCA, GE, and Proscan VCRs only). -
Page 14: Chapter 3 Playing Discs
Chapter 3 Compatible discs This DVD Player is capable of playing the following types of discs: DVDs, Video CDs, and CDs with mp3 files,WMA files (Windows Media Audio), and JPEG files on them. Before you put a disc in the player, make sure it is DVD+Rewritable compatible. -
Page 15: Search Options
Search Options To search a disc, you can use the FORWARD button or the REVERSE button.You can also use the following search features: Picture Scan - When you’re playing a disc, each time you press FORWARD or REVERSE, your DVD Player scans the disc faster until you reach the fastest scan speed.To resume normal playback, press PLAY. -
Page 16: Using The On-Screen Info Displays
Playing Discs Using the On-Screen Info Displays The Info Display appears across the top of the screen when you press the INFO button on the remote while you’re playing a disc. Use the an icon is highlighted, follow the on-screen instructions, and use the remote to scroll through the options. -
Page 17: How To Navigate In The Info Display
Left Down Time Display (all Info Displays) This feature displays the time that has elapsed during playback. For DVD discs, the time displayed refers to the current title and acts as a Time Search feature.You can skip right to any scene. Highlight the Time Display, and use the number buttons on the remote to enter the elapsed time you want to go to.You must use two digits for each field. -
Page 18: Subtitles Icon
Playing Discs Subtitles Icon (DVD Info Display) By default, subtitles are off.To turn subtitles on: With Info Display on the screen, press the icon is highlighted. To turn subtitles on or change the language, press the repeatedly to see what settings are available (the options appear in the box at the bottom of the Info Display). -
Page 19: Play Mode Icon
Play Mode Icon (DVD, CD Info Displays) The Play Mode options available depend upon the type of disc you’re playing. The default play mode (standard play) plays the disc’s contents in the order in which the disc was created (i.e., track 1 plays first, followed by track 2, etc.). Play Mode Options Repeat: DVDs and Audio CDs Random Play: Audio CDs (tracks play in random order). -
Page 20: Playing Discs
Playing Discs AB Repeat (DVDs only) AB Repeat lets you define a specific segment on the disc that you want to repeat.To watch a scene over and over: With the Play Mode icon highlighted in the Info Display, press the Repeat Mode: AB. -
Page 21: Bookmark Icon
Bookmark Icon (DVD and Audio CD Info Display) The Bookmark feature lets you mark a point on the disc so you can quickly start playing the disc from a bookmarked point. Creating a Bookmark Highlight the Bookmark icon on the Info Display. Press OK (the Bookmark Banner appears). Highlight an unused bookmark.When the disc reaches the scene you want to mark, press the OK button on the remote (the bookmark icon changes to two icons side-by-side: an arrow and a trash can). -
Page 22: Camera Angle Icon
Playing Discs Camera Angle Icon (DVD Info Display) Some discs contain multiple angles of a particular scene or sequence. If the disc only has one angle, this feature won’t work. Currently, very few discs have this feature. While a disc is playing, press ANGLE on the remote. If the disc wasn’t created with multiple angles, (the invalid symbol) appears. - Page 23 PLAY 01.THE REASON -3.jA- - LET_S_ 04. WHY ON WHY 02.IMMORTALIT 03.TREAT HER 04.WHY ON WHY 05.LOVE IS IN Example of mp3 files. STOP Current Selection mp3 Not Selected Example of JPEG files. Graphics throughout this User’s Guide are for representation only. Playing Discs Select a file using the press OK, and then press...
-
Page 24: Musical Slide Show
Playing Discs Musical Slide Show: playing JPEG and mp3 or WMA music files at the same time You can display JPEG files while listening to mp3 or WMA music files recorded on the same disc. Insert the disc containing the two types of files in the player. Select an image file using the selection.The name of the folder where the file is located and the name of the file appear on the right in the "Current selection"... -
Page 25: The Dvd Player Menu System
Chapter 4 The DVD Player Menu System The DVD player menu system is not the same as the disc menu or the Info Display.The DVD player menu appears when there’s no disc playing. If you are playing a disc, press STOP on the remote control to stop playback (the DVD player menu appears). -
Page 26: Program Play
Menu System Program Play (Audio CDs and mp3 CDs) With this option, you choose the order in which the chapters (or tracks) play. Highlight Program Play, and press the OK button (the Program Playlist screen appears). Follow the on-screen instructions to create your program: Audio CD: select a track using the the tracks. -
Page 27: Parental Control Menu
The Parental Control Menu You can set up ratings limits and lock your player in order to control the type of content people watch on your DVD Player.The padlock icon indicates whether the player is locked or unlocked. Locked: You need to enter the password in order to play discs that have a higher rating than what you’ve allowed.When the player is locked, nobody can access the Control menu without entering the password. -
Page 28: Unlocking Your Player
Menu System Unlocking your DVD Player If you’re playing a disc, press STOP (the DVD Player’s main menu appears). Parental Control Press the button until screen appears). Use the number buttons to enter the password you created, and press OK (the Control menu items appear). -
Page 29: Rated Titles
8 Least Restrictive *MPAA ratings may vary from disc to disc. 1 Most Restrictive Password Required Free Access Unrated Titles Free Access Password Required Graphics throughout this User’s Guide are for representation only. Menu System To set Ratings for Rated Titles: Rating Limits menu enables you to block discs that contain movies that have a rating assigned to them (R,... -
Page 30: Display Menu
Menu System The Display Menu Display menu contains the settings that affect how a disc’s content looks on your TV and how the display on the front of the player appears. Play Play Mode Parental Control Display TV Image Sound Front Display Languages Black Level... -
Page 31: Front Display
16 x 9 Widescreen Player is connected to a wide-screen TV. If you choose this setting and you don’t have a widescreen TV, the images on the screen might appear distorted due to vertical compression. If you play a disc recorded in 4 x 3 format on a widescreen TV, the left and right side of the screen will appear black. -
Page 32: Sound Menu
Menu System The Sound Menu Sound menu lets you adjust the player’s settings to match the equipment you connected to your DVD Player, and to use the DVD Player’s Sound features. All of the submenus in the Sound menu have two settings: On and Off. Simply highlight the menu and press the OK button on the remote to change the current setting. -
Page 33: Languages Menu
Resume Play Play Mode Player Menus English Lock Disc Menus Display Audio Sound Subtitle Languages Resume Play Play Mode Player Menus Lock Disc Menus English Display Francais Audio Sound Español Subtitle Languages Notes: Discs are created differently.The DVD player can’t override some language preferences. If a disc’s software was created to play the movie (title) in a preferred language, the preference you set might be ignored. -
Page 34: Chapter 5:Additional Information
Note: If you prefer, we can provide you with the name of an Authorized Service Representative who will visit your home for a fee to install your electronic entertainment system and to instruct you in its operation. For details about this service, call 1-888-206-3359. For additional assistance while using your RCA product, please visit www.rca.com/customersupport. -
Page 35: Additional Information
If you’re operating the TV, press the button first, etc. (this remote operates most RCA, GE, and Proscan TVs). • Check battery installation— the direction of the + and – on the batteries must match information in battery compartment cover. - Page 36 Additional Information The menu is displayed in a foreign language • The Language menu (Player Menus) is set to that language. Go to Languages in the main DVD player menu and select the Player Menus option. Highlight the language you prefer, and press Play doesn’t begin •...
-
Page 37: Maintenance Of Cabinet
Maintenance of Cabinet For safety reasons, when cleaning the cabinet be sure to disconnect the AC power cord from the AC outlet • Do not use benzene, thinner, or other solvents for cleaning. • Wipe the cabinet with a soft cloth. Formation of Condensation •... -
Page 38: Recommendations And Information Concerning Discs
Additional Information Recommendations and information concerning discs CD-R and CD-RW discs This player can play most CD-R and CD-RW discs. However, depending on the recorder of the discs of your personal computer, the type of disc and recording method used, some discs might not play, or the performance might not meet the expected standard of quality.When playing a CD-R disc, it is completely normal for the unit to take up to 20 seconds to recognize the disc before it plays. - Page 39 CD-R and CD-RW discs with JPEG format “image” files To view your JPEG images on a TV set you do not need to record your photographs with a resolution above 400,000 pixels (which corresponds to an image format of about 720 x 576 dots) because of the resolution of most TVs.
-
Page 40: Limited Warranty
Additional Information Limited Warranty What your warranty covers: • Defects in materials or workmanship. For how long after your purchase: • 90 days from date of purchase - Unit exchange, which includes parts and labor. • 91 days to 1 year from date of purchase - Unit exchange, which includes parts only; you pay the labor. - Page 41 Thomson. Product Registration: Please complete the online Product Registration on www.rca.com/productregistration or complete and mail the Product Registration Card packed with your unit. It will make it easier to contact you should it ever be necessary. The return of the card is not required for warranty coverage.
-
Page 42: Accessories To Complement Your Dvd Player
1-800-338-0376 (Use this number only to place an order for accessory items.) You can buy some accessories on-line at www.rca.com/accessories (subject to availability) Note: Products shown might not be available from www.rca.com web site. Optical Plug to Optical... - Page 43 This page intentionally left blank.
- Page 44 Visit the RCA website at www.rca.com Please do not send any products to the Indianapolis address listed below or on the carton.This will only add delays in service for your product. Thomson Inc. 10330 North Meridian Street Indianapolis, IN 46290 ©2003 Thomson Inc.