Advertisement
IMPORTANT SAFEGUARDS
When using electrical appliances, basic safety precautions should always be followed, including the following:
- Read all instructions.
- To protect against risk of electrical shock do not put Food Processor in water or other liquid.
- Close supervision is necessary when any appliance is used by or near children.
- UNPLUG from outlet when not in use, before putting on or taking off parts, and before cleaning.
- AVOID contact with moving parts.
- DO NOT operate any appliance with a damaged cord or plug, or after the appliance malfunctions or has been dropped or damaged in any manner. Return appliance to the nearest authorized service facility for examination, repair or adjustment.
- The use of accessory attachments not recommended or sold by the manufacturer may cause fire, electric shock or personal injury.
- DO NOT use outdoors.
- DO NOT let the cord hang over the edge of table or counter.
- Keep hands and utensils away from moving blades or discs while processing food to reduce the risk of severe injury to persons or damage to the food processor. A scraper may be used but must be used only when the food processor is not running.
- Blades are sharp. Handle carefully
- To reduce the risk of injury, never place cutting blade or discs on base without first putting bowl properly in place.
- Be certain cover is securely locked in place before operating appliance.
- NEVER feed food by hand. Always use food pusher.
- Never use without the cover interlock mechanism engaged.
- To protect against electrical shock, this appliance is equipped with a cord having a 3-prong grounding-type plug for insertion into a proper grounding-type receptacle. DO NOT alter the plug for use in a 2-prong receptacle. If the plug will not fit into a receptacle, have the proper receptacle installed by a qualified electrician.
- This appliance is for HOUSEHOLD USE ONLY.
SAVE THESE INSTRUCTIONS!
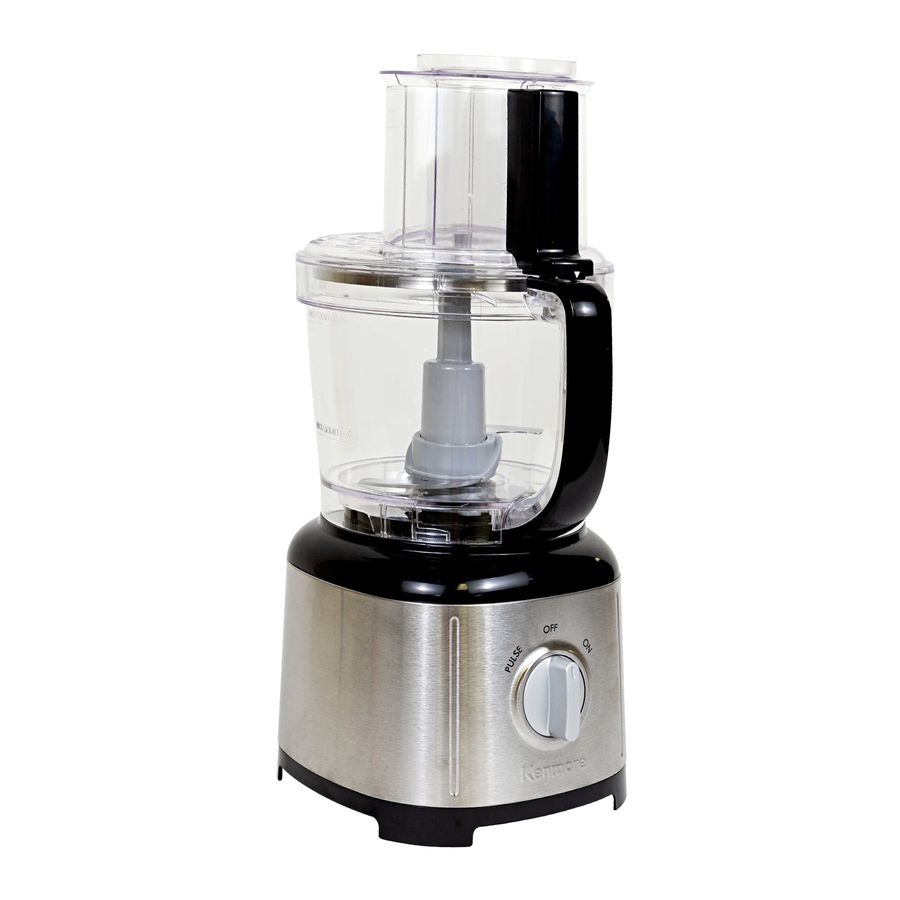
PARTS AND FEATURES

PREPARING TO USE
Before using the food processor, wash all parts except the Base in hot, soapy water. Rinse dry. These parts can also be placed in the dishwasher on the top rack. Do not put in or near the utensil basket.
 Blades are sharp. Handle carefully. |
| NEVER place food processor's motor/base in water or other liquids. |
| NOTE - DO NOT attempt to chop ice in this Food Processor; it will damage the Bowl and dull the Chopping Blade. This unit will not whip cream, beat egg whites to a desirable volume, grind coffee beans, spices or other items with high oil content, or slice or shred hardboiled eggs, marshmallows, or soft cheeses.
|

ASSEMBLING YOUR FOOD PROCESSOR
ASSEMBLY
- Make sure the Control Knob is in the OFF position and the power cord is unplugged.
- Be sure Food Processor base is on a flat, dry, clean, stable surface before you begin processing.
- To assemble, put the Bowl on the Base by aligning the Bowl handle with the Unlock icon on the base. Lock the Bowl onto the Base by turning the Bowl counterclockwise until it clicks into place. Once locked, the Bowl handle will face front and center (see Fig. 1).
NOTE - There is only one position for the Bowl to lock onto the Base. The unit will not operate if the Bowl does not lock onto the Base. - Place the Bowl Cover onto the Bowl. Align the arrow on the Cover with the Unlock icon on the Bowl (see Fig. 2, 2a and 2b). Turn the Cover counterclockwise towards the center front until it clicks.
 NOTE - There is only one position for the Bowl Cover to lock onto Bowl. The unit will not operate if the Bowl Cover does not lock onto the Bowl, or if the Large Food Pusher is not inserted into the Oval Food Chute.
 - There is a Food Pusher Assembly consisting of a Large and Small Pusher. Align the raised seam running down the back of the Large Pusher with the slot in the Interlock Start Switch. Insert the Large Pusher into the Oval Food Chute. Then insert the Small Pusher into the Circular Food Chute in the Large Pusher. See Fig. 3 and 3a.

 NOTE - There is only one position for the Bowl Cover to lock onto Bowl. The unit will not operate if the Bowl Cover does not lock onto the Bowl, or if the Large Food Pusher is not inserted into the Oval Food Chute.
BLADE ASSEMBLY
- Place the Chopping Blade on the Disk Drive Adaptor as shown.
![]()
- Rotate the Chopping Blade clockwise until it locks in place.


OPERATING YOUR FOOD PROCESSOR
CONTROLS
PULSE
- When the Control Knob is turned counterclockwise to PULSE and held, the Food Processor operates. As soon as you let go of the Knob it returns to the OFF position.
- Use PULSE for short processing tasks, such as chopping nuts, raw meats or vegetables. This allows you much greater control of the consistency of what you are processing.
ON
- When the Control Knob is turned clockwise to ON, the unit will run continuously. This is good for less tender food and items that take a while longer to process.
- When you have finished processing, turn the control knob switch to OFF.
CHOPPING
- Lock the Bowl onto the Base as described in Assembly.
- Place the Chopping Blade onto the Center Post (see Fig. 4).
![]()
- Place food to be chopped into Bowl. Refer to the Chopping Guide to prepare food for chopping.
![]()
Blades are sharp. Handle carefully. - Lock Bowl Cover onto Bowl as described in Assembly.
- The Control Knob should be in the OFF position. Plug the cord into an electric outlet.
![]()
- Insert the Food Pusher Assembly as far as it will go down into the Oval Food Chute.
- Turn the Control Knob to ON to run constantly, or for better control over consistency, turn and hold knob on PULSE.
- When finished processing:
- If Pulsing, release Control Knob and unit automatically stops.
- If you turned processor to ON, turn Control Knob to OFF to stop.
- Allow the chopping blade to stop rotating.
NOTE - Before opening the Bowl Cover, turn the Control Knob to OFF and unplug the cord.
- Remove the Food Pusher Assembly from the Processor.
- To remove bowl cover, unlock by turning clockwise until cover unlatches, and lift off.
- Lift the chopping blade by its base and remove. Unlock the Bowl by turning it clockwise and lift off. Empty the processed food.


 Chopping Blade is very sharp. Use caution when handling. |
SLICE OR SHRED
| Make sure control knob switch is turned to OFF and unit is unplugged before use. Never use your hand to push food into processor. The use of heavy pressure on the Food Pusher will not speed operation. |
- Lock the Bowl onto the Base as described in Assembly.
- Slide the disc drive adapter down onto the center drive post of the base, then place the slice/ shred disc, with the desired side facing up for either slicing or shredding, onto the disc stem and push down. At this point the disc will be at the top of the bowl.
![]()
Slicing/Shredding Disc is very sharp. Use caution when handling. - Lock the Bowl Cover onto the Bowl.
- Fill Oval or Circular Food Chute with food. See Shredding or Slicing Guide for food piece sizes.
- If using the Large Pusher, fill the Oval Chute with pieces of food such as potato, cabbage, green pepper, whole tomato, etc., up to but not above the Max Fill line marked on the Chute (see Fig. 6).

- If using the Small Pusher, first remove it from the Large Pusher. Insert the Large Pusher all the way into the Oval Food Chute. Place food pieces into the Circular Food Chute.
- If using the Large Pusher, fill the Oval Chute with pieces of food such as potato, cabbage, green pepper, whole tomato, etc., up to but not above the Max Fill line marked on the Chute (see Fig. 6).
- Plug the power cord into a proper electric outlet.
- Start Processor.
- If using Large Pusher, make sure that it is joined together with Small Pusher. Insert Pusher into Oval Food Chute to Max Fill line so that Pusher depresses spring in Interlock Start Switch. Turn Control Knob to ON to start Processor. Raise Pusher from Chute to stop Processor.
- If using Small Pusher, Processor will begin running once Control Knob is turned to ON. Use Small Pusher to push food through Circular Chute. Turn Control Knob to OFF to stop Processor.
- When food processing is complete, turn Control Knob to OFF, unplug processor, and wait for disc to stop rotating.
![]()
Before opening the Bowl Cover Assembly, be sure you have turned the unit OFF and unplugged the cord. - Open bowl cover by turning clockwise, and remove disc with disc stem.
![]()
Slicing/Shredding Disc is very sharp. Use caution when handling. - Unlock Bowl by turning clockwise towards Unlock icon and lift bowl off. Empty the processed food.

TO PROCESS LONG AND THIN FOOD ITEMS
| Make sure control knob switch is turned to OFF and unit is unplugged before use. Never use your hand to push food into processor. The use of heavy pressure will not speed operation. |
- Lock the Bowl onto the Base as described in Assembly.
- Slide the disc stem down onto the center post of the base, then place the slice/shred disc, with the desired side facing up for either slicing or shredding, onto the disc stem and push down. At this point the disc will be at the top of the bowl.
![]()
Slicing/Shredding Disc is very sharp. Use caution when handling. - Lock bowl cover assembly onto bowl.
- Remove Small Pusher from Large Pusher. Insert Large Pusher into Oval Food Chute.
- Fill the Circular Food Chute with long and thin food items such as pepperoni, carrots or celery.
- Insert Small Pusher into Circular Food Chute above food. Plug cord into electrical outlet.
![]()
Food pusher must always be used when processing food. NEVER use hand to push food directly. - Turn the Control Knob to ON, then press down lightly but firmly on Small Pusher to feed items down and onto slice/shred disc. When the chute is empty, turn the Control Knob to OFF.
- When food processing is complete, turn Control Knob to OFF, unplug processor, and wait for disc to stop rotating.
![]()
Before opening the Bowl Cover, turn the unit OFF and unplug the cord. - Take off the bowl cover and carefully lift out disc and disc stem. Unlock Bowl by turning clockwise towards Unlock icon and lift bowl off. Empty the processed food.
FOOD PROCESSING TIPS - LIQUIDS
- Hot foods and liquids under 120°F / 49°C can be processed in the bowl. Anything over this temperature is too hot.
- Be sure to process small amounts of liquids (2 cups or less) at a time. Larger amounts may leak from the bowl.
CARE AND CLEANING
NOTE - DO NOT ATTEMPT to sharpen the cutting edges of the Chopping Blade or the reversible Disc. They are permanently sharpened at the factory and will be ruined by attempted sharpening.
- Before cleaning, turn the Control Knob to OFF and unplug the cord to Food Processor.
- Whenever possible, rinse parts immediately after processing for easy cleanup.
- Wipe the Base, Control Knob, and feet with a damp cloth and dry thoroughly. Stubborn spots can be removed by rubbing with a damp cloth and a mild, non-abrasive cleaner. DO NOT immerse the Base in liquid.
- All removable parts can be washed by hand or in a dishwasher in the top rack. Do not put in or near the utensil basket.
- If washing removable parts by hand, wash in hot, sudsy water, rinse and dry thoroughly.
- If necessary use a small nylon bristle brush to thoroughly clean the Bowl and Bowl Cover. This type of brush will also help prevent cutting yourself on the Chopping Blade and Slicing/ Shredding Disc.
- Do not use rough scouring pads or cleansers on any plastic or metal parts.
- Do not fill the Bowl with boiling water or place any of the parts in boiling water.
- Some foods, such as carrots, may temporarily stain the Bowl. To remove stains, make a paste of 2 tablespoons baking soda and 1 tablespoon warm water. Apply the paste to the stains and rub with a cloth. Rinse and dry.
Any other servicing should be performed by a qualified service dealer.
CHOPPING GUIDE
| FOOD | AMOUNT | DIRECTIONS |
| Baby Food | Up to 4 cups (1000ml) | Add up to 4 cups cooked vegetables and/or meat to Bowl, along with 1/4 cup liquid per cup of solid food. Process continuously to desired fineness. |
| Bread Crumbs | Up to 5 slices | Cut either fresh or dry bread slices into 1 1/2 to 2-inch pieces. Add to Bowl and process to fine crumbs. |
| Cookie/Cracker Crumbs | Up to 5 cups | Use for making crumbs from graham crackers, chocolate or vanilla wafers |
| Cranberries, Minced | 3 cups (750ml) | Pulse to chop to desired fineness. Can also add sugar to make cranberry relish |
| Eggs, Chopped | Up to 12 | Peel, dry and halve hard-cooked eggs. Add to Bowl. Pulse to chop, checking fineness after 4/5 pulses. |
| Garlic, minced | Up to 12 | Be sure Bowl is dry. Drop clove(s) down food chute while unit is running. |
| Meat, chopped (Raw or Cooked) | Up to 2 1/2 cups (600ml) | Cut the meat into 1-inch cubes. Add to bowl and pulse to chop. |
| Mushrooms, chopped | Up to 12 Medium | Halve large ones and add to Bowl. Pulse to desired fineness. |
| Nuts, Chopped | 2 cups (300ml) | Add to Bowl and Pulse to chop. |
| Onions, Chopped | Up to 2 large | Quarter and add to Bowl. Pulse 1 or 2 times to coarsely chop. For green onions, up to 2 cups cut into 1-inch pieces. |
| Parmesan or Romano Cheese, grated | Up to 1 1/2 cups (375ml) | Allow cheese to reach room temperature. Cut into 1-inch cubes. Add to bowl and pulse to coarse chop; process continuously to finely grate. |
| Parsley, Chopped | Up to 2 cups | Add to Bowl and Pulse to chop to desired fineness, about 10 to15 seconds. Process other herbs in same way. |
| Pepper; Green, Red, Yellow, Chopped | Up to 1 pepper | Cut into 1-inch pieces. Add to bowl and pulse to chop. |
| Soups, Pureed or Creamed | 2 cups | Add up to 2 cups hot (less than 176°F) vegetable soup for pureeing and creaming. Process to desired smoothness. |
| Squash (Butternut), Pumpkin or Sweet Potatoes Pureed | Up to 5 cups, 1 in. cubes | Add 1/4 cup of cooking liquid per cup of food. Pulse to finely chop, then process continuously to puree. |
| Strawberries, Pureed | 2 cups | Hull and halve large berries. Add to bowl and pulse to chop. Process continuously to puree. |
| Tomatoes, Chopped | 4 medium | Quarter tomatoes. Add up to 4 and pulse to desired size. |
SHREDDING GUIDE
| FOOD | DIRECTIONS |
| Cabbage | Use shredding disc for very fine cabbage or slaw. Cut into pieces to fit chute. Shred, using light pressure. Empty Bowl as cabbage reaches disc. |
| Carrots | Position in chute and shred. |
| Cheese, Cheddar | Cheese must be well chilled. Cut to fit chute. |
| Cheese, Mozzarella | Cheese must be chilled in freezer for 30 minutes prior to shredding. Cut to fit chute. Use light pressure. |
| Potatoes | Cut to fit chute. |
| Zucchini | Cut to fit chute, either lengthwise or horizontally |
SLICING GUIDE
| FOOD | DIRECTIONS |
| Apple | Halve and stack horizontally in chute. Use firm pressure. |
| Cabbage / Lettuce | Halve head, cut to fit chute. |
| Carrots | Cut to fit chute |
| Celery | Remove string. Pack chute for best results. |
| Cucumber | Cut to fit chute if necessary. |
| Mushrooms | Stack chute with mushrooms on their sides for lengthwise slices. |
| Onions | Halve and fill chute, positioning onions upright for coarsely chopped results. |
| Peaches / Pears | Halve and core. Position upright in chute and slice using light pressure. |
| Peppers; Green, Red, Yellow, etc. | Keep whole, cut stem end off and seed, keep top end intact. Fit pepper into chute, intact end to the top, squeezing slightly to fit if necessary. Cut large ones into quarters or strips, depending on desired results. Slice using moderate pressure. |
| Pepperoni | Cut into 3-in. lengths. Remove inedible casing. |
| Potatoes | Peel if desired. Position in chute, cutting large potatoes in halves. |
| Strawberries | Hull. Arrange berries on their sides for lengthwise slices. |
| Tomatoes | Use small tomatoes for whole slices, halve if necessary. Use gently, but firm pressure. |
| Turnips | Peel. Cut turnips to fit chute. |
| Zucchini | Slice off ends. Use small squash for whole slices; halve larger ones to fit chute. |
Customer Assistance
1-800-265-8456
www.koolatron.com

Documents / Resources
References

Download manual
Here you can download full pdf version of manual, it may contain additional safety instructions, warranty information, FCC rules, etc.
Download Kenmore KKFP11CB, KKFP11CR - 11-Cup Food Processor Manual
Advertisement
Thank you! Your question has been received!


Need Assistance?
Do you have a question about the KKFP11CB that isn't answered in the manual? Leave your question here.