Table of Contents
Advertisement
Quick Links
Laundry
User Manual
EN
Washing Machine
Használati útmutató
HU
MOSÓGÉP
Uporabniški priročnik
SI
Pralni stroj
Návod k použití
CZ
Automatická pračka
Návod na použitie
SK
Automatická práčka
Upute za uporabu
HR
Perilica rublja
Käyttäjän ohjeet
FI
Pyykinpesukone
Washing Machine
ES-FL77MS
Home Appliances
For Life
Advertisement
Table of Contents

Related Manuals for Sharp ES-FL77MS


Summary of Contents for Sharp ES-FL77MS
- Page 1 Home Appliances Laundry User Manual Washing Machine Használati útmutató MOSÓGÉP Uporabniški priročnik Pralni stroj Návod k použití Automatická pračka Návod na použitie Automatická práčka Upute za uporabu Perilica rublja Käyttäjän ohjeet Pyykinpesukone Washing Machine ES-FL77MS For Life...
-
Page 2: Table Of Contents
CONTENTS CHAPTER-1: BEFORE USING THE APPLIANCE SAFETY WARNINGS GENERAL WARNINGS CHAPTER-2: OVERVIEW OF YOUR DEVICE Techincal Specifications General Appearance CHAPTER-3: INSTALLATION Removing transportation safety screws Adjusting Adjustable Stays Electrical connection Water inlet hose connection Water discharge connection CHAPTER-4: INTRODUCTION OF CONTROL PANEL Detergent drawer Programme knob Electronic display... -
Page 3: Chapter-1: Before Using The Appliance
CHAPTER -1: BEFORE USING THE APPLIANCE SAFETY WARNINGS Operating voltage / frequency: (V/Hz) (220-240) V~/50Hz; Total current (A): 10 Water pressure (Mpa) Maximum: 1 Mpa / Minimum : 0.1 Mpa Total power (W) : 2100 Maximum dry laundry capacity (kg): 7 Do not install your machine on a carpet or such grounds that would prevent the ventilation of its base. - Page 4 CHAPTER -1: BEFORE USING THE APPLIANCE Danger of getting burnt! Do not touch discharging hose and water during discharging as the appliance may reach high temperatures when running. DEATH RISK DUE TO ELECTRICAL CURRENT! • Do not use multiple receptacles or extension cord. •...
-
Page 5: General Warnings
CHAPTER -1: BEFORE USING THE APPLIANCE drawer, door). These parts might break and cause you to get injured. • There’s the risk of tripping and injury if the materials like hose and cables are not properly stored after your machine is installed. Machine must be carried by 2 people or more. - Page 6 CHAPTER -1: BEFORE USING THE APPLIANCE conducted due to Quality Control procedures. This will not damage your machine. • Remember that packaging materials of your machine may be dangerous for children. • Keep the packaging materials in a place where children cannot reach or dispose of them appropriately.
-
Page 7: Chapter-2: Overview Of Your Device
CHAPTER -1: BEFORE USING THE APPLIANCE • Use your machine only for laundries that have been specified as suitable for washing by the manufacturer. • Before operating the washing machine, remove the 4 transportation screws and rubber spacers from the back of the machine. If the screws are not removed, it may cause heavy vibration, noise and product malfunction, (voiding the guarantee). -
Page 8: General Appearance
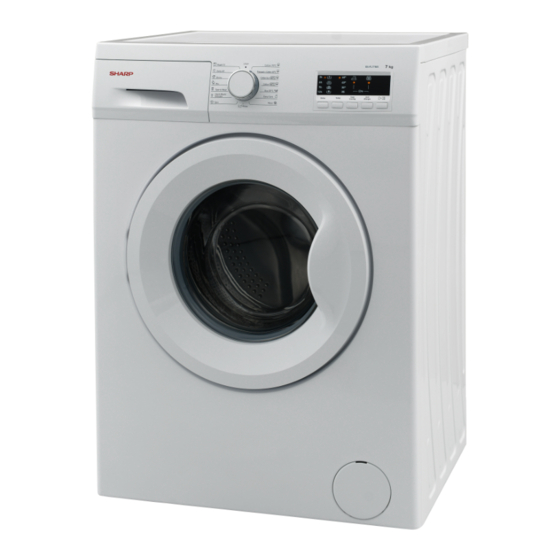
CHAPTER -2: OVERVIEW OF YOUR DEVICE GENERAL APPEARANCE 1. Detergent drawer 2. Programme knob 3. Upper Tray 4. Electronic display 5. Container 6. Cover of pump filter 7. Power Cable 8. Discharging Hose 9. Water Inlet Valve 10. T r a n s p o r t a t i o n Safety CHAPTER -3: INSTALLATION REMOVING TRANSPORTATION SAFETY SCREWS... -
Page 9: Electrical Connection
CHAPTER -3: INSTALLATION • Adjust the stays upward and downward by rotating them. • After maintaining the balance, compress the plastic adjustment nut upward again. • Never put cardboard, wood or suchlike materials under your machine if you are intending to stabilize the distortions on the ground. -
Page 10: Chapter-4: Introduction Of Control Panel
CHAPTER -4: INTRODUCTION OF CONTROL PANEL SECTIONS 1-Detergent drawer 2-Programme knob 3-Display Panel DETERGENT DRAWER You can use the liquid level determination plate when you want to wash your laundry with liquid detergent. You can use your liquid detergents in all programs without prewashing. Place the liquid detergent aparatus in the second compartment (which is available inside the machine) of the detergent drawer (*) and set the detergent amount. -
Page 11: Chapter-5: Preliminary Preparation For Laundering
CHAPTER -5: PRELIMINARY PREPARATION FOR LAUNDERING SEPARATING LAUNDRIES • Your laundry has product labels on them that specifiy their specifications. Wash or dry your laundry according to the specifciations on the product label. • Separate your laundries according to their types (cotton, synthetic, sensitive, wool etc.), their temperatures (cold, 30°, 40°, 60°, 90°) and degree of contamination (slightly stained, stained, highly stained). -
Page 12: Chapter -6: Operating Your Machine
CHAPTER -6: OPERATING YOUR MACHINE (*)Machinery specifications may vary depending on the product purchased. • Plug your machine in. • Open the water faucet. • Open the machine door. • Spread your laundries in your machine. • Push the door of your machine until hearing the locking sound to close it. •... -
Page 13: Cancelling Programme
CHAPTER -6: OPERATING YOUR MACHINE If while the child lock is engaged and any programme is running, the programme knob is switched to the CANCEL position and another programme is selected, the programme previously selected continues from where it left. To deactivate it, it will be sufficient to press on the same buttons for more than 3 seconds. - Page 14 CHAPTER-7: PROGRAM TABLE If you want to additionally Spinning your laundries upon completion of washing SPINNING operation, you may use this programme for any kind of laundries. Laundry recommended SENSITIVE/ 30° for hand wash or sensitive HAND WASH laundry. SPORTS Sportswear.
-
Page 15: Chapter-8: Maintenance And Cleaning Of Your Machine
CHAPTER -8: MAINTENANCE AND CLEANING OF YOUR MACHINE Unplug your machine before starting the maintenance and cleaning of your machine. Turn the tap water off before starting the maintenance cand cleaning of your machine. CAUTION: Your machine’s parts might be damaged if cleaners with solvent agents are used. Do not use cleaning materials with solvent agents. -
Page 16: Liquid Detergent Apparatus
CHAPTER -9: FLUSH STOPPER / BODY / DRUM Keep on pulling by depressing on the section shown below in the detergent drawer and keep pulling and then unsettle the detergent drawer. • Flsuh it using a brush. • Collect residues in the housing of the detergent drawer without dropping them inside the machine. • Assemble the detergent drawer after drying it using a towel or dry cloth. -
Page 17: Chapter-10: Troubleshooting
CHAPTER -10: TROUBLESHOOTING All repairing operations required for your machine should be carried out by our authorised service. If your machine requires a repair or if you cannot remove the fault by the help of the information provided as follows: •Unplug your machine. - Page 18 CHAPTER -10: TROUBLESHOOTING FAULT POSSIBLE CAUSE TROUBLESHOOTING Press on Start/Pause button To eliminate foam formation, mix a spoon of softener with half litres of water, and pour the mixture in Excessive amount of detergent the detergent drawer. After 5-10 used. minutes, press on Start/Pause Excessive foam is formed in the button again.
-
Page 19: Chapter-11: Automatic Fault Warnings And What To Be Done
CHAPTER -11: AUTOMATIC FAULT WARNINGS AND WHAT TO BE DONE TROUBLE CODE POSSIBLE FAULT WHAT TO DO Close the machine door. If your machine persists to indicate The door of your machine is left Wash fault, turn off your machine, open.