
Related Manuals for Philips MAT972

Summary of Contents for Philips MAT972
- Page 1 Internet Terminal MAT972 Owner’s Manual Important! Return your Warranty Registration Card within 10 days. See why inside. For Keyboard Information See MAT972KB QUG (Quick Use Guide) webtv Connected Power Message Smartcard...
- Page 2 And we’ll do everything in our power to keep you happy with your purchase for many years to come. As a member of the PHILIPS MAGNAVOX “family,” you’re entitled to protection by one of the most comprehensive war- ranties and outstanding service networks in the industry.
-
Page 3: Safety Instructions
Safety Instructions READ BEFORE OPERATING EQUIPMENT SAVE THESE INSTRUCTIONS This product was designed and manufactured to meet strict quality and safety standards. There are, however, some installation and operation precautions which you should be par- ticularly aware of. 1. Read Instructions - All the safety and operating instructions should be read and understood before the appliance is operated. - Page 4 Safety Instructions (continued) This symbol is to alert you to important operating or servicing instructions that may appear in your owner’s manual. When using your telephone equipment, always follow these basic safety precautions in order to reduce the risk of fire, electric shock, and injury to persons.
-
Page 5: Federal Communications Commission Information
If you experience trouble with this telephone equipment, please contact Philips Consumer Electronics repair facility at Philips Service Solutions Group, P.O. Box 555, Old Andrew Johnson Highway, Jefferson City, TN 37760, for more information on obtaining service or repairs. -
Page 6: Canadian Ringer Equivalence Number Notice
The termination on a loop may consist of any combination of devices subject only to the requirement that the total of the REN of all devices does not exceed five. The REN for the MAT972 is .2A. -
Page 7: Emission Notices
Emission Notices Federal Communications Commission (FCC) Statement The Philips Magnavox MAT972 has been tested and found to comply with the limits for a Class B digital device, pursuant to Part 15 of the FCC Rules. Operation is subject to the follow-... -
Page 8: Welcome
Welcome Thank you for purchasing the Philips Magnavox Internet Terminal. Before you use this product to access the Internet, you must first subscribe to the WebTV Internet Terminal. This manual will help you connect the Internet Terminal and subscribe to the WebTV Network;... -
Page 9: Table Of Contents
Table of Contents Getting Started Safety Instructions ....... . .3 - 4 Federal Communications Commission Information . -
Page 10: Package Contents
Package Contents Make sure you received the following items: Remote control Two AAA batteries (for remote control) AC power cord Telephone cord One video cable (yellow) One set of audio cables (red and white) Telephone-splitter (T-splitter) IR (infrared) Blaster webeye Coaxial cable S-video cable Additional literature may be included. -
Page 11: Back Panel
Connect a microphone here. Use a microphone that has a 1/8” connector. A suitable microphone is available from Philips Consumer Electronics. To order, see page 44. Refer to the on-screen instructions (see page 8) for more information on microphone use. To send sound with an email, see page 39. -
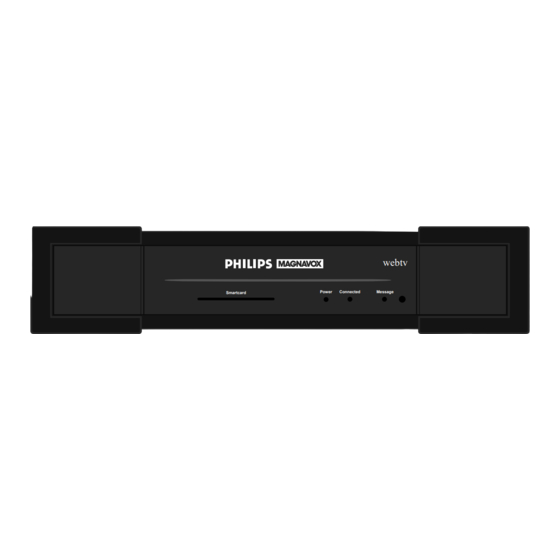
Page 12: Front Panel
Front Panel 1 Smartcard port Allows you to use Smartcard technology when it becomes available. Accessories may be required. Additional information will be available from the WebTV Network when features are available. 2 Power indicator Indicates the Internet Terminal power is on. 3 Connected indicator This indicator flashes when the Internet Terminal is connecting to the WebTV Network. -
Page 13: Remote Control
Remote Control 1 CODE SET button - Allows you to program the remote control to operate your TV. 2 TV MODE button - Press before pressing other buttons to operate the TV. 3 Back (EXIT) button - Press to return to the previous screen or to remove the on-screen keyboard. -
Page 14: Before You Begin
WebTV Network customer support.) Usage Requirements The Philips Magnavox Internet Terminal is to be used solely with the WebTV Network, a subscription-based Internet service operated by WebTV Networks, Inc. (WNI). Access to and use of the WebTV Network is subject to your agreement to WNI’s terms of service. -
Page 15: Step 1 Connecting The Internet Terminal To The Tv
Step 1 Connecting the Internet Terminal to the TV OPTION A If your TV has an S-Video jack, use this option for the best picture quality. If you want to watch TV with the Internet Terminal turned off, you also should connect a Coaxial Cable as shown in Option C. -
Page 16: Step 1 Connecting The Internet Terminal To The Tv
Step 1 Connecting the Internet Terminal to the TV (continued) Phone IR Blaster Printer Port OPTION C If your TV does not have S-Video or Audio/Video jacks, use this option. Connect the Coaxial Cable to the Cable Out jack on the back of the Internet Terminal and to the Antenna In jack on your TV. -
Page 17: Step 2 Connecting The Antenna/Cable Tv Signal, A Cable Box (Or Satellite Box), Or A Vcr
Step 2 Connecting the Antenna/Cable TV Signal, a Cable Box (or Satellite Box), or a VCR OPTION A If you do not have a standard coaxial cable type of antenna or a Cable TV signal, use this option. You will need to purchase an adapter (matching transformer) like the one shown above. - Page 18 Step 2 Connecting the Antenna/Cable TV Signal, a Cable Box (or Satellite Box), or a VCR (continued) Phone IR Blaster OPTION C If you have a Cable Box only (no VCR), choose this option. Connect the Cable TV signal to the In jack on your Cable Box. Connect a Coaxial Cable to the Out jack on your Cable Box and to the Cable In jack on the back of the Internet Terminal.
- Page 19 Step 2 Connecting the Antenna/Cable TV Signal, a Cable Box (or Satellite Box), or a VCR (continued) Cable TV Signal OPTION E If you are using a Cable Box and a VCR, choose this option. Connect the Cable TV Signal to the In jack on your Cable Box. Connect a Coaxial Cable to the Out jack on your Cable Box and to the Antenna In jack on your VCR.
-
Page 20: A Cable Box (Or Satellite Box), Or A Vcr
Step 2 Connecting the Antenna/Cable TV Signal, a Cable Box (or Satellite Box), or a VCR (continued) Video Cassette Recorder Phone IR Blaster OPTION F If you have a VCR and want to watch one show while recording another, use this connection. -
Page 21: Step 3 Connecting The Ir Blaster
Step 3 Connecting the IR Blaster Phone The IR Blaster enables your Internet Terminal to program your VCR and to select channels on your Cable Box or Satellite Box. Connect the IR Blaster cable to the IR Blaster jack on the back of the Internet Terminal. -
Page 22: Step 4 Connecting The Telephone Cord
Step 3 Connecting the IR Blaster, continued After you have connected the Internet Terminal and signed up with the WebTV Network, you must set up your IR Blaster to work with your equipment. Simple instructions are available after you sign up with the WebTV Network. -
Page 23: Step 5 Connecting The Webeye
Step 5 Connecting the webeye If you want to place the Internet Terminal in a cabinet, or somewhere out of view, use the webeye. Then, point the remote control at the webeye (not the Internet Terminal) in order to control the Internet Terminal. Connect the webeye cord to the webeye jack on the back of the Internet Terminal. -
Page 24: Connecting A Printer (Optional)
Connecting a Printer (optional) You may connect a printer to the Internet Terminal. This will enable you to print email messages and Internet pages. To see which printers can be con- nected and to learn how to print, select Using WebTV from the Web Home Page, then select Instructions, then select Printing. -
Page 25: Signing Up For The Webtv Network
Signing Up for the WebTV Network Signing up for the WebTV Network is an easy process that asks you to pro- vide some billing information. You may use the on-screen keyboard to enter the information. If you have trouble signing up, please call 1-800-GO-WEBTV (469-3288). -
Page 26: Additional Sign-Up Tips
Additional Sign-up Tips The sign-up pages will reappear each time you turn on your Internet Terminal until you complete the sign-up process. If you make a mistake, press the Back (EXIT) button until the incorrect page appears. Going back deletes the information on the current page. Make the correction, then continue as instructed. -
Page 27: Using The On-Screen Keyboard
Using the On-screen Keyboard Use the on-screen keyboard to type information when an activity requires typing, such as sending an email message. When a text box appears on the screen, a vertical line appears in the box. This line indicates exactly where you may type. -
Page 28: Terms You Need To Know
Terms You Need to Know Utah Areas on a page that can be highlighted are called links, because they link you to another page. Links can be words, pictures, icons, or boxes. The WebTV Network finds each link on a page for you when you press the Arrow buttons on the remote. -
Page 29: Options Panel (Webtv)
Options Panel (WebTV) The WebTV Options Panel allows you to quickly perform common features of the WebTV Network. Each option is described below. To use the WebTV Options Panel, follow these steps. While accessing the Internet, press the OPTIONS button on the remote con- trol. -
Page 30: Remote Control
Setting the Remote Control to Operate a TV You can program the Internet Terminal remote control to operate your TV. It is already programmed to control your Internet Terminal. Your television must be able to receive an infrared (IR) signal from a remote control. There is no guarantee that the remote control will operate your brand of TV. -
Page 31: Remote Control
Optimus Optonica Orion Panasonic Penney 030, 045, 046, 048, 054 057, 059, 066, 074, 078 087, 162, 176, 183, 205 Philco 046, 047, 055, 057, 081, 123 Philips Pilot Pioneer Portland Prism Proscan Proton 044, 046, 057 Pulsar Quasar 078, 082, 192, 277... -
Page 32: Tv Home Page
TV Home Page To get to the TV Home Page, press the VIEW button on the remote control until the TV Home Page appears. The following information appears on the TV Home Page: Title, time, and channel of current TV program - To go to the Program Info page (where you have the option to record the program or to be reminded of the program), use the Arrow buttons to select the program title, then press the GO button. -
Page 33: Tv Listings
TV Listings With TV Listings, you can see what’s coming on in the next hour or during the next seven days. The Search feature quickly lists the shows you’re looking for. Go to the TV Home Page. Select TV Listings. Select a search method under View TV Listings or Search TV Listings. -
Page 34: On-Screen Vcr Controls
On-Screen VCR Controls You may use your Internet Terminal’s remote control to operate your VCR. Do not use your VCR’s remote; the VCR controls will appear on the TV screen. If you can’t use your Internet Terminal remote control to operate your VCR, make sure your IR Blaster is set up properly. -
Page 35: Web Home Page
Web Home Page To get to the Web Home Page, press the VIEW button on the remote control until the Web Home Page appears. The following links appear on the Web Home Page: TV Home - To go to the TV Home Page, use the Arrow buttons to select this link, then press the GO button. -
Page 36: Web Home
Web Home Page (continued) Favorites - To go to your Favorites folders, use the Arrow buttons to select this link, then press the GO button. This is where you store your favorite Internet sites. To learn how to save a site to your Favorites folders, go to the Web Home Page, then select Using WebTV, then select Instructions. -
Page 37: Webpip Tm
WebPIP WebPIP™ (Picture-In-Picture) works on any TV. It displays a TV window on the screen and allows you to watch TV while you browse the Internet. For example, during a ball game you can go to a sports web site and check up-to- the-minute scores, player statistics, and game summaries without missing a single play. -
Page 38: Attaching Images To Email
Attaching Images to Email Email lets you send pictures to your friends and family. To attach an image from your camcorder, VCR, or Digital Camera, follow steps 1-8 below. Before you begin, make sure your video equipment is connected correctly. To connect video equipment to the Internet Terminal, connect the audio and video cables to the Audio/Video Out jacks of your video equipment and to the Audio/Video In jacks on the back of the Internet Terminal, matching like... -
Page 39: Attaching Sound To Email
Attaching Sound to Email Email lets you add your voice or other audio to a message. You may record sound from a microphone or a camcorder. To attach a microphone to the MIC(rophone) jack on the back of the Internet Terminal, see page 11. -
Page 40: Specifications
Specifications Terminals Phone jack Mic(rophone) jack IR (Infrared) Blaster jack Printer Port Audio In/Out (right and left) jacks Video In/Out jacks webeye jack S-Video jack Cable In jack Cable Out jack AC Input jack Dimensions 338.6 mm x 77.5 mm x 207.6 mm Weight 5 lbs. -
Page 41: Warranty
Be sure the letter includes your name, address, telephone number, and product serial number. Enclose your money order in the amount quoted to you by the Philips Service Solutions Group representative. 4. When your product is received, it will be replaced by a new, repaired, renewed, or comparable product which meets Philips’... -
Page 42: Index
accessories ..... . .44 a/ch button ..... . .13 ac input jack . -
Page 44: Accessories
To order a keyboard, contact Philips at the address listed below. The Universal Microphone M62080 is included with some models. It may or may not be included with your model, but it is available from Philips Service Solutions Group. You may use the microphone to attach audio to an email message.