
Related Manuals for Pioneer carrozzeria MEH-P050


Summary of Contents for Pioneer carrozzeria MEH-P050
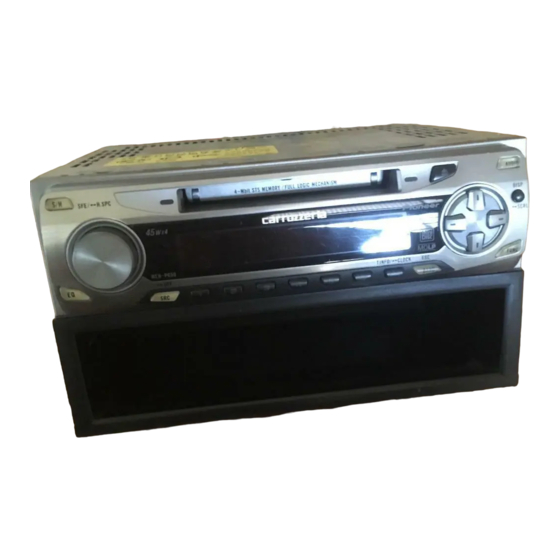
- Page 1 Translated from Japanese to English - www.onlinedoctranslator.com MD/tuner main unit MEH-P050 operating instructions...
-
Page 2: Please Be Sure To Read It
Please be sure to read it For your safety, please be sure to observe About pictograms This instruction manual, installation manual, and markings on the product use various pictograms to ensure that you use the product safely and correctly, and to prevent injury to yourself and other people, as well as damage to property. -
Page 3: Safety Precautions
Please be sure to read it Safety precautions (Please also read the separate "Safety Precautions".) caveat [how to use] Do not operate while driving Complex functions that require you to look at the screen for a long time are Do not operate while driving. careless forward and cause a traffic accident. -
Page 4: Table Of Contents
table of contents Please be sure to read it Listening to MD with built-in MD Basic operation of the built-in MD ....Please be sure to follow these instructions for your safety . . . 2 ● Pictograms 12 How to switch modes ....14 ●... - Page 5 CONTENTS Other features adjust the sound Setting the desired sound space ..42 Decrease the Volume Instantly 58 Display Correcting the equalizer curve ..43 the Clock 58 Directly Operate Frequently Selecting the equalizer curve ..44 How to Used Functions 59 switch modes ....44 . . . 44 ●...
- Page 6 Introduction Name of each part ■ Body Eject 0button audio MD slot AUDIO button sound focus enhancer SFE button display DISPLAY button volume VOLUME function FUNCTION button 1-6 buttons equalizer EQ button 5/∞/2/3button sauce SOURCE button band BAND button traffic information T.INFO button...
- Page 7 Introduction ■ Separately sold remote control "CD-R660" ● You can operate this unit with the optional remote control “CD-R660”. ● For the handling of the remote control, read the instruction manual of the remote control. teeth character Attenuator ATT button (page 58) The attenuator turns ON/OFF each time the button is pressed.
- Page 8 Introduction To prevent battery drain Always start the car engine when using this machine. Also, do not turn the car's ignition switch to ON (or ACC) for a long time with the car's engine off, even when the unit is turned off. It will cause the battery to run out. About the guide display A guide is displayed on the display so that you can operate the unit by looking at the display.
-
Page 9: Use
Introduction Using a 50-disc multi-CD player A 50-disc multi-CD player can be connected to this unit. However, functions specific to 50- disc multi-CD players cannot be operated with this unit. Only the functions described in this manual can be operated with this unit. Also, it does not switch to title list mode. teeth character About playback of MD recorded for a long time... -
Page 10: Basic Operation Of This Unit
Basic operation of this unit volume VOLUME sauce SOURCE button Basic operation of this machine Power ON/Source selection/Volume control/Power OFF You can use this machine with the operation only here. Press the SOURCE button to Turn on the power The power of this unit is turned on. ●... - Page 11 Basic operation of this unit Four Press the SOURCE button for 1 second or more to power off The power will be turned off. When connecting a TV, single-type CD, or multi-MD For details on how to operate, refer to each instruction manual. Book ·...
-
Page 12: Listening To Md With Built-In Md
Listening to MD with built-in MD Eject MD slot 0button volume VOLUME 5/∞/2/3button Basic operation of built-in MD MD set/song selection/fast forward/fast reverse/MD eject You can listen to MD with only this operation. With the label side of the MD facing up, Insert in the direction of the arrow. - Page 13 Listening to MD with built-in MD 2or3Press the button to select the song you want to hear (or fast forward/rewind) Elapsed playback time 3: To select the next track (or fast-forward) song number 2: To select the previous track (or rewind) Differentiating between song selection and fast-forward/fast-rewind select the song you want to hear less than 0.5 seconds...
-
Page 14: How To Switch Modes
Listening to MD with built-in MD display DISPLAY button function FUNCTION button band BAND button 5/∞/2/3button How to switch modes To use convenient functions other than normal operations, switch the mode. ■ Switching function modes Press the FUNCTION button to Switching function modes Each time the button is pressed, it switches as follows. - Page 15 Listening to MD with built-in MD Listening to the same song or group repeatedly Playback range switching You can listen to the song you are listening to repeatedly. For group discs, you can select the range for repeated playback, such as repeating the current track or one group.
- Page 16 Listening to MD with built-in MD Listen to songs in a different order than usual random play You can play songs in random order. This is useful when you want to enjoy music in a different order than usual. Switch to playback range switching mode, Selecting the playback range (page 15) Random playback is performed within the selected playback range.
- Page 17 Listening to MD with built-in MD Search for the song or group you want to hear scan playback Plays only the beginning of the song for about 10 seconds each. For group discs, only the beginnings of all songs in the current group are played for about 10 seconds each. It is also possible to play only the beginning of the first track of all groups for about 10 seconds each.
-
Page 18: Group 17 Pausing Md Playback
Listening to MD with built-in MD Four When the song (group) you want to hear is played, ∞Press the button to turn off scan playback. ● If function mode has been canceled, perform step 1 to switch to scan mode again. and then turn scan playback off. -
Page 19: Displaying The Title Of The Md
Listening to MD with built-in MD Display the MD title. Title display/Title scroll In addition to displaying the elapsed playback time, disc names, group names, and track names can also be displayed. Disc names, group names, and song titles can be displayed up to 10 characters at a time. You can also display hidden characters in order. -
Page 20: Listen To The Radio
listen to the radio 2/3button volume VOLUME band sauce BAND button SOURCE button Basic radio operation Band switching/channel selection/volume control You can listen to the radio with the operation only here. Press the SOURCE button to make the source radio Receive radio. - Page 21 listen to the radio 2or3Press the button to select a station 3: When selecting a high-frequency broadcasting station frequency display 2: When selecting a low-frequency broadcasting station Proper use of selection method Manual tuning (1 step at a time) less than 0.5 seconds Automatic tuning 0.5 seconds or more ●...
-
Page 22: Registering Stations Automatically
listen to the radio 5/∞/2/3button function FUNCTION button band BAND button 1-6 buttons Registering multiple stations automatically You can search for stations with good reception and automatically register them with buttons 1 to 6. Press the BAND button to Select a band to register (page 20) Press the FUNCTION button to Enter BSM mode FivePress the button to start BSM... -
Page 23: Registering Stations One By One
listen to the radio Registering stations one by one preset memory You can manually register your favorite stations one by one to buttons 1 to 6. Press the BAND button to Select a band to register (page 20) 2or3press the button Select the station you want to register (page 21) Press one of the buttons from 1 to 6 for 2 seconds or more, register... -
Page 24: When Calling A Registered Station Directly
listen to the radio Calling up a registered station preset tuning Registered stations can be called up easily. ■ When calling a registered station directly Press the BAND button to Selecting a registered band (page 20) Press one of the buttons 1-6 to Calling registered stations directly Receiving registration number ■... - Page 25 You can change the name of the station to "FM M-CD" and display it by tuning to the target frequency. · If you are using a Pioneer TV with an FM modulator, set the modulator frequency to If you match, you can change the station name to "FM TVsound" and display it.
-
Page 26: Listening To Cds With Multi Cd
Listening to CDs with Multi CD volume VOLUME sauce 5/∞/2/3button SOURCE button Basic operation of multi-CD Disc selection/song selection/fast forward/fast reverse You can listen to CDs on a multi-CD player with just this operation. Press the SOURCE button to Make the source a multi-CD ●... - Page 27 Listening to CDs with Multi CD 2or3Press the button to select the song you want to hear (or fast forward/rewind) Elapsed playback time 3: To select the next track (or fast-forward) song number 2: To select the previous track (or rewind) Differentiating between song selection and fast-forward/fast-rewind select the song you want to hear less than 0.5 seconds...
-
Page 28: How To Switch Modes
Listening to CDs with Multi CD display DISPLAY button function FUNCTION button band BAND button 5/∞/2/3button 1-3 buttons How to switch modes To use convenient functions other than normal operations, switch the mode. ■ Switching function modes Press the FUNCTION button to Switching function modes Each time the button is pressed, it switches as follows. -
Page 29: Listening To The Same Song Or Cd Repeatedly
Listening to CDs with Multi CD memo · Press the BAND button to cancel detailed setting mode. ·"CD TEXT" can be played on a multi-CD that supports "CD TEXT" (such as "CDX-P670"). It does not switch to title input mode during playback. (Titles pre-recorded in "CD TEXT" cannot be changed.) Listening to the same song or CD repeatedly Playback range switching... - Page 30 Listening to CDs with Multi CD Listen to songs in a different order than usual random play You can play songs in random order. This is convenient when you want to enjoy music in a different order than usual. Switch to playback range switching mode, Selecting the playback range (page 29) Random playback is performed within the selected playback range.
- Page 31 Listening to CDs with Multi CD ■ When searching for a song you want to hear (track scan playback) 2or3Press the button to switch to disc repeat All tracks on the CD being played are played for about 10 seconds at a time. increase.
- Page 32 Listening to CDs with Multi CD Specify only the songs you want to hear. ITS designation In order to play only the specified songs (page 33), specify the songs you want to listen to on the Multi CD in advance. About ITS Acronym for “Instant Track Selection”.
- Page 33 Listening to CDs with Multi CD Play only the specified song ITS playback You can play only the songs specified by "ITS specification". Switch to playback range switching mode, Selecting the playback range (page 29) ITS playback is performed within the selected playback range. Press the FUNCTION button to Select ITS playback mode FivePress the button to turn on ITS playback...
-
Page 34: Unlocking For Each Cd
Listening to CDs with Multi CD Press the FUNCTION button for 2 seconds or more, then Press the FUNCTION button to Select ITS designation mode Four ∞press the button to release The song that was playing is deselected and then selected. The song that is being played is played. - Page 35 Listening to CDs with Multi CD Enter CD title Enter title To display the CD title (page 37), enter the title in advance. About title input · Title input is a function to input the title of the CD and display it on the display. By entering the CD title, you can search for the desired CD in the title list (page 39).
- Page 36 Listening to CDs with Multi CD ■ Select characters to enter Fiveor∞Press the button to select the character you want to enter The selected character flashes. Five: to select the next character ∞: to select the previous character button to push selectable characters lowercase alphabet 1 button...
- Page 37 Listening to CDs with Multi CD Show CD title Disc title display You can display the CD title entered in Title Input (page 35). Press the DISPLAY button to switch display Each time the button is pressed, it switches as follows. increase.
-
Page 38: Displaying The Singer Name
Listening to CDs with Multi CD Display the title and singer name of "CD TEXT" Title display/Title scroll When playing back "CD TEXT" on a multi-CD that supports "CD TEXT" ("CDX-P670", etc.), the disc name, artist name, etc. can be displayed. Up to 10 characters can be displayed at once. -
Page 39: Searching For A Cd You Want To Listen To
Listening to CDs with Multi CD Find the CD you want to listen to by looking at the title title list You can select the CD you want to listen to from the CD titles. Press the FUNCTION button to Select title list mode pose 2or3press the button... -
Page 40: Pausing Cd Playback
Listening to CDs with Multi CD Pause CD playback Pause CD playback can be paused. Press the FUNCTION button to Choose a pose mode FivePress the button to turn on the pause CD playback pauses. ∞button to turn it off. Press the BAND button to Cancel function mode Displayed during pause. -
Page 41: Adjusting The Sound Quality Of A Cd
Listening to CDs with Multi CD Adjusting the sound quality of CDs COMP/DBE There are two functions, COMP and DBE, to adjust the sound quality of the CD. COMP is effective when he's listening to music with a large volume difference, such as classical music, and DBE is effective when he's listening to songs that lack bass. -
Page 42: Adjust The Sound
adjust the sound sound focus enhancer audio SFE button AUDIO button band equalizer sauce BAND button EQ button 5/∞/2/3button SOURCE button Set to your preferred sound space. SFEs The sound image of vocals, musical instruments, etc. can be clarified, and a natural and comfortable sound space can be produced easily. -
Page 43: Correcting The Equalizer Curve
adjust the sound Press the button to switch the riding position 3: When moving to the right L (left) , C (middle) , R (right) 2: When moving to the left You can choose. memo · SFE stands for "Sound Focus Enhancer". · For both FRT1 and FRT2, “Hi” is more effective than “Lo”. -
Page 44: Switch Modes
adjust the sound Choosing an equalizer curve You can select your favorite equalizer curve from the preset equalizer curves. About Custom ·In “Custom”, an equalizer curve adjusted to your liking is registered for each source. will be recorded. (The built-in MD, multi-CD, and external have the same settings.) If you adjust the equalizer curve, the adjusted curve will be registered in “Custom”. - Page 45 adjust the sound Volume balance adjustment mode (page 46) → Equalizer adjustment mode (page 47) → Bass/Treble level adjustment mode (page 50) → Loudness mode (page 52) → subwoofer mode (page 53) → Subwoofer adjustment mode (page 53) → High pass filter mode (page 56) → SLA mode (page 57) →...
-
Page 46: Switching The Advanced Audio Setting Mode
adjust the sound ■ Switching the advanced audio setting mode Press the AUDIO button for 2 seconds or more, Enter audio advanced settings mode Press the AUDIO button to Switching the advanced audio setting mode Each time the button is pressed, it switches as follows. increase. -
Page 47: Adjusting The Curve
adjust the sound 2or3Press the button to adjust the left/right volume balance 3: When strengthening the right The left/right balance can be adjusted in the 2: When strengthening the left range from L9 to R9. Four Press the BAND button to Exit audio adjustment mode Adjust the equalizer curve to your liking By adjusting the equalizer curve prepared in advance, you can create the desired sound... -
Page 48: Fine Adjustment
adjust the sound Fine adjustment of the equalizer curve The equalizer curve has three bands, and you can adjust the center frequency and Q factor for each band. Press the EQ button to Select the equalizer curve you want to adjust (page 44) Press the AUDIO button for 2 seconds or more, Enter audio advanced settings mode... - Page 49 adjust the sound Four Press the BAND button to open the advanced audio settings. cancel constant mode memo · By adjusting the equalizer curve, It will be registered in “Custom”. · When receiving traffic information (page 60), operate the advanced audio setting mode. I can not do it.
-
Page 50: Adjusting The Bass And Treble
adjust the sound Adjust bass and treble bass/treble You can adjust the cutoff frequency and level of bass and treble. please note · If the Harmonic Spice mode (page 43) is selected, the Harmonic Spice Bass and treble can be adjusted only when is ON and the “Custom” curve is selected. ·... -
Page 51: Selection Of Treble Frequency To Adjust
adjust the sound ■ Selection of Bass Frequency to Adjust Press the AUDIO button for 2 seconds or more, then Press the AUDIO button to Select bass frequency selection mode 2or3Press button to select frequency 3: When choosing a high frequency The frequency can be selected from 40, 2: When choosing a low frequency 63, 100 and 160 (Hz). -
Page 52: Adding Sharpness
adjust the sound Adding sharpness to the sound at low volumes loudness You can correct the lack of low and high frequencies when listening at a low volume, and make the sound sharper. Press the AUDIO button to Choose a loudness mode Fivepress the button turn loudness on ∞button to turn it off. - Page 53 adjust the sound use a subwoofer Subwoofer This unit allows you to adjust the subwoofer connected to the RCA output terminals. (This function is ON by default.) About phase switching ·Some sound output from the subwoofer may not be output from the front/rear speakers. It contains the same frequency range as the sound you hear.
- Page 54 adjust the sound Five Adjusting the cutoff frequency and level ■ Choose a frequency 2or3Press button to select frequency 3: When choosing a high frequency From 50Hz, 80Hz, 125Hz 2: When choosing a low frequency You can choose. ■ Adjust the level Fiveor∞Press the button to adjust the level It can be adjusted in the range of -6 to +6.
-
Page 55: Adjusting
adjust the sound Adjusting the subwoofer with an external amplifier, etc. non-fading The original sound can be output from the RCA output without passing through the low- pass filter (subwoofer) of this unit. You can also adjust its output level. Press the AUDIO button to Select non-fading mode Fivepress the button... - Page 56 adjust the sound Prevent low-pitched sounds from being output from the speakers High pass filter (HPF) When the high-pass filter is turned on, sounds with frequencies lower than the selected frequency will be output from each speaker. About High Pass Filter (HPF) ·...
-
Page 57: Aligning The Differences
adjust the sound Equalize the volume difference of each source SLAs You can adjust the volume of each source based on the FM volume so that there is no difference in volume when switching sources. Press the SOURCE button to receive FM, Check the FM volume (page 20) Press the SOURCE button to Switch to the source you want to adjust... -
Page 58: Other Features
Other features function FUNCTION button sauce 5/∞/2/3button SOURCE button equalizer EQ button band traffic information BAND button T.INFO button Decrease volume instantly Attenuator You can instantly reduce the volume when it is difficult to hear conversations in the car. Press the ATT button on the remote control (page 7) It turns ON/OFF each time the button is pressed. -
Page 59: Internal Md, Multi Cd
Other features Operate frequently used functions directly direct function By pressing the DF button on the remote control, you can directly operate frequently used functions for each source. ■ Internal MD, Multi CD Press the DF button on the remote control, Turn on Pause (page 7) Playback pauses. -
Page 60: Receiving Traffic Information
Other features Receive traffic information traffic information Easily receive AM 1,620 kHz or 1,629 kHz traffic information. Press the T.INFO button to Receive traffic information Receive traffic information at AM 1,620 kHz. 2or3press the button switch the frequency 3: When set to 1,629 kHz Receiving frequency 2: When set to 1,620 kHz Press the T.INFO button to... - Page 61 Other features Press the FUNCTION button Each time the button is pressed, it switches as follows. increase. clock adjustment mode → AUX (external device) mode (page 62) → RCA external output mode (page 64) → Return to clock adjustment mode memo ·...
-
Page 62: To The Sound Of An External Device
Other features Listening to audio from an external device AUX (external device) settings You can listen to the audio from an external device such as a portable device or VTR connected to this unit. About connection with external devices · Using the optional RCA/IP-BUS interconnector “CD-RB20” or “CD-RB10” You can connect a DAT or VTR with RCA output to this unit as an external device. -
Page 63: Entering The Name Of The External Device
Other features Enter the name of the external device You can enter the name of the connected external device. Press the SOURCE button to Switching the source to AUX (page 10) Press the FUNCTION button for 2 seconds or more to Switch to external device name input mode When "DAT"... - Page 64 Other features Selecting the signal output from the RCA external output When using a subwoofer by connecting an external amplifier to the RCA external output of this unit, you can select whether to adjust the subwoofer with this unit or output the original sound to adjust the subwoofer with an external amplifier.
-
Page 65: About The Mute Function
About the mute function · Combining this unit with a Pioneer navigation system with a mute function, The mute function works only when a mute signal is received from that product. The volume is “0” when the mute function is working. -
Page 66: Proper Use Of Md
appendix Correct use of MD ■ Usable MDs ■ Labels ● MDs with the following mark ● Be sure to specify the label attached to the MD. Nidisc). affix it to the position of specified Paste it on the outside position, or stack two If you paste it, the MD will come out. -
Page 67: Notes On Storage
appendix ■ Notes on storage ■ Condensation in cold weather ● MD should not be exposed to direct sunlight. ● Immediately after turning on the heater when it is cold When you start playing the MD at this time, Do not store in places subject to high temperatures. please don't Condensation on the optical lens or MD in the not be able to play normally... -
Page 68: Is It A Malfunction? If You Think
appendix Is it a malfunction? If you think even if i check Is it a malfunction? and When you can't fix If you think Before requesting repair, "Warranty and after-sales service on page 71. Check the contents of the table below please. -
Page 69: Radio
appendix ■ Radio cause symptoms treatment Please tune the frequency correctly. While listening to the radio, I hear a noise that says, “Jeeeeeeee, the (21 pages) frequency of the station is correct. do not have. many. Please try to select another station. The signal of the broadcasting station is weak. -
Page 70: When It Appears
appendix If you see a message like this message (error number) when the message is displayed treatment "No Data" A disc name has not been entered. Switch to a display other than the disc name display. Please change it. (page 19) disc name while playing a new MD. -
Page 71: Warranty And After-Sales Service
Please contact the store where you purchased the product or the nearest Pioneer service station. For the location and telephone number, refer to the "Information on Customer Service and Repair Desks" supplied with the machine. -
Page 72: Main Specifications
appendix Main specifications ■ ■ MD player section Amplifier audio section :45 W x 4 :minidisc digital Maximum output format audio system :20W x 4 Rated output disk used :mini disc (50-15,000Hz, 5% THD) signal load format:Sampling frequency: 44.1 kHz Impedance:4Ω... - Page 73 appendix high pass filter:frequency : 50Hz/80Hz/125Hz Slope: -12dB/oct. Subwoofer : 50/80/125Hz output:frequency Slope: -18 dB/oct. gain : ±12dB : NORMAL/REVERSE phase ■ Common part :DC 14.4V Power supply used (10.8 to 15.1V available) : Negative ground method Ground method :10.0A current consumption External dimensions (Mounting dimensions):178(W)×50(H)×162(D)
- Page 74 For repair and handling (installation, combination, etc.) of Pioneer products, please contact the store where you purchased the product. When requesting repair, please refer to the instruction manual "Is this a malfunction?" Troubleshooting” and check if there is a malfunction. If it still doesn't work,1type name,2date of purchase,3Please let us know the specific failure symptoms.