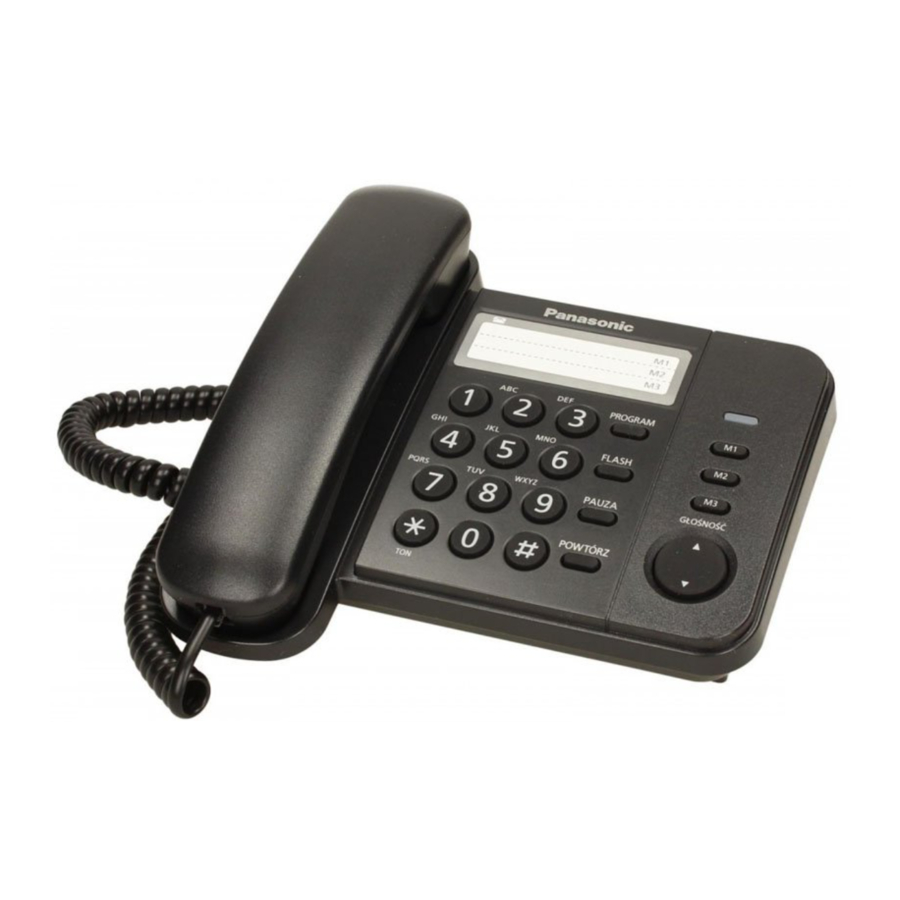
Panasonic KX-TS520FX - Integrated Telephone System Operating Instructions
- Operating instructions (2 pages)
Advertisement
Getting Started
Controls

- Memory sticker
- Ringer indicator
- Auto dial {M1}, {M2}, {M3}
- VOLUME
![]() ,
, ![]()
- {PAUSE}
![]() {TONE}
{TONE}- DIALING MODE selector
- RINGER selector
- {REDIAL}
- {FLASH}
- {PROGRAM}
 ,
, 
 {TONE}
Accessory information
- Handset - one
- Handset cord - one
- Telephone line cord - one ;
Connections

- Connect the handset cord (
![]() ) to the handset and the unit. Connect the telephone line cord until it clicks into the unit and telephone line jack (
) to the handset and the unit. Connect the telephone line cord until it clicks into the unit and telephone line jack (![]() ). After line connection, lift the handset to check for a dial tone.
). After line connection, lift the handset to check for a dial tone. - Set the DIALING MODE selector to TONE.
 ) to the handset and the unit. Connect the telephone line cord until it clicks into the unit and telephone line jack (
 ). After line connection, lift the handset to check for a dial tone.
- If you cannot dial, set to PULSE.
![]()

- Set the RINGER selector to HIGH, LOW or OFF.
(Example: "HIGH" is selected.)
- When set to OFF, the unit will not ring but the ringer indicator will still flashing.
![]()

Connecting a communication device
If you connect a communication device (computer, modem, fax, answering machine, etc.) to the telephone line, you can connect it through this unit using the DATA jack. After connecting the handset and telephone line cord, connect the communication device telephone line cord to the DATA jack.
- Make sure the communication device is not in use before using this unit (making calls, storing phone numbers in memory etc.) or the communication device may not operate properly.
Making/Answering Calls
Making calls
- Lift the handset and dial the phone number.
- When you finish talking, place the handset on the cradle.
To redial the last number dialed
Lift the handset - Press {REDIAL}.
- {REDIAL} will dial the last number you called manually, not a One-Touch Dialer number (3-B).
To adjust the receiver volume (6 levels)
Press  or
or  repeatedly while talking.
- After hanging up, the volume level will be saved.
Answering calls
When a call is being received, the unit rings, the ringer indicator flashes quickly. You can j a telephone number is dialed in PULSE mode, answer the call by simply lifting the handset
- The ringer indicator will flash when
- a telephone number is dialed in PULSE mode, or
- someone picks up or hangs up another phone connected to the same phone line.
This is normal.
One-Touch Dialer
Storing phone numbers in memory
You can store up to 3 phone numbers in the one-touch auto dial buttons {M1}, {M2} or {M3}. Do not press any one-touch auto dial buttons before storing to prevent misoperation.
- Lift the handset →Press {PROGRAM}.
- Press the one-touch auto dial button {M1}, {M2} or {M3}.
- Enter a phone number up to 21 digits.
- Press {PROGRAM}.
- When finished, hang up.
- If a pause is required for dialing, press {PAUSE} in step 3. A pause stored in a phone number counts as one digit (4-C).
If you misprogram
Hang up - Restart from step 1.
To erase a stored number
Lift the handset - Press {PROGRAM} - the one-touch auto dial button {M1}, {M2} or {M3} of the phone number to be erased - {PAUSE} - {PROGRAM} - Hang up.
Memory sticker
Use the memory sticker as a name or phone number index for the stored numbers.

Dialing a stored number
- Lift the handset.
- Press the one-touch auto dial button {M1}, {M2} or {M3}.
- {REDIAL} does not work for One-Touch Dialer.
To dial the number again, hang up and repeat steps 1 and 2. - If the telephone line cord is disconnected more than 3 days, the stored numbers may be erased. Store phone numbers again, if necessary.
Special Features
For call waiting service users
To use call waiting, you must first subscribe to the call waiting service of your service provider/ telephone company. This feature allows you to receive calls while you are already talking on the phone. If you receive a call while on the phone, you will hear a call waiting tone.
- Press {FLASH} to answer the 2nd call.
- To switch between calls, press {FLASH}.
Note:
- Please contact your service provider/telephone company for details and availability of this service in your area.
Temporary tone dialing (for rotary/pulse service users)
You can temporarily switch the dialing mode to tone when you need to access touch-tone services (for example, answering services, telephone banking services, etc.). Press  {TONE} before entering access numbers which require tone dialing.
Pause (for PBX/long distance service users)
A pause is sometimes required when making calls using a PBX or long distance service.
Example: If you need to dial the line access number "9" when making outside calls with a PBX:
- Lift the handset to start calling.
- {9} - {PAUSE}
- Dial the phone number.
Note:
- A 2.1 second pause is inserted each time {PAUSE} is pressed. Repeat as needed to create longer pauses.
Things You Should Know
Wall mounting
- Press the tabs in the direction of the arrows (
![]() ), then remove the wall mounting adaptor (
), then remove the wall mounting adaptor (![]() ).
).

- Tuck the telephone line cord inside the wall mounting adaptor, and push it in the direction of the arrow.
 ), then remove the wall mounting adaptor (
 ).
).
- The word "UP WALL" should face upward
.

- Drive screws (not included) into the wall using the wall template below. Connect the telephone line cord. Mount the unit and then slide it down.


To temporarily set the handset down during a conversation, place it as shown here.

Troubleshooting
| Problem | Cause/solution |
| The unit does not work. |
|
| The call cannot be connected even if you dialed correctly. |
|
| The unit does not ring. |
|
| You cannot store a phone number in memory. |
|
| The other party suddenly cannot hear your voice during a conversation. |
|
| You cannot redial by pressing {REDIAL}. |
|
| Liquid or other form of moisture has entered the unit. |
|

For your safety
To prevent severe injury and lost of life/ property, read this section carefully before using the product to ensure proper and safe operation of your product.

- To prevent the risk of fire or electrical shock, do not expose the product to rain or any type of moisture.
- Do not disassemble the product.
- Do not spill liquids (detergents, cleansers, etc.) onto the telephone line cord plug, or allow it to become wet at all. This may cause a fire. If the telephone line cord plug becomes wet, immediately pull it from the telephone wall jack, and do not use.

- Never install telephone wiring during an electrical storm.
- Never install telephone line jacks in wet locations unless the jack is specifically designed for wet locations.
- Never touch uninsulated telephone wires or terminals unless the telephone line has been disconnected at the network interface.
- Use caution when installing or modifying telephone lines.
Important safety instructions
When using your product, basic safety precautions should always be followed to reduce the risk of fire, electric shock and injury to persons, including the following:
- Do not use this product near water, for example, near bathtub, washbowl, kitchen sink or laundry tub, in a wet basement or near a swimming pool.
- Avoid using a telephone (other than a cordless type) during an electrical storm. There may be a remote risk of electric shock from lightning.
- Do not use the telephone to report a gas leak in the vicinity of the leak.
SAVE THESE INSTRUCTIONS
Environment
- The product should be kept free from excessive smoke, dust, high temperature, and vibration.
- The product should not be exposed to direct sunlight.
- Do not place heavy objects on top of the product.
- The product should be kept away from heat sources such as radiators, cookers, etc. It should not be placed in rooms where the temperature is less than 5°C or greater than 40°C. Damp basement should also be avoided.
Routine care
- Wipe the outer surface of the product with a soft moist cloth.
- Do not use benzine, thinner, or any abrasive powder.
Notice for product disposal, transfer, or return
- This product can store your private/confidential information. To protect your privacy/confidentiality, we recommend that you erase the information such as one-touch dialer from the memory before you dispose of, transfer, or return the product.
Specifications
| Power Source | From telephone line |
| Dimensions (H x W x D) | Approx. 95 mm х 190 mm х 196 mm |
| Mass (Weight) | Approx. 518 g |
| Operating conditions | 5°C–40°C, 20%–80% relative air humidity (dry) |
Note:
- Design and specifications are subject to change without notice.
- The illustrations in these instructions may vary slightly from the actual product.
Note:
- This equipment is designed for use on the Czech Republic and Slovakia analogue telephone network.
- In the event of problems, you should contact your equipment supplier in the first instance.
- For use on other countries, please contact your equipment supplier.
Declaration of Conformity:
For information of Compliance with EU
relevant Regulatory Directives,
Contact to Authorised Representative:
Panasonic Testing Centre
Panasonic Marketing Europe GmbH
Winsbergring 15, 22525 Hamburg, Germany
http://www.ptc.panasonic.eu/doc
© Panasonic System Networks Malaysia
Sdn. Bhd. 2009
Panasonic Corporation
1006, Oaza Kadoma, Kadoma-shi,
Osaka 571-8501, Japan
http://www.panasonic.com

Documents / Resources
References
Download manual
Here you can download full pdf version of manual, it may contain additional safety instructions, warranty information, FCC rules, etc.
Download Panasonic KX-TS520FX - Integrated Telephone System Operating Instructions
Advertisement
Thank you! Your question has been received!


Need Assistance?
Do you have a question about the KX-TS520FX that isn't answered in the manual? Leave your question here.