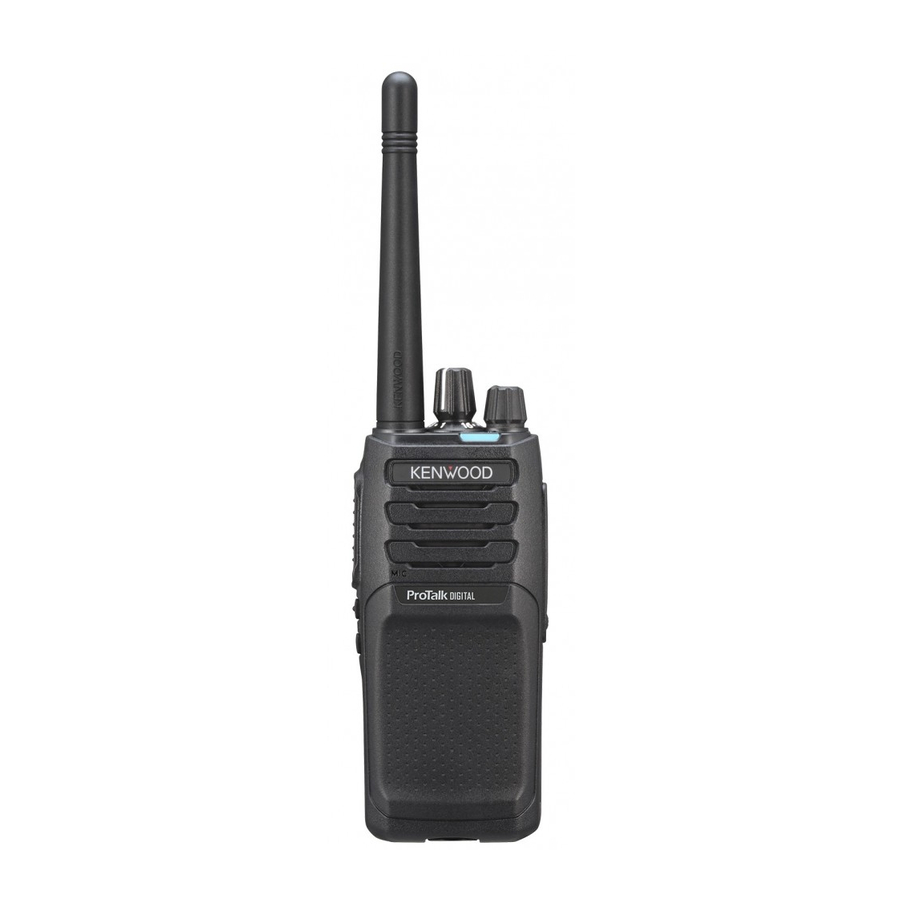
Kenwood NX-P1200NV/AV, NX-P1202AV, NX-P1300NU/AU, NX-P1302AU User Guide
- User manual (51 pages) ,
- User manual (51 pages)
Advertisement

SUPPLIED ACCESSORIES
Carefully unpack the transceiver. We recommend that you identify the items listed in the following list before discarding the packing material. If any items are missing or have been damaged during shipment, file a claim with the carrier immediately.
| Item | Quantity |
| Antenna | 1 |
| Battery charger/ AC adapter (KSC-35S) | 1 |
| Li-ion battery pack (KNB-45L) | 1 |
| Speaker/ microphone jack cap | 1 |
| Speaker/ microphone locking bracket | 1 |
| Belt clip (KBH-10) | 1 |
| Screw (M3 x 8 mm) | 2 |
| Warranty card | 1 |
| User guide | 1 |
Note:
- For the speaker/ microphone jack, waterproof performance is guaranteed by securing the supplied cap. Waterproof performance will not be guaranteed by connecting an optional speaker/ microphone, etc.
INSTALLING/ REMOVING THE BATTERY PACK
- Align the battery pack with the back of the transceiver, then press the battery pack and transceiver firmly together until the release latch on the base of the transceiver locks.
![Kenwood - NX-P1200NV - INSTALLING THE BATTERY PACK INSTALLING THE BATTERY PACK]()
- To remove the battery pack, lift the safety catch on the base of the transceiver, then press the release latch underneath the safety catch.
![Kenwood - NX-P1200NV - REMOVING THE BATTERY PACK - Step 1 REMOVING THE BATTERY PACK - Step 1]()
- While pressing the release latch, pull the battery pack away from the transceiver.
![Kenwood - NX-P1200NV - REMOVING THE BATTERY PACK - Step 2 REMOVING THE BATTERY PACK - Step 2]()
CHARGING THE BATTERY PACK
ATTENTION:
- Always switch OFF a transceiver equipped with a battery pack before inserting the transceiver into the charger.
- Plug the AC adapter cable into the jack located on the rear of the charger.
- Plug the AC adapter into an AC outlet.
- Slide a battery pack or a transceiver equipped with a battery pack into the charging slot of the charger.
- Make sure the metal contacts of the battery pack mate securely with the charger terminals.
- The indicator lights red and charging begins.
![Kenwood - NX-P1200NV - The charging indicator location The charging indicator location]()
- When charging is completed, the indicator flashing green. Remove the battery pack or the transceiver from the charging slot of the charger.
- It takes approximately 3 hours to charge the battery pack.
- When the charger will not be used for a long time, unplug the AC adapter from the AC outlet.
Note:
- When the indicator blinks red, the battery pack is either defective or the battery pack contacts are not properly mated with those of the charger.
- When the indicator flashes green and orange, the battery pack has not satisfied the charging start temperature. Remove the battery pack from the charger and wait until it reaches a normal temperature before charging it again.
- The ambient temperature should be between 5°C and 40°C (41°F and 104°F) while charging is in progress. Charging outside this range may not fully charge the battery.
- The battery pack life is over when its operating time decreases even though it is fully and correctly charged. Replace the battery pack.
BASIC OPERATION

SWITCHING POWER ON/OFF
Turn the Power switch/ Volume control clockwise to switch the transceiver ON.
Turn the Power switch/ Volume control counterclockwise fully to switch the transceiver OFF.
ADJUSTING THE VOLUME
Rotate the Power switch/ Volume control to adjust the volume.
Clockwise increases the volume and counterclockwise decreases it.
SELECTING A ZONE
Press and hold the Side 1 button (Zone Up) or Side 2 button (Zone Down) for 1 second to change the Zone (1 ~ 4).
SELECTING A CHANNEL
Rotate the Selector to select your desired channel.
TRANSMITTING
- Select the desired channel.
- Press the PTT switch and speak to the microphone. Release the PTT switch to receive.
- For best sound quality, hold the transceiver approximately 1.5 inches (3 ~ 4 cm) from your mouth.
RECEIVING
Select the desired channel. If signaling is configured on the selected channel, you will hear a call only if the received signal matches your transceiver settings.
DEFAULT CHANNEL SETTINGS
These transceivers allows you to reprogram each of the channels with different frequencies and QT/DQT (Analog)/ RAN (NXDN Digital) settings. The table below lists the default channel settings.
Note:
- The default setting of the zone differs depending on each model. For compatible KENWOOD models of each zone, refer to the detailed instruction manual.

NX-P1200NV (NXDN/ Analog Transceiver)

NX-P1200AV (Analog Transceiver)

NX-P1202AV (Analog Transceiver)
 NX-P1300NU (NXDN/ Analog Transceiver)

NX-P1300AU (Analog Transceiver)

NX-P1302AU (Analog Transceiver)

Documents / ResourcesDownload manual
Here you can download full pdf version of manual, it may contain additional safety instructions, warranty information, FCC rules, etc.
Download Kenwood NX-P1200NV/AV, NX-P1202AV, NX-P1300NU/AU, NX-P1302AU User Guide
Advertisement
Thank you! Your question has been received!


Need Assistance?
Do you have a question about the NX-P1200NV that isn't answered in the manual? Leave your question here.