AEG 6000 Series User Manual
Hide thumbs
Also See for 6000 Series:
- User manual (136 pages) ,
- User manual (24 pages) ,
- User manual (24 pages)
Table of Contents
Advertisement
Quick Links
Advertisement
Table of Contents

Related Manuals for AEG 6000 Series


Summary of Contents for AEG 6000 Series
- Page 1 HGB75400SM User Manual USER MANUAL...
-
Page 2: Table Of Contents
10. ENERGY EFFICIENCY..................... 19 FOR PERFECT RESULTS Thank you for choosing this AEG product. We have created it to give you impeccable performance for many years, with innovative technologies that help make life simpler – features you might not find on ordinary appliances. Please spend a few minutes reading to get the very best from it. - Page 3 ENGLISH usage. Always keep the instructions in a safe and accessible location for future reference. 1.1 Children and vulnerable people safety This appliance can be used by children aged from 8 • years and above and persons with reduced physical, sensory or mental capabilities or lack of experience and knowledge if they have been given supervision or instruction concerning the use of the appliance in a...
- Page 4 CAUTION: The appliance must not be supplied • through an external switching device, such as a timer, or connected to a circuit that is regularly switched on and off by a utility. CAUTION: The cooking process has to be supervised.
-
Page 5: Safety Instructions
ENGLISH 2. SAFETY INSTRUCTIONS 2.2 Electrical Connection This appliance is suitable for the following markets: GB IE WARNING! Risk of fire and electric 2.1 Installation shock. WARNING! • All electrical connections should be Only a qualified person must made by a qualified electrician. install this appliance. - Page 6 • Do not pull the mains cable to • Do not operate the appliance with disconnect the appliance. Always pull wet hands or when it has contact with the mains plug. water. • Use only correct isolation devices: line •...
-
Page 7: Installation
ENGLISH • The use of a gas cooking appliance • Deactivate the appliance and let it results in the production of heat and cool down before you clean it. moisture. Provide good ventilation in • Disconnect the appliance from the the room where the appliance is electrical supply before maintenance. - Page 8 B.S. 5440, Par. 2 and B.S. 6891 Current The manufacturer will not accept liability, Editions. should the above instructions or any of the other safety instructions incorporated The hob should not be installed in a bed in this instruction booklet be ignored.
- Page 9 ENGLISH CAUTION! Make sure that the gas supply pressure of the appliance obeys the recommended values. Rigid connection: Carry out connection by using metal rigid pipes (copper with mechanical end). 3.4 Injectors replacement 1. Remove the pan supports. 2. Remove the caps and crowns of the burner.
- Page 10 National Inspection Council for Electrical Installation Contracting [NICEIC]). The manufacturer refuses to be held responsible, if these safety measures are not abided by. Supply connections This hob has to be connected to 220-240 V (~ 50-60 Hz ) electricity supply.
- Page 11 ENGLISH The wires in the cord are coloured as symbol , or coloured green and follows: yellow. 2. Connect the blue (neutral) wire to the Green and yellow - Earth terminal which is marked with the letter 'N' or coloured blue. Blue - Neutral 3.
- Page 12 400 mm 50 mm A. Supplied seal If a furniture unit is B. Supplied bracket installed at a distance of 400 mm above the hob, there must be a minimum safety distance of 50 mm to the left or right from the edge of the hob.
-
Page 13: Product Description
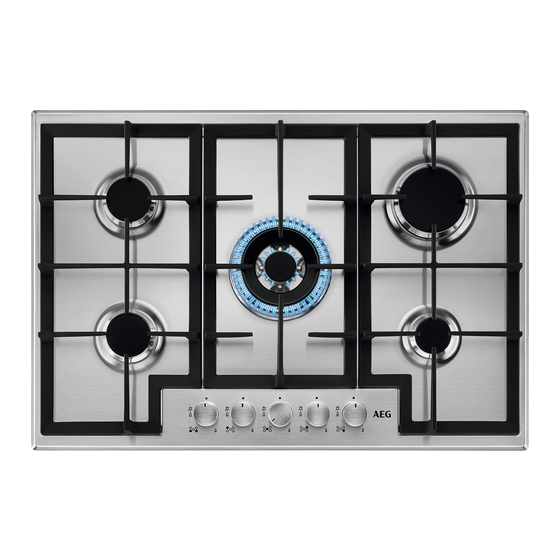
ENGLISH A. Removable panel B. Space for connections min 30 mm Kitchen unit with oven The electrical connection of the hob and min 5 mm the oven must be installed separately for (max 150 mm) safety reasons and to let easy remove 60 mm oven from the unit. - Page 14 5.1 Burner overview 1. Push the control knob down and turn it counterclockwise to the maximum gas supply position ( ). 2. Keep the control knob pushed for equal or less than 10 seconds. This lets the thermocouple warm up. If not, the gas supply is interrupted.
-
Page 15: Hints And Tips
ENGLISH 5.3 Turning the burner off WARNING! Always turn the flame down To put the flame out, turn the knob to or switch it off before you the off position remove the pans from the burner. 6. HINTS AND TIPS WARNING! CAUTION! Refer to Safety chapters. - Page 16 7.2 Pan supports 7.3 Cleaning the hob • Remove immediately: melted plastic, The pan supports are not plastic foil, sugar and food with sugar, resistant to washing in a otherwise, the dirt can cause damage dishwasher. They must be to the hob.
-
Page 17: Troubleshooting
ENGLISH 8. TROUBLESHOOTING WARNING! Refer to Safety chapters. 8.1 What to do if... Problem Possible cause Remedy There is no spark when you The hob is not connected to Check if the hob is correctly try to activate the spark gen- an electrical supply or it is connected to the electrical erator. -
Page 18: Technical Data
8.3 Labels supplied with the accessories bag Stick the adhesive labels as indicated below: MOD. MOD. MOD. TYPE PROD.NO. IP20 PROD.NO. PROD.NO. SER.NO. 0049 SER.NO SER.NO 03 IT DATA DATA MADE IN ITALY A. Stick it on Guarantee Card and send C. -
Page 19: Energy Efficiency
ENGLISH 9.3 Other technical data Gas original: G20 (2H) 20 mbar 11,65 kW TOTAL POW- Gas replace- G30 (3+) 28-30 mbar 832 g/h ment: G31 (3+) 37 mbar 818 g/h Electric supply: 220-240 V ~ 50-60 Hz 3 core flexible cable with non rewireable plug fitted with a 3 amp car- tridge fuse Appliance cate- II2H3+... - Page 20 Type of hob Built-in hob Number of gas burners Left rear - Semi-rapid 59.7% Centre Rear - Multi Crown 53.4% Energy efficiency per gas burner Right rear - Rapid 56.6% (EE gas burner) Right front - Auxiliary not applicable Left front - Semi-rapid 57.7%...
- Page 21 ENGLISH...
- Page 22 www.aeg.com...
- Page 23 ENGLISH...
- Page 24 www.aeg.com/shop...