Table of Contents
Advertisement
Quick Links
See also:
Service Manual
Contents
Getting Started
Introduction........................................ 2
Read Me First .................................... 3
Precautions...................................... 10
Basic Operation
Starting Up/Shutting Down................29
LCD (Touchscreen) ..........................33
Useful Information
Buttons............................................. 38
Quick Menu...................................... 39
Software Keyboard .......................... 41
Signature Capture............................ 47
Troubleshooting
Troubleshooting ................................................................................................. 55
Appendix
...................................62
Please read these instructions carefully before using this product and save this
manual for future use.
OPERATING INSTRUCTIONS
...58
Wireless Display
Model No.
Description of Parts .......................... 14
First-time Operation.......................... 17
Battery Power................................... 36
SD Memory Card.............................. 48
Bluetooth .......................................... 49
Control Panel.................................... 53
For Effective Use.............................. 54
CF-08
.................... 64
Advertisement
Table of Contents

Related Manuals for Panasonic Toughbook CF-08TX1A1M

Summary of Contents for Panasonic Toughbook CF-08TX1A1M
-
Page 1: Table Of Contents
OPERATING INSTRUCTIONS Contents Getting Started Introduction... 2 Read Me First ... 3 Precautions... 10 Basic Operation Starting Up/Shutting Down...29 LCD (Touchscreen) ...33 Useful Information Buttons... 38 Quick Menu... 39 Software Keyboard ... 41 Signature Capture... 47 Troubleshooting Troubleshooting ... 55 Appendix LIMITED USE LICENSE AGREEMENT Specifications... -
Page 2: Introduction
Introduction Thank you for purchasing this Panasonic wireless display. For optimum perfor- mance and safety, please read these instructions carefully. Terms and illustrations in these instructions Conditions that may result in minor or moderate injury. CAUTION Useful and helpful information. -
Page 3: Read Me First
Read Me First Information to the User This product and your Health This product, like other radio devices, emits radio frequency electromagnetic energy. The level of energy emitted by this product however is far much less than the electromagnetic energy emitted by wireless devices like for example mobile phones. - Page 4 Read Me First délibérations de jurys et comités de scientifiques qui examinent et interprètent con- tinuellement les nouveautés de la vaste littérature sur les recherches effectuées. Dans certaines situations ou environnements, l’utilisation de ce produit peut être restreinte par le propriétaire du bâtiment ou par les représentants responsables de l’organisation.
- Page 5 Informations relatives à l’évacuation des déchets, destinées aux utilisateurs d’appareils électriques et électroniques (appareils ménagers domestiques) Lorsque ce symbole figure sur les produits et/ou les documents qui les accompagnent, cela signifie que les appareils électriques et électroniques ne doivent pas être jetés avec les ordures ménagères.
- Page 6 Connect the equipment into an outlet on a circuit different from that to which the receiver is connected. Consult the Panasonic Service Cen- ter or an experienced radio/TV tech- nician for help. Warning To assure continued compliance, use...
- Page 7 Directive 1999/5/EC.” Hint: If you want to get a copy of the original DoC of our products which relates to the R&TTE, please contact to our web address: http://www.doc.panasonic.de Contact: Panasonic Services Europe A Division of Panasonic Marketing Europe GmbH...
- Page 8 If you lose the fuse cover the plug must not be used until a replacement cover is obtained. A replacement fuse cover can be pur- chased from your local Panasonic Dealer. IF THE FITTED MOULDED PLUG IS UNSUITABLE FOR THE SOCKET OUT-...
- Page 9 Blue: Neutral Brown: Live As the colours of the wires in the mains lead of this apparatus may not corre- spond with the coloured markings iden- tifying the terminals in your plug, proceed as follows: The wire which is coloured GREEN-and- YELLOW must be connected to the terminal in the plug which is marked by the letter E or by the safety earth symbol...
-
Page 10: Precautions
Precautions Wireless Display Usage Avoid Extreme Heat and Cold Do not store or use the wireless display in loca- tions exposed to heat, direct sunlight, or extreme cold. Avoid moving the wire- less display between locations with large tem- perature difference. Operation: 5 °C to 35 °C {41 °F to 95 °F} Storage: -20 °C to 60 °C... - Page 11 Do Not Connect a Tele- phone Line, or a Net- work Cable Other Than the One Specified, into the LAN Port If the LAN port is con- nected to a network such as the ones listed below, a fire or electric shock may result.
- Page 12 Do Not Use This Wire- less Display with a Bat- tery Pack Other Than the One Specified Use only the specified Panasonic battery pack (CF-VZSU44U) with your CF-08. Use of batteries other than those manu- factured and supplied by Panasonic may repre- sent a safety hazard.
- Page 13 Stop Using Should the battery emit an abnormal odor, become hot to the touch, become discolored, change shape, or become in any way dif- ferent from normal, remove it from the wire- less display and stop using it. Do not touch the terminals on the battery pack.
-
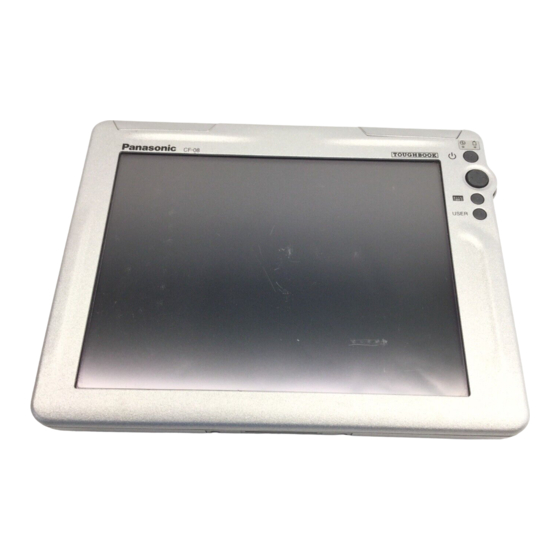
Page 14: Description Of Parts
Description of Parts A. LCD (Touchscreen) B. Wireless LAN antenna C. Bluetooth antenna D. Power status E. Power button F. Battery status G. DC-IN jack H. LAN port I. Cursor control button J. Keyboard button K. USB port L. USER button M. - Page 15 A. Battery cover latch B. Hand strap Adjust the length of the belt so that the wireless display does not fall by mistake, and firmly hold the wireless display when using it. C. Battery pack D. Headphone jack You can connect headphones or amplified speakers.
- Page 16 Description of Parts Using the Tether Attaching the Tether The tether can be attached to the upper right or upper left corner of the display. It prevents the pen (included) from falling accidentally.
-
Page 17: First-Time Operation
First-time Operation Preparation A Check and identify the supplied accessories. If you do not find the described accessories, contact your technical support office. • AC adaptor...1 Model No.: CF-AA1623A • Stylus...1 • Cloth...1 • Tether ( page 16) ... 1 •... - Page 18 First-time Operation C Slide the battery cover latch. D Open and remove the battery cover. E Firmly attach the battery pack to the connector. F Fit the battery cover into (A), and then close the battery cover. G Slide the battery cover latch. H Attach the hand strap.
- Page 19 CAUTION Be careful not to catch the tab when you close the battery cover. Make sure the cover is securely attached. Otherwise the battery pack may fall when you carry the wireless display. Do not touch the terminals of the battery pack and the wireless display. Doing so can make the terminals dirty or damaged, and may cause malfunction of the battery pack and the wireless display.
- Page 20 First-time Operation Turn on the wireless display. Calibrate the touchscreen. Make the date and time setting. You can use the software keyboard when you set the time. For information about how to use the Software Keyboard: If the [Date/Time Properties] screen does not appear automatically Double-tap on the desktop, and double-tap [Date/Time].
- Page 21 Make the network setting. Before making the settings for the wireless display, check the following server set- tings. Is the remote desktop allowed to use? IP address and subnet mask (if the name server is inside the network, use the server name instead.) User name and password When making connections with a LAN...
- Page 22 First-time Operation Make the settings to connect the server. The client used will differ depending on the server. Server name ® ® Microsoft Windows ® Microsoft Windows ® Microsoft Windows ® Citrix MetaFrame Presentation Server 3.0 ® Citrix Presentation Server 4.0 Web server When making connections with Microsoft Perform the following procedure.
- Page 23 When making connections with Citrix Perform the following procedure. A Double-tap B Enter the IP address or server name for the connection destination in [Server or Published Application], and tap [Save]. When the message appears, tap [Yes]. C Select the name entered in step B, and tap [Edit]. D Tap [Edit Logon Information], enter Username and Password (and Domain, if required), and tap [Save].
-
Page 24: Setting The Password
First-time Operation You can set two types of users with different operating authorities. Supervisor Changes settings related to the wire- less display operations, and controls the operations of the User. The security setting screen can be displayed using the following procedure. A Double-tap B Double-tap [Security (Supervisor)]. - Page 25 NOTE NOTE The password will not be displayed on the screen. You can use up to 40 alphanumeric characters (excluding spaces). When the password has been set, you need to enter your password in [Current Password]. To disable the password, leave the input field empty. Disabling the Supervisor Password also disables the User Password.
- Page 26 First-time Operation C. Skip Password Dialog Allows the User to log on without entering a password. When the User turns on the wireless display, the [Enter Password] screen is not displayed. (If you press the power button with the USER button pressed, the [Enter Password] screen will be displayed, and the Supervisor can log on with the Supervisor Password.)
- Page 27 Save the settings. Settings made up to step If the settings are not saved, they will be lost when the wireless display is turned off. A Double-tap Confirm that your wireless display is connected to a power outlet. ( B Tap [Start Backup]. Backing up data will start.
- Page 28 First-time Operation H Insert the media containing the files copied in step C-D, and then tap [Browse]. I Select the file and tap J Tap [Next]. K Tap [Update Start]. L When the confirmation message appears, tap [Yes]. ROM Update will start. When ROM Update terminates, the wireless display will restart and the cali- bration screen will appear automatically.
-
Page 29: Starting Up/Shutting Down
Starting Up/Shutting Down Starting Up Turn on the wireless display. When you log on as a Supervisor Press the power button with the USER button pressed. • If you do not do so, even when you set enter the Supervisor Password, the wireless display will run in the User operating environment. - Page 30 Starting Up/Shutting Down Connect to the server. When making connections with Microsoft Remote Desktop Connection Double-tap on the desktop. The server desktop screen will appear. The file name entered when making the server setting will appear instead of “XXX”. • When you do not add the check mark for [Save my password] in “When mak- ing connections with Microsoft Desktop Connection”...
- Page 31 When terminating the connection Perform the following operation. Tap [Start] - [Log Off] - [Log Off]. CAUTION If you tap [Start] - [Shut Down], the power for the server itself will be turned off. Make the settings (only for the Supervisor) When settings have been changed Before turning off the wireless display, save (back up) the settings making refer- ence to step...
- Page 32 Starting Up/Shutting Down B Press the power button with the keyboard button and USER button ( 38) pressed until the message “Reset the device to factory default...” appears. When the [Enter Password] screen appears, enter the Supervisor Pass- word and tap [OK]. C Select [Yes].
-
Page 33: Lcd (Touchscreen)
LCD (Touchscreen) Using the Stylus Handling the Stylus Clean the stylus tip and screen prior to operation. Foreign particles can scratch the screen and impede the operation of the stylus. Use the provided stylus only on the screen. Using it for any other purpose may damage the stylus and scratch the screen. - Page 34 LCD (Touchscreen) Handling the Touchscreen Use the provided stylus with CF-08. Do not use an implement other than the stylus that comes with the wireless display. Do not place any object on the surface or press down forcefully with sharp- pointed objects (e.g., nails), or hard objects that can leave marks (e.g., pencils and ball point pens).
- Page 35 A Double-tap on the desktop. B Double-tap [Buttons]. C Assign [Rotate Screen] to the keyboard button, long push, and tap D Double-tap [Rotate]. E Add the check mark for [0 degrees (Landscape)] and [90 degrees], and tap F Save the above setting. Refer to step of “First-time Operation”...
-
Page 36: Battery Power
Battery Power Battery Indicator Battery indicator Not lit The battery pack is not inserted or not being charged. Pulsing orange Charging is in progress. Green The battery is fully-charged. The remaining battery is approximately 9% or less. Blinking red The battery pack or the charging circuit is not operating normally. - Page 37 You can reduce power consumption using the following method. When using the battery, the wireless display can be used for a longer period of time. Power conservation effects can be achieved even when the AC adaptor is connected. Replacing the Battery Pack The battery pack is a consumable item so the replacement (CF-VZSU44U) will be necessary.
-
Page 38: Buttons
Buttons At the time of purchase, the following functions or applications are assigned to each button. Keyboard button USER button To execute the right click operation: Press the USER button for more than 2 seconds. You can use the right click once. Each time after this, before using the right click once, execute step You can also execute the right click operation using Quick Menu ( Customizing buttons... -
Page 39: Quick Menu
Quick Menu Quick Menu is used to display information about the wireless display, or to enable frequently used functions and applications to be launched quickly without going through Control Panel ( A. Battery Display remaining battery level (Same setting for [Power] in Con- trol Panel). - Page 40 Quick Menu Customizing buttons A Double-tap The [QuickMenu Application Assignment] screen will appear. B In [1. Select Button], tap one button to which the function or application is to be assigned from among the four buttons. C In [2. Assign a Function], tap to be assigned.
-
Page 41: Software Keyboard
Software Keyboard The Software Keyboard can be displayed on the wireless display, and you can then input characters or symbols by tapping the Software Keyboard. Input methods Numeric Keyboard, Full Keyboard and Transcriber can be used. Numeric Keyboard and Full Keyboard can be selected as either large or small panels. To use Transcriber, refer to “Transcriber”... - Page 42 Software Keyboard Display the [Keyboard Options] screen and select the input method in the fol- lowing procedure. A Double-tap [Input Panel] in [Control Panel]. B In the [Input Panel Properties] screen, select [Key- board] (A), and then tap [Options] (B). C In the [Keyboard Options] screen, change the input method (and/or panel size), and then tap D Tap...
-
Page 43: Option Settings
A. Option settings Display the [Transcriber: Options] screen of Transcriber option set- tings. ( below) B. Change recognition mode Run hand/block letter (character (alphabet/symbol/numeric)). C. Display symbol input panel Display the screen for symbol input. D. Change upper/lower/symbol mode Change input mode to upper/lower/ symbol mode. - Page 44 Software Keyboard [Inking] tab A. Recognition Delay Slide the bar to set the time for rec- ognition of handwritten characters. B. Add space after If the check mark is added, when handwritten characters are recog- [Advanced] tab A. Shorthand Register shorthand. For further information, refer to “Shorthand”...
- Page 45 Shorthand The following functions can be assigned for handwriting input. Text expansion Display words, phrases, or sentences. e.g.: Input “ABC” in handwriting display “Hello.” A Tap [Settings] to the right of “Shorthand.” B Tap [Add]. C Select the function that you want to assign, and then tap [Next]. D Register shorthand.
- Page 46 Software Keyboard F Tap [Finish]. The screen will automatically return to step B. To assign two or more functions in succession, repeat step B to F. G Tap H Tap to close the [Transcriber: Options] screen. I Save the above setting. Refer to step of “First-time Operation”...
-
Page 47: Signature Capture
Signature Capture Signature Capture operates on CF-08, supporting input of signatures in applications running on the connection destination server. At the time of purchase, this wireless display is not preset to enable startup of Signature Capture. Before using Signature Capture, set the wireless display to enable startup using one of the following methods. -
Page 48: Sd Memory Card
SD Memory Card About SD Memory Card An SD Memory Card can be used for the following purposes. The exchange of data with various devices equipped with an SD Memory Card slot, and so on. Use as a memory card (e.g., use as a storage unit on which files can be written). Inserting/Removing a Card Open the SD Memory Card slot cover and confirm the SD Memory Card indicator... -
Page 49: Bluetooth
Bluetooth To enable Bluetooth Double-tap Double-tap [Bluetooth Device Properties]. Tap the [General] tab, and make the necessary settings. A. Enable Bluetooth Add the check mark for [Enable Blue- tooth] to enable Bluetooth. B. Serial Port / DialUp Network Add the check mark for [Serial Port] or [DialUp Network] to make connec- tions with the serial port or dial-up Network. - Page 50 Bluetooth To make connections with the serial port Tap the [Serial Port] tab, and make the following procedure. A Turn on the Bluetooth device. B Tap [Select Device] (A). If you add the check mark for [Auto Reconnect] (C), the connection will be made automatically when Bluetooth is enabled.
- Page 51 To make connections with the dial-up network Tap the [DialUp Network] tab, and make the following procedure. The setting procedure below may vary depending on the Bluetooth device you are using. (For example, the [Enter PIN code] screen described in step F may appear multiple times or in a different order.) For details, refer to the manual that comes with your Bluetooth device.
- Page 52 Bluetooth N Double-tap the connection name created in step J. O At the [Dial-Up Connection] screen, enter the proper User Name, Password, and Domain (G) for the connection destination. If the phone number entered in step L does not display correctly at “Phone”...
-
Page 53: Control Panel
Control Panel In Control Panel, you can see the list of applets that can be used on this wireless display. If you double-tap the icon (or the name), the screen will start up. Explanations for each Control Panel applet can be displayed using the following procedure. -
Page 54: For Effective Use
For Effective Use Maintenance Do not use water when cleaning the panel. Ingredients included in water may leave residue and reduce readability of the screen. <When cleaning dust/dirt> Avoid rubbing off dust/dirt with cloth since it may leave scratch on the screen. Sweep dust/dirt with fine brush, then wipe it with "dry"... -
Page 55: Troubleshooting
Troubleshooting Follow the instructions below when a problem has occurred. For a software prob- lem, refer to the software’s instruction manual. If the problem persists, contact your technical support office. Starting Up Cannot start up. The power indica- tor or battery indica- tor is not lit. - Page 56 Troubleshooting Shut Down Cannot shut down. Sound No sound. Unable to hear sound in stereo. Wireless Communication Cannot connect to network. Connecting Peripherals The connected key- board and mouse do not work. The device con- nected to the serial port does not work. Cannot print.
- Page 57 Others No response. The screen content may not display correctly due to poor signal quality. In such case, move to a place where signal quality is good then make a connection. Press the power button for four seconds or longer to shut down the wireless display, and then press the power button to turn it on.
-
Page 58: Limited Use License Agreement
LIMITED USE LICENSE AGREEMENT THE SOFTWARE PROGRAM(S) (“PROGRAMS”) FURNISHED WITH THIS ® PANASONIC PRODUCT (“PRODUCT”) ARE LICENSED ONLY TO THE END- USER (“YOU”), AND MAY BE USED BY YOU ONLY IN ACCORDANCE WITH THE LICENSE TERMS DESCRIBED BELOW. YOUR USE OF THE PROGRAMS SHALL BE CONCLUSIVELY DEEMED TO CONSTITUTE YOUR ACCEPTANCE OF THE TERMS OF THIS LICENSE. - Page 59 F. You may not remove any copyright, trademark or other notice or product identi- fication from the Programs and you must reproduce and include any such notice or product identification on any copy of any Program. YOU MAY NOT REVERSE ASSEMBLE, REVERSE COMPILE, OR MECHANI- CALLY OR ELECTRONICALLY TRACE THE PROGRAMS, OR ANY COPY THEREOF, IN WHOLE OR IN PART.
- Page 60 Contrat de licence d’usage limité Le(s) logiciel(s) (les “Logiciels”) fournis avec ce produit Panasonic sont exclusivement concédés en licence à l’utilisateur ultime (“vous”), et ils ne peu- vent être utilisés que conformément aux clauses contractuelles cidessous. En util- isant les logiciels, vous vous engagez de manière définitive à respecter les termes, clauses et conditions des présentes.
- Page 61 machine, de tous les Logiciels ainsi que de la documentation les accompag- nant, à la même partie ou détruire les copies non cédées. F. Vous ne pouvez retirer aucune marque de droits d’auteur, marque de com- merce ou autre ni aucune identification de produit des Logiciels et vous devez reproduire et inclure toutes ces notices ou identifications de produit sur toutes les copies des Logiciels.
-
Page 62: Specifications
Specifications Main Specifications Model No. Memory (ROM/RAM) Display Method Internal LCD Display Wireless LAN Bluetooth Sound Card Slot SD Memory Card Interface Button Pointing Device Power Supply AC Adaptor Battery Pack Operating Time Charging Time Power Consumption Physical Dimensions (W × H × D) Weight Operation Environment Storage Environment... - Page 63 Software This slot does not support the MultiMedia card. Operation has been confirmed for Panasonic SD Memory Cards with up to 2 GB capacity. Theoretical value and not the actual speed. The transfer rate does not become higher even if you use a card that supports the higher transfer rate.
-
Page 64: Limited Warranty
This is the only warranty Panasonic makes to you. Panasonic does not warrant that the functions contained in the Programs will meet your requirements or that the operation of the... - Page 65 Panasonic’s entire liability, and your exclusive remedy under this warranty shall be limited to the replacement, in the United States, of any defective disk or other media which is returned to Panasonic’s Authorized Service Center, together with a copy of the purchase receipt, within the aforesaid warranty period.
- Page 66 For Canada PANASONIC COMPUTER AND PERIPHERALS LIMITED WARRANTY Coverage – Panasonic Canada Inc. (“PCI”) warrants to you, the first end user customer, this computer product (excluding software media), when purchased from PCI or from a PCI authorized reseller, to be free from defects in materials and workmanship under normal use, subject to the terms set forth below, during the period of warranty coverage specified.
- Page 67 Canada for a period of sixty (60) days from date of receipt as evidenced by your purchase receipt for your Panasonic Com- puter product. THIS IS THE ONLY WARRANTY THAT PCI MAKES RESPECTING THE SOFTWARE MEDIA.
- Page 68 Panasonic Computer Solutions Company 50 Meadowlands Parkway, Panazip 2F-5, Secaucus, NJ 07094 Importer's name & address pursuant to the EU GPSD directive 2001/95/EC/Art.5 Panasonic Computer Products Europe, Panasonic Marketing Europe GmbH Hagenauer Straße 43 65203 Wiesbaden Germany © 2006 Matsushita Electric Industrial Co., Ltd. All Rights Reserved.