Table of Contents
Advertisement
Quick Links
User' s Guide
Shop online at
OSXL-101
omega.com
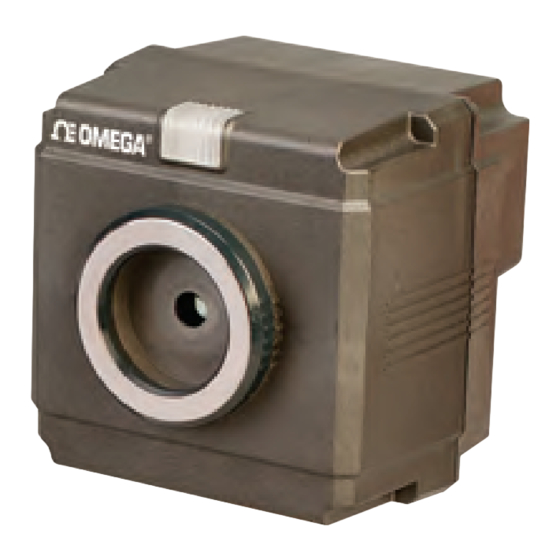
Compact Thermal Image Sensor
e-mail: info@omega.com
Rev. 1.01
For latest product manuals:
omegamanual.info
Windows 98/Windows 2000/
Windows XP
(Windows 2000/Windows XP
are recommended)
MADE IN JAPAN
®
ENGINEERING INC .
,
omega.com
®
800
-TC-OMEGA (800-826-6342)
© COPYRIGHT 2009 OMEGA ENGINEERING, INC.
OSXL-101
Compact Thermal Image Sensor
Application Software
Advertisement
Table of Contents

Related Manuals for Omega Engineering OSXL-101


Summary of Contents for Omega Engineering OSXL-101
- Page 1 Rev. 1.01 For latest product manuals: omegamanual.info Windows 98/Windows 2000/ Windows XP (Windows 2000/Windows XP are recommended) MADE IN JAPAN ® ENGINEERING INC . omega.com ® -TC-OMEGA (800-826-6342) © COPYRIGHT 2009 OMEGA ENGINEERING, INC. OSXL-101 Compact Thermal Image Sensor Application Software...
- Page 2 FAX: +44 (0)161 777-6622 e-mail: sales@omega.co.uk It is the policy of OMEGA Engineering, Inc. to comply with all worldwide safety and EMC/EMI regulations that apply. OMEGA is constantly pursuing certification of its products to the European New Approach Directives. OMEGA will add the CE mark to every appropriate device upon certification.
- Page 3 Introduction Thank you for purchasing a compact thermal image sensor. In order to use this product safely, please read this instruction manual completely before use and confirm the correct handling and instructions. In addition, please retain this instruction manual for future reference. Before using Please confirm the contents of packing.
-
Page 4: Safety Precautions
Safety precautions • The safety precautions shown in this manual indicate the important contents about safety. Please be sure to understand and follow these precautions. • In this manual, in order to use this product safely, the precautions are described with the following indications and marks. -
Page 5: Table Of Contents
Contents Introduction ............. Safety precautions .......... Precautions for use ......... Outline of product ..........1 Operation flowchart .......... 2 Preparation before using ........Installation of application software ....4 Starting application software ......7 Uninstall of application software ..... LAN setting of thermal image sensor 1. -
Page 6: Outline Of Product
Outline of product 1. Main screen OSXL-101 Application Software OSXL-101 Application Software OSXL-101 Application Software OSXL-101 Application Software Alarm OSXL-101 Application Software OSXL-101 ApplicationSoftware Alarm judgment Trend graph... -
Page 7: Operation Flowchart
Operation flowchart Image/Data File(F) Function (D) Help (H) Temp Range (R) Start Saving (R) Help (H) Manual/auto Stop Saving (P) Version (V) Frame average/ 9Pixel average/ 9pixel Median/ Rotation_Upside Down/Mirror Image/Data Setup(S) Sensor selection Saving interval & period Saving data format & directory Zone Trending(G) Trend Data (D) Graph Data Save (S) -
Page 8: Preparation Before Using
Preparation before using Installation of this application software to your PC Page 4 ~ Application software installation Connection of the thermal image sensor and the PC Page 9 ~ with supplied custom network cable Thermal image sensor LAN setting Running of the application software for initial settings Page 7 ~ Application software activation Page 15 ~... -
Page 9: Installation Of Application Software
Installation of application software The following is the installation procedure of the application software. (The procedure is for Windows XP.) 1. Start your PC and launch Windows. Before this application software is installed, close all other applications that are running. If not, the installation may be affected from them. 2. - Page 10 3. [Installation folder selection] The following screen will appear. OSXL-101_ApplicationSoftVer2_00 OSXL-101_ApplicationSoftVer2_00 The installer will install OSXL-101_ApplicationSoftVer2_00 to the following folder. C:¥Program Files¥OMEGA¥OSXL-101_ApplicationSoftVer2_00¥ Install OSXL-101_ApplicationSoftVer2_00 for yourself, or for anyone who uses this computer: Specify directory and folder you want to install. The default folder is [C:/program file/OMEGA/OSXL- 010 Application Soft].
- Page 11 5. [The OSXL-101 application software is installed.] The installation will start. OSXL-101_ApplicationSoftVer2_00 OSXL-101_ApplicationSoftVer2_00 OSXL-101_ApplicationSoftVer2_00 OSXL-101_ApplicationSoftVer2_00 Installing OSXL-101_ApplicationSoftVer2_00 OSXL-101_ApplicationSoftVer2_00 is being installed. After the installation is completed, the following screen will appear. After you confirm it, press [Close] button to quit.
-
Page 12: Starting Application Software
[Method 1] Double-click the icon on the desktop. OSXL-101 OSXL-101 [Method 2] Select from [Start] _ [Programs] _ [OSXL-101]. By using either method, the application will start. The Preference window will appear. Select [LAN] _Click [Apply] button. OSXL-101 Application Software OSXL-101 Application Software A warning by security software may appear at the initial startup. - Page 13 Uninstallation of application software The following is the uninstall procedure of the OSXL-101 application software from a PC. (The procedure is for Windows XP.) 1. Select [Control Panel] from [Start] button. 2. Start [Add or Remove Programs]. 3. Select [OSXL-101 Application Soft] and click [Remove] button.
-
Page 14: Lan Setting Of Thermal Image Sensor
LAN settings of thermal image sensor The setting for the thermal image sensor is performed through the LAN in order to use sensors and connected PC properly. When the sensor is used first time, the LAN settings of the sensor is required. 1. -
Page 15: Pc Settings
2. PC settings In order to communicate with the sensor(s), you need to set IP Address in your PC. If PC has already been connected to the network, remove it from the network. According to the following procedure, you will need to change the IP Address of your TCP/IP connection. - Page 16 Check [Use the following IP address:] and set the IP address, subnet mask and default gateway. [Current memorandum] IP address Subnet mask Default gateway Assign an IP address not to conflict with other instruments. Set the following, [IP address: 192.168.1.100, Subnet mask: 255.255.255.0, Default gateway: Blank] are set.
-
Page 17: Connection Of Thermal Image Sensor And Pc
The connections are a quick-disconnect locking type. Insert the plug until it clicks. To unplug, hold the sliding part (that has the [Arrow] marking on) and pull it outward. . If the “A” part is pulled, the plugs may be damaged. OSXL-101 [ρ] mark [Arrow] mark Plug •... -
Page 18: Network Settings Of Thermal Image Sensor
Start this application software. Refer to Page 7 [Starting application software] for the startup. Select [Sensor Setup] [Network(Sensor)] in the menu. OSXL-101 Application Software OSXL-101 Application Software The following screen will appear. - Page 19 Enter information into the following setting items. • Sensor number A Number to be assigned to each sensor Enter the numbers from 1 to 4. When one sensor is only used, enter 1. When multiple sensors are used, assign the numbers from 1 to 4 not to overlap each other. •...
-
Page 20: Initial Settings Of Application Software
Initial settings of application software These steps described here will register the sensor to be connected to the application software. Select [Sensor Setup] [IP Address] in the menu. OSXL-101 Application Software OSXL-101 Application Software... - Page 21 The following screen will appear. Enter the following items. • Sensor number input Select the menu of the sensor numbers that you want to communicate with. • IP address Enter the IP addresses assigned to each sensor with the Network settings procedure. •...
-
Page 22: Display Of Thermal Images
Page 15) to the application software has not been performed yet, complete these settings first. [1] The following screen will appear. Click [Run] button on the screen. OSXL-101 Application Software OSXL-101 Application Software When the IP registration_(Ref. Page 15) to the application software is not completed yet,... - Page 23 [2] The thermal image will appear on the screen. OSXL-101 Application Software OSXL-101 Application Software [When multiple sensors are connected] When multiple sensors are connected, click the tab of the sensor number you want to display and then perform the above [1] and [2].
-
Page 24: Screen Configuration And Explanation
Screen configuration and explanation OSXL-101 Application Software OSXL-101 Application Software Origin (0,0) Names Explanations Main Menu Bar Various functions can be selected. Refer to the next page. Sensor Tabs For selecting the sensor to be displayed Display a 2-dimensional thermal image based on temperature from each Thermal Image pixel in a 48x47 array. - Page 25 Menu bar and its functions 1. Image/Data File (F) Functions under this menu are to Start/stop the saving function of image files (.jpg) and temperature value files (.csv). You can assign different modes of saving files and download location of data and images. 2.
-
Page 26: Image/Data File (F)
[Brows] button at Directory section. The default location is [OSXL-101] folder under My Documents. These settings are activated only by clicking [OK]. button at the bottom. To cancel these settings, click [Cancel] button. -
Page 27: Sensor Setup (S)
2. Sensor Setup (S) Network (Sensor) OSXL-101 Application Software OSXL-101 Application Software Selecting [Network(Sensor)] will bring up Network Setup window. Here, modify network communication parameters including IP Address on the connected sensor(s). Refer to [Network settings of the thermal image sensor] (Page 13) for details. -
Page 28: Alarm(Sensor)
_Alarm (Sensor)_ Selecting [Alarm(Sensor)] will bring up Alarm Setup window. This window uploads alarm setup to the selected sensor(s). You can have one area per sensor and two alarms per area. Alarm will be activated when consecutive 4 frames have met the alarm condition you have set. - Page 29 [5: Image Save Setup] This sensor can save a thermal image and temperature data on its built-in memory when Alarm condition occurs. You have three choices for this function as follows; O None No data or thermal image will be saved under an alarm condition. O Alarm 1 Thermal Image will be saved when Alarm 1 is activated.
- Page 30 If the thermal image has been saved in the sensor memory, the application software begins downloading the image data from the sensor after clicking the [Retrieve Image button. The progress bar indicates the download status. Wait until the downloading completes. Upon completion of downloading, the thermal image will be displayed in a new window.
- Page 31 • Alarm output and saving image The following figure shows the logic between alarming state (alarm on/Alarm off) and contact output condition. Alarm turns on/off when consecutive 4 frames have satisfied the alarm condition you have set. Alarming state Contact output Auto Reset Image is overwrit Image saving...
-
Page 32: Procedure For Setting Alarms To Sensor
Procedure for setting alarms to sensor This paragraph explains steps for alarm settings on the selected sensor. By using these steps, you can configure the contact outputs of the sensor or saving thermal image data. Steps [1] Selecting sensor In [Sensor Selection] section, click one of the radio buttons of the sensor1-4 you want to set alarms. - Page 33 [3] Designation of Alarm Area Here you can set the Alarm Area. When there is a pixel in this area that meets the conditions of the alarm settings specified by [2], the contact output signal goes out. Specify the area by using your mouse on the Sensor Image screen to the left of Alarm Setup window.
- Page 34 Next, select the output logic of contact. The output logic can be specified for both the alarm 1 and alarm 2. The following logic is available. (1) N.O ... Normally open (2) N.C … Normally closed The following is an example for selecting [AL-1 N.C/ AL-2 N.C]. Select output logic...
- Page 35 For the alarm output logic and rating, see [Alarm output] (Page 9 of Sensor Manual) and [Specifications] (Page 12 of Sensor Manual). In addition, alarm indication is provided on the main application software window. Red / yellow flashes when OSXL-101 Application Software alarm is activated. It is displayed above the tab of each sensor.
- Page 36 Emissivity Setup Selecting [Emissivity] brings up Emissivity Setup window with the current Emissivity value indicated. (Default is set to 1.00) To change the value, click the Up/Down arrow mark or enter a numerical value directly from the keyboard. The setting range is 0.10 to 1.00 with the increment of 0.01. The Emissivity can be set for each sensor independently.
-
Page 37: Function (D)
3. Functions (D) Temp Range OSXL-101 Application Software OSXL-101 Application Software Select either [Manual] or [Auto] temperature span scaling. [Manual] Allows you to set manually set the temperature span between -20 to 300°C (-4 to 572°F). [Auto] Automatically sets the span based on the highest and lowest temperature in the image. -
Page 38: Zone Trend
Max Temp Pt. By selecting ( ) [Max Temp Pt.], you can display a OSXL-101 Application Software OSXL-101 Application Software maximum temperature point and its temperature value in the image window. The maximum temperature point will be indicated by “H”... - Page 39 OSXL-101 Application Software OSXL-101 Application Software...
-
Page 40: Zone Setup
Zone Setup The following procedure is used for setting up Zone Trending _ [ 2] and the software alarms. [1] Select a sensor number by clicking one of the radio buttons. Select the sensor. Make sure that you’ve registered the IP Address of the connected sensors. - Page 41 [3] Zone Data Filter The following choices are available; (1) Average Calculated average value of all the data points in the zone. (2) Max Temp Pixel with the maximum value in the zone. (3) Min Temp Pixel with the minimum value in the zone. (4) Difference : Time Trend the temperature difference between the current temperature and the temperature that was taken “N”...
- Page 42 [5] Registering the Zones By clicking [Enter] button, you can register the zone with all the parameters you have set on [1] through [4] in this window. All parameters will be listed in the window as shown below. You can have up to 8 zones and thus you can have up to 8 trending graphs in the Zone Trending window.
- Page 43 click the number of the zone that you want to change, then click [Enter]. The setting information of the zone selected is now modified. The following figure is an example for modifying the setting parameters for Zone No. 2. After performing the step [1] ~ [4], After selecting the zone for, click click [Zone#] of the zone that you [Enter].
- Page 44 Once you have setup the zone corresponding colored zone boxes will appear in the main thermal image window. If you have set software alarms for any of the zones the zone box will blink when the alarm is activated as shown in the picture below. OSXL-101 Application Software OSXL-101 Application Software...
-
Page 45: Help (H)
4. Help (H) Help Manual is displayed. Version The version information of the application software is shown. -
Page 46: Connection Error
Connection error When there’s no communications between the PC and OSXL-101 Application Software OSXL-101 Application Software the sensor for 30 seconds, [Connection Error!] is displayed on the main screen. The information through the network connection may not be correctly transferred to the under such condition. -
Page 47: Troubleshooting
Troubleshooting Symptoms Causes Measures Update it to the latest version. Cannot complete OS version may not be the latest. Refer to the instruction manual (Page software installation 4) for installation. Check the connection of the cable and The custom Network cable is not Connect the custom network cable connected properly. - Page 48 WARRANTY/DISCLAIMER OMEGA ENGINEERING, INC. warrants this unit to be free of defects in materials and workmanship for a period of 13 months from date of purchase. OMEGA’s WARRANTY adds an additional one (1) month grace period to the normal one (1) year product warranty to cover handling and shipping time. This ensures that OMEGA’s customers receive maximum coverage on each product.
- Page 49 Where Do I Find Everything I Need for Process Measurement and Control? OMEGA…Of Course! Shop online at omega.com TEMPERATURE Thermocouple, RTD & Thermistor Probes, Connectors, Panels & Assemblies Wire: Thermocouple, RTD & Thermistor Calibrators & Ice Point References Recorders, Controllers & Process Monitors Infrared Pyrometers PRESSURE, STRAIN AND FORCE Transducers &...