Panasonic DVD-S700 DVD/CD Player Manual
- Owner's manual (16 pages) ,
- Operating instructions manual (16 pages) ,
- Troubleshooting (4 pages)
Advertisement
Caution for AC Mains Lead
Dear customer
Thank you for purchasing this product.
Please read these instructions carefully before using this product, and save this manual for future use.
(For the AC mains plug of three pins)
("EB" or "GC" area code model only)
For your safety, please read the following text carefully.
This appliance is supplied with a moulded three pin mains plug for your safety and convenience.
A 5-ampere*1 fuse is fitted in this plug. Should the fuse need to be replaced please ensure that the replacement fuse has a rating of 5-ampere*1 and that it is approved by ASTA or BSI to BS1362.
Check for the ASTA mark ![]() or the BSI mark
or the BSI mark ![]() on the body of the fuse.
on the body of the fuse.
If the plug contains a removable fuse cover you must ensure that it is refitted when the fuse is replaced.
If you lose the fuse cover the plug must not be used until a replacement cover is obtained. A replacement fuse cover can be purchased from your local dealer.
Before use
Remove the connector cover.
How to replace the fuse
The location of the fuse differ according to the type of AC mains plug (figures A and B). Confirm the AC mains plug fitted and follow the instructions below.
Illustrations may differ from actual AC mains plug.
- Open the fuse cover with a screwdriver.
Figure A | Figure B |
- Replace the fuse and close or attach the fuse cover.
Figure A | Figure B | |
*1 (For Saudi Arabia and Kuwait)
13 ampere
Safety precautions

Unit
- To reduce the risk of fire, electric shock or product damage,
- Do not expose this unit to rain, moisture, dripping or splashing.
- Do not place objects filled with liquids, such as vases, on this unit.
- Use only the recommended accessories.
- Do not remove covers.
- Do not repair this unit by yourself. Refer servicing to qualified service personnel.
- Do not let metal objects fall inside this unit.
- Do not place heavy items on this unit.
AC mains lead
- To reduce the risk of fire, electric shock or product damage,
- Ensure that the power supply voltage corresponds to the voltage printed on this unit.
- Insert the mains plug fully into the socket outlet.
- Do not pull, bend, or place heavy items on the lead.
- Do not handle the plug with wet hands.
- Hold onto the mains plug body when disconnecting the plug.
- Do not use a damaged mains plug or socket outlet.
- The mains plug is the disconnecting device. Install this unit so that the mains plug can be unplugged from the socket outlet immediately.

Unit
- This unit utilizes a laser. Use of controls or adjustments or performance of procedures other than those specified herein may result in hazardous radiation exposure.
- This unit may receive radio interference caused by mobile telephones during use. If such interference occurs, please increase separation between this unit and the mobile telephone.
- (For the United Kingdom, Ireland, Australia, New Zealand, Eastern Europe and South Africa)
This unit is intended for use in moderate climates.
(For others)
This unit is intended for use in tropical climates.
Placement
- Place this unit on an even surface.
- To reduce the risk of fire, electric shock or product damage,
- Do not install or place this unit in a bookcase, built-in cabinet or in another confined space. Ensure this unit is well ventilated.
- Do not obstruct this unit's ventilation openings with newspapers, tablecloths, curtains, and similar items.
- Do not place sources of naked flames, such as lighted candles, on this unit.
- Do not expose this unit to direct sunlight, high temperatures, high humidity, and excessive vibration.
Batteries
- Danger of explosion if battery is incorrectly replaced. Replace only with the type recommended by the manufacturer.
- When disposing the batteries, please contact your local authorities or dealer and ask for the correct method of disposal.
- Mishandling of batteries can cause electrolyte leakage and may cause a fire.
- Do not mix old and new batteries or different types at the same time.
- Do not heat or expose to flame.
- Do not leave the battery(ies) in an automobile exposed to direct sunlight for a long period of time with doors and windows closed.
- Keep the AAA R03 batteries out of reach of children to prevent swallowing.
- Do not take apart or short circuit.
- Do not recharge alkaline or manganese batteries.
- Do not use batteries if the covering has been peeled off.
- Remove batteries if you do not intend to use the remote control for a long period of time.
Store in a cool, dark place.
General Information
Accessories
- 1 Audio/Video cable (K2KA2BA00003)
- 1 Remote Control (N2QAYA000015)
- 2 Batteries for remote control
 NOTE
NOTE
- Product numbers correct as of June 2013. These may be subject to change.
Sales and Support information (For the United Kingdom and Ireland customers)
Customer Communications Centre
- For customers within the U.K.: 0844 844 3899
- For customers within Ireland: 01289 8333
- Monday - Friday 9:00am - 5:00pm,
(Excluding public holidays). - For further support on your product, please visit our website: www.panasonic.co.uk
Direct Sales at Panasonic U.K.
- Order accessory and consumable items for your product with ease and confidence by phoning our Customer Communications Centre Monday - Friday 9:00am - 5:00pm, (Excluding public holidays).
- Or go on line through our Internet Accessory ordering application at www.pas-europe.com
- Most major credit and debit cards accepted.
- All enquiries transactions and distribution facilities are provided directly by Panasonic U.K.
- It couldn't be simpler!
- Also available through our Internet is direct shopping for a wide range of finished products. Take a browse on our website for further details.
NOTE:
DVD-S700 with AV (21 pin) is used in the illustrations unless otherwise mentioned. Illustrations in this manual may differ depending on models and countries.
Inserting the batteries
Insert so the poles (+ and –) match those in the remote control.

R03, AAA (Manganese batteries)
Region codes
DVD-Video
This DVD player is designed to support the Region Management System. Confirm the region number for the unit on the rear panel. Check the regional code number on the disc package.
| Region | Discs that can be played |
| United Kingdom, Ireland, Eastern Europe, Middle East and South Africa |  |
| Asia |  |
| Australia, New Zealand |  |
Playable medias
You can play back the following medias:
| DVD Video | DVD-Video format |
| DVD-R DVD-R DL | DVD-Video format*1, JPEG*2*3, MP3*4, Xvid*5*6*7 |
| DVD-RW | DVD-Video format*1 |
| +RW +R +R DL | Video*1 |
| CD-Audio | CD-DA, Video CD, Super Video CD |
| CD-R CD-RW | CD-DA, JPEG*2*3, MP3*4, Video CD, Super Video CD, Xvid*5*6*7 |
| USB | MP3*4, JPEG*2*3, Xvid*5*6*7 |
*1 Finalizing is necessary.
*2 The file extension has to be '.JPG' or '.JPEG'.
*3 Files that have been altered, edited or saved with computer picture editing software may not be displayed.
*4 The file extension has to be '.mp3'.
*5 The file extension has to be '.XVID', '.xvid', '.AVI', or '.avi'.
*6 (For the United Kingdom, Ireland, Eastern Europe and South Africa)
Subtitle text file is supported. (For others)
Subtitle text file is not supported.
*7 Certified to the Xvid Home Profile.
NOTE
- It may not be possible to play the medias in some cases due to the type of media, the condition of the recording, the recording method and how the files were created.
(For USB devices) - This unit does not guarantee connection with all USB devices.
- This unit does not support USB device charging.
- FAT12, FAT16 and FAT32 file systems are supported.
- This unit supports USB2.0 High Speed.
- This unit can support an HDD formatted to FAT32. Some types of HDD may require the use of its external power supply unit.
Unit and disc care
Clean this unit with a soft, dry cloth
- Never use alcohol, paint thinner or benzine to clean this unit.
- Before using chemically treated cloth, read the instructions that came with the cloth carefully.
- Cleaning of the lens is generally not necessary although this depends on the operating environment.
- Do not use commercially available lens cleaners as they may cause malfunction.
Clean discs
- Wipe with a damp cloth and then wipe dry.


Disc handling precautions
- Handle discs by the edges to avoid inadvertent scratches or fingerprints on the disc.
- Do not attach labels or stickers to discs.
- Do not use record cleaning sprays, benzine, thinner, static electricity prevention liquids or any other solvent.
- Do not use the following discs:
- Discs with exposed adhesive from removed stickers or labels (rented discs etc.).
- Discs that are badly warped or cracked.
- Irregularly shaped discs, such as heart shapes.
Connections
| FOR THE UNITED KINGDOM, IRELAND, SAUDI ARABIA AND KUWAIT ONLY READ THE CAUTION FOR THE AC MAINS LEAD ON RELEVANT PAGE BEFORE CONNECTION. |
Before making any connections we suggest you temporarily disconnect all the units from AC power.
- Do not place the unit on amplifiers/receivers or equipment that may become hot. The heat can damage the unit.
- Do not connect video signals through a video recorder. Due to copy guard protection the picture may not be displayed properly.
DVD-S500

DVD-S700

NOTE for AC mains lead
- This unit consumes a small amount of AC power even when turned off. In the interest of power conservation, if you will not be using this unit for an extended period of time, it can be disconnected.
NOTE for HDMI (DVD-S700 only)
- AUDIO terminals become impossible to use according to the kind of the cable that you use.
DVD-S500
VIDEO OUT

- Connect terminals of the same color.
AV (Scart)
(For the model with AV (21 pin) only)
 (For the model with AV (21 pin) only) - var 1")
DVD-S700
VIDEO OUT

- Connect terminals of the same color.
AV (Scart)
(For the model with AV (21 pin) only)
 (For the model with AV (21 pin) only) - var 2")
HDMI

With HDMI compatible amplifier

Control guide

- Standby/on switch
![]() ,
, ![]()
Press to switch the unit from on to standby mode or vice versa. In standby mode, the unit is still consuming a small amount of power.
DISPLAY
Displays information on TV screen during playback.
OPEN/CLOSE![]() ;
;
Opens/closes the disc tray - 0-9,
![]() 10
10
To select title/chapter/track numbers etc.
e.g., 5: 5
15:![]() 10
10 ![]() 1
1 ![]() 5
5
SEARCH MODE
Starts to select the point- Press
![]() to select the item.
to select the item. - Press 0 to 9 to specify the location.
- Press OK.
- Press
- TOP MENU
Shows Top menu
MENU- Shows Menu
- Sets PBC of VCD equipped with Playback Control (PBC) function to On/Off
![]()
- Selects items, input position, etc.
- For moving the display position of enlarged images
- For rotating JPEG images
OK
Confirms menu selection
 ,
, 
 ;
; 10
10 1
1  to select the item.
SETUP
Enters or exits the system setup menu
RETURN 
Returns to the previous display
- SKIP,
![]()
- Skips to previous title/chapter/track or next title/chapter/track
- Switches the MENU page of VCD equipped with Playback Control (PBC) function
SEARCH![]() ,
,
Starts fast reverse or fast forward
![]() ,
,![]()
Stops playback
PLAY/PAUSE![]() ,
, ![]()
Starts or pauses playback
FRAME![]()
Plays Video frame by frame
- REPEAT
Selects various repeat mode Selectable modes differ depending on the type of contents. REP DIR plays all the same type of files in the selected folder repeatedly.
A-B REPEAT
Repeats playback from point A to B on a media
SLOW
Starts slow motion playback
CANCEL
Clear the input information - SUBTITLE
Shows the subtitle and selects different subtitle
RANDOM/ANGLE
Starts random playback/Switches the camera angle
AUDIO
Changes soundtracks
ZOOM
Changes zoom ratio
PROGRAM
Sets the playback order- Press
![]() to select the item.
to select the item. - Press 0 to 9 to specify the order.
To cancel: Press CANCEL. - Press
![]() to select PLAY.
to select PLAY.
To clear the whole program:
Press![]() to select CLEAR.
to select CLEAR. - Press OK.
USB
Switches to the USB mode / Returns to the disc mode
USB REC
Performs USB REC (CD Ripping)
- Press
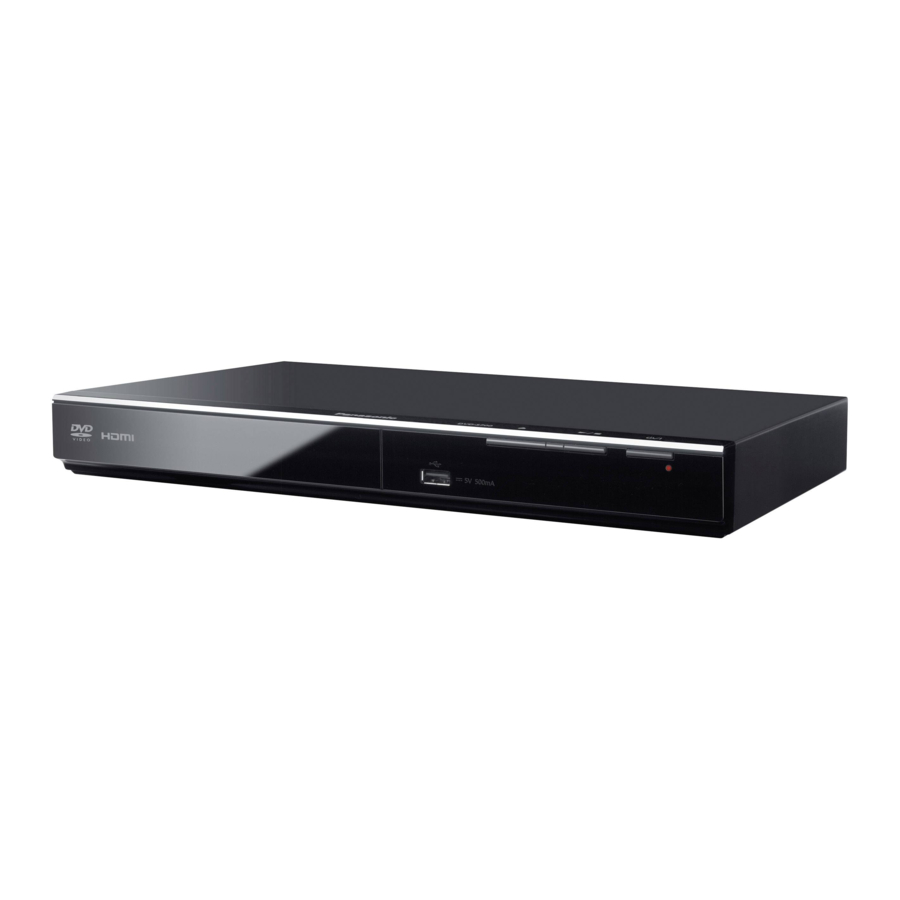
- Disc tray
When inserting a media, ensure that it is facing the right way up. - USB port
Connects a USB device - POWER LED
Lights when the power is turned on.

 ,
, ,
, ,
, 

 to select the item.
Playback
- Turn on the TV and select the correct video input.
- Press
![]() .
. - Place a disc or connect a USB device.
![]()
- If this unit is not switched to the USB mode when connecting the USB device, press USB and press
![]() to select the item.
to select the item.
- If this unit is not switched to the USB mode when connecting the USB device, press USB and press
- Press
![]() to select the item and press OK.
to select the item and press OK.
 .
.
 to select the item.
 to select the item and press OK.
- Depending on the disc, playback may start automatically.
(JPEG only) - When you press PLAY/PAUSE
![]() instead of OK, you can start the slide show.
instead of OK, you can start the slide show.
Stopping playback
Press STOP  .
.
 The stopped position is memorized.
Power Resume function
Press PLAY/PAUSE  to restart from this position.
This position is memorized even after power outage (Power Resume). However, if the restart position is misaligned or depending on the media and playback conditions, the unit may not operate normally.
NOTE
- Screen saver will start automatically if the media playback is stopped and the menu is closed for about 5 minutes.
- The player will automatically switch to Power Standby mode if you do not press any buttons for about 25 minutes after the media has stopped playing.
- During playback of DTS source, there will be no sound from the speakers. Select a different audio source (e.g. Dolby Digital).
(DVD-S700 only)
Or please connect the unit to an AV receiver that can decode DTS via an HDMI terminal, and set "Audio Out" to "Bitstream".
(For the United Kingdom, Ireland, Eastern Europe and South Africa only)
Displaying subtitles text
You can display subtitles text onto the Xvid video disc on this unit. This function has no relation to the subtitles specified in Xvid standard specifications and has no clear standard. The operation might be different or it may not operate properly depending on the way the file was made or the state of this unit (playing, stopped, etc.). If the subtitle does not appear correctly, change the subtitle language.
USB REC (CD Ripping)
You can copy audio files (CD-DA) from a CD on a USB device into MP3 format.
- Connect the USB device.
- Play an audio CD.
- During play, press USB REC.
- Press
![]() to select "YES", and press OK.
to select "YES", and press OK.
 - Step 1")
- Press
![]() to select "TRACKS".
to select "TRACKS". - In the default setting, all tracks are checked.
- To remove each check mark, select the track by pressing
![]() , and press OK.
, and press OK. - To clear all the check marks, select the check mark at the top and press OK.
 - Step 2")
- Press
![]() to select "START", and press OK to begin copying.
to select "START", and press OK to begin copying. - You can change to preferred settings in the "OPTIONS" menu.
- To exit the menu, select "QUIT", and then press OK.
 to select "YES", and press OK.
 - Step 1")
 to select "TRACKS".
  - Step 2")
HDMI CEC protocol
(DVD-S700 only)
The DVD player supports HDMI CEC (Consumer Electronics Control) protocol. Panasonic does not guarantee 100% interoperability with all HDMI CEC devices.
- Set "HDMI CEC" to "On".
One Touch Play
When a video disc is placed in the unit and you press  , it turns on the TV, then disc play starts.
System Standby
When you turn off the TV, all connected HDMI CEC devices switch to standby mode simultaneously.
Control with TV's remote control
The ability to control "Playback Control", "Disc Menu Control" and "Device Select". For details, see the Operating Instructions for your TV.
Changing the player settings
Change the unit's settings if necessary. The settings remain intact even if you switch the unit to standby.
- Press SETUP.
- Press
![]() to select the menu, and press
to select the menu, and press ![]() .
. - Press
![]() to select the item, and press
to select the item, and press ![]() to confirm your selection.
to confirm your selection. - Press
![]() to select the settings, and press OK.
to select the settings, and press OK. - To return the previous menu, press
![]() .
. - To exit, press SETUP.
Operation methods other than the above procedure may be displayed. In that case, follow the on-screen instructions. Depending on the type of media, this unit's settings may be disabled.
- To return the previous menu, press
 to select the menu, and press
  .
. .
.SYSTEM
TV System
 This menu contains the options for selecting the color system that matches the connected TV.
NTSC
Video signal from PAL disc playback will be output in NTSC format.
PAL
Video signal from NTSC disc playback will be output in PAL format.
PAL60
Video signal from NTSC disc playback will be output in PAL60 format.
Auto
Video output signal will be set automatically to suit the connected TV.
Screen Saver
This setting enables the Screen Saver to activate. Screen saver will start automatically if the media playback is stopped for about 5 minutes.
SCART RGB (For the model with AV (21 pin))
When connecting this unit with the SCART terminal, select "On".
Resolution (DVD-S700 only)
Select a video resolution that is compatible with the TV display capability. Selecting "Auto" can automatically select the best resolution.
HDMI CEC (DVD-S700 only)
When connecting this unit with the TV via the HDMI cable, linked operations with a connected device is possible.
TV Type
Select picture aspect to suit your connected TV.
4:3PS/4:3LB
When connected to a 4:3 aspect television:
Playing 16:9 ratio picture is following
- 4:3PS: the side is cut off
- 4:3LB: with black bands on top and bottom
16:9/16:9full
When connected to a 16:9 aspect television:
Playing 4:3 ratio picture is following
- 16:9: displayed in the center of the screen
- 16:9 full: stretched horizontally to fill the TV screen
LANGUAGE
OSD
This switches the language for display menu.
Audio
This switches the language for output audio.
Subtitle
This switches the language for subtitle.
Menu
This switches the language for disc menu.
(For the United Kingdom, Ireland, Eastern Europe and South Africa only)
Xvid Subtitle
You can set the font type that supports the recorded Xvid subtitle.
- Press
![]() to select "Xvid Subtitle", then press
to select "Xvid Subtitle", then press ![]() .
.
"Latin 1", "Latin 2", "Cyrillic", "Turkish"
Select the font type for the recorded title. - Press
![]() to select a setting, then press OK to confirm your selection.
to select a setting, then press OK to confirm your selection.
 to select "Xvid Subtitle", then press
  .
.Changing the player settings
AUDIO
Audio Out (DVD-S700 only)
This sets the audio output method when connected to the "HDMI AV OUT" terminal.
Bitstream
When the connected equipment is supporting Dolby Digital
PCM
When the connected equipment is not supporting Dolby Digital
Dynamic Range
Adjusts for clarity even when the volume is low through compressing the range of the lowest sound level and the highest sound level.
VIDEO
Brightness
This adjusts the brightness.
Contrast
This adjusts the contrast.
Hue
This adjusts the color tone.
Saturation
This adjusts the saturation.
Sharpness
This adjusts the sharpness of the image outline.
OTHER
Rating
This sets the playback limitation level for DVD video discs. Selecting "8 No Limit" can play all discs.
Password
The password is required when setting or canceling the playback limitation or restoring the unit to the factory default. When doing this for the fi rst time, key in "0000".
If you forget your old four-digit password, key in "0000".
Default
This restores the unit to the factory default settings.
Specifications
| Signal system: | PAL/NTSC |
| Operating temperature range: | +5°C to +35°C |
| Operating humidity range: | 20% to 80% RH (no condensation) |
| Video output: | |
| Output level: | 1.0 Vp-p (75 ) |
| Output connector: | Pin jack (1 System) |
| [The model with AV (21 pin)] | AV (21 pin) (1 System) |
| [The model with AV (21 pin)] RGB output: | |
| Output level: | 0.7 Vp-p (75 ) |
| Output connector: | AV (21 pin) (1 System) |
| Audio output: | |
| Output level: | 2 Vrms (1 kHz, 0 dB) |
| Output connector: | Pin jack (1 System) |
| [The model with AV (21 pin)] | AV (21 pin) |
| Number of connectors: | |
| [The model with AV (21 pin)] | 2 channel (2 System) |
| [The model without AV (21pin)] | 2 channel |
| USB slot: | USB2.0: 1 System |
| [DVD-S700] HDMI AV output: | |
| Output format: | 480p/576p/1080i/720p/1080p |
| Output connector: - This unit supports "HDMI CEC" function. | Type A (19 pin) |
| LASER Specification Class I LASER Product: | |
| Wave Length: | 770 to 800 nm (CD)/645 to 660 nm (DVD) |
| Power supply: | |
| [United Kingdom, Ireland, Australia, New Zealand, Eastern Europe and South Africa] | AC 220 to 240 V, 50 Hz |
| [Middle East and Asia] | AC 220 to 240 V, 50/60 Hz |
| [Others] | AC 110 to 240 V, 50/60 Hz |
| Power consumption: | Approx. 10 W |
| Power consumption in standby mode: | |
| [United Kingdom, Ireland, Eastern Europe and South Africa] | Less than 0.5 W |
| [Others] | Less than 1 W |
| Dimensions (W x D x H): | 310 mm x 210 mm x 39 mm (Including the projecting parts) |
| Mass: | Approx. 1.1 kg |
Specifications are subject to change without notice.
Troubleshooting
Before requesting service, make the following checks. If you still need assistance, consult your dealer for instructions.
| To reset |
| Images from this DVD player do not appear on the television.
|
 ; to open the disc tray.
No picture./No sound.
Check the video connection between the DVD player and the TV.
Turn on your TV and set to the correct in channel for the DVD player.
Remote control does not work.
Aim the remote control directly at the sensor on the front of the DVD player.
The screen is distorted. Noise occurs.
Check if the TV System setting is correct.
Discs cannot be played back.
Check for any scratches or smudges on the disc. If the disc is dirty, clean the disc.
Not able to select some items in the setup / system menu.
Press STOP  twice before selecting the setup/system menu.
Depending on the disc availability, some menu items cannot be selected.

Documents / Resources
References

Download manual
Here you can download full pdf version of manual, it may contain additional safety instructions, warranty information, FCC rules, etc.
Advertisement
Thank you! Your question has been received!


Need Assistance?
Do you have a question about the DVD-S500 that isn't answered in the manual? Leave your question here.