Sony ICF-DVD57TV Operating Instructions Manual
Lcd-tv dvd kitchen clock radio
Hide thumbs
Also See for ICF-DVD57TV:
- Service manual (94 pages) ,
- Operating instructions manual (44 pages) ,
- Specifications (2 pages)
Table of Contents
Advertisement
Quick Links
Downloaded from:
LCD-TV DVD Kit chen
Clock Radio
Operat ing Inst ruct ions
Ow ner's Record
The model number and the serial number are located on the top.
Record the serial number in the space provided below. Refer to them
whenever you call upon your Sony dealer regarding this product.
Model No. ICF-DVD57TV
Serial No.
For installation and connections, refer to "Connection" on page 7.
ICF-DVD57TV
© 2005 Sony Corporation
https://www.usersmanualguide.com/
2-593-845-21 (1)
Advertisement
Table of Contents

Related Manuals for Sony ICF-DVD57TV


Summary of Contents for Sony ICF-DVD57TV
- Page 1 Ow ner’s Record The model number and the serial number are located on the top. Record the serial number in the space provided below. Refer to them whenever you call upon your Sony dealer regarding this product. Model No. ICF-DVD57TV Serial No.
- Page 2 Class B digital device, Please register this product on line at pursuant to Part 15 of the FCC Rules. These limits are http://www.sony.com/productregistration. designed to provide reasonable protection against Proper registration will enable us to send you harmful interference in a residential installation.
-
Page 3: Table Of Contents
Table of Cont ent s Features ..............4 Ot her Usef ul Funct ions Precautions ............4 Selecting the audio emphasis ......32 About this manual ..........5 To attenuate the volume ........32 About the discs this unit can play ..... 5 Operating the Cooking Timer Connection ............ -
Page 4: Features
Dolby Laboratories. “DTS,” “DTS Digital Surround” and “DTS Digital Out” are trademarks of Digital Theater Systems, Inc. If you have any questions or problems concerning your unit, please consult your nearest Sony dealer. Downloaded from: https://www.usersmanualguide.com/... -
Page 5: About This Manual
About t his m anual About t he discs t his unit can play Convent ions •Instructions in this manual describe how to This unit can play the following discs: use the unit mainly by using the controls on •DVD VIDEO the supplied remote control. - Page 6 Discs t hat t his syst em cannot play DVD region code t his unit can play. •CD-ROMs This unit has a region code printed on the top •CD-Rs/CD-RWs other than those recorded in of the unit and will only play DVDs that are the following formats: labeled with identical region codes.
-
Page 7: Connection
Connect ion Basic Connect ions (Connect ing CATV or an Use this hookup if you subscribe to a CATV System that does not require a cable box. Ant enna) Connecting directly to cable or an antenna On AUDIO/VIDEO INPUT connect ors You can connect a VCR, etc. -
Page 8: Before Installation
Before Inst allat ion Inst alling t he Unit Under a Cabinet The unit should be installed in an area with good reception. The unit can be installed without the spacer. Im proving t he Recept ion Mark the position of the 4 holes by using the supplied template. -
Page 9: Setting The Clock
Install the unit with the supplied Set t ing t he Clock mounting screws. Plug in the unit. “AM 12:00” will flash in the Clock Display Mounting Window. screw Press CLOCK for a few seconds. You will hear a beep and the hour digits will start to flash in the Clock Display Window. -
Page 10: Location Of Controls
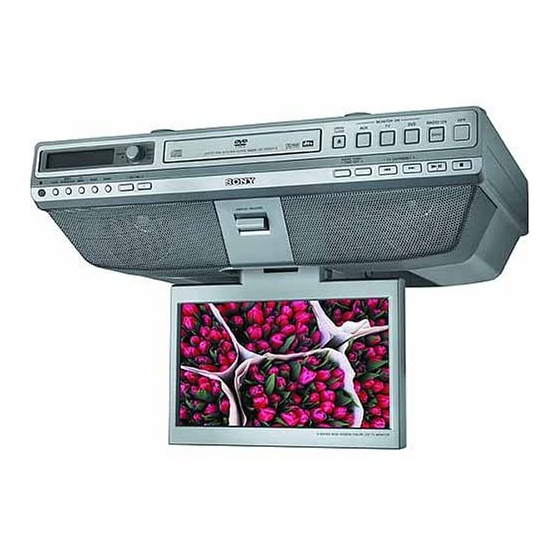
Locat ion of cont rols * There is a tactile dot on the VOLUME + and Refer to the pages listed for details. u buttons. 1 DISPLAY RELEASE 12 qg TV button 12-13 2 Disc Tray 17 To turn on the TV. qh DVD button 17 3 TIMER dial and TIMER indicator, PUSH START/STOP button 32... - Page 11 Remot e cont rol The corresponding but t ons of t he rem ot e cont rol f unct ion t he sam e as t hose on t he unit . Instructions in this manual describe how to use the unit by mainly using the remote control.
-
Page 12: Setting The Monitor
Set t ing t he Channels Wat ching t he TV After you finish connecting the unit, you can run Auto Program to set up your channels. The Initial Setup screen appears when you Set t ing t he m onit or turn your TV on for the first time. -
Page 13: Watching The Tv
Wat ching t he TV Set t ing t he screen m ode In addition to the FULL, ZOOM, WIDE, and Press TV. STANDARD modes are also available. Select the desired channel using TV CH/ PRESET – , .(Previous) or +, Press M ODE/SCREEN SIZE repeatedly. -
Page 14: To Watch Catv Channels
To w at ch CATV channels To display t he channel num ber You have to subscribe to a CATV company. Note that CATV cannot be received in some Press DISP (Display) on the remote control. areas. This TV receives 1-125 cable TV The current channel number appears in the channels. -
Page 15: Playing T He Radio
Sw it ching bet w een Playing t he Radio m onaural and st ereo The radio is set for stereo reception at the default setting. If FM stereo reception is poor, M anual Tuning set to “FM MONO (monaural).” Noise will be reduced although the sound will not be heard Press RADIO ON/BAND [RADIO/BAND] in stereo. -
Page 16: Presetting Your Favorite Stations
Tuning in a Preset St at ion Preset t ing Your Favorit e Press RADIO ON/BAND [RADIO/BAND] St at ions to turn on the radio. Press RADIO ON/BAND [RADIO/BAND] to select the band. Preset Tuning Press TV CH/PRESET – , .(Previous) You can preset up to 10 stations for AM, and or +, >(Next ) [.(Previous)/ 20 stations for FM. -
Page 17: Disc Play
Press Z OPEN/CLOSE to open the disc tray, and place a disc on the disc tray. Disc Play With the label side up This chapter describes various functions for playback. Playing a disc Press Z OPEN/CLOSE to close the disc tray. -
Page 18: Searching A Chapter/Title/Track Directly
Operat ion f or playback Searching a chapt er/t it le/t rack direct ly Do this Use t he rem ot e cont rol. Press x* Stop playback Press Z OPEN/ Eject the disc To select the desired chapter/track number CLOSE on the unit Press the number buttons to enter the desired after the disc stops. -
Page 19: Resume Playback
Resum e playback Playing repeat edly You can resume playback from the point (Repeat Playback) where the playback has been stopped. The unit memorizes the point even after the power is turned off. You can play all of the chapters or titles on a During playback, press x (St op) to stop. -
Page 20: Displaying Elapsed Time
• Video CD (when PBC is off) Displaying elapsed t im e TRACK ELAPSED (Elapsed time of the track) TRACK REMAIN (Remaining time of the track) You can display the elapsed time and the DISC ELAPSED (Elapsed time of the disc) remaining time of DVDs, Video CDs and Audio CDs. -
Page 21: Using A Dvd Menu
Using t he M ENU but t on Using a DVD m enu Some DVDs have a more comprehensive menu that includes things such as the audio With some DVDs you can use the original languages, subtitle languages, titles, and menu such as Title menu and DVD menu. -
Page 22: Changing Angles
Changing angles Using t he PBC (playback cont rol) funct ion Some DVDs have multiple alternative angles During playback of a PBC compatible Video recorded for certain scenes. If you have set CD, you can display the PBC menu to select “ANGLE MARK”... -
Page 23: Changing The Audio
Changing t he audio Changing t he audio out put Some DVDs have multiple audio languages you can choose from. You can select the desired audio output from “STEREO”, “MONO LEFT”, “MONO RIGHT” or “MIX-MONO” during Video CD or Audio CD playback. -
Page 24: Changing Set Up
Changing Set up Press SETUP. G E N E R A L S E T U P A N G L E M A R K R E S E T You can set up and adjust this player using the on-screen Setup Menus. -
Page 25: Setting For The Dvd Player
Set t ing for t he DVD player — GENERAL SETUP G E N E R A L S E T U P A N G L E M A R K R E S E T S E L E C T : < , , E N T E R Q U I T : S E T U P ♦... -
Page 26: Settings For Digital Audio Output - Audio Setup
Notes Set t ings for digit al audio • When “ OFF” is select ed, no signal is out put f rom t he OPTICAL OUTPUT connect or. out put • When you connect t he player and a digit al —... -
Page 27: Language Settings For Dvd Playback
♦ AUDIO Language set t ings for Switches the language of the sound track. When you select “ORIGINAL”, the language DVD playback given priority on the disc is selected. (Default: ORIGINAL) — LANGUAGE SETUP Notes • Regardless of your set t ing, t he language ot her t han you set may be aut omat ically act ivat ed, L A N G U A G E S E T U P... -
Page 28: Settings For Parental Control - Parental Setup
Select ing t he Parent al Set t ings for Parent al Cont rol m ode on and off Cont rol — PARENTAL SETUP – PARENTAL CONTROL When the PARENTAL COTROL mode is set to When you set the password for the first time, ON, the password is required to change the be sure to set the parental control together. -
Page 29: Preparing For The Initial Parental Setting - Level
Preparing f or t he init ial M onit oring video signals parent al set t ing - LEVEL input from a connect ed Playback of some DVDs can be limited device according to a predetermined level, such as the age of the viewer. -
Page 30: Changing The Screen Settings
BRIGHTNESS: TV CH/PRESET +, >(Next) Changing t he screen Press [TUNE/CH +] to brighten the picture. set t ings TV CH/PRESET –, .(Previous) Press [TUNE/CH –] to darken the picture. Press ENTER to enter the setting. You can adjust the screen settings manually if (Default value: 30) the screen is hard to see from your position. - Page 31 DVD AUDIO LEVEL: TV CH/PRESET –, .(Previous) Press or +, >(Next) [TUNE/CH – or +] select one of the following options. HIGH : Select when the sound of playing the DVD is small. NORMAL : Select when the sound of playing the DVD is normal.
-
Page 32: Ot Her Useful Funct Ions
Operat ing t he Cooking Ot her Useful Tim er (Count dow n Tim er) Funct ions The timer can be set at one minute intervals between 1–120. Turn TIM ER until the desired time Select ing t he audio appears in the Clock Display Window. -
Page 33: Addit Ional Inform At Ion
Addit ional Not es on discs inform at ion •To keep the disc clean, do not touch the surface. Handle the disc by its edge. •Keep your discs in their cases or disc magazines when not in use. Do not subject Preparing the Remote the discs to heat/high temperature. - Page 34 M usic discs encoded w it h copyright prot ect ion This product is designed to play back discs that conform to the Compact Disc (CD) standard. Recently, various music discs encoded with copyright protection are marketed by some record companies. Please be aware that among those discs, there are some that do not conform to the CD standard and may not be playable by this product.
-
Page 35: Specifications
Specificat ions AUDIO POWER General SPECIFICATIONS Time display 12-hour system Speaker 77 mm (3 ⁄ inches) dia, POWER OUTPUT AND TOTAL HARMONIC 6 Ω DISTORTION Power outputs 1.8 W + 1.8 W (at 10% With 6–ohm loads, both channels driven from harmonic distortion) 100 –... -
Page 36: Troubleshooting
•Perform Auto Program to add channels not servicing is required. If the problem that are not presently in the memory. persists, consult the nearest Sony dealer. Cable stations don't seem to work •Make sure Cable is set to “ON” in the “TV There is no picture. -
Page 37: Error Display
The language for the sound track cannot be Error display changed when you play a DVD. • Multilingual tracks are not recorded on the DVD. The following indications will be displayed. • Changing the language for the track is POWER OFF OVERHEAT prohibited on the DVD. -
Page 38: Language Code List
Language Code List The language spellings conform to the ISO 639: 1988 (E/F) standard. Code Language Code Language Code Language Code Language 6565 Af ar 7089 Frisian 7771 M alagasy 8382 Serbian 6566 Abkhazian 7165 Irish 7773 M aori 8385 Sundanese 6570 Af rikaans 7168 Scot s/Gaelic 7775 M acedonian... - Page 39 Downloaded from: https://www.usersmanualguide.com/...
-
Page 40: Important Safeguards
Wall or Ceiling M ount ing If your appliance can be mounted to a wall or ceiling, mount it only as recommended by Sony. Pow er Source This appliance should be operated only from the type of power source indicated on the marking label. - Page 41 Unauthorized substitutions may result in fire, electric shock, or other hazards. Saf et y Check Upon completion of any service or repairs to the appliance, ask the service technician to perform routine safety checks (as specified by Sony) to determine that the appliance is in safe operating condition. Downloaded from:...
- Page 42 Downloaded from: https://www.usersmanualguide.com/...
- Page 43 Downloaded from: https://www.usersmanualguide.com/...
- Page 44 Printed on 100% recycled paper using VOC (Volatile Organic Compound)-free vegetable oil based ink. Sony Corporation Printed in China Downloaded from: https://www.usersmanualguide.com/...
- Page 45 This file has been downloaded from: www.UsersManualGuide.com User Manual and User Guide for many equipments like mobile phones, photo cameras, monther board, monitors, software, tv, dvd, and othes.. Manual users, user manuals, user guide manual, owners manual, instruction manual, manual owner, manual owner's, manual guide, manual operation, operating manual, user's manual, operating instructions, manual operators, manual operator, manual product, documentation manual, user maintenance, brochure, user reference, pdf manual Downloaded from:...