
Related Manuals for Beko BBO6851MDX


Summary of Contents for Beko BBO6851MDX
- Page 1 Built-in Oven User Manual BBO6851MDX 385442480/ EN/ R.AA/ 14/11/2022 14:23 7729486388...
-
Page 2: Table Of Contents
Table of Contents 6 General Information About Bak- ing ........... 1 Safety Instructions......General Warnings About Baking Intended Use ......... in the Oven ........Child, Vulnerable Person and Pet 6.1.1 Pastries and oven food..... 26 Safety ..........6.1.2 Meat, Fish and Poultry....29 Electrical Safety ...... - Page 3 Welcome! Dear Customer, Thank you for choosing the Beko product. We want your product, manufactured with high quality and technology, to offer you the best efficiency. Therefore, carefully read this manual and any other documentation provided before using the product.
-
Page 4: Safety Instructions
1 Safety Instructions • This section includes the Intended Use safety instructions necessary • This product is designed to be to prevent the risk of personal used at home. It is not suitable injury or material damage. for commercial use. •... -
Page 5: Electrical Safety
they are supervised or trained • When the door is open, do not about the safe use and haz- put any heavy objects on it or ards of the product. allow children to sit on it. You • Children should not play with may cause the oven to tip over the product. -
Page 6: Transportation Safety
• The product must not be • If the power cable is damaged, plugged into the outlet during it must be replaced by the installation, repair, and trans- manufacturer, an authorized portation. service or a person to be spe- • Plug the product into an outlet cified by the importer com- that meets the voltage and pany in order to prevent pos-... -
Page 7: Installation Safety
• The product is heavy, carry the • To prevent overheating, the product with at least two product should not be in- people. stalled behind decorative • Do not use the door and / or doors. handle to transport or move Safety of Use the product. -
Page 8: Temperature Warnings
• The hinges of the product door Accessory Use move when opening and clos- • It is important that the wire ing the door and might jam. grill and tray are placed prop- When opening / closing the erly on the wire shelves. For door, do not hold the part with detailed information, refer to the hinges. -
Page 9: Steam System
• Do not heat closed tins and food too far in the back of the glass jars in the oven. The grill. This is the hottest area pressure that would build-up and fatty foods may catch fire. in the tin/jar may cause it to 1.10 Steam System burst. -
Page 10: Maintenance And Cleaning Safety
1.11 Maintenance and the lime that may form on the oven base. Otherwise, the Cleaning Safety product base shall be dam- • Wait for the product to cool aged. before cleaning the product. • To remove the lime that may Hot surfaces may cause occur in the water pool on the burns! -
Page 11: Environmental Instructions
2 Environmental Instructions 2.1 Waste Directive 2.2 Package Information Packaging materials of the product are 2.1.1 Compliance with the WEEE Dir- manufactured from recyclable materials in ective and Disposing of the accordance with our National Environment Waste Product Regulations. Do not dispose of the pack- This product complies with EU WEEE Dir- aging waste with the household or other ective (2012/19/EU). -
Page 12: Your Product
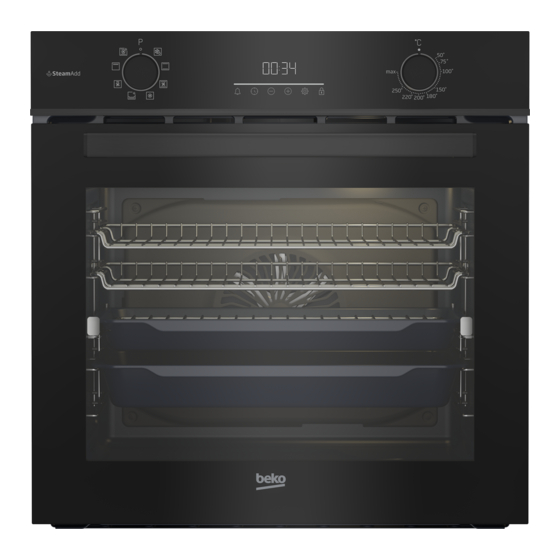
3 Your product 3.1 Product Introduction 1 Control panel 2 Lamp 3 Wire shelves 4 Fan motor (behind the steel plate) 5 Door 6 Handle 7 Water pool for steam assisted cook- 8 Shelf positions 9 Upper heater 10 Ventilation holes 3.2 Product Control Panel Introduc- tion and Usage In this section, you can find the overview... -
Page 13: Control Panel
3.2.1 Control Panel 1 Function selection knob 2 Timer 3 Temperature selection knob If there are knob(s) controlling your Timer product, in some models this/these knob(s) may be so that they come out when pushed (buried knobs). For settings to be made with these knobs, first push the relevant knob in and pull out the knob. -
Page 14: Product Accessories
be set for these functions are shown. The order of the operating modes shown here may differ from the arrangement on your product. Function Temperature Function description Description and use symbol range (°C) The oven is not heated. Only the fan (on the back wall) oper- ates. -
Page 15: Use Of Product Accessories
Standard tray Wire grill in tray It is used for pastries, frozen foods and fry- By placing it in the tray (if provided), it is ing large pieces. ensured that the oils flowing while grilling are collected in the tray and thus the con- tamination of the oven is prevented. - Page 16 On models without wire shelves : Placing the tray on the cooking shelves On models with wire shelves : It is also crucial to place the trays on the Placing the wire grill on the cooking wire side shelves properly. While placing shelves the tray on the desired shelf, its side de- signed for holding must be on the front.
- Page 17 Stopping function of the wire grill There is a stopping function to prevent the wire grill from tipping out of the wire shelf. With this function, you can easily and safely take out your food. While removing the wire grill, you can pull it forward until it reaches the stopping point.
- Page 18 by stretching the front a little. And remove the wire basket by stretching the front handle of the wire frame. Place the frying grill in the oven so as its short handle will face the front. EN / 18...
-
Page 19: Technical Specifications
3.6 Technical Specifications General specifications Product external dimensions (height/width/depth) (mm) 595 /594 /567 Oven installation dimensions (height / width / depth) 590 - 600 /560 /min. 550 (mm) Voltage/Frequency 220-240 V ~; 50 Hz Cable type and section used/suitable for use in the min. -
Page 20: First Use
4 First Use Before you start using your product, it is If the first timer is not set, “12:00” recommended to do the following stated in symbol continue to flash the following sections respectively. and your oven will not start. For your oven to function, you must 4.1 First Timer Setting confirm the time of day by setting... -
Page 21: Using The Oven
NOTICE: Some detergents or cleaning NOTICE: During the first use, smoke and agents may cause damage to the surface. odour may come up for several hours. This Do not use abrasive detergents, cleaning is normal and you just need good ventila- powders, cleaning creams or sharp objects tion to remove it. - Page 22 pleted, turn off the oven by turning the *It varies depending on the product model. It may not be available on your product. function selection knob and the tem- perature knob to the off (up) position. Turning on the oven Cooking by setting the cooking time: When you select a operating function you You can have the oven turn off automatic-...
-
Page 23: Steam Assisted Cooking
ð Your oven will start operating im- • Stay away when opening the oven door, mediately at the selected function as steam and heat may escape during and temperature. The set cooking and after steam assisted cooking. The time starts to count down and the steam may burn your hand, face and/or symbol appears on the display. -
Page 24: Settings
temperature inside the oven Timer keys cannot be used when reaches the set temperature the the key lock is on. The key lock will symbol disappears. not be cancelled in case of power failure. 5. Place your food in the oven at the re- commended rack position. - Page 25 ing time are set at the same time, Setting the display brightness the shorter time is shown on the 1. Touch key until the symbol ap- display. pears on the display. 3. After the alarm time is completed, the symbol starts flashing and gives you an audible warning.
-
Page 26: General Information About Baking
4. Touch the keys to set the minute. 5. Confirm by touching the key. ð The time of day is set and the sym- bol disappears on the display. 6 General Information About Baking You can find tips on preparing and cooking •... - Page 27 • Metal, ceramic and glass moulds extend • If the inside of the cake is cooked well, the cooking time and the bottom sur- but outside is sticky, use less liquid, de- faces of pastry foods do not brown crease the temperature and increase the evenly.
- Page 28 Food Accessory to be Operating func- Shelf position Temperature (°C) Baking time used tion (min) (approx.) Round cake mould, 26 cm in Sponge cake diameter with Fan Heating 30 … 40 clamp on wire grill ** Top and bottom Cookie Pastry tray * 25 …...
-
Page 29: Meat, Fish And Poultry
Preheating is recommended for all food. *These accessories may not be included with your product. **These accessories are not included with your product. They are commercially available accessories. 6.1.2 Meat, Fish and Poultry • After the cooking time is expired, keep the meat in the oven for approximately The key points on grilling 10 minutes. -
Page 30: Grill
6.1.3 Grill The key points of the grill • Prepare foods of similar thickness and Red meat, fish and poultry meat quickly weight as much as possible for the grill. turns brown when grilled, holds a beautiful • Place the pieces to be grilled on the wire crust and does not dry out. -
Page 31: Steam Assisted Cooking
6.1.4 Steam assisted cooking • The cooking table contains cooking re- commendations tested by the manufac- General Information turer. You can set the amount of water, • Steam assisted cooking can only be per- temperature, steam assisted cooking formed with the steam assisted cooking function and time for food which are not functions specified in the manual. -
Page 32: Test Foods
Food Operating func- Shelf position Temperature (°C) Baking time (min) Recommended tion (approx.) amount 15 minutes 250/ Whole chicken Fit Fry 60 … 80 1800-2000 g max then 190 Frozen nugget Fit Fry 15 … 25 400-1000 g Meatball Fit Fry 20 …... -
Page 33: Maintenance And Cleaning
Food Accessory to be Operating func- Shelf position Temperature (°C) Baking time used tion (min) (approx.) Round cake mould, 26 cm in Sponge cake diameter with Fan Heating 30 … 40 clamp on wire grill ** Round black metal mould, 20 Top and bottom Apple pie 50 …... - Page 34 • Some detergents or cleaning agents • If your product has an easy steam clean- cause damage to the surface. Unsuitable ing function, you can make easy steam cleaning agents are: bleach, cleaning cleaning for light non-permanent dirt. products containing ammonia, acid or (See “Easy Steam Cleaning [} 36]”.) chloride, steam cleaning products, de- •...
-
Page 35: Cleaning Accessories
• You can remove the calcium stains (yel- • While cleaning the inox panels with knob low stains) on the glass surface with the control, do not use inox cleaning agents commercially available descaling agent, around the knob. The indicators around with a descaling agent such as vinegar the knob can be erased. -
Page 36: Easy Steam Cleaning
3. To reattach the shelves, the procedures In order to increase the efficiency of de- applied when removing them must be scaling likely in the water pool, in addi- repeated from the end to the beginning, tion to the descaling steps above, after respectively. -
Page 37: Cleaning The Oven Door
Immediately open the door and wipe the lime residue that may form on the oven oven interiors with a wet sponge or cloth. glass, wipe the glass with vinegar and Steam will be released when opening the rinse. door. This may pose a risk of burns. Be Do not use harsh abrasive clean- careful when opening the door. -
Page 38: Removing The Inner Glass Of The Oven Door
Illustration 6: Hinges - open position 7. Get the oven door to a half-open posi- Illustration 3: Hinges - closed position tion. 8. Pull the removed door upwards to re- lease it from the right and left hinges Illustration 4: Hinges - open position and remove it. -
Page 39: Cleaning The Oven Lamp
6. While reassembling the innermost glass (1), pay attention to place the printed side of the glass on the inner glass. It is crucial to place the lower corners of the innermost glass (1) to meet the lower plastic slots. 7. -
Page 40: Troubleshooting
3. If your oven lamp is type (A) shown in the figure below, rotate the oven lamp as shown in the figure and replace it 3. Lift the lamp's protective glass cover with a new one. If it is type (B) model, with a screwdriver. - Page 41 • (If there is timer on your appliance) Keys on the control panel do not work. >>> If your product has a key lock, the key lock may be enabled, disable the key lock. Oven light is not on. • Oven lamp may be faulty. >>> Replace oven's lamp.