
Related Manuals for JVC XS-F720B


Summary of Contents for JVC XS-F720B
- Page 1 BLUETOOTH SPEAKER WITH CD PLAYER XS-F720B 22086-KCD818 P/N:227-00818J06-035L9 Size:145x210mm 80g paper , black prinitng (封面80g书纸,内页70g书纸,黑色 印刷,60版30页钉装,封面/底背面空 白)
- Page 2 MISES EN GARDE IMPORTANTES MERCI DE BIEN VOULOIR LIRE LES CONSIGNES DE SÉCURITÉ ATTENTIVEMENT AVANT D’UTILISER L'APPAREIL ET CONSERVER POUR RÉFÉRENCE ULTÉRIEURE. Il convient que l’aération ne soit pas gênee par l’obstruction des ouvertures d’aération par des objets tels que journaux, nappes, rideaux, etc. ...
- Page 3 Veillez toujours à débrancher l’appareil de la prise électrique avant de le déplacer ou de le nettoyer. Nettoyez-le exclusivement avec un chiffon sec. Débranchez l’appareil quand il y a un orage ou des éclairs, et avant toute période de non utilisation prolongée.
-
Page 4: Description Du Produit
DESCRIPTION DU PRODUIT Vue supérieure Touche Prise MIC 1 Prise MIC 2 Prise d'entrée AUX Port USB Port USB de CHARGE Touche Touche BASSE Touche VOL + MIC Touche 10 / Dossier + Contrôle du Touche 10 / Dossier - Touche VOL - MIC volume Touche... - Page 5 Vue arrière Orifices de ventilation Prise d’alimentation CA CHARGE Votre haut-parleur est alimenté par une batterie plomb-acide rechargeable intégrée (4000mAh). Rechargez la batterie intégrée avant de l’utiliser pour la première fois. La charge peut prendre jusqu'à 7 heures. Attention : Utilisez uniquement le câble d'alimentation fourni. Branchez une extrémité...
-
Page 6: Mise En Marche / Arrêt De L'appareil
Attention : Jeter les batteries de manière responsable dans un centre local de recyclage des déchets ménagers. Ne jetez pas la batterie dans un feu, car elle risque d'exploser. N'essayez pas d'ouvrir le produit ou de remplacer la batterie. La batterie est intégrée et ne peut pas être remplacée. - Page 7 Appuyez sur la touche FONCTION jusqu'à ce que l'écran affiche « BLUETOOTH » et que l’indicateur d’appariement clignote. Activez la fonction Bluetooth de votre périphérique. Choisissez «XS-F720B» pour connecter. Si un code PIN est demandé lors de la connexion d'un appareil Bluetooth, entrez « 0000 ».
-
Page 8: Fonctionnement Usb
L'écran affichera « READING » (INITIALISATION), puis la lecture commencera à partir de la première plage. Pour les CD audio, le nombre total de plages et la durée totale de lecture s’affichent à l’écran. Pour les CD MP3 avec plusieurs dossiers, l'écran affichera le nombre total de dossiers et le nombre total de fichiers. - Page 9 IMPORTANT : Le port USB est conçu uniquement pour le transfert de données, les autres appareils ne peuvent pas être utilisés via cette connexion USB. Il est recommandé de ne pas utiliser de rallonge USB. Ne débranchez pas le périphérique USB de l'appareil lors de la lecture ou de la Autres usages Pour...
- Page 10 Aléatoire Pour mettre en lecture toutes les plages / dossiers dans un ordre aléatoire. Intro. Pour mettre en lecture les 10 premières secondes de chaque plage / fichier. Pour annuler le mode de lecture répétée et revenir à la lecture normale, appuyez sur la touche PROG./P-MODE jusqu'à...
-
Page 11: Entretien Et Nettoyage
2 Sur le microphone, il y a un interrupteur ON / OFF. Assurez-vous de placer l'interrupteur sur la position de marche (ON) pendant le fonctionnement. 3 Appuyez sur la touche MIC VOL + ou - de l'appareil pour augmenter ou diminuer le volume du microphone. -
Page 12: Mise Au Rebut
Plage de fréquence de 2402 - 2480 MHz l'émetteur Bluetooth Puissance max. de l'émetteur 0.167 dBm Bluetooth MISE AU REBUT Nous sommes des revendeurs responsables et nous respectons l'environnement. Nous vous encourageons à respecter les procédures de mise au rebut correcte de votre produit, des éléments d'emballage et, si applicable, des accessoires et des piles. - Page 13 BELANGRIJKE VEILIGHEIDSINSTRUCTIES LEES DE VOLGENDE INSTRUCTIES AANDACHTIG DOOR ALVORENS HET PRODUCT TE GEBRUIKEN EN BEWAAR DEZE GEBRUIKSAANWIJZING VOOR LATERE RAADPLEGING. Belemmer de ventilatie niet door het afdekken van de ventilatiegaten met voorwerpen zoals een krant, tafelkleed, gordijn, etc. Plaats geen bronnen met open vlam, zoals een aangestoken kaars, op het apparaat. ...
- Page 14 Haal de stekker uit het stopcontact bij bliksem, een storm of als u het toestel langere tijd niet denkt te gebruiken. Dit product bevat geen onderdelen die door de gebruiker gerepareerd kunnen worden. Repareer dit product niet zelf. Alleen vakbekwame technici mogen het apparaat repareren. In geval van een storing, neem contact op met een erkende reparateur om het toestel te inspecteren en repareren.
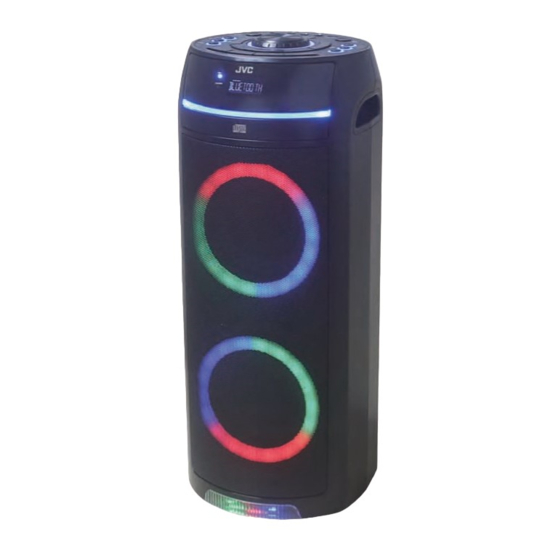
- Page 15 PRODUCTOVERZICHT Bovenaanzicht knop MIC1-aansluiting MIC2-aansluiting AUX IN-aansluiting USB-poort USB-laadaansluiting knop BASS knop 10/FOLD. + knop MIC VOL. + knop 10/FOLD. - knop Volumeregel MIC VOL. - button knop knop EQ button ECHO knop FUNCTION knop OPENEN/SLUITEN knop PROG. / P-MODE knop LIGHT knop knop Vooraanzicht...
- Page 16 Achteraanzicht Ventilatieopeningen AC~ aansluiting OPLADEN Uw speaker wordt van stroom voorzien door een geïntegreerde oplaadbare loodzuuraccu (4000mAh). Laad de geïntegreerde accu volledig op voordat u het toestel voor het eerst gebruikt. Het kan tot 7 uur duren alvorens de accu volledig is opgeladen. Opgelet: Gebruik alleen het meegeleverd snoer.
- Page 17 Opgelet: Lever uw gebruikte batterijen in bij een geschikt inzamelpunt van uw gemeente. Gooi geen batterijen in vuur, ze kunnen ontploffen. Probeer niet om het product te openen en de accu te vervangen. De accu is geïntegreerd en kan niet worden vervangen.
- Page 18 Druk op de FUNCTION knop totdat het scherm„BLUETOOTH“ weergeeft en het PAIR-controlelampje knippert. Schakel de Bluetooth-functie op het toestel in. Kies “XS-F720B” om een verbinding te maken. Als er tijdens het verbinden met een Bluetooth-apparaat naar een pincode wordt gevraagd, voer „0000“...
- Page 19 Voor MP3-CD met meerdere mappen, het scherm geeft het totaal aantal mappen en het totaal aantal bestanden weer. 4 Om een disc te verwijderen, druk op de knop om het afspelen te stoppen en druk dan op de OPEN/CLOSE knop om de CD-klep te openen. ...
-
Page 20: Programma Afspelen
Andere handelingen Doe het volgende Afspelen pauzeren Druk op de knop. De afspeeltijd en het huidig tracknummer knipperen op het scherm. Afspelen hervatten. Druk opnieuw op de knop. Afspelen stoppen Druk op de knop. Het totaal aantal mappen en tracks wordt weergegeven. - Page 21 1 Wanneer het afspelen is gestopt, druk op de PROG./P-MODE knop om de programmamodus te openen. De tekst “PROG” knippert en “P01” verschijnt op het scherm. 2 Druk op de om een track/bestand te selecteren. Wanneer u een map in een USB-apparaat wilt specificeren, druk en houd de 10/FOLD.+ of 10/FOLD.
-
Page 22: Reiniging En Onderhoud
HET GELUIDSEFFECT REGELEN Equalizer (EQ) functie Deze functie stelt u in staat om van speciale geluidseffecten te genieten. Druk tijdens het afspelen herhaaldelijk op de EQ knop om de gewenste instelling te selecteren: FLAT, POP, CLASSIC, JAZZ of ROCK Bass-functie Druk op de BASS knop om het basgeluid al dan niet te versterken. - Page 23 VERWIJDERING Als verantwoordelijke handelaar dragen we zorg voor het milieu. We moedigen u dan ook aan om de juiste verwijderingsprocedure voor uw product en verpakkingsmateriaal, en indien van toepassing, voor het toebehoren en de batterijen te volgen. Dit draagt bij tot het behoud van de natuurlijke rijkdommen door deze op zodanige wijze te recyclen dat zowel de menselijke gezondheid als het milieu worden beschermd.
- Page 24 INSTRUCCIONES DE SEGURIDAD IMPORTANTES LEA ATENTAMENTE LAS SIGUIENTES INSTRUCCIONES ANTES DE UTILIZAR EL APARATO Y CONSÉRVELAS PARA REFERENCIA EN EL FUTURO. No deberá dificultarse la ventilación del aparato obstruyendo las ranuras de aire con objetos como pueden ser periódicos, manteles, cortinas, etc. ...
- Page 25 Desenchufe la unidad durante las tormentas eléctricas o cuando no la piense utilizar durante un período de tiempo prolongado. Este producto no contiene piezas que puedan ser reparadas por parte el usuario. No intente reparar este producto por su cuenta. Este servicio solo deberá ser efectuado por personal técnico cualificado. En caso de un fallo, póngase en contacto con un servicio técnico autorizado para su inspección y reparación.
-
Page 26: Descripción General Del Producto
DESCRIPCIÓN GENERAL DEL PRODUCTO Vista superior botón Conector MIC1 Conector AUX Conector MIC2 IN (Entrada Puerto USB CHARGE (Carga Puerto USB USB) botón Botón BASS (Graves) Botón 10/FOLD. + (10/Carp. +) Botón MIC VOL. + Control del Botón 10/FOLD. (10/Carp. -) Botón MIC VOL. - Page 27 Vista trasera Orificios de ventilación CA ~ toma CARGA Su altavoz está alimentado por una batería integrada recargable de plomo-ácido (4000 mAh). Recargue la batería por completo antes de usar el producto por vez primera. La carga podría tardar hasta 7 horas. Precaución: Utilice únicamente el cable de alimentación suministrado.
-
Page 28: Encendido Y Apagado De La Unidad
Precaución: Deseche las baterías de forma responsable en un punto de reciclado de residuos domésticos municipal. No arroje las baterías al fuego, ya que podrían explotar. No intente abrir el producto para sustituir la batería. La batería está integrada y no es reemplazable. - Page 29 Pulse el botón FUNCTION(Función) hasta que la pantalla muestre “BLUETOOTH” y el indicador luminoso de emparejamiento parpadee. Active la función Bluetooth en su dispositivo. Seleccione “XS-F720B” para conectar. Si se le solicitara un código PIN al conectar un dispositivo Bluetooth, introduzca “0000”.
- Page 30 3 Cierre la puerta de CD, asegurándose de que quede colocada en su sitio. Oirá un clic. La pantalla mostrará “READING” (Leyendo) y la reproducción comenzará desde la primera pista. Para los CD de audio, la pantalla mostrará el número total de pistas y el tiempo total de reproducción.
- Page 31 IMPORTANTE: El puerto USB está diseñado únicamente para transferencia de datos, y no se podrán utilizar otros dispositivos con esta conexión USB. No se recomienda utilizar cables alargadores de USB. No desconecte el dispositivo USB de la unidad cuando lo esté Otras operaciones Para Haga lo siguiente...
-
Page 32: Reproducción Programada
Reproducción aleatoria. Reproducir pistas/archivos en orden aleatorio. Intro. Reproducir los 10 primeros segundos de cada pista/archivo. Para cancelar el modo de repetición de la reproducción y volver a la reproducción normal, pulse el botón PROG./P-MODE hasta que todos los indicadores de repetición desaparezcan de la pantalla. REPRODUCCIÓN PROGRAMADA La programación de pistas/archivos de un disco/dispositivo USB es posible cuando la reproducción esté... -
Page 33: Cuidado Y Mantenimiento
La entrada de micrófono está disponible en todos los modos. 1 Conecte el micrófono a la toma MIC1 o MIC2 situada en el panel superior de la unidad. 2 En el micrófono, existe un interruptor ON/OFF (Encendido/apagado). Asegúrese de establecer el interruptor en la posición ON durante el funcionamiento. - Page 34 Toma de micrófono 6,3 mm Temperatura operativa 5 – 35 °C Versión de Bluetooth Alcance de Bluetooth Aproximadamente 10 metros (distancia de línea de vista) Perfil de Bluetooth A2DP Intervalo de frecuencias del 2402 - 2480 MHz transmisor de Bluetooth Potencia máxima del 0.167 dBm transmisor de Bluetooth...
- Page 35 INSTRUÇÕES DE SEGURANÇA IMPORTANTES LEIA ESTAS INSTRUÇÕES COM ATENÇÃO ANTES DE UTILIZAR O APARELHO, E GUARDE-AS PARA FUTURAS REFERÊNCIAS. A ventilação não deve ser obstruída pela cobertura das aberturas de ventilação com coisas como jornais, toalha de mesa, cortinas, etc. ...
- Page 36 Marca comercial A palavra Bluetooth® e os logótipos são marcas registadas da Bluetooth SIG, Inc. Qualquer uso de tais marcas por parte da King Profit Trading Ltd. é efetuada sob licença. Símbolos Esta marca é aplicada para mostrar que o equipamento se encontra em Equipamento de Classe II conformidade com a diretiva europeia Para identificar o equipamento...
-
Page 37: Visão Geral Do Produto
VISÃO GERAL DO PRODUTO Vista superior botão Entrada MIC1 Entrada MIC2 Entrada Auxiliar (AUX-IN) Porta USB Porta de CARREGAMENTO botão Botão GRAVES Botão MIC VOL. + Botão 10/FOLD. + Botão 10/FOLD. Controlo do Botão MIC VOL. volume botão botão Botão EQ Botão ECO... - Page 38 Vista traseira Orifícios de ventilação Entrada AC~ CARREGAMENTO A sua coluna de som é alimentada através de uma bateria de ácido de chumbo recarregável incorporada (4000mAh). Carregue por completo a bateria antes da primeira utilização. O carregamento pode levar até 7 horas. Cuidado: Use apenas o fio da alimentação fornecido.
-
Page 39: Ligar/Desligar A Unidade
Cuidado: Elimine baterias de forma responsável num centro de reciclagem de resíduos domésticos. Não atire a bateria para o fogo, pois esta pode explodir. Não tente abrir o produto para substituir a bateria. Ela está incorporada e não pode ser substituída. ... - Page 40 Prima o botão FUNÇÃO até que o visor apresente “BLUETOOTH” e o indicador luminoso de emparelhamento comece a piscar. Ligue a função Bluetooth no dispositivo. Selecione “XS-F720B” para ligar. Se lhe for pedido um código PIN enquanto liga um dispositivo Bluetooth, insira “0000”.
- Page 41 4 Para retirar um disco, prima o botão para parar a reprodução, e depois prima o botão de ABRIR/FECHAR para abrir a porta do CD. O visor apresenta “OPEN”. 5 Segure o disco pelas extremidades e retire-o cuidadosamente. NOTA: Para garantir um bom desempenho, espere até...
- Page 42 Outras operações Para Faça o seguinte Faça uma pausa na Prima o botão reprodução. O tempo de reprodução e o número da faixa atual piscam no visor. Continue a Prima de novo o botão reprodução. Pare a reprodução. Prima o botão O número total de pastas e faixas é...
- Page 43 1 Enquanto tem a reprodução parada, prima o botão PROG./P-MODE para entrar no modo de programa. “PROG” pisca e “P01” aparece no visor. 2 Prima o botão para selecionar uma faixa/ficheiro. Quando desejar especificar uma pasta num dispositivo USB, prima e mantenha premido primeiro o botão 10/FOLD.+ ou 10/FOLD.
-
Page 44: Cuidados E Manutenção
AJUSTAR O EFEITO SONORO Função equalizadora (EQ) Esta função permite-lhe desfrutar de efeitos sonoros especiais. Durante a reprodução, prima repetidamente o botão EQ para selecionar a definição desejada: PLANO, POP, CLÁSSICO, JAZZ ou ROCK. Função GRAVES Prima o botão dos GRAVES para ligar ou desligar a função de melhoria dos graves. - Page 45 ELIMINAÇÃO Como um retalhista responsável, nós cuidamos do meio ambiente. Como tal, pedimos-lhe que siga o procedimento correto para a eliminação do produto, materiais da embalagem e, se aplicável, dos acessórios e pilhas. Isto irá ajudar a preservar os recursos naturais e assegurar que os materiais sejam reciclados de forma a proteger a saúde e o meio ambiente.
- Page 46 IMPORTANT SAFETY INSTRUCTIONS PLEASE READ THE FOLLOWING INSTRUCTIONS CAREFULLY BEFORE USING THE PRODUCTAND KEEP FOR FUTURE REFERENCE. The ventilation should not be impeded by covering the ventilation openings with items, such as newspapers, table-cloths, curtains, etc. No naked flame sources, such as lighted candles, should be placed on the apparatus. ...
- Page 47 Trademark The Bluetooth® word mark and logos are registered trademarks owned by Bluetooth SIG,Inc. and any use of such marks by King Profit Trading Ltd.is under license. Symbols This mark is applied to show the equipment conforms to European Class II equipment radio equipment directive.
-
Page 48: Product Overview
PRODUCT OVERVIEW button MIC1 jack Top View AUX IN jack MIC2 jack USB port USB CHARGE port button BASS button 10/FOLD. +button MIC VOL. + button Volume 10/FOLD. - button MIC VOL. - button control button button button EQ button ECHO button FUNCTION button OPEN/CLOSE button... - Page 49 Back View Ventilation holes AC~ socket CHARGING Your speaker is powered by a built-in rechargeable lead-acid battery (4000mAh). Fully charge the built-in battery before using for the first time. Charging may take up to 7 hours. Caution: Use the supplied power cord only. Plug one end of the power cord into the AC socket on the back of the speaker, then plug the other end to a wall outlet.
-
Page 50: Turning The Unit On/Off
Caution: Dispose of batteries responsibly at local authority household waste recycling facility. Do not dispose of batteries in a fire as the batteries may explode. Do not attempt to open the product to replace the battery. It is built-inand not changeable. ... - Page 51 Turn on the Bluetooth function on the device. Choose “XS-F720B” to connect. If a PIN code is requested while connecting a Bluetooth device, enter“0000”. Once successfully connected, start playback on your Bluetooth device. The pairindicatorlight willstop flashing. Rotate the volume control knob on the unit or adjust the volume on theexternal device to increase or decrease the volume to your desired level.
-
Page 52: Usb Operation
NOTE: To ensure good performance, wait until the system has completely read the disc before proceeding with other functions. If no disc is loaded or if the disc is unreadable, the display will show “NO DISC”. Other operations Do this Pause playback Press the button. -
Page 53: Repeat Play Modes
The total number of folders and tracks will be displayed. Select a folder Press and hold the 10/FOLD.+ or 10/FOLD. – button. Select a track/file Press the button. You can skip tracks/files one by one. Select a track/file Press the 10/FOLD. +or10/FOLD. - button to number above 10 skip forward or backward 10 tracks/files. -
Page 54: Aux-In Operation
AUX-IN OPERATION 1 Press the FUNCTION button until the display shows “AUX”. 2 Connect your audio device to the AUX IN jack on the top panel of theunit with an AUX IN cable.(audio cable is not included) 3 Rotate the VOLUME knob on the unit or adjust the volume on theexternal device to increase or decrease the music volume to yourdesired level. -
Page 55: Care And Maintenance
CARE AND MAINTENANCE Clean the outside of the unit with a soft, slightly damp cloth. Never clean it with chemicals or detergent with chemicals or detergent. Keep the unit dust-free. SPECIFICATIONS ACpower input 100-240V~ ( ~ alternating current symbol) 50/60Hz Power consumption USB output... - Page 58 Made in China...