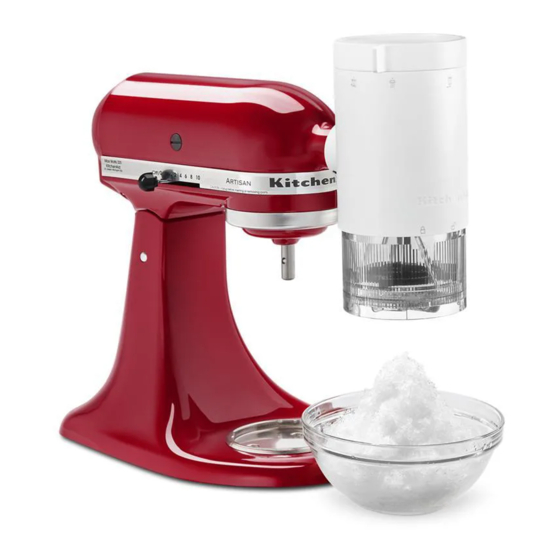
KitchenAid KSMSIA Shave Ice Attachment Manual
- Manual (49 pages) ,
- Owner's manual (21 pages)
Advertisement
PARTS AND FEATURES

- Detachable Ice Cup
- Ice Cup Pusher
- Main Upper Housing
- Convenient Storage Box
- Fine Shave Blade
- Coarse Shave Blade
- Ice Cup Sleeve
- Plastic Ice Mold w/Lid (x4)
PRODUCT SAFETY
IMPORTANT SAFEGUARDS
When using electrical appliances, basic safety precautions should always be followed, including the following:
- Read all instructions.
- This appliance is not intended for use by persons (including children) with reduced physical, sensory, or mental capabilities, or lack of experience or knowledge, unless they are closely supervised and instructed concerning use of the appliance by a person responsible for their safety.
- Close supervision is necessary when any appliance is used by or near children. Children should be supervised to ensure that they do not play with the appliance.
- Never leave the appliance unattended while it is in operation.
- Avoid contacting moving parts. Keep fingers out of discharge opening.
- The use of attachments not recommended or sold by KitchenAid may cause fire, electric shock, or injury.
- Do not use the appliance outdoors.
- Turn the appliance OFF/0, unplug from outlet and detach the attachment from appliance before cleaning and when not in use. Turn the appliance OFF/0 and make sure the motor stops completely before putting on or taking off parts.
- Allow the appliance to cool completely before putting on or taking off parts, and before cleaning the appliance.
- Blades are sharp. Handle Carefully.
- Also see the Important Safeguards section included in the Stand Mixer Use and Care Guide.
SAVE THESE INSTRUCTIONS
This product is designed for household use only.
GETTING STARTED
The Shave Ice Attachment is compatible with all household KitchenAid Stand Mixers. Set the Blades to Shave Ice as per requirement.
| Name | Icon | Intended Use | Speed |
| Coarse Shave Blade |  | For coarser ice shaving / ice chips. | 10 |
| Fine Shave Blade |  | For a fine, fluffy, snowlike ice shaving texture. | 10 |
NOTE: For detailed instructions on swapping blades, please see "CHANGING THE BLADE" section.
TEMPERING THE ICE PUCKS
Tempering Ice means allowing the ice to adjust at room temperature until it develops a glossy, wet look and is clear from all sides. Tempering is an important step for producing the lightest and fluffiest shave ice. Many factors determine the amount of time it takes to temper. In most cases, your ice puck should be ready to use in 10 minutes or less.

NOTE: Ice pucks made with plain water require tempering. For mixed base recipes, refer to the recipe details for tempering instructions.
The Ice Molds are used for best performance for both coarse and fine shaving. It's easy to get shave ice from tempered ice out of the molds.
TIP: For the fluffiest shave ice, we recommend tempering the ice puck for 10 minutes, and then using the Fine Shaving Blade.
PRODUCT USAGE
ICE PUCK PREPARATION
- Fill the ice mold with water or flavored ice base mixture of your choice.

NOTE: To keep the mold from overflowing while freezing, be sure not to fill past the fill line visible just below the rim of the mold. - Affix the lid to the top of the mold and place it in the freezer for 12 to 24 hours.

NOTE: Freezing time may vary and will depend both on the temperature of your freezer as well as the sugar or alcohol content of your mixture.


NOTE: See "Tips for Great Results" sections for more details on Ice Puck Preparation.
SET UP & ASSEMBLY - PREPARING TO MAKE SHAVE ICE
Before using your Shave Ice Attachment, clean it by following the detailed instructions in "CARE & CLEANING" section.
- After removing the ice molds from the freezer, press firmly on the bottom and sides to help release the puck from the mold.

- For Plain Ice recipes, allow ice to rest for up to 10 minutes - this is called "Tempering" and is recommended to achieve ideal Shave Ice results.

- Turn the Stand Mixer OFF (0) and then unplug.

- For Stand Mixer with a hinged attachment hub cover: Flip up to open.
For Stand Mixer with a removable attachment hub cover: Turn the attachment knob counterclockwise to remove the attachment hub cover.

- Insert the Main Housing into the attachment hub, make sure the power shaft fits into the square hub socket. If necessary, rotate the attachment back and forth for proper fitment. The pin on the attachment housing will fit into the notch of the hub rim when in the proper position.

-
Tighten the Stand Mixer attachment hub knob clockwise until the attachment is completely secured into the Stand Mixer.

-
Ensure that the upper lever of the housing is rotated all the way to left. If not, rotate it to the left until it clicks into place. This will ready the attachment for use and must be completed before loading the Ice Puck into the Ice Cup and attaching it to the housing.

-
Remove the Ice Cup from the housing by rotating it to the right and pulling downward. Take note of the small indicator arrow which must line up with the Lock and Unlock symbols on the housing.

OPTIONAL : If you wish to change the blade, grip the blade from the bottom and rotate it to right to unlock and remove.


ASSEMBLY
- Grip the blade from the bottom and slowly insert it into the bottom of the Ice Cup by aligning the interlocking tabs. Once inserted, rotate the blade to the left until you hear a "Click", to properly lock the blade in place.

NOTE: Each of the interlocking tabs is unique size, ensuring the blade can only be installed in the correct position. - Insert the Ice Cup Sleeve into the Detachable Ice Cup, then insert a prepared Ice Puck. Be sure to insert the ice puck with the cross hatches facing upward.

- Attach the Detachable Ice Cup to the bottom side of the main housing, rotating it to the left to lock it in place.

NOTE: The small indicator arrow on the Detachable Ice Cup that should line up with the Lock and Unlock symbols on the main housing. - Release the top lever by gently rotating it to the right. The spring will engage as the Ice Pusher clamps down on the ice puck. The Shave Ice Attachment is properly loaded and ready to use.


SHAVING ICE
- Place a serving dish of your choice beneath the Shave Ice Attachment. Do this before starting the mixer.

-
Plug the Stand Mixer into a grounded outlet Set the mixer to the highest speed to begin shaving. NOTE: For best results, consider rotating the dish as the ice shaves to create a more even, cone-shaped mound of ice.

-
Once shaving is complete, turn off the mixer and return the upper lever to the leftmost locked position.


Electrical Shock Hazard
Plug into a grounded 3 prong outlet. Do not remove ground prong. Do not use an adapter. Do not use an extension cord. Failure to follow these instructions can result in death, fire, or electrical shock.
- Remove the Ice Cup from the housing by rotating it to the right and pulling downward. Discard any remaining ice.

- Finish your Shave Ice dessert with a variety of flavorings or toppings of your choice.
![]()


See below for additional tips, tricks and recipes to help make the most of your Shave Ice experience.
For even more recipes and inspiration, visit KitchenAid.com
CHANGING THE BLADE
- Grip the blade from the bottom and rotate to the right to remove, or to the left to install.
Once inserted, rotate the blade to the left until you hear a "Click", to properly lock the blade in place.

- Each of the interlocking tabs is unique size, ensuring the blade can only be installed in the correct position.


CARE AND CLEANING

Allow the appliance to cool completely before putting on or taking off parts, and before cleaning the appliance.
NOTE: Disassemble the unit properly before cleaning. For instructions, refer to the SET UP & ASSEMBLY section steps 7, 8, and optional.
- The following parts are dishwashersafe, top rack only:
Detachable Ice Cup Fine and Coarse Blades, Plastic Ice Molds Ice Cup Pusher, Ice Cup Sleeve and Lids

- Do not immerse Housing in water or other liquid. Wipe clean with a warm, damp cloth, and dry thoroughly with a soft cloth before re-use or storing.


TIPS FOR GREAT RESULTS
Setting Up Your Shave Ice Attachment
- It is recommended that you install your Shave Ice Attachment on the Stand Mixer first, before completing any other set up step.
- To more easily install the clear plastic Ice Cup into the Upper Housing, look for the small black indicator arrow. This arrow must line up with the Lock/Unlock icons on the Upper Housing.
- When switching blades, please note that the blades feature 3 uniquely sized tabs that must line up with their corresponding slots in the bottom of the ice cup. If the tabs are lined up incorrectly, the blade will not install.
Making Shave Ice
- Tempering is an important part of making great Shave Ice since an ice puck straight out of the freezer is actually TOO COLD to shave. Tempering means allowing your ice puck(s) to warm slightly at room temperature, until the outside of the puck has a nice glossy sheen to it.
This typically takes about 10 minutes.
NOTE: Ice pucks made with plain water require tempering. For mixed base recipes, refer to the recipe details for tempering instructions.
- Some Shave Ice recipes, particularly those with ingredients frozen into the ice puck, may shave better with either the Fine or Coarse blade. It is recommended that you try out recipes with each blade to see which produces your desired result.
Preparing Your Ice Molds
- It is important to note the subtle fill line just below the top rim of the Ice Molds. Please do not fill the molds beyond this line as it may negatively affect freezing.
- Allow ice molds to freeze for a minimum of 12 hours. Note that some mixed base recipes may require more time to freeze due to a variety of ingredients.
- For recipes with sugar, there is a delicate balance between a mixture that is sweet to the taste but still capable of freezing hard enough to shave. Please follow recipes as closely as possible to ensure great results.
- For recipes with Alcohol, you should not exceed an above over 8% within the mixture. This will help ensure the mixture freezes hard enough to shave.
- Consider removing frozen ice pucks from the molds and storing them in another container inside your freezer. This is referred to as "Ice Harvesting" and will help ensure you always have ice on hand when the occasion calls for Shave Ice.
Shave Ice Troubleshooting Tips
- Fine Blade Creates Coarse Ice - This can occur if the ice is still too cold. Consider extending the tempering time. Alternatively, check the blade for any possible damage as this can affect shave performance.
- Puck Does Not Shave - This can occur when a recipe mixture is too soft or too hard. If the mixture is too soft, it may contain too much sugar or alcohol to freeze properly. Consider revisiting the recipe. If the mixture is too hard, the puck may need to temper for longer. See "Making Shave Ice".
- If issues persist, please contact KitchenAid customer service. Visit www.KitchenAid.com for contact information specific to your region.
FOR DETAILED INFORMATION ON USING THE SHAVE ICE ATTACHMENT
Visit www.kitchenaid.com or additional instructions, videos, inspiring recipes, and tips on how to use your Shave Ice Attachment.
SHAVE ICE RECIPES
EVERYDAY SHAVE ICE
Make it Your Own!
Make the pucks. Pour water into the Plastic Ice Molds and freeze for 12-24 hours.
Ingredients:
- 1 frozen ice puck
- Shave ice syrup of choice
Allow the ice puck to rest at room temperature (temper) until the outside of the puck has a nice glossy sheen. Place the ice puck into KitchenAid Shave Ice Attachment. Place a bowl under the attachment, turn speed to 10, and shave the ice. Pack the ice into a small bowl or cup (a 4" wide x 2" tall bowl is ideal) as firm as possible, then drizzle with desired amount of syrups. Enjoy.
For a creamier shave ice version:
Place a small scoop of vanilla ice cream in your bowl (a 4" x 2" tall bowl is ideal) and then pack the shave ice around and on top of it. Top with syrups of choice, and then top with a drizzle of sweetened condensed milk.
CREATIVE NOTE: Add additional toppings like a sprinkle of matcha, fresh diced fruit, caramel sauce, gummy candies, whipped cream.
SHAVE ICE COFFEE 'N CREAM
Customize it More!
Ingredients:
- 1 puck of frozen coffee
- 1 cup of milk of choice, cold
- 1 scoop of vanilla ice cream
Instructions:
Make the ice pucks. Pour leftover coffee into the plastic ice molds and freeze for 12-24 hours. This recipe DOES NOT require tempering.
Place the coffee puck into KitchenAid Shave Ice Attachment. Place a bowl under the attachment, turn speed to 10, and shave the coffee.
Evenly distribute the shave coffee between two cups. Add 1 cup of milk to each cup and whisk briskly with a fork. Add a scoop of vanilla ice cream and serve with a spoon.
CREATIVE NOTE: You can also make this with no milk for more of a traditional shave ice treat. Just place your scoop of ice cream into the bowl first. Shave the coffee then pack the shave coffee around and over the ice cream. Top with a drizzle of heavy cream or sweetened condensed milk. (1 Puck = 1 Coffee Shave Ice)
JUICY SLUSHEES
Get Creative!
1 frozen puck = 1-10 ounce slushee
Ingredients:
- 1 puck of frozen juice (apple, orange, cranberry - no pulp)
- Sparkling water, chilled
Instructions:
Make the ice pucks. Pour juice into the Plastic Ice Molds and freeze for 12-24 hours. This recipe DOES NOT require tempering.
Place the frozen juice puck into KitchenAid Shave Ice Attachment. Align the arrow on the canister with the unlocked symbol then twist counter clockwise to lock in place. Place a bowl under the attachment, turn speed to 10, and shave the juice.
Place the shave juice into a glass, add ¾ cup of sparkling water, and whisk briskly with a fork. Enjoy.
FRUITY LEMONADE FREEZE
Try Something New!
Frozen fruit pucks (Makes 2):
- 8 Ounces Fruit of choice (frozen or fresh)
- 1 cup of water
- 1 tablespoon honey
Instructions:
For Frozen Pucks: Blend 8 ounces of fruit of choice with 1 cup of water and 1 tablespoon of honey. Pour the mixture through a fine mesh sieve to remove any pulp or seeds. Then, pour into the plastic ice molds and freeze for 12-24 hours. This recipe DOES NOT require tempering.
For Lemonade:
1 frozen fruit puck
Lemonade of choice, cold
Place the fruit puck into KitchenAid Shave Ice Attachment. Align the arrow on the canister with the unlocked symbol then twist counter clockwise to lock in place. Place a bowl under the attachment, turn speed to 10, and shave the fruit puree.
Add the shave puree into a glass of choice. Add ¾ cup of lemonade and whisk briskly with a fork. Enjoy!
CREATIVE NOTE: You can replace the lemonade with your favorite iced tea.

Documents / Resources
References
![kitchenaid.com]() Kitchen Appliances to Bring Culinary Inspiration to Life | KitchenAid
Kitchen Appliances to Bring Culinary Inspiration to Life | KitchenAid![www.kitchenaid.com]() Kitchen Appliances to Bring Culinary Inspiration to Life | KitchenAid
Kitchen Appliances to Bring Culinary Inspiration to Life | KitchenAid
Download manual
Here you can download full pdf version of manual, it may contain additional safety instructions, warranty information, FCC rules, etc.
Advertisement
Thank you! Your question has been received!


Need Assistance?
Do you have a question about the KSMSIA that isn't answered in the manual? Leave your question here.