
Related Manuals for Unique CLASSIC RETRO UGP-36CR W


Summary of Contents for Unique CLASSIC RETRO UGP-36CR W
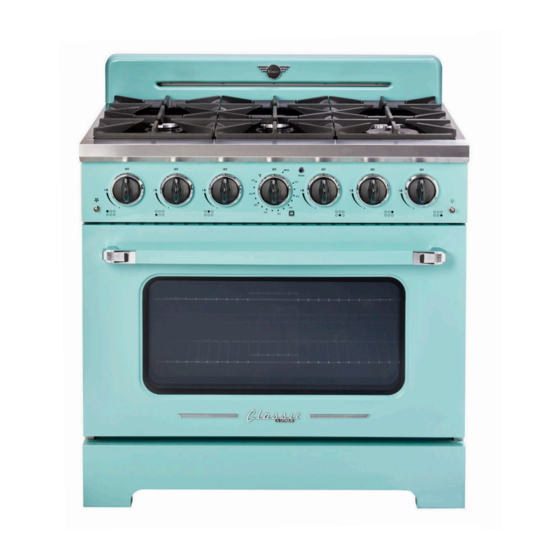
- Page 1 CLASSIC RETRO BY UNIQUE 36”CONVECTION GAS RANGE MODEL NUMBERS: UGP-36CR W, UGP-36CR B, UGP-36CR LG, UGP-36CR T OWNER’S GUIDE serial number: DEC22V1 4002621...
- Page 2 CLASSIC RETRO BY UNIQUE 36” CONVECTION GAS RANGE GAS RANGE - NG & LPG CONVERTIBLE Installation & Owner’s Manual This manual contains information for: • Important Safeguards • Installation • Use and Care Certain ranges come equipped with special features. Determine from a study of your range which of the instructions given in this booklet pertain to your range.
- Page 3 MANUFACTURED & CERTIFIED BY Unique Appliances WARNING: If the information in this manual is not followed exactly, a fire or explosion may result causing property damage, personal injury or death. Do not store or use gasoline or other flammable vapors and liquids in the vicinity of this or any other appliance.
-
Page 4: Table Of Contents
TABLE OF CONTENTS BEFORE USING YOUR GAS RANGE ....5 WELCOME ........6 IMPORTANT SAFEGUARDS . -
Page 5: Before Using Your Gas Range
BEFORE USING YOUR GAS RANGE WARNING HAVE THIS RANGE INSTALLED BY A QUALIFIED INSTALLER. Improper installation, adjustment, alteration, services, or maintenance can cause injury or property damage. Consult a qualified installer, service agency, or the gas supplier. BEFORE USING YOUR GAS RANGE: •... -
Page 6: Welcome
WELCOME & CONGRATULATIONS Congratulations on your purchase of a UNIQUE range! We are very proud of our product – and are completely committed to providing you with the best service possible. Your satisfaction is our #1 priority. Please read this manual very carefully. It contains valuable information on how to properly maintain your new Unique propane range. -
Page 7: Important Safeguards
READ ALL IMPORTANT SAFEGUARDS AND ALL INSTRUCTIONS BEFORE USING THE APPLIANCE. WARNING If the information in this manual is not followed exactly, a fire or an explosion may result causing property damage, personal injury or even death. Do not store or use gasoline, liquid propane cylinder or other flammable vapors and liquids in the viicinity of this appliance. -
Page 8: Safety Instructions
SAFETY INSTRUCTIONS Definitions This is a safety alert symbol. It will alert you to potential personal or property safety hazards. Obey all safety messages to avoid any property damage, personal injury or death. WARNING WARNING indicates a potentially hazardous situation which, if not avoided, could result in serious injury or death. - Page 9 SAFETY INSTRUCTIONS UNPACKING AND HANDLING Extremely Heavy. Proper equipment and adequate manpower when move the range to avoid personal injury or damage to the unit or the floor. The unit is heavy and rests on adjustable steel legs. Failure to follow this advice may result in damage or personal injury. WARNING DO NOT lift range by the oven door handles !! WARNING...
-
Page 10: Installation And Operation Instructions
INSTALLATION AND OPERATION INSTRUCTIONS To ensure proper and safe operation, read all instructions before using the product. Install or locate the product only in accordance with the provided Installation Instructions. WARNING • All servicing should be performed to a qualified technician. •... - Page 11 INSTALLATION AND OPERATION INSTRUCTIONS IMPORTANT Keep appliance area clear and free from combustible materials, gasoline, and other flammable vapors. Gas Supply Requirements Installation of this range must conform with local codes, or in the absence of local codes, the National Fuel Gas Code, ANSI Z223.1 I NFPA 54. In Canada, installation must conform to the current natural Gas Installation /code, CAN 1-1.1-M81 and with local codes where applicable.
- Page 12 CARBON MONOXIDE WARNING Carbon Monoxide is a possible danger when using any gas powered appliance. All gas appliances MUST be installed by a licensed professional who is familiar with the Carbon Monoxide levels appropriate for each appliance. The American Gas Association publishes CO emissions for appliances and heating equipment through the ANSI Std.
-
Page 13: Installation Instructions
INSTALLATION INSTRUCTIONS Be sure appliance is properly installed and grounded by a qualified technician. It is the responsibility of the technician to make certain that your range is properly installed. Situations caused by improper installation are not covered under the warranty. - Page 14 INSTALLATION INSTRUCTIONS Dimensions and Clearances The range may be installed flush to the rear wall. You may install a non-combustible material on the rear wall above the range and up to the vent hood. It is not necessary to install non-combustible materials behind the range below the counter top height. The minimum distance from the side of the range above the counter top to combustible sidewalls must be at least 10 inches.
- Page 15 INSTALLATION INSTRUCTIONS Minimum to cabimets on either side Maximum depth of the range for cabinets above countertops Minimum To wall on either side sealed burner models Front edge of the range side panel forward from cabinet To countertops below cooktop and at the range back...
- Page 16 INSTALLATION INSTRUCTIONS Electric Power Supply Requirements Your range must be electrically grounded in accordance with local codes or, in the absence of local codes, in accordance with the National Electrical Code (ANSI/NFPA 70, latest edition). In Canada, electrical grounding must be in accordance with the current CSA C22.
- Page 17 INSTALLATION INSTRUCTIONS Area allows for flush installation with through-the-wall connection of pipe stub/shut-off valve and rear wall 120V outlet. Shortest connection from Area allows for flush installation hard pipe stub location with through-the-floor connection to range hook-up of pipe stub/shut-off valve HOW TO INSTALL THE BACKSPLASH 1.
-
Page 18: Handle Installation Instructions
HANDLE INSTALLATION INSTRUCTIONS Step 1: Use the allen key that is included with your range to loosen the screws on the bottom of the handles. Step 2: Insert the assembled handle onto the range door. -- - ---- -----c:a -------- --- �... -
Page 19: Gas Connection
GAS CONNECTIONS Connect Range to Gas Supply • Install a manual gas line shut-off valve in the gas line in an easily accessed location outside the range in the gas piping external to the appliance for the purpose of turning on or shutting off gas to the appliance. •... -
Page 20: Gas Range Conversion
GAS RANGE CONVERSION To convert application and/or adjust from NG to LPG The range is set for use with Natural Gas (NG). The factory setting is indicated on the serial plate. When set for Natural Gas operation, the pressure regulator will regulate the gas to 4”... - Page 21 GAS RANGE CONVERSION *Note: For operation at elevations above 2000ft., appliance rating shall be reduced at the rate of 4% for each 1000 ft. above sea level IMPORTANT: After replacing the natural gas to LP orifices, be sure to keep the original factory installed natural gas orifices for future range conversion back to natural gas.
-
Page 22: Converting Range To Liquified Pertoleum Gas
INSTRUCTIONS FOR CONVERTING RANGE TO OPERATE ON LIQUEFIED PETROLEUM GAS 1. Convert the Pressure Regulator To access the gas regulator, pull the range away from the cabinet wall. The gas regulator is located at the bottom right corner of the range. Electrical shock hazard can occur and result in injury or death. - Page 23 INSTRUCTIONS FOR CONVERTING RANGE TO OPERATE ON LIQUEFIED PETROLEUM GAS 2. Convert Top Burner for LP/Propane Gas CAUTION Save the natural gas orifices removed from the appliance for possible future conversions to natural gas. You should use the following process to convert to Natural gas.
- Page 24 INSTRUCTIONS FOR CONVERTING RANGE TO OPERATE ON LIQUEFIED PETROLEUM GAS 3. Convert Oven Burner Orifice for LP/Propane Gas Remove 3 screws between the kick panel and the oven door (ref below 1.). Hold the toe kick panel on both ends and slowly pull upwards and out towards your self. (ref below 2.).
- Page 25 INSTRUCTIONS FOR CONVERTING RANGE TO OPERATE ON LIQUEFIED PETROLEUM GAS 5. Convert Gas Valves for LP/Propane Gas Remove control knobs (ref below 1.). Turn the top burner valve fully counterclockwise (minimum position), then proceed to adjust the adjustment screw clockwise for a smaller flame and counterclockwise for a bigger flame.
- Page 26 INSTRUCTIONS FOR CONVERTING RANGE TO OPERATE ON LIQUEFIED PETROLEUM GAS 6. Reconnect Gas and Electrical Supply to Range Leak testing of the appliance shall be conducted according to the installation instructions provided with the range. Checking for Manifold Gas Pressure If it is necessary to check the manifold gas pressure, remove the burner cap, inner ring, outer burner head and burner base of the right front top burner and connect a manometer (water gauge) or other pressure test device to the burner orifice.
- Page 27 INSTRUCTIONS FOR CONVERTING RANGE TO OPERATE ON LIQUEFIED PETROLEUM GAS 7. Air Shutter Oven Burner The air shutter for the oven burner may need adjustment, especially if the unit has been converted for use with LP/Propane gas. The approximate flame length of the oven burner is 1 or 1.5 inch (distinct inner blue flame).
-
Page 28: Hood Composite Install & Using Range For First Time
HOOD/COMPOSITE OVERLAY INSTALL & USING OVEN FOR FIRST TIME ISLAND INSTALLATION WALL INSTALLATION Wood Composite Overlay Wood Composite Overlay Metal Hood Metal Hood 30” (762mm) min 30” (762mm) min 36” (914mm) max 36” (914mm) max 66”-72” 66”-72” Countertop (1676mm) Countertop (1676mm) (1829mm) (1829mm) -
Page 29: Cooktop Operation
COOKTOP OPERATION 36” Control Panel Push to release gas. Turn to Ignite and “Hi” Adjust to appropriate position. flame height. To light the surface burners, push and turn the appropriate control knob counter clockwlse to a “Hi” position. You will hear a clicking noise (the sound of the electric spark igniting the burner). - Page 30 COOKTOP OPERATION SIMMER AND BOIL • A smaller flame will give the best simmer results. Small flames offer precise cooking performance for delicate foods, keeping food warm, melting chocolate or butter, and for cooking that need to cook over low heat for a long time. •...
- Page 31 COOKTOP OPERATION WARNING FOOD SAFETY According to the United States Department of Agriculture: DO NOT hold foods at temperatures between 40°F to 140°F more than 2 hours. Cooking raw foods below 275°F is not recommended. WARNING Never use this appliance as a space heater to heat or warm the room, Doing so many result in carbon monoxide poisoning and overheating of the oven.
-
Page 32: Oven Operation
OVEN OPERATION HOW TO USE THE GAS OVEN General features The gas oven is provided with two burners: The Oven burner, mounted on the lower part of the oven The Broil burner, mounted on the upper part of the oven Using the oven for the first time It is advised to follow these instructions: •... - Page 33 OVEN OPERATION OVEN VENT Do not block the ducts at the rear of the range when cooking in the oven. It is important that the flow of hot air from the oven and fresh air into the oven burner never be interrupted. Avoid touching the vent opening or nearby surfaces during oven or broiler operation - they may become hot.
- Page 34 OVEN OPERATION OVEN THERMOSTAT - The numbers printed on the control panel indicate the increasing oven temperature value (°F). - To regulate the temperature, set the chosen number onto the control knob indicator. - The position BROIL serves only to turn on the broil burner. Note: When the range will not be used for long periods of time, set the gas knobs to their OFF positions and also close the gas shut-off valve placed on the main gas supply line.
- Page 35 OVEN OPERATION CONVECTION MODE Heat is transferred from the bake burners in the bottom of the oven cavity to the oven cavity itself. The convection fan in the rear of the oven then circulates the hot air, providing even heat distribution throughout the oven. Convection cooking generally provides a more even temperature with faster baking times than the standard oven baking setting.
- Page 36 OVEN OPERATION 1. When using the range for the first time or after long period of non-usage, keep pressing the knob inward for approximately 10 – 15 seconds after the burner has lit to ensure the gas valve has been accurately primed. 2.
-
Page 37: Broiler Operation
BROILER OPERATION NOTE: Door must be closed during broiling operation. Broiling is a method of cooking tender cuts of meat directly under the infrared broiler in the oven. Broiling in the oven is accomplished with the oven door closed. It is normal and necessary for some smoke to be present to give the food a broiled flavor. -
Page 38: Care & Maintenance
CARE AND MAINTENANCE Grates, Main Tops, Surface Burners The grates are made of cast iron. These materials can be cleaned at the sink with detergent or soap-filled scouring pads. Do not be alarmed when the grate loses its shiny finish. The heat from the burners will cause the grates to lose their shiny finish. Clean the burner with soap and water, rinse thoroughly and dry completely before reassembling. - Page 39 CARE AND MAINTENANCE Cleaners and Cleaning Materials Do not use harsh cleaners or degreasers on or around functional parts (valves, controls, etc., or aluminum tubing). This will damage or drastically reduce the life of the part. Use only a mild solution of soap and water on backguards, aluminum control panels and painted surfaces.
- Page 40 CARE AND MAINTENANCE CORRECT REPLACEMENT OF THE BURNERS It is very important to check that the burner flame spreader and the cap have been correctly positioned. Failure to do so can cause serious problems. In appliances with electric ignition, check that the electrode is always clean to ensure trouble-free sparking.
- Page 41 CARE AND MAINTENANCE OVEN RACK INSTALLATION AND REMOVAL • The oven racks are provided with a safety catch to prevent accidental removal. • They must be inserted as shown. • To pull them out remove the rack in the reverse order. REMOVING THE OVEN DOOR FOR CLEANING To facilitate oven cleaning, it is possible to remove the door.
- Page 42 CARE AND MAINTENANCE LEVELING THE RANGE The range must be level to obtain proper operating. The four screws type leveling legs located on the corners at the bottom of range should be adjusted by turning them clockwise to make the range higher or counter-clockwise to lower the range until the range is level.
- Page 43 CARE AND MAINTENANCE COOKTOP • To avoid electrical shock or burns, turn off all controls and ensure the cooktop is cool before cleaning. • Before cleaning the cooktop, ensure that all burners are turned off and that all components are cool enough to safely touch. Do not use harsh or abrasive cleaning agents, waxes, polishes, or commercial •...
- Page 44 CARE AND MAINTENANCE METAL FINISHES • Wash with soap and water, glass cleaner, or mild liquid sprays. OVEN RACKS • Clean oven racks with solution of detergent and hot water. To clean heavy soil, use a scouring pad such as steel wool with plenty of water. OVEN FRAME •...
-
Page 45: Troubleshooting
TROUBLESHOOTING Before you call for service, please review the potential problems and possible causes and remedies shown in the table. Problem Possible Cause Remedy • Have oven connected to a properly sized electrical power supply by a qualified • Oven is not connected to the electrician. -
Page 46: Wiring Diagram
WIRING DIAGRAM... - Page 47 APPLIANCE INFORMATION (manual copy - keep with your records) To make care and servicing of your range easy and efficient, please record the following information for future reference: Model: Serial Number: Purchased From: Date Purchased: Installed By: detatch along dotted line detatch along dotted line APPLIANCE INFORMATION (remote copy - keep with your appliance)
-
Page 48: Warranty
This UNIQUE appliance must be serviced regularly as outlined in the Owner’s Manual. In case of damage, the owner must provide proof of purchase, Model, and Serial Number to the selling dealer or Unique Appliances. This warranty is LIMITED STRICTLY to the terms indicated herein, and no other expressed warranties or remedies thereunder shall be binding on Unique. -
Page 49: Product Registration
Toll-free Website info@UniqueAppliances.com 1-877-427-2266 or 1-905-827-6154 www.UniqueAppliances.com available during regular business hours, 8:30 am to 4:30 pm, EST Please visit our website for more quality Unique products: www.UniqueAppliances.com Unique Appliances Ltd., 2245 Wyecroft Road #5, Oakville, Ontario, Canada, L6L 5L7... -
Page 50: Rating Plate
RATING PLATE Conforms to ANS1 STD Z21.1-2018 Certified to CSA STD 1.1-2018 En conformité avec ANS1 STD Z21.1b-2018 Certifiés CSA STD 1.1-2018 HOUSEHOLD COOKING APPLIANCE. FOR INDOOR USE ONLY. APPAREIL DE CUISSON DOMESTIQUE. POUR USAGE INTÉRIEUR SEULEMENT. Model: UGP-36CR Serial No: Modèle: UGP-36CR de série: Brûleur... - Page 52 ©2022 Unique Appliances Ltd., 2245 Wyecroft Road #5, Oakville, Ontario, Canada, L6L 5L7 www.UniqueAppliances.com...