Buffalo LinkStation 200 User Manual
Hide thumbs
Also See for LinkStation 200:
- User manual (142 pages) ,
- User manual (127 pages) ,
- User manual (137 pages)
Advertisement
Quick Links
Advertisement

Related Manuals for Buffalo LinkStation 200


Summary of Contents for Buffalo LinkStation 200
- Page 1 LinkStation 200 User Manual www.buffalotech.com 35020312-02 2014-03...
-
Page 2: Table Of Contents
Contents Chapter 1 Installation ............7 Diagrams ....................7 Turning the LinkStation On and Off ...........8 Chapter 2 Configuration ...........9 Opening Settings from a Computer ...........9 Opening Easy Admin ..................9 Opening Advanced Settings .............12 Opening Settings from a Smartphone ..........13 iPhone, iPad, and iPod touch ...............13 Android Smartphones and Tablets ..............14 Chapter 3 Remote Access ..........17 WebAccess ..................17... - Page 3 Access Restrictions ..................36 Active Directory .................38 NT Domains ..................40 Delegating Authority to an External SMB Server ......42 Chapter 5 Managing Storage..........45 RAID Arrays ..................45 Working with RAID Arrays ..............45 Using JBOD ....................45 Changing RAID Mode ...................46 RMM (RAID Mode Manager) .................47 RAID Scanning....................48 Adding an External Hard Drive ............49 Connect an External Drive................49...
- Page 4 Hard Drive Replacement Examples .............56 Chapter 6 Backup ............62 Back Up from the LinkStation ............62 Preparing a Backup Destination ..............62 Configuring a Backup Job ................63 Backing Up Your Mac with Time Machine ........65 Copying from a USB Device ...............68 Configuring Direct Copy ................68 Starting Direct Copy ..................70 Chapter 7 Multimedia .............71 DLNA ....................71...
- Page 5 Setting up a Printer from a Smartphone .............80 Setting up a Printer with Windows 8.1, Windows 8, Windows 7, or Windows Vista ....................81 Setting Up a Printer with Windows XP ............82 Chapter 8 Advanced Features ........83 Email Notification ................83 Sleep Mode ..................84 Encrypting Data Transmission ............85 Encrypting Settings Data ................85 Encrypting FTP Transfer Data ..............85...
- Page 6 Changing the IP Address ................96 Chapter 10 Appendix ............98 When the Power LED Blinks ...............98 Default Settings ................100 Specifications .................. 100 Models ......................101 Chapter 11 Regulatory Compliance Information ..103 The United States ................103 Europe ....................103...
-
Page 7: Chapter 1 Installation
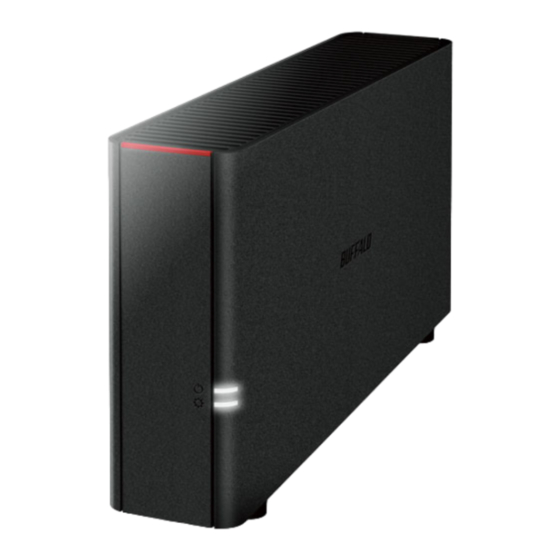
Chapter 1 Installation Diagrams LS210D LS220D/LS220DE Power LED The white power LED will light up while the LinkStation is on. The white power LED blinks while booting or shutting down. The red power LED blinks when an error occurs. If there is a status message, the power LED blinks amber. If there is new firmware available, the power LED glows amber. -
Page 8: Turning The Linkstation On And Off
Power Switch Move the switch up and down to power on and off. USB 2.0 Port Compatible Buffalo USB hard drives, USB flash drives, digital cameras, and USB printers can be connected. USB hubs are not supported. LAN Port Connect to a router, hub, or switch on your Ethernet network with the included Ethernet cable. -
Page 9: Chapter 2 Configuration
Chapter 2 Configuration Configure and administer your LinkStation using the Settings interface, accessible from a browser window. Open the interface using the procedure below or type the LinkStation’s IP address in the URL field of your browser. Within Settings, the Easy Admin page gives you quick access to commonly used settings. Opening Settings from a Computer Note: Internet Explorer 9, Firefox 18, Google Chrome 24, Safari 5, and later are supported. - Page 10 Notes: • If you click any buttons, you will need to enter a username and password. • Username/Password Combinations: Username Password Settings Available admin password LinkStation’s name, IP address, guest blank workgroup, drive status, firmware version LinkStation’s name, IP address, workgroup, drive status, your username your password...
- Page 11 The first time you access your LinkStation, this page will open. Step through the wizard to change your administrative password. WebAccess Configure WebAccess to access your LinkStation remotely. Refer to the WebAccess section in chapter 3 for more information. BitTorrent Configure BitTorrent to download large files efficiently.
- Page 12 DLNA Configure DLNA to stream media files to DLNA-compatible devices on the LAN. Refer to the DLNA section in chapter 7 for more information. Opening Advanced Settings Click Advanced Settings in Easy Admin. Enter the administrator username and password, then click OK. The Advanced Settings screen will open.
- Page 13 Note: To go back to Easy Admin, click the Home icon. Opening Settings from a Smartphone You can access your LinkStation’s Settings from your iOS or Android device. Download and install “SmartPhone Navigator” from the App Store or Google Play. Notes: •...
- Page 14 Settings will be displayed. Notes: • The first time you go through setup, you’ll be given a chance to change the default password, correct the time zone settings, and select the RAID mode (models with 2+ drives only). Step though the wizard to change these settings.
- Page 15 Tap Open Settings. Settings will be displayed. Notes: • The first time you go through setup, you’ll be given a chance to change the default password, correct the time zone settings, and select the RAID mode (models with 2+ drives only). Step though the wizard to change these settings.
- Page 16 • Tap Desktop to show Advanced Settings. This screen gives the full array of settings that could be changed from a computer, but is not optimized for smartphones. What the Mobile Mode Settings Can Do You can change the following settings from your mobile device: •...
- Page 17 Chapter 3 Remote Access WebAccess WebAccess is a program for accessing the files in the shared folder of your LinkStation from your computer, smartphone, or tablet through the Internet. Notes: • Be careful when configuring WebAccess. Certain settings can make the files in the shared folder available to any- one on the Internet, without any access restrictions.
- Page 18 Enter a username and password. This will create a new user. Tap Next. Enter the password from the previous step again and tap Next.
- Page 19 Tap OK. Note: If UPnP is not enabled on your network, you will only be able to access your NAS from the local network. To use WebAccess from outside your home, either enable UPnP in the router or open port 9000 for WebAccess in your router’s settings.
- Page 20 Tap Browse. WebAccess will launch. Tap OK if the following message is displayed. Tap your NAS’s hostname to open the shared folder.