Table of Contents
Advertisement
Available languages
Available languages
Quick Links
Air Purifier with humidification
This manual is made with 100% recycled paper.
EN IN TH DB98-34547A(4)
Paper_AC347HPAWQ_3ge_IB_cover_EN.indd 3
function
user manual
imagine
the possibilities
Thank you for purchasing this Samsung product.
To receive more complete service, please
register your product at
www.samsung.com/register
AC-347HPAWQ Series
AX034EPXAWQ Series
2013-07-31 오전 10:27:41
Advertisement
Chapters
Table of Contents

Related Manuals for Samsung AC-347HPAWQ Series


Summary of Contents for Samsung AC-347HPAWQ Series
- Page 1 Air Purifier with humidification function user manual This manual is made with 100% recycled paper. imagine the possibilities Thank you for purchasing this Samsung product. To receive more complete service, please register your product at www.samsung.com/register EN IN TH DB98-34547A(4) Paper_AC347HPAWQ_3ge_IB_cover_EN.indd 3...
- Page 2 ) and destroys the hydrogen bond of protein structure to perform sterilization which removes germ, virus, and mold in the air. f Clean humidification : Samsung air purifier with humidification function uses a water purification filter to prevent white powder caused after moisture vaporizes from forming. High-class design f The high-class design of the air purifier with humidification function gives the feel of gentle breeze.
-
Page 3: Table Of Contents
Contents Safety precautions ..................... . . 3 Check before use . - Page 4 Safety precautions FOR INSTALLATION CAUTION The appliance should be installed in a place where the power cord of the product can be easily pulled out. f Failure to do so may result in electric shock or fire due to electric leakage. Install your appliance on a level and hard floor that can support its weight.
- Page 5 FOR OPERATION WARNING If the appliance is flooded, turn off the appliance and contact a service center. If the appliance generates a strange noise, a burning smell or smoke, disconnect the power supply immediately and contact a service center. f Failure to do so may result in electric shock or fire. In the event of a gas leak (such as propane gas, LP gas, etc.), ventilate immediately without touching the power plug.
- Page 6 Safety precautions FOR OPERATION CAUTION Keep about 2m distance from other electric appliances such as TV, video, audio etc. f Failure to do so may result in reduced video quality or noise. Leave more than 15cm space between the product and the wall. f This appliance intakes air from rear side to purify the air, so installing the appliance in the middle of the place might be efficient.
-
Page 7: Check Before Use
Check before use Checking installation Check the required installation condition below. f The installation area should be level, not sloping. f The area near the air intake and air outlet should Be free from obstruction. f The area should not be humid, nor have inflammable material nearby. f The area should allow 15cm away from the wall. - Page 8 If the pre filter is cleaned frequently, the capacity of air purifier with humidification function is improved and you can maintain better indoor environment. f For filter change, refer to the 'Changing the HEPA and deodorization flter' in the cleaning and maintenance section. Product specification AC-347HPAWQ Series Model AX034EPXAWQ Series Product size(WxHxD)
- Page 9 3. Filling water for the water bottle. - Use tap water (which shouldn’t be hotter than 40 °C). - When filling the bottle, you should grip the water bottle tightly. 4. Close the water bottle cap. - Turn the bottle cap in clockwise direction. 5.
-
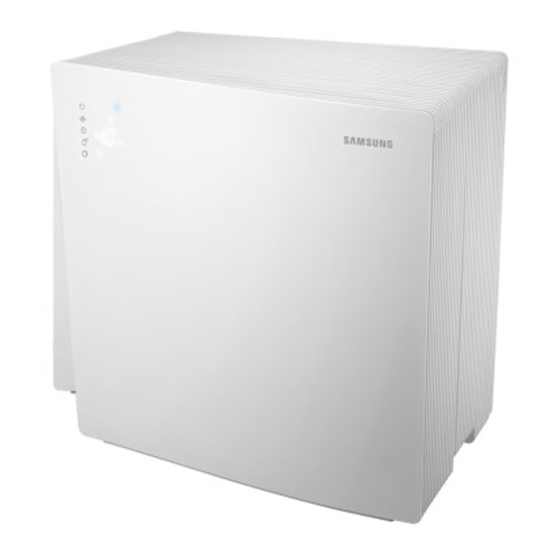
Page 10: Check The Name Of The Components
Check the name of the components Air purifier with humidification function Upper cover Opens and closes the upper cover to check the water bottle or pre filter Air outlet Pre filter Output of the humidity or air Filters the dust of the Water bottle flow incoming air... - Page 11 Buttons on the control panel Humidification mode display Water supply display Displays when water supply is needed Button control part Current purification level display 전원 Displays current air purification level Fan speed/Auto/Sleep display 풍량/모드 Displays fan speed adjustment or Auto/ Sleep mode 예약...
-
Page 12: Operation Mode
Operation mode You can select humidification and purification mode or purification mode only. Humidification and purification mode f Operates the humidification mode that adjusts indoor humidity and purification mode, providing clean air at the same time. f The [ ] light will be on on the control panel and the desired humidity can be adjusted. Purification mode f You can operate purification mode only in the summer or high humidity condition. -
Page 13: Sleep Mode
Sleep mode When you are sleeping, the air purifier with humidification function will be turned off automatically. While the appliance is switched on, press [ ] button and set the sleep mode. f Each time you press [ ] button, the time for sleep mode will be selected by 1 hour unit from continuation to 8Hr(8hours). -
Page 14: Cleaning And Maintenance
Cleaning and maintenance • Before you clean the appliance, you turn off and unplug the appliance. CAUTION Cleaning the exterior f Wet a towel with warm water, wring the towel tightly, and use to wipe the appliance clean. f Use a cleaning brush to remove the dust in the grooves of the exterior panel. f Use a cotton bud to clean the grooves of the exterior. - Page 15 Cleaning dust sensor 1. Grip the grooves of the dust sensor cover and pull the cover toward the right. Dust sensor cover 2. Clean the dust sensor lens carefully with a cotton bud. Dust sensor lens 3. Put the two hinge parts of the dust sensor cover into the right grooves of the dust sensor part(①) and press the cover in the arrow direction(②) to attach.
- Page 16 Cleaning and maintenance Cleaning the water bottle 1. While the appliance is switched off, detach the upper cover(①) and ① Upper cover lift off the water bottle from water bottle box(②). ② Water bottle 2. Open the water bottle cap. Port - Turn the bottle cap in an anti clockwise direction.
- Page 17 Cleaning the water purification filter 1. After detaching the water purification filter from water bottle cap, put the filter into a bowl of tap water and clean it by shaking slowly. 2. Fit the water purification filter back into the water bottle cap. • Water purification filter needs to be cleaned only when the surface of the filter is polluted.
- Page 18 Cleaning and maintenance Cleaning the humidification filter When the appliance is not cleaned for a long time, sediment powder will form on the humidification hydraulic turbin, so clean the filter frequently. 1. While the appliance is switched off, detach the upper cover(①) and lift off ①...
- Page 19 5. After fitting the rubber packing into the groove of the humidification hydraulic filter, the humidification filter with humidification hydraulicn turbin. When putting the humidification hydraulic turbin into the appliance, the 'Back' writing on the turbin should look at the rear side of the appliance.
- Page 20 Cleaning and maintenance Cleaning the tray and the interior of the appliance If the appliance is not cleaned for a long time, sediment (powder) can form so clean the appliance frequently. 1. While the appliance is switched off, detach the upper cover(①) and lift off ①...
- Page 21 Cleaning the pre filter 1. While the appliance is switched off, detach the upper cover(①) and ① detach the pre filter from pre filter frame. Upper cover Pre filter ② 2. Clean the pre filter with running water. - When the dust is too thick, rinse the filter with warm water using neutral detergent.
- Page 22 - The filter exchange light on the control panel will go out with a beep sound and the light will be on again for next exchange period. • Exchange filter can be purchased at a Samsung service center. NOTE • The HEPA filter and deodorization filter shouldn’t be cleaned or touched with water.
-
Page 23: Troubleshooting
Troubleshooting Before reporting the problems of your appliance, please check the trouble shooting table below. Problem Solution • Check if there is a power failure. After checking the status of power supply, operate the appliance again. The air purifier with • Check if the power plug is properly connected. - Page 24 ) dan menghancurkan ikatan hidrogen struktur protein untuk melakukan sterilisasi yang membasmi kuman, virus, dan jamur di udara. f Pelembapan bersih : Pemurni udara dengan fungsi pelembapan Samsung menggunakan filter pemurni air untuk mencegah terbentuknya bubuk putih setelah kelembapan menguap. Desain kelas atas f Desain kelas atas pemurni air dengan fungsi pelembapan menciptakan kesan seperti angin sepoi yang lembut.
- Page 25 Tindakan pencegahan keselamatan ..................3 Periksa sebelum menggunakan .
-
Page 26: Tindakan Pencegahan Keselamatan
Tindakan pencegahan keselamatan UNTUK PEMASANGAN PERHATIAN Perangkat ini harus dipasang di tempat yang memungkinkan untuk mencabut kabel daya produk dengan mudah. f Jika tidak dilakukan dapat mengakibatkan sengatan listrik atau kebakaran karena kebocoran listrik. Pasang perangkat di lantai yang rata dan keras yang dapat menyangga beratnya. f Jika tidak dilakukan dapat mengakibatkan getaran tidak normal, berbunyi, atau masalah dengan produk. - Page 27 UNTUK PENGOPERASIAN PERINGATAN Jika perangkat tergenang, matikan perangkat lalu hubungi pusat servis. Jika perangkat mengeluarkan bunyi aneh, bau terbakar atau asap, segera lepaskan catu daya dan hubungi pusat servis. f Jika tidak dilakukan dapat mengakibatkan sengatan listrik atau kebakaran. Seandainya terjadi kebocoran gas (seperti gas propana, LPG, dll.), segera alirkan udara tanpa menyentuh steker listrik.
- Page 28 Tindakan pencegahan keselamatan UNTUK PENGOPERASIAN PERHATIAN Jaga jarak sekitar 2 m dari peralatan listrik lainnya seperti TV, video, audio, dll. f Jika tidak dilakukan dapat mengakibatkan kualitas video menurun atau terganggu. Sediakan jarak ruang lebih dari 15 cm antara produk dan dinding. f Perangkat ini memasukkan udara dari sisi belakang untuk memurnikan udara, sehingga akan efisien apabila dipasang di tengah ruangan.
-
Page 29: Periksa Sebelum Menggunakan
Periksa sebelum menggunakan Memeriksa pemasangan Periksa kondisi pemasangan yang diperlukan di bawah. f Permukaan pemasangan harus rata, tidak miring. f Area di dekat lubang masuk dan keluar udara harus Bebas dari penghalang. f Area itu tidak boleh lembap, atau di dekat bahan yang mudah terbakar. f Area tersebut harus menyisakan jarak 15 cm dari dinding. - Page 30 Periksa sebelum menggunakan Menampilkan kelembapan saat ini f Pemurni udara dengan fungsi pelembapan mendeteksi dan menampilkan kelembapan saat ini secara otomatis dalam satuan 5 %. f Tingkat kelembapan yang ditampilkan mungkin berbeda dari kelembapan di area yang jauh. f Pengguna dapat mengatur kecepatan kipas saat mengoperasikan fungsi pelembapan perangkat. f Kelembapan yang diatur mungkin berbeda dari kelembapan yang ditampilkan tergantung lingkungan dan kondisi penggunaan.
- Page 31 2. Buka tutup botol air. - Putar tutup botol berlawanan dengan arah jarum jam. Sebelum Port membuka botol air, tekan port di tengah tutup botol, yang akan melepaskan vakum dan membuat tutup botol lebih mudah untuk dibuka. 3. Mengisi air untuk botol air. - Gunakan air keran (yang tidak lebih panas dari 40 ℃).
-
Page 32: Periksa Nama-Nama Komponen
Periksa nama-nama komponen Pemurni udara dengan fungsi pelembapan Penutup atas Buka dan tutup penutup atas untuk memeriksa botol air atau prafilter Lubang keluar udara Prafilter Outout kelembapan atau aluran Menyaring debu dalam Botol air udara udara yang masuk Lubang masuk udara Menyedot udara dari luar Sensor debu Mendeteksi debu di... - Page 33 Tombol-tombol pada panel kontrol Tampilan mode pelembapan Tampilan suplai air Menampilkan kapan suplai air diperlukan Bagian tombol Tampilan tingkat pemurnian saat ini kontrol 전원 Menampilkan tingkat pemurnian udara saat ini Tampilan Kecepatan kipas/Otomatis/ 풍량/모드 Tidur Menampilkan pengaturan kecepatan kipas atau mode Otomatis/Tidur 예약...
-
Page 34: Mode Operasi
Mode operasi Anda dapat memilih mode pelembapan dan pemurnian atau hanya mode pemurnian. Mode pelembapan dan pemurnian f Mengoperasikan mode pelembapan yang menyesuaikan kelembapan dalam ruang dan mode pemurnian, pada saat yang sama menyediakan udara bersih. f Lampu [ ] akan menyapa pada panel kontrol dan kelembapan yang diinginkan dapat diatur. Mode pemurnian f Anda dapat mengoperasikan hanya mode pemurnian di musim panas atau dalam kondisi kelembapan tinggi. -
Page 35: Mode Tidur
• Mode sebelum mengatur mode tidur akan dioperasikan. • Fungsi timer mati hanya bekerja dalam mode tidur. Ion S–Plasma Ion S-Plasma Samsung menangkap bahan berbahaya yang melayang di udara melalui HOO – yang dihasilkan dengan menggabungkan hidrogen (H) aktif dengan ion oksigen (O –... -
Page 36: Pembersihan Dan Perawatan
Pembersihan dan perawatan • Sebelum Anda membersihkan perangkat, matikan dan cabut steker listrik perangkat. PERHATIAN Membersihkan bagian luar f Basahi handuk dengan air hangat, peras kuat-kuat, lalu gunakan untuk menyeka perangkat sampai bersih. f Gunakan sikat pembersih untuk menghilangkan debu dalam lekukan di bagian luar panel. - Page 37 Membersihkan sensor debu 1. Pegang lekukan pada penutup sensor debu lalu tarik penutup ke arah kanan. Penutup sensor debu 2. Bersihkan lensa sensor debu dengan hati-hati menggunakan tangkai kapas. Lensa sensor debu 3. Masukkan kedua bagian berengsel penutup sensor debu ke lekukan di bagian kanan sensor debu (①) lalu tekan penutup searah tanda panah (②) untuk memasangnya.
- Page 38 Pembersihan dan perawatan Membersihkan botol air 1. Setelah perangkat dimatikan, lepaskan penutup atas (①) lalu ① Penutup atas angkat botol air keluar dari kotak botol air (②). ② Botol air 2. Buka tutup botol air. Port - Putar tutup botol berlawanan dengan arah jarum jam. Sebelum membuka botol air, tekan port di tengah tutup botol untuk melepaskan vakum sehingga tutup botol dapat dibuka dengan lebih mudah.
- Page 39 Membersihkan filter pemurnian air 1. Setelah melepaskan filter pemurnian air dari tutup botol air, masukkan filter ke dalam mangkuk berisi air keran dan bersihkan dengan menggoyang perlahan. 2. Pasang kembali filter pemurnian air ke tutup botol air. • Filter pemurnian air hanya perlu dibersihkan apabila permukaan filter terkontaminasi. • Penggunaan awal : Apabila filter baru dicuci beberapa kali, kadang-kadang air berubah warna menjadi merah CATATAN tua tetapi tidak akan membahayakan tubuh manusia.
- Page 40 Pembersihan dan perawatan Membersihkan filter pelembapan Apabila perangkat tidak dibersihkan dalam waktu lama, bubuk sedimen akan terbentuk pada turbin hidraulik pelembapan, oleh karena itu sering bersihkan filter. 1. Setelah perangkat dimatikan, lepaskan penutup atas (①) lalu angkat ① Penutup atas botol air keluar dari kotak botol air (②).
- Page 41 5. Setelah memasang packing karet ke dalam lekukan pada filter hidraulik pelembapan, filter pelembapan dengan turbin hidraulik pelembapan. Ketika memasang turbin hidraulik pelembapan ke dalam perangkat, tulisan ‘Back (Belakang)’ pada turbin harus terlihat di sisi belakang perangkat. 6. Setelah menutup penutup samping (①), masukkan botol air ke dalam ③...
- Page 42 Pembersihan dan perawatan Membersihkan baki dan bagian dalam perangkat Sering bersihkan perangkat, karena jika tidak dibersihkan dalam waktu lama sedimen (bubuk) dapat terbentuk. 1. Setelah perangkat dimatikan, lepaskan penutup atas (①) lalu angkat botol ① Penutup atas air keluar dari kotak botol air (②). ②...
- Page 43 Membersihkan prafilter 1. Setelah perangkat dimatikan, lepaskan penutup atas (①) lalu ① lepaskan prafilter dari rangka prafilter. Penutup atas Prafilter ② 2. Bersihkan prafilter dengan air mengalir. - Apabila debu terlalu tebal, bilas filter dengan air hangat menggunakan deterjen netral. 3.
- Page 44 - Lampu penggantian filter pada panel kontrol akan mati dengan bunyi biip dan akan menyala kembali untuk periode penggantian berikutnya. • Filter pengganti dapat dibeli di pusat servis Samsung. CATATAN • Filter HEPA dan filter deodorisasi tidak boleh dibersihkan atau terkena air.
-
Page 45: Mengatasi Masalah
Mengatasi Masalah Sebelum melaporkan masalah dengan perangkat Anda, periksa tabel pemecahan masalah di bawah. Masalah Solusi • Periksa apakah ada gangguan daya. Setelah memeriksa status catu daya, operasikan kembali perangkat. Pemurni udara • Periksa apakah steker listrik tersambung dengan benar. Tancapkan steker listrik ke stopkontak dinding dengan fungsi dengan benar dan operasikan kembali perangkat. - Page 46 เครื ่ อ งฟอกอากาศพร้ อ มฟั ง ก์ ช ั น ปรั บ ความชื ้ น Samsung ใช้ แ ผ่ น กรองน้ ำ า เพื ่ อ ป้ อ งกั น คราบสี ข าวที ่ เ กิ ด ขึ ้ น...
- Page 47 สารบ ั ญ ข้ อ ควรระวั ง เพื ่ อ ความปลอดภั ย . . . . . . . . . . . . . . . . . . . . . . . . . . . . . . . . . . . . . . . . . . . . . . . . . . . . . . . . 3 ตรวจสอบก่...
-
Page 48: ข้ อ ควรระวั ง เพื ่ อ ความปลอดภั ย
ข ้ อ ควรระว ั ง เพ ื ่ อ ความปลอดภ ั ย สำ า หรั บ การติ ด ตั ้ ง ข้ อ ควรระวั ง ควรติ ด ตั ้ ง อุ ป กรณ์ น ี ้ ใ นที ่ ซ ึ ่ ง สามารถดึ ง สายไฟของอุ ป กรณ์ อ อกได้ โ ดยง่ า ย f มิ... - Page 49 สำ า หรั บ การทำ า งาน คำ า เตื อ น ถ้ า อุ ป กรณ์ ม ี น ้ ำ า ล้ น ให้ ป ิ ด อุ ป กรณ์ แ ละติ ด ต่ อ ศู น ย์ บ ริ ก าร ถ้...
- Page 50 ข ้ อ ควรระว ั ง เพ ื ่ อ ความปลอดภ ั ย สำ า หรั บ การทำ า งาน ข้ อ ควรระวั ง เว้ น ระยะห่ า งประมาณ 2 เมตรจากอุ ป กรณ์ ไ ฟฟ้ า ชิ ้ น อื ่ น เช่ น โทรทั ศ น์ เครื ่ อ งเล่ น วิ ด ี โ อ เครื ่ อ งเสี ย ง เป็...
-
Page 51: ตรวจสอบก่ อ นใช้ ง าน
ตรวจสอบก ่ อ นใช ้ ง าน การตรวจสอบการติ ด ตั ้ ง ตรวจสอบเงื ่ อ นไขจำ า เป็ น ในการติ ด ตั ้ ง ที ่ ด ้ า นล่ า ง f พื ้ น ที ่ ต ิ ด ตั ้ ง ควรเรี ย บเสมอกั น ไม่ ล าดเอี ย ง f ต้... - Page 52 ในการเปลี ่ ย นแผ่ น กรอง โปรดดู ท ี ่ ‘การเปลี ่ ย นแผ่ น กรอง HEPA และแผ่ น กรองขจั ด กลิ ่ น ’ ในส่ ว นการทำ า ความสะอาด และการบำ า รุ ง รั ก ษา ข้ อ มู ล จำ า เพาะของผลิ ต ภั ณ ฑ์ AC-347HPAWQ Series รุ ่ น AX034EPXAWQ Series ขนาดผลิ...
- Page 53 2 . เปิ ด ฝาขวด - หมุ น ฝาขวดในทิ ศ ทางทวนเข็ ม นาฬิ ก า ก่ อ นเปิ ด ฝาขวด ให้ ก ดช่ อ งที ่ พอร์ ต กึ ่ ง กลางของฝาขวด ซึ ่ ง จะเป็ น การไล่ อ ากาศออก ทำ า ให้ เ ปิ ด ฝาขวด ได้...
-
Page 54: ชื ่ อ ของชิ ้ น ส่ ว นต่ า งๆ
ช ื ่ อ ของช ิ ้ น ส ่ ว นต ่ า งๆ เครื ่ อ งฟอกอากาศพร้ อ มฟั ง ก์ ช ั น ปรั บ ความชื ้ น ฝาครอบด้ า นบน เปิ ด และปิ ด ฝาครอบด้ า น บน... - Page 55 ปุ ่ ม ต่ า งๆ บนแผงควบคุ ม สั ญ ลั ก ษณ์ ข องโหมดปรั บ ความชื ้ น สั ญ ลั ก ษณ์ ก ารเติ ม น้ ำ า แสดงเมื ่ อ ต้ อ งมี ก ารเติ ม น้ ำ า ส่...
-
Page 56: โหมดการทำ า งาน
โหมดการท ำ า งาน คุ ณ สามารถเลื อ กโหมดปรั บ ความชื ้ น และฟอกอากาศ หรื อ โหมดฟอกอากาศเพี ย งอย่ า งเดี ย ว โหมดปรั บ ความชื ้ น และฟอกอากาศ f ใช้ โ หมดปรั บ ความชื ้ น เพื ่ อ ปรั บ ความชื ้ น ภายในอาคาร และใช้ โ หมดฟอกอากาศซึ ่ ง ทำ า ให้ อ ากาศสะอาดในเวลาเดี ย วกั น f ไฟสถานะ... -
Page 57: โหมดนอนหลั บ
โหมดนอนหล ั บ เมื ่ อ คุ ณ นอนหลั บ เครื ่ อ งการฟอกอากาศพร้ อ มฟั ง ก์ ช ั น ปรั บ ความชื ้ น จะปิ ด โดยอั ต โนมั ต ิ ขณะที ่ เ ครื ่ อ งเปิ ด อยู ่ ให้ ก ดปุ ่ ม [ ] และตั... -
Page 58: การทำ า ความสะอาดและการบำ า รุ ง รั ก ษา
การท ำ า ความสะอาดและการบ ำ า ร ุ ง ร ั ก ษา • ก่ อ นที ่ ค ุ ณ จะทำ า ความสะอาดอุ ป กรณ์ ให้ ป ิ ด และถอดปลั ๊ ก ออก ข ้ อ ควรระว ั ง การทำ... - Page 59 การทำ า ความสะอาดเซนเซอร์ ฝ ุ ่ น 1 . จั บ ช่ อ งฝาครอบเซนเซอร์ ฝ ุ ่ น และดึ ง ฝาครอบไปทางขวา ฝาครอบ เซนเซอร์ ฝ ุ ่ น 2 . ทำ า ความสะอาดเลนส์ ข องเซนเซอร์ ฝ ุ ่ น ด้ ว ยไม้ พ ั น สำ า ลี อย่...
- Page 60 การท ำ า ความสะอาดและการบ ำ า ร ุ ง ร ั ก ษา การทำ า ความสะอาดขวดน้ ำ า 1 . ขณะที ่ ป ิ ด เครื ่ อ ง ให้ ถ อดฝาครอบด้ า นบน (①) และยกขวดน้ ำ า ออก ① ฝาครอบด้...
- Page 61 การทำ า ความสะอาดแผ่ น กรองน้ ำ า 1 . หลั ง จากถอดแผ่ น กรองน้ ำ า ออกจากฝาขวดแล้ ว ให้ แ ช่ แ ผ่ น กรองในน้ ำ า ประปา และทำ า ความสะอาดโดยเขย่ า เบาๆ 2 . ใส่ แ ผ่ น กรองน้ ำ า กลั บ เข้ า สู ่ ฝ าขวดน้ ำ า •...
- Page 62 การท ำ า ความสะอาดและการบ ำ า ร ุ ง ร ั ก ษา การทำ า ความสะอาดแผ่ น กรองของอุ ป กรณ์ ป รั บ ความชื ้ น ถ้ า ไม่ ไ ด้ ท ำ า ความสะอาดอุ ป กรณ์ เ ป็ น เวลานาน ผงตะกอนจะจั บ ตั ว กั น ที ่ ใ บพั ด ไฮดรอลิ ก ของอุ ป กรณ์ ป รั บ ความชื ้ น ดั ง นั ้ น ควรทำ...
- Page 63 5 . หลั ง จากใส่ ย างเข้ า ช่ อ งของแผ่ น กรองไฮดรอลิ ก ของอุ ป กรณ์ ป รั บ ความชื ้ น แล้ ว ให้ ป ระกอบแผ่ น กรองของอุ ป กรณ์ ป รั บ ความชื ้ น เข้ า กั บ ใบพั...
- Page 64 การท ำ า ความสะอาดและการบ ำ า ร ุ ง ร ั ก ษา การทำ า ความสะอาดถาดและภายในอุ ป กรณ์ ถ้ า คุ ณ ไม่ ไ ด้ ท ำ า ความสะอาดอุ ป กรณ์ เ ป็ น เวลานาน อาจเกิ ด ตะกอน (ประเภทคราบ) ขึ ้ น ได้ ดั ง นั ้ น ควรทำ า ความสะอาด อุ...
- Page 65 การทำ า ความสะอาดแผ่ น กรองขั ้ น ต้ น 1 . เมื ่ อ ปิ ด อุ ป กรณ์ ให้ ถ อดฝาครอบด้ า นบน (①) และถอดแผ่ น กรอง ① ขั ้ น ต้ น ออกจากกรอบ ฝาครอบ ด้ า นบน แผ่ น กรอง ขั...
- Page 66 เปล ี ่ ย นคร ั ้ ง ถ ั ด ไป • คุ ณ สามารถซื ้ อ แผ่ น กรองสำ า หรั บ เปลี ่ ย นได้ ท ี ่ ศ ู น ย์ บ ริ ก าร Samsung หมายเหต...
-
Page 67: การแก้ ไ ขปั ญ หา
การแก ้ ไ ขป ั ญ หา ก่ อ นที ่ จ ะรายงานปั ญ หาเกี ่ ย วกั บ อุ ป กรณ์ โปรดตรวจสอบตารางการแก้ ไ ขปั ญ หาที ่ ด ้ า นล่ า งนี ้ ปั ญ หา การแก้ ไ ข •... - Page 68 QUESTIONS OR COMMENTS? COUNTRY CALL OR VISIT US ONLINE AT 0800-112-8888 INDONESIA www.samsung.com/id 021-5699-7777 1800-88-9999 MALAYSIA www.samsung.com/my 1800-29-3232 THAILAND www.samsung.com/th 02-689-3232 Paper_AC347HPAWQ_3ge_IB_cover_EN.indd 2 2013-07-31 오전 10:27:40...