IBM Storwize V7000 Quick Installation Manual
Hide thumbs
Also See for Storwize V7000:
- Introduction and implementation manual (670 pages) ,
- Problem determination manual (474 pages) ,
- Troubleshooting and maintenance manual (189 pages)
Table of Contents
Advertisement
Quick Links
Advertisement
Table of Contents

Related Manuals for IBM Storwize V7000


Summary of Contents for IBM Storwize V7000
- Page 1 IBM Storwize V7000 Quick Installation Guide Version 6.1.0 GC27-2290-00...
- Page 3 IBM Storwize V7000 Quick Installation Guide Version 6.1.0 GC27-2290-00...
- Page 4 IBM Environmental Notices and User Guide on the documentation CD. This edition applies to the IBM Storwize V7000 , Version 6.1.0, and to all subsequent releases and modifications until otherwise indicated in new editions.
-
Page 5: Table Of Contents
European Contact Information . . 34 Step 12. Powering on the system . . 21 Taiwan Contact Information . . 35 Chapter 3. Configuring the system . . . 25 Step 13. Configuring the system . 25 © Copyright IBM Corp. 2010... - Page 6 Storwize V7000 Version 6.1.0: Quick Installation Guide...
-
Page 7: Figures
Hole locations in the back of the rack . . 10 enclosure . . 23 Removing the enclosure end cap . 12 Initialization tool welcome panel . . 26 Securing an enclosure to a rack cabinet © Copyright IBM Corp. 2010... - Page 8 Storwize V7000 Version 6.1.0: Quick Installation Guide...
-
Page 9: Tables
Tables Cabling guide . . 14 LED status when control enclosure is powered LED status when expansion enclosures are . 23 powered on . 22 © Copyright IBM Corp. 2010... - Page 10 Storwize V7000 Version 6.1.0: Quick Installation Guide...
-
Page 11: Safety And Environmental Notices
3. Find the matching identification number in the IBM Systems Safety Notices. Then review the topics concerning the safety notices to ensure that you are in compliance. 4. Optionally, read the multilingual safety instructions on the Storwize V7000 website. Go to Support for Storwize V7000 website at www.ibm.com/storage/support/storwize/v7000, click the current product documentation link, and then click Multi-language. - Page 12 Storwize V7000 Version 6.1.0: Quick Installation Guide...
-
Page 13: Chapter 1. Before You Begin The Installation
See the following website for the available translated versions of the Quick Installation Guide: Support for Storwize V7000 website at www.ibm.com/storage/support/storwize/v7000 Occasionally you are referred to topics in the Storwize V7000 Information Center. A copy of the Storwize V7000 Information Center is on the DVD that is included in your shipping order. -
Page 14: Step 1. Reviewing Your Packing Slip
__ v License Function authorization document __ v Code Reference flyer __ v IBM Storwize V7000 Quick Installation Guide, GC27-2290-00 Additional components for control enclosures: __ v USB key, also known as a flash drive, is located with the publications. -
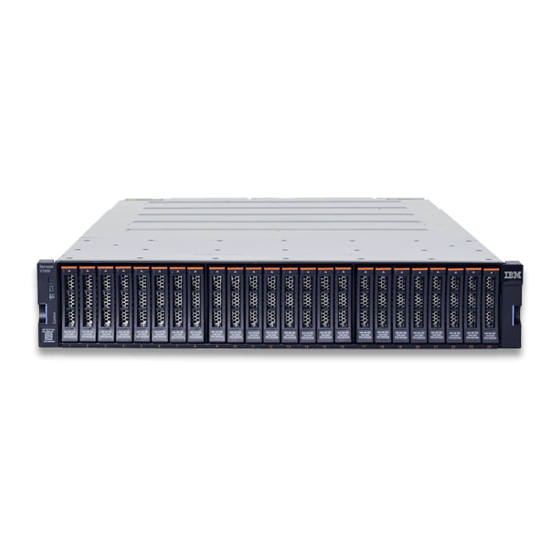
Page 15: Step 2. Identifying The Hardware Components
The power supply units for the control enclosure each contain a battery. Each enclosure takes up the full 2U height in the rack. See the IBM Storwize V7000 Troubleshooting, Recovery, and Maintenance Guide PDF on the DVD for the full descriptions of the hardware components. -
Page 16: Data Ports And Leds In The Rear Of The Control
2 is inverted, or top side down. Figure 4 shows the rear view of a control enclosure and identifies the location of the ports. Figure 4. Data ports and LEDs in the rear of the control enclosure Storwize V7000 Version 6.1.0: Quick Installation Guide... - Page 17 1 Fibre Channel ports. Each canister has four Fibre Channel ports. They are in a block of four in two rows of two connectors. The ports are numbered 1 - 4 from left to right, top to bottom. Their use is optional.
-
Page 18: Step 3. Verifying Environmental Requirements
If you have not done the environmental planning for your system, see the "Storwize V7000 physical installation planning" topic in the Storwize V7000 Information Center. -
Page 19: Step 4. Reviewing Enclosure Location Guidelines
Step 4. Reviewing enclosure location guidelines Use these guidelines to create a plan that identifies an appropriate location in the rack for the enclosure or enclosures that you are installing now or in the future. An enclosure requires two standard rack units of space in a rack. - Page 20 Storwize V7000 Version 6.1.0: Quick Installation Guide...
-
Page 21: Chapter 2. Performing The Hardware Installation
3 Rack mounting screw hole 4 Top rail location pin hole Figure 8 on page 10 shows the alignment of the rail location pins to the rack and the alignment of the clamping screw to the rack. © Copyright IBM Corp. 2010... -
Page 22: Attaching A Rail Assembly To A Rack Cabinet
Figure 9 shows two rack units with the back mounting holes identified. 2 Units Figure 9. Hole locations in the back of the rack 1 Bottom rail location pin hole 2 Rack mounting screw hole Storwize V7000 Version 6.1.0: Quick Installation Guide... -
Page 23: Step 6. Installing The Enclosures
3 Top rail location pin hole 7. Insert the rail location pins through the holes in the rack cabinet. 8. Insert a clamping screw into the rack mounting hole between the rail location pins. 9. Tighten the screw to secure the rail to the rack from the back side. 10. -
Page 24: Removing The Enclosure End Cap
Do not have more than one enclosure extended out of the rack at the same time to avoid the danger of the rack toppling over. 4. Insert a screw into the hole behind the enclosure end cap and tighten the screw as shown in Figure 11 on page 13. Storwize V7000 Version 6.1.0: Quick Installation Guide... -
Page 25: Step 7. Connecting The Sas Cables To The Expansion Enclosures
Figure 11. Securing an enclosure to a rack cabinet 5. Push the end caps back into position. 6. Repeat this procedure for each additional enclosure that you install. Step 7. Connecting the SAS cables to the expansion enclosures This task applies if you are installing one or more expansion enclosures. Chapter 2. - Page 26 2. Attach the SAS cables from the control enclosure to the first expansion enclosure as shown in Figure 12 on page 15. Remove the protective end covers, if necessary. The first expansion enclosure is below the control enclosure. Storwize V7000 Version 6.1.0: Quick Installation Guide...
-
Page 27: Attaching An Expansion Enclosure To The Control Enclosure
Control enclosure Expansion enclosure 1 Figure 12. Attaching an expansion enclosure to the control enclosure a. Port 1 1 of the upper canister, control enclosure, attaches to Port 1 2 of the upper canister, expansion enclosure 1. b. Port 1 3 of the lower canister, control enclosure, attaches to Port 1 4 of the lower canister, expansion enclosure 1. -
Page 28: Adding A Second Expansion Enclosure
Port 1 on the lower canister is opposite port 1 on the upper canister. Note: The connecting sequence from port 2 of the node canister is called chain 2. 4. Attach the SAS cables from the first expansion enclosure to the third expansion enclosure. Storwize V7000 Version 6.1.0: Quick Installation Guide... -
Page 29: Attaching Sas Cables To The Enclosures
Expansion enclosure 2 Control enclosure Expansion enclosure 1 Expansion enclosure 3 Figure 14. Attaching SAS cables to the enclosures a. Port 2 9 of the upper canister, expansion enclosure 1, attaches to Port 1 10 of the upper canister, expansion enclosure 3. b. -
Page 30: Step 8. Attaching The Ethernet Cables
3. Plug the longwave SFP transceivers into ports 1-4, as needed. For more information about removing and replacing hardware components, see the "Removing and replacing parts" topics in the Storwize V7000 Information Center to find out how to perform these procedures. -
Page 31: Step 11. Connecting The Power Cords
Ensure that you attach the Fibre Channel cables evenly between the two node canisters. Be sure to configure your Fibre Channel zoning to match the guidelines in the "Zoning details" topic in the Storwize V7000 Information Center. You must configure your zoning before the system is fully operational. -
Page 32: Unlocking The Cable Retention Bracket
5. Place the cable retention bracket around the end of the cable that plugs into the power supply unit. 6. Slide the cable retention bracket along the cord until it fits snugly against the plug end of the cable. Storwize V7000 Version 6.1.0: Quick Installation Guide... -
Page 33: Step 12. Powering On The System
2. Use the information in Table 2 on page 22 to verify the state of the LEDs on the system. Verify that no faults are detected. See the IBM Storwize V7000 Troubleshooting, Recovery, and Maintenance Guide PDF on the DVD if problems are encountered. -
Page 34: Leds On The Power Supply Units Of The Expansion Enclosure
4. Use the Table 3 on page 23 to verify the state of the LEDs on the system. Verify that no faults are detected. Figure 18 on page 23 shows the location of the LEDs on the power supply units in the rear of the control enclosure. Storwize V7000 Version 6.1.0: Quick Installation Guide... -
Page 35: Leds On The Power Supply Units Of The Control
Figure 18. LEDs on the power supply units of the control enclosure Table 3. LED status when control enclosure is powered on Hardware component LED name If power on and no fault is detected Left enclosure end cap, front of LED is on. - Page 36 LED is off Battery failure LED is on or flashing. Battery good, lower right See the IBM Storwize V7000 Troubleshooting, Recovery, and Maintenance Guide PDF on the DVD if problems are encountered. Storwize V7000 Version 6.1.0: Quick Installation Guide...
-
Page 37: Chapter 3. Configuring The System
To complete this step, you must use a supported browser. Verify that you are using a supported browser from the following website: Support for Storwize V7000 website at www.ibm.com/storage/support/storwize/v7000 v Scenario 1: Setting up your system for the first time with a control enclosure or a control enclosure and one or more expansion enclosures. -
Page 38: Initialization Tool Welcome Panel
21. If necessary, wait until the cluster has started. If you are unable to create the cluster, see the IBM Storwize V7000 Troubleshooting, Recovery, and Maintenance Guide PDF on the DVD that is shipped with the system. Remove hardware components only when directed to do so by the service procedures. - Page 39 This step completes the quick installation procedures. If you are setting up for the first time, see the configuring topics in the Storwize V7000 Information Center and continue to follow the tasks available in Getting Started from the management GUI. If you added an expansion enclosure into an existing system, continue to perform your standard tasks.
- Page 40 Storwize V7000 Version 6.1.0: Quick Installation Guide...
-
Page 41: Notices
Consult your local IBM representative for information on the products and services currently available in your area. Any reference to an IBM product, program, or service is not intended to state or imply that only that IBM product, program, or service may be used. Any functionally equivalent product, program, or service that does not infringe any IBM intellectual property right may be used instead. - Page 42 IBM, therefore, cannot guarantee or imply reliability, serviceability, or function of these programs. The sample programs are provided "AS IS", without warranty of any kind. IBM shall not be liable for any damages arising out of your use of the sample programs.
-
Page 43: Trademarks
IBM, the IBM logo, and ibm.com are trademarks or registered trademarks of International Business Machines Corp., registered in many jurisdictions worldwide. Other product and service names might be trademarks of IBM or other companies. A current list of IBM trademarks is available on the web at Copyright and trademark information at www.ibm.com/legal/copytrade.shtml. -
Page 44: Industry Canada Compliance Statement
2004/108/EC on the approximation of the laws of the Member States relating to electromagnetic compatibility. IBM cannot accept responsibility for any failure to satisfy the protection requirements resulting from a non-recommended modification of the product, including the fitting of non-IBM option cards. -
Page 45: Japan Vcci Council Class A Statement
Tel: 914-499-1900 Der verantwortliche Ansprechpartner des Herstellers in der EU ist: IBM Deutschland Technical Regulations, Department M456 IBM-Allee 1, 71137 Ehningen, Germany Tel: +49 7032 15-2937 e-mail: tjahn@de.ibm.com Generelle Informationen: Das Gerät erfüllt die Schutzanforderungen nach EN 55024 und EN 55022 Klasse A. -
Page 46: International Electrotechnical Commission (Iec) Statement
This topic contains the product service contact information for Europe. European Community contact: IBM Technical Regulations Pascalstr. 100, Stuttgart, Germany 70569 Tele: 0049 (0)711 785 1176 Fax: 0049 (0)711 785 1283 Email: mailto:tjahn@de.ibm.com Storwize V7000 Version 6.1.0: Quick Installation Guide... -
Page 47: Taiwan Contact Information
Taiwan Contact Information This topic contains the product service contact information for Taiwan. IBM Taiwan Product Service Contact Information: IBM Taiwan Corporation 3F, No 7, Song Ren Rd., Taipei Taiwan Tel: 0800-016-888 Notices... - Page 48 Storwize V7000 Version 6.1.0: Quick Installation Guide...
- Page 50 Part Number: 85Y5979 Printed in USA GC27-2290-00...