JVC KD-SC601 Instructions Manual
Hide thumbs
Also See for KD-SC601:
- Instructions manual (203 pages) ,
- Servise manual (55 pages) ,
- Schematic diagrams (12 pages)
Table of Contents
Advertisement
Available languages
Available languages
Quick Links
CD RECEIVER
RECEPTOR CON CD
RECEPTEUR CD
CD RECE∑VER
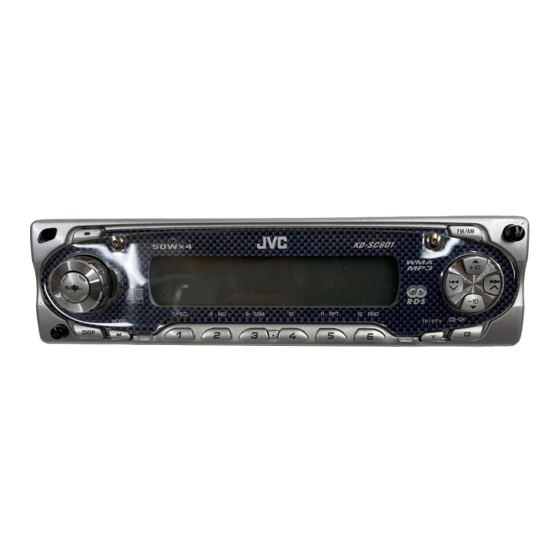
KD-SC601
• This unit is equipped with the display demonstration. To cancel it, see page 8.
• Esta unidad está equipada con la demostración en indicación. Para cancelarla, consulte
la página 8.
• Cet appareil est équipé d'une fonction de démonstration des affichages. Pour l'annuler,
référez-vous à la page 8.
• Bu ünite, ekran tanΩtΩm gösterisi ile donatΩlmΩπtΩr. ∑ptal etmek için 8. sayfaya bakΩn.
For installation and connections, refer to the separate manual.
Para la instalación y las conexiones, refiérase al manual separado.
Pour l'installation et les raccordements, se référer au manuel séparé.
Montaj ve ba∂lantΩlar için di∂er elkitabΩna bakΩn.
ATT
SOUND
U
R
SOURCE
F
D
VOL
VOL
INSTRUCTIONS
MANUAL DE INSTRUCCIONES
MANUEL D'INSTRUCTIONS
TAL∑MATLAR
GET0191-004A
[EU]
Advertisement
Chapters
Table of Contents

Related Manuals for JVC KD-SC601


Summary of Contents for JVC KD-SC601
- Page 1 CD RECEIVER RECEPTOR CON CD RECEPTEUR CD CD RECE∑VER KD-SC601 SOUND SOURCE • This unit is equipped with the display demonstration. To cancel it, see page 8. • Esta unidad está equipada con la demostración en indicación. Para cancelarla, consulte la página 8.
-
Page 2: How To Reset Your Unit
IMPORTANT FOR LASER PRODUCTS 1. CLASS 1 LASER PRODUCT 2. CAUTION: Do not open the top cover. There are no user serviceable parts inside the unit; leave all servicing to qualified service personnel. 3. CAUTION: Visible and invisible laser radiation when open and interlock failed or defeated. Avoid direct exposure to beam. -
Page 3: Table Of Contents
Thank you for purchasing a JVC product. Please read all instructions carefully before operation, to ensure your complete understanding and to obtain the best possible performance from the unit. CONTENTS MP3/WMA OPERATIONS ....25 How to reset your unit ....... -
Page 4: Location Of The Buttons
LOCATION OF THE BUTTONS Control panel Display window d ∞ (down) button 1 Remote sensor 2 Control dial –10 button (standby/on/attenuator) button 4 SEL (select) button Display window 5 Screws (M2 × 5 mm) f Tuner reception indicators—MO (monaural), 6 Plate cover and standard plate ST (stereo) 7 FM/AM DAB button g Disc type indicators—WMA, MP3... -
Page 5: Remote Controller
Remote controller 3 • Selects the preset stations (or services) while listening to the radio (or the DAB tuner). Each time you press the button, the preset station (or service) number increases, and SOUND the selected station (or service) is tuned in. •... -
Page 6: Preparing The Remote Controller
Otherwise, it may be damaged. Place the battery. Slide the battery into the holder with the + KD-SC601 is equipped with the steering side facing upwards so that the battery is wheel remote control function. fixed in the holder. -
Page 7: Basic Operations
BASIC OPERATIONS Turning on the power Volume level appears. Turn on the power. Volume level indicator Note on One-Touch Operation: Adjust the sound as you want. (See When you select a source in step 2 below, the pages 29 and 30.) power automatically comes on. -
Page 8: Canceling The Display Demonstration
Canceling the display Select “DEMO OFF.” demonstration DEMO ON DEMO OFF When shipped from the factory, display demonstration has been activated, and starts automatically when no operations are done for about 20 seconds. • It is recommended to cancel the display demonstration before you use the unit for the first time. -
Page 9: Setting The Clock
Setting the clock Finish the setting. You can also set the clock system to either 24 hours or 12 hours. Press and hold SEL (select) for more than 2 seconds so that one of the To check the current clock time or change the PSM items appears on the display. -
Page 10: Radio Operations
RADIO OPERATIONS Listening to the radio To stop searching before a station is received, press the same button you have pressed for searching. You can use either automatic searching or manual searching to tune in to a particular station. Searching for a station manually: Manual search Searching for a station automatically: Auto search... -
Page 11: Storing Stations In Memory
Storing stations in memory Tune in to a station you want while “M” (manual) is still flashing. You can use one of the following two methods to To tune in to stations of store broadcasting stations in memory. higher frequencies •... -
Page 12: Tuning In To A Preset Station
Manual preset Repeat the above procedure to store other stations into other preset You can preset up to 6 stations in each band numbers. (FM1, FM2, FM3, and AM) manually. Notes: Ex.: Storing FM station of 92.5 MHz into the •... -
Page 13: Rds Operations
RDS OPERATIONS What you can do with RDS To use Network-Tracking Reception You can select the different modes of network- RDS (Radio Data System) allows FM stations to tracking reception to continue listening to the send an additional signal along with their regular same programme in its finest reception. - Page 14 Using TA Standby Reception Press and hold SEL (select) for more than 2 seconds so that one of the TA Standby Reception allows the unit to switch PSM items appears on the display. temporarily to Traffic Announcement (TA) from (PSM: see pages 31 and 32.) the current source (another FM station, CD, or other connected components).
- Page 15 Using PTY Standby Reception Finish the setting. PTY Standby Reception allows the unit to switch temporarily to your favorite programme (PTY: Programme Type) from the current source (another FM station, CD, or other connected components). • PTY Standby Reception will not work if you are 7 When the current source is FM, the PTY listening to an AM station.
- Page 16 Searching your favorite programme Press and hold the number button for more than 2 seconds to store the You can search any one of the PTY codes. PTY code selected into the preset In addition, you can store your 6 favorite programme types in the number buttons.
- Page 17 To search your favorite programme type Press ¢ or 4 to start PTY search for your favorite programme. Press and hold T TP/PTY for more than 2 seconds while listening to an FM station. • If there is a station broadcasting a programme The last selected PTY code appears.
-
Page 18: Other Convenient Rds Functions And Adjustments
Other convenient RDS Setting the TA volume level functions and adjustments You can preset the volume level for TA Standby Reception. When a traffic programme is received, the volume level automatically changes to the Automatic selection of the station preset level. when using the number buttons •... - Page 19 PTY codes NEWS: News SOCIAL: Programmes on social AFFAIRS: Topical programmes expanding activities on current news or affairs RELIGION: Programmes dealing with any INFO: Programmes which impart aspect of belief or faith, or the advice on a wide variety of topics nature of existence or ethics SPORT: Sport events...
-
Page 20: Cd Operations
CD OPERATIONS Refer “MP3/WMA OPERATIONS” on pages 25 to The display changes to show the following: 28 for operating MP3/WMA discs. CD indicator Playing a CD Open the control panel. Current source indication Note on One-Touch operation: Total playing time Total track number When a CD is already in the loading slot, of the inserted disc... -
Page 21: Locating A Track Or A Particular Portion On A Cd
To stop play and eject the CD To go to a particular track directly Press 0. Press the number button corresponding to the CD play stops and the control panel flips down. track number to start its playback. The CD automatically ejects from the loading slot. -
Page 22: Selecting Cd Playback Modes
To play back tracks repeatedly How to use the +10 and –10 buttons (Track Repeat Play) • Ex. 1: To select track number 32 while You can play back the current track repeatedly. playing track number 6 Press M MODE to enter the functions mode while playing a (Three times) (Twice) -
Page 23: Playing A Cd Text
Playing a CD Text Prohibiting disc ejection In a CD Text, some information about the disc (its You can prohibit disc ejection and can lock a disc disc title, performer, and track title) is recorded. in the loading slot. This CD Text information will be shown automatically when you play a CD Text. -
Page 24: Mp3/Wma Introduction
MP3/WMA INTRODUCTION What are MP3/WMA? How are MP3/WMA files recorded and played back? MP3 is an abbreviation of Motion Picture Experts Group (or MPEG) Audio Layer 3. MP3 is simply a MP3/WMA “files (tracks)” can be recorded in file format with a data compression ratio of 1:10 “folders”... -
Page 25: Mp3/Wma Operations
MP3/WMA OPERATIONS Refer also to “CD OPERATIONS” on pages The display changes to show the following: 20 to 23. CD indicator Playing a disc Open the control panel. Current source indication WMA or MP3 indicator* Note on One-Touch operation: When a disc is already in the loading slot, pressing CD CD-CH turns on the unit and starts playback automatically. -
Page 26: Locating A File Or A Particular Portion On A Disc
To stop play and eject the disc Notes: • The display shows up to 8 characters at a time and Press 0. scrolls if there are more than 8 characters. Playback stops and the control panel flips down. See also “To select the scroll mode—SCROLL” on The disc automatically ejects from the loading slot. - Page 27 To go to a particular file quickly within the To go to a particular folder directly current folder (+10 and –10 buttons) IMPORTANT: Press M MODE to enter the functions mode To directly select the folders using the number while playing a disc. button(s), it is required that folders are assigned 2 digit numbers at the beginning of their folder names.
-
Page 28: Selecting Playback Modes
To skip to the next or previous folder Active Mode Plays at random indicator Press 5 (up) while playing a disc FLDR RND RND and All files of the to skip to the next folder. indicators current folder, then Each time you press the button light up. -
Page 29: Sound Adjustments
SOUND ADJUSTMENTS Selecting preset sound modes Indication For: Preset values (C-EQ: custom equalizer) LOUD USER (Flat sound) You can select a preset sound mode (C-EQ: ROCK Rock or custom equalizer) suitable to the music genre. disco music CLASSIC Classical –02 •... -
Page 30: Adjusting The Sound
Adjusting the sound When you adjust the bass, treble, or loudness, the adjustment you have made is stored for the currently selected sound mode (C-EQ) including You can adjust the sound characteristics to your “USER.” preference. If you are using a two-speaker system, set the fader level to “00.”... -
Page 31: Other Main Functions
OTHER MAIN FUNCTIONS Changing the general settings Adjust the PSM item selected. (PSM) You can change the items listed in the table below and on page 32 by using the PSM (Preferred Setting Mode) control. Basic Procedure Repeat steps 2 and 3 to adjust the other PSM items if necessary. - Page 32 Factory-preset See Indications Selectable values/items settings page 29 programme types PTY STBY PTY standby (see page 19) TA VOL Traffic announcement VOL 00 — VOL 30 or 50 VOL 20 volume P-SEARCH Programme search DAB AF Alternative frequency AF OFF AF ON AF ON search...
- Page 33 To select the display color—COLOR To select the telephone muting—TEL You can select the color of the display according This mode is used when a cellular phone system to your preference. is connected. Depending on the phone system When shipped from the factory, “ALL DEMO” is used, select either “MUTING 1”...
-
Page 34: Assigning Names To The Source
To select the external component to use To select the amplifier gain control —EXT IN —AMP GAIN You can connect the external component to the You can change the maximum volume level of CD changer jack on the rear using the Line Input this unit. -
Page 35: Changing The Standard Plate
Ex.: When you select CD as the source plate supplied with your unit. Select a character. You can also download them by visiting <http://www.jvc.co.jp/jvccar>. • When changing the plate, be careful not to leave your fingerprints on the plate or cover. Loosen the screws with the supplied hex screwdriver. - Page 36 Notes: Replace with another plate (a • Be sure to keep the hex screwdriver for future use. standard, cutout, or downloaded • Two spare screws for the plate cover attachment are plate) of your preference. provided with the unit. See the Installation/ Connection Manual (separate volume).
-
Page 37: Detaching The Control Panel
Attaching the control panel Detaching the control panel Insert the right side of the control You can detach the control panel when leaving panel into the groove on the panel the car. holder. When detaching or attaching the control panel, be careful not to damage the connectors on the back of the control panel and on the panel holder. -
Page 38: Cd Changer Operations
CD CHANGER OPERATIONS Playing discs We recommend that you use the JVC MP3- compatible CD changer with your unit. Select the CD changer (CD-CH). By using this CD changer, you can play back your original CD-Rs (Recordable) and CD-RWs (Rewritable) recorded either in audio CD format CD-CH* or in MP3 format. - Page 39 To go to a particular disc directly • When the current disc is a CD: Playback starts from the first track of the Press the number button corresponding to the current disc. disc number to start its playback (while the CD changer is playing).
- Page 40 MP3 discs * First time you press +10 or –10 button, the This is possible only when connecting a JVC CD track/file skips to the nearest higher or lower changer equipped with CD Text and/or MP3 disc track/file with a track/file number of multiple information reading capability.
-
Page 41: Selecting The Playback Modes
Selecting the playback modes To play back tracks/files repeatedly (Track Repeat/Folder Repeat/Disc Repeat Play) To play back tracks/files at random (Folder Random/Disc Random/Magazine Press M MODE to enter the Random Play) functions mode during play. Press M MODE to enter the Press RPT (repeat), while functions mode during play. -
Page 42: External Component Operations
EXTERNAL COMPONENT OPERATIONS Playing an external component Turn on the connected component and start playing the source. You can connect the external component to the CD changer jack on the rear using the Line Input Adjust the volume. Adapter KS-U57 (not supplied). Preparations: •... -
Page 43: Dab Tuner Operations
We recommend that you use DAB (Digital Audio Broadcasting) tuner KT-DB1500 or KT-DB1000 one of the services with your unit. If you have another DAB tuner, consult your JVC IN-CAR ENTERTAINMENT dealer. A typical ensemble has 6 or more programmes (services) broadcast at the same time. After •... -
Page 44: Storing Dab Services In Memory
To tune in to a particular ensemble Start searching for an ensemble. without searching To search for ensembles of Before you start..higher frequency Press FM/AM DAB briefly if CD, CD changer, or external component is the current source. Press and hold FM/AM DAB to select DAB To search for ensembles of lower frequency tuner as the source. -
Page 45: Tuning In To A Preset Dab Service
Tuning in to a preset DAB Tune in to an ensemble you want. service You can easily tune in to a preset DAB service. Remember that you must store services first. If you have not stored them yet, see “Storing DAB Select a service of the ensemble you services in memory”... -
Page 46: What You Can Do More With Dab
What you can do more with To adjust the DAB volume level You can adjust the volume level of DAB tuner and store it in memory. By adjusting the volume level properly to match it to the FM sound level, Tracing the same programme automatically you will not need to adjust the volume level each (Alternative Reception) -
Page 47: Troubleshooting
TROUBLESHOOTING What appears to be trouble is not always serious. Check the following points before calling a service center. Symptoms Causes Remedies • Sound cannot be heard The volume level is set to the Adjust it to the optimum level. from the speakers. - Page 48 Symptoms Causes Remedies • Disc cannot be played No MP3/WMA files are Change the disc. back. recorded on the disc. MP3/WMA files do not have Add the extension code the extension code <.mp3> or <.mp3> or <.wma> to their file <.wma>...
- Page 49 Symptoms Causes Remedies • “NO DISC” appears on the No disc is in the magazine. Insert discs into the display. magazine. Discs are inserted upside down. Insert discs correctly. • “NO MAG” appears on the No magazine is loaded in the Insert the magazine.
-
Page 50: Maintenance
MAINTENANCE Handling discs When playing a CD-R or CD-RW Before playing back CD-Rs or CD-RWs, read This unit has been designed to reproduce CDs, their instructions or cautions carefully. CD-Rs (Recordable), CD-RWs (Rewritable), and • Use only “finalized” CD-Rs or CD-RWs. CD Texts. -
Page 51: Specifications
Alternate Channel Selectivity (400 kHz): If you want some additional downloaded 65 dB plates, you can download them by visiting Frequency Response: 40 Hz to 15 000 Hz <http://www.jvc.co.jp/jvccar>. Stereo Separation: 30 dB Capture Ratio: 1.5 dB [MW Tuner] Sensitivity: 20 µV... - Page 52 IMPORTANTE PARA PRODUCTOS LÁSER 1. PRODUCTO LÁSER CLASE 1 2. PRECAUCIÓN: No abra la tapa superior. En el interior de la unidad no hay piezas que pueda reparar el usuario; encargue el servicio a personal técnico cualificado. 3. PRECAUCIÓN: Radiación láser visible e invisible en caso de apertura o con interbloqueo averiado o defectuoso.
- Page 53 Muchas gracias por la compra de un producto JVC. Como primer paso, por favor lea detenidamente este manual para comprender a fondo todas las instrucciones y obtener un máximo disfrute de esta unidad. CONTENIDO OPERACIONES CON MP3/WMA ..25 Cómo reposicionar su unidad ....
-
Page 54: Ubicación De Los Botones
UBICACIÓN DE LOS BOTONES Panel de control Ventanilla de visualización d Botón ∞ (abajo) 1 Sensor remoto 2 Dial de control Botón –10 3 Botón (en espera/encendido/ atenuador) Ventanilla de visualización 4 Botón SEL (selección) f Indicadores de recepción del sintonizador— 5 Tornillos (M2 ×... -
Page 55: Control Remoto
Control remoto 3 • Selecciona las emisoras preajustadas (o servicios) mientras escucha la radio (o el sintonizador DAB). Cada vez que pulsa el botón, el número de la emisora (o servicios) preajustada SOUND aumenta, y se sintoniza la emisora (o servicios) seleccionada. •... -
Page 56: Preparación Del Control Remoto
De lo contrario, se podría dañar. Coloque la pila. El KD-SC601 cuenta con la función de control remoto en el volante de la dirección. Introduzca la pila en la portapila con el lado + En caso de que su automóvil esté equipado dirigido hacia arriba, de manera que quede con control remoto en el volante de dirección,... -
Page 57: Operaciones Basicas
OPERACIONES BASICAS Conexión de la alimentación Aparece el nivel de volumen. Encienda la unidad. Indicador de nivel de volumen Nota sobre la operación con pulsación única: Ajuste el sonido según se desee. La unidad se enciende automáticamente cuando (Consulte las páginas 29 y 30). usted selecciona la fuente en el paso 2 de abajo. -
Page 58: Cancelación De La Demostración En Pantalla
Cancelación de la Seleccione “DEMO OFF”. demostración en pantalla DEMO ON La unidad se expide de fábrica con la DEMO OFF demostración en pantalla activada para que se inicie automáticamente tras un período de inactividad de 20 segundos. • Se recomienda cancelar la demostración en pantalla antes de utilizar la unidad por primera vez. -
Page 59: Ajuste Del Reloj
Ajuste del reloj Finalice el ajuste. También podrá ajustar el sistema del reloj ya sea a 24 horas o 12 horas. Pulse y mantenga pulsado SEL (selección) durante más de 2 Para verificar la hora actual en el reloj o segundos para que aparezca uno de cambiar el modo de pantalla los ítems de PSM en la pantalla. -
Page 60: Operaciones De La Radio
OPERACIONES DE LA RADIO Para escuchar la radio Para cancelar la búsqueda antes de recibir una emisora, pulse el mismo botón que el pulsado para la búsqueda. Podrá sintonizar una determinada emisora mediante búsqueda automática o búsqueda Para buscar una emisora manual. -
Page 61: Cómo Almacenar Emisoras En La Memoria
Cómo almacenar emisoras en Sintonice la emisora deseada mientras la memoria “M” (manual) está parpadeando. Para sintonizar emisoras de frecuencias más altas Las emisoras podrán almacenarse en la memoria mediante uno de los dos métodos siguientes. • Preajuste automático de emisoras FM: SSM (Memoria secuencial de las emisoras más Para sintonizar emisoras de frecuencias más fuertes) -
Page 62: Cómo Sintonizar Una Emisora Preajustada
Preajuste manual Repita el procedimiento de arriba para almacenar otras emisoras en Podrá preajustar manualmente hasta 6 emisoras los otros números de preajuste. en cada banda (FM1, FM2, FM3 y AM). Ej.: Almacenamiento de una emisora FM de Notas: 92,5 MHz en el número de preajuste 1 de la •... -
Page 63: Operaciones De Rds
OPERACIONES DE RDS Qué puede hacer con RDS Para usar la recepción de seguimiento de redes de radio El RDS (sistema de datos por radio) permite a Puede seleccionar diferentes modos de las estaciones de FM transmitir una señal recepción de seguimiento de redes de radio para adicional junto con las señales de los programas seguir escuchando el mismo programa con una de radio regulares. - Page 64 Empleo de la recepción de espera de TA Pulse y mantenga pulsado SEL (selección) durante más de La recepción de espera de TA permite que la 2 segundos para que aparezca uno unidad cambie temporalmente a anuncio de de los ítems de PSM en la pantalla. tráfico (TA) desde la fuente actual (otra emisora de FM, CD o otros componentes conectados).
- Page 65 Empleo de la recepción de espera de Finalice el ajuste. La recepción de espera de PTY permite que la unidad cambie temporalmente a su programa favorito (PTY: tipo de programa) desde la fuente actual (otra emisora de FM, CD o otros componentes conectados).
- Page 66 Búsqueda de su programa favorito Pulse y mantenga pulsado el botón numérico durante más de 2 Puede efectuar la búsqueda de cualquiera de los segundos para que el código PTY códigos PTY. Asimismo, podrá almacenar 6 tipos de seleccionado se almacene en el programas favoritos en los botones numéricos.
- Page 67 Búsqueda del tipo de programa favorito Pulse ¢ para iniciar la búsqueda de PTY de su programa Pulse y mantenga pulsado T TP/PTY favorito. durante más de 2 segundos mientras escucha una emisora de • Si hay una emisora que esté transmitiendo un Aparece el último código PTY seleccionado.
-
Page 68: Otras Convenientes Funciones Y Ajustes De Rds
Otras convenientes funciones Ajuste del nivel de volumen de TA y ajustes de RDS Podrá preajustar el nivel de volumen para recepción de espera de TA. Cuando se reciba un programa de tráfico, el nivel de volumen Selección automática de la estación cambiará... - Page 69 Códigos PTY NEWS: Noticias SOCIAL: Programas sobre actividades AFFAIRS: Programas temáticos que van de sociales noticias a asuntos de actualidad RELIGION: Programas que tratan de INFO: Programas que ofrecen consejos cualquier aspecto de las sobre una amplia variedad de creencias o fe, o naturaleza de temas la existencia o ética SPORT:...
-
Page 70: Operaciones Del Reproductor De Cd
OPERACIONES DEL REPRODUCTOR DE CD Para los detalles sobre la operación con discos La pantalla cambia para mostrar los siguientes: MP3/WMA, consulte “OPERACIONES CON Indicador CD MP3/WMA” en las páginas 25 a 28. Reproducción de un CD Abra el panel de control. Indicación de la fuente actual Tiempo de Número total de... -
Page 71: Localizando Una Pista O Un Determinado Pasaje De Un Cd
Para parar la reproducción y expulsar el Para seleccionar directamente una determinada pista Pulse 0. Pulse el botón de número correspondiente al La reproducción del CD se para y el panel de número de pista que desea reproducir. control bascula hacia abajo. El CD será expulsado automáticamente de la ranura de carga. -
Page 72: Selección De Los Modos De Reproducción De Cd
Para reproducir las pistas repetidamente Cómo usar los botones +10 y –10 (Reproducción repetida de pistas) • Ej. 1: Para seleccionar la pista número 32 Podrá reproducir repetidamente la pista actual. mientras se está reproduciendo la pista número 6 Pulse M MODE para entrar en modo de funciones mientras se está... -
Page 73: Reproducción Del Cd Text
Reproducción del CD Text Prohibición de la expulsión del disco En el CD Text, se ha grabado cierta información relacionada con el disco (el título del disco, su Es posible inhibir la expulsión del disco y ejecutante y título de la pista). bloquearlo dentro de la ranura de carga. -
Page 74: Introducción De Mp3/Wma
INTRODUCCIÓN DE MP3/WMA ¿Qué es MP3/WMA? ¿Cómo se graban y reproducen los archivos MP3/WMA? MP3 es abreviatura de Motion Picture Experts Group (o MPEG) Audio Layer 3. El MP3 es En terminología PC, “archivos (pistas)” MP3/ simplemente un formato de archivo con una relación WMA se pueden grabar en “carpetas”. -
Page 75: Operaciones Con Mp3/Wma
OPERACIONES CON MP3/WMA Refiérase también a “OPERACIONES DEL La pantalla cambia para mostrar los siguientes: REPRODUCTOR DE CD” en las páginas 20 a Indicador CD Reproducción de un disco Abra el panel de control. Indicación de la fuente actual Indicador WMA o MP3* Nota sobre la operación con pulsación única: Si pulsa CD CD-CH cuando hay un disco introducido en la ranura de carga, la unidad se... -
Page 76: Localizando Un Archivo O Un Determinado Pasaje Del Disco
Para parar la reproducción y expulsar el disco Notas: • En la pantalla se visualizan simultáneamente hasta Pulse 0. 8 caracteres, efectuándose el desplazamiento La reproducción del disco se para y el panel de secuencial si hay más de 8. control bascula hacia abajo. - Page 77 Para desplazarse rápidamente a un Para ir directamente a una carpeta determinado archivo dentro de la carpeta específica actual (botones +10 y –10) IMPORTANTE: Pulse M MODE para entrar en modo de Para seleccionar directamente las carpetas funciones mientras se está reproduciendo un utilizando el(los) botón(es) numérico(s), será...
-
Page 78: Selección De Los Modos De Reproducción
Para saltar a la carpeta siguiente o anterior Indicador Se reproducen de Modo activado forma aleatoria Pulse 5 (arriba) mientras se está FLDR RND Los Todos los archivos reproduciendo un disco, para indicadores de la carpeta actual, saltar a la siguiente carpeta. RND y luego todos los Cada vez que pulsa el botón... -
Page 79: Ajustes Del Sonido
AJUSTES DEL SONIDO Selección de los modos de Valores preajustados Indicación Para: sonido preajustados (C-EQ: LOUD ecualizador personalizable) USER (Sonido plano) Puede seleccionar un modo de sonido ROCK Música de preajustado (C-EQ: ecualizador personalizable) rock o disco adecuado al género musical. CLASSIC Música –02 clásica... -
Page 80: Ajuste Del Sonido
Ajuste del sonido Al ajustar los graves, los agudos o la sonoridad, el ajuste realizado por usted quedará almacenado en el modo de sonido seleccionado (C-EQ), Usted puede ajustar las características de sonido incluyendo “USER”. a su preferencia. Si está usando un sistema de dos altavoces, ajuste el nivel del desvanecedor a “00”. -
Page 81: Otras Funciones Principales
OTRAS FUNCIONES PRINCIPALES Cambio de los ajustes Ajuste el ítem de PSM seleccionado. generales (PSM) Las opciones listadas en la tabla de abajo y en la página 32 se pueden cambiar utilizando el control PSM (Modo de ajustes preferidos). Procedimiento básico Repita los pasos 2 a 3 para ajustar Pulse y mantenga pulsado los otros ítems PSM, si es... - Page 82 Valores/opciones Ajustes de Consulte Indicaciones seleccionables fabrica la página 29 tipos de programa PTY STBY Espera PTY (consulte la página 19) TA VOL Volumen de anuncio de VOL 00 — VOL 30 o 50 VOL 20 tráfico P-SEARCH Busqueda de programa DAB AF Búsqueda de frecuencia AF OFF...
- Page 83 Para seleccionar el color de Selección del silenciamiento telefónico visualización—COLOR —TEL Puede seleccionar el color de visualización Este modo se utiliza cuando hay un sistema de según sus preferencias. teléfono celular conectado. Dependiendo del La unidad se expide de fábrica con la opción sistema de teléfono celular en uso, seleccione “ALL DEMO”...
-
Page 84: Asignación De Nombres A La Fuente
Selección del componente exterior a Para seleccionar el control de ganancia utilizar—EXT IN del amplificador—AMP GAIN Es posible cambiar el nivel máximo de volumen Utilizando el adaptador de entrada de línea de esta unidad. Cuando la potencia máxima de KS-U57 (no suministrado) usted puede conectar los altavoces es de menos de 50 W, seleccione el componente exterior a la toma del cambiador “LOW PWR”... -
Page 85: Cambio De La Placa Estándar
Podrá cambiar la placa estándar por otra placa Seleccione un carácter. suministrada con su unidad. También podrá efectuar la descarga visitando <http://www.jvc.co.jp/jvccar>. • Cuando cambie la placa, tenga cuidado de no manchar la placa o la cubierta con la yema de sus dedos. - Page 86 Notas: Reemplace la placa por otra (placa • Asegúrese de guardar el destornillador hexagonal estándar, recortada o descargada) para uso futuro. deseada. • Junto con esta unidad, se proveen dos tornillos de repuesto para el accesorio de la cubierta de la •...
-
Page 87: Desmontaje Del Panel De Control
Desmontaje del panel de Cómo instalar el panel de control control Inserte el lado derecho del panel de control en la ranura del portapanel. Podrá desmontar el panel de control cuando salga de su automóvil. Al desmontar o instalar el panel de control, preste atención para no dañar los conectores provistos al dorso del panel de control y en el portapanel. -
Page 88: Operación Del Cambiador De Cd
OPERACIÓN DEL CAMBIADOR DE CD Reproducción de los discos Con esta unidad se recomienda utilizar el cambiador de CD de JVC compatible con MP3. Seleccione el cambiador de CD (CD-CH). Utilizando este cambiador de CD, podrá reproducir sus CD-Rs (grabables) y CD-RWs... - Page 89 Para seleccionar directamente un • Cuando el disco actual es un CD: La reproducción se inicia desde la primera determinado disco pista del disco actual. Pulse el botón del número correspondiente al número de disco deseado para iniciar su reproducción (mientras el cambiador de CD está reproduciendo el CD).
- Page 90 Esto es posible solamente cuando se conecta un Nota: cambiador de CD JVC equipado con capacidad Si el disco reproducido actualmente es un disco MP3, de lectura de información de CD Text y/o disco se omiten archivos dentro de la misma carpeta.
-
Page 91: Selección De Los Modos De Reproducción
Para reproducir repetidamente las pistas/ Selección de los modos de los archivos (Reproducción repetida de reproducción pistas/de carpetas/de discos) Para reproducir pistas/archivos de forma Pulse M MODE para entrar en modo de funciones durante la aleatoria (Reproducción aleatoria de reproducción. carpetas/de discos/de cargador) Pulse RPT (repetición), Pulse M MODE para entrar en... -
Page 92: Operaciones Del Componente Exterior
OPERACIONES DEL COMPONENTE EXTERIOR Reproducción del componente Encienda el componente conectado exterior y comience a reproducir la fuente. Ajuste el volumen. Podrá conectar el componente externo al jack del cambiador de CD en la parte trasera utilizando el adaptador de entrada de línea KS-U57 (no suministrado). -
Page 93: Operaciones Del Sintonizador De Dab
“ensemble” y uno de los KT-DB1000 junto con su unidad. servicios Si tiene otro sintonizador de DAB, consulte con su concesionario de JVC de equipos de audio para automóviles. Un “ensemble” típico tiene 6 o más programas • Refiérase también a las instrucciones (servicios) transmitidos al mismo tiempo. -
Page 94: Cómo Guardar Los Servicios Dab En La Memoria
Para sintonizar un determinado Comience a buscar un “ensemble”. “ensemble” sin efectuar la búsqueda Para búsqueda de Antes de empezar..ensembles de frecuencias Pulse FM/AM DAB brevemente si la fuente más altas actual es un CD, el cambiador de CD o un componente exterior. -
Page 95: Cómo Sintonizar Un Servicio Dab Preajustado
Cómo sintonizar un servicio Sintonice un “ensemble” deseado. DAB preajustado Podrá sintonizar fácilmente un servicio DAB preajustado. Tenga presente que primero deberá almacenar los servicios. Si todavía no lo ha Seleccione un servicio del hecho, “Cómo guardar los servicios DAB en la “ensemble”... -
Page 96: Qué Más Puede Hacer Con El Dab
Qué más puede hacer con el Para ajustar el nivel de volumen de DAB Podrá ajustar el nivel de volumen del sintonizador DAB y almacenarlo en la memoria. Ajustando correctamente el nivel de entrada para Rastreo automático del mismo programa que corresponda con el nivel de sonido FM, no (Recepción alternativa) necesitará... -
Page 97: Localización De Averias
LOCALIZACIÓN DE AVERIAS Lo que aparenta ser una avería podría resolverse fácilmente. Verifique los siguientes puntos antes de acudir al centro de servicio. Síntomas Causas Remedios • El sonido no sale por los El nivel de volumen está Ajustarlo al nivel óptimo. altavoces. - Page 98 Síntomas Causas Remedios • No se puede reproducir el No hay archivos MP3/WMA Cambie el disco. disco. grabados en el disco. Los archivos MP3/WMA no Añada el código de extensión tienen el código de extensión <.mp3> o <.wma> a sus <.mp3>...
- Page 99 Síntomas Causas Remedios • “NO DISC” aparece en la No hay disco en el magazin. Inserte los discos en el pantalla. magazin. Los discos han sido insertados Inserte los discos boca abajo. correctamente. • “NO MAG” aparece en la No hay ningún magazin Inserte el magazin.
-
Page 100: Mantenimiento
MANTENIMIENTO Manipulación de los discos Cuando se reproduce un CD-R o CD-RWs Antes de reproducir los CD-Rs o CD-RWs, lea atentamente sus instrucciones o precauciones. Esta unidad ha sido diseñada para reproducir • Utilice únicamente CD-Rs o CD-RWs CDs, CD-Rs (Grabables), CD-RWs “finalizados”. -
Page 101: Especificaciones
Si desea algunas placas descargadas 11,3 dBf (1,0 µV/75 Ω) adicionales, podrá descargarlas visitando Umbral de silenciamiento de 50 dB: <http://www.jvc.co.jp/jvccar>. 16,3 dBf (1,8 µV/75 Ω) Selectividad de canal alternativo (400 kHz): 65 dB Respuesta de frecuencias: 40 Hz a 15 000 Hz Separación estereofónica: 30 dB... - Page 102 IMPORTANT POUR PRODUITS LASER 1. PRODUIT LASER CLASSE 1 2. ATTENTION: N’ouvrez pas le couvercle supérieur. Il n’y a aucune pièce réparable par l’utilisateur à l’intérieur de l’appareil; confiez toute réparation à un personnel qualifié. 3. ATTENTION: Risque de radiations laser visible et invisible quand l’appareil est ouvert et que le système de verrouillage ne fonctionne pas ou a été...
- Page 103 Merci pour avoir acheté un produit JVC. Veuillez lire attentivement toutes les instructions avant d’utiliser l’appareil afin de bien comprendre son fonctionnement et d’obtenir les meilleures performances possibles. TABLE DES MATIÈRES FONCTIONNEMENT DES MP3/WMA ..25 Comment réinitialiser votre appareil ..
-
Page 104: Emplacement Des Touches
EMPLACEMENT DES TOUCHES Panneau de command Fenêtre d’affichage d Touche ∞ (bas) 1 Capteur de télécommande 2 Molette de commande Touche –10 3 Touche (attente/en service/sourdine) 4 Touche SEL (sélection) Fenêtre d’affichage 5 Vis (M2 × 5 mm) f Indicateurs de réception du tuner— 6 Couvercle de plaque et plaque standard 7 Touche FM/AM DAB MO (monaural), ST (stéréo) -
Page 105: Télécommande
Télécommande 3 • Choisissez les stations (ou services) préréglées pendant l’écoute de la radio (ou du tuner DAB). Chaque fois que vous appuyez sur la touche, le numéro de station (ou service) SOUND préréglée augmente et la station (ou service) choisie est accordée. •... -
Page 106: Préparation De La Télécommande
(tel que le tableau de bord). Sinon, elle risque d’être endommagée. Le KD-SC601 est muni d’une fonction de Placez la pile. télécommande de volant. Insérez la pile dans le porte-pile avec le pole Si votre voiture est muni d’un pilote de... -
Page 107: Fonctionnement De Base
FONCTIONNEMENT DE BASE Mise sous tension Le niveau de volume apparaît. Mettez l’appareil sous tension. Indicateur du niveau de volume Remarque sur le fonctionnement monotouche: Ajustez le son comme vous le Quand vous choisissez la source à l’étape 2 ci- souhaitez. -
Page 108: Annulation De La Démonstration Des Affichages
Annulation de la Choisissez “DEMO OFF”. démonstration des affichages DEMO ON À l’expédition de l’usine, la démonstration est en DEMO OFF service et celle-ci démarre automatiquement quand aucune opération n’est effectuée pendant environ 20 secondes. • Il est recommandé d’annuler la démonstration des affichages avant d’utiliser l’appareil pour la première fois. -
Page 109: Réglage De L'horloge
Réglage de l’horloge Terminez le réglage. Vous pouvez aussi régler le système de l’horloge sur un affichage par cycle de 24 heures ou de 12 heures. Maintenez pressée SEL (sélection) Pour vérifier l’heure actuelle ou changer le mode d’affichage pendant plus de 2 secondes de Appuyez répétitivement sur DISP façon que l’un des éléments PSM (affichage). -
Page 110: Fonctionnement De La Radio
FONCTIONNEMENT DE LA RADIO Écoute de la radio Pour arrêter la recherche avant qu’une station ne soit accordée, appuyez sur la même touche que vous avez utilisée pour la recherche. Vous pouvez utiliser la recherche automatique ou l’accord manuel pour accorder une station Recherche manuelle d’une station: particulière. -
Page 111: Mémorisation Des Stations
Mémorisation des stations Accordez une station souhaitée pendant que “M” (manuel) clignote. Vous pouvez utiliser l’une des deux méthodes Pour accorder des stations suivantes pour mémoriser les stations reçues. de fréquences supérieures • Présélection automatique des stations FM: SSM (Mémorisation automatique des meilleures stations) •... -
Page 112: Accord D'une Station Présélectionnée
Présélection manuelle Répétez la procédure ci-dessus pour mémoriser d’autres stations sur Vous pouvez présélectionner manuellement un d’autres numéros de présélection. maximum de 6 stations pour chaque bande (FM1, FM2, FM3 et AM). Remarques: • La station précédemment présélectionnée est Ex.: Mémorisation de la station FM située à 92,5 MHz sur le numéro de présélection 1 effacée quand une nouvelle station est mémorisée sur le même numéro de présélection. -
Page 113: Fonctionnement Rds
FONCTIONNEMENT RDS Présentation du RDS Pour utiliser la réception de suivi de réseau Le RDS (Radio Data System) permet aux Vous pouvez choisir un des différents modes de stations FM d’envoyer un signal supplémentaire poursuite en réseau pour continuer d’écouter le en même temps que les signaux de leurs même programme avec la meilleure réception programmes ordinaires. - Page 114 Utilisation de l’attente de réception TA Maintenez pressée SEL (sélection) pendant plus de 2 secondes de L’attente de réception TA permet à l’appareil de façon que l’un des éléments PSM commuter temporairement sur des informations apparaisse sur l’affichage. (PSM: routières (TA) à partir de la source actuelle (une autre station FM, une CD ou un autre appareil Voir les pages 31 et 32).
- Page 115 Utilisation de l’attente de réception Terminez le réglage. L’attente de réception PTY permet à l’appareil de commuter temporairement sur votre programme favori (PTY: Type de programme) à partir de la source actuelle (une autre station FM, un CD ou un autre appareil connecté). 7 Si la source actuelle est une station FM, •...
- Page 116 Recherche de votre programme Maintenez pressée la touche préférée numérique pendant plus de 2 secondes pour mémoriser le code Vous pouvez rechercher n’importe quel code PTY choisi sur le numéro de PTY. préréglage souhaité. De plus, vous pouvez mémoriser vos 6 types de programme préférés sur les touches numériques.
- Page 117 Pour rechercher votre type de programme Appuyez sur ¢ ou 4 pour préférée démarrer la recherche PTY pour votre programme préféré. Maintenez pressée sur T TP/PTY pendant plus de 2 secondes pendant l’écoute d’une station FM. • S’il y a une station diffusant un programme du code PTY que vous avez choisi, cette station Le dernier code PTY choisi apparaît.
-
Page 118: Autres Fonctions Rds Pratiques Et Ajustements
Autres fonctions RDS Réglage du niveau de volume TA pratiques et ajustements Vous pouvez prérégler le niveau de volume pour l’attente de réception TA. Quand un programme d’informations routières est reçu, le niveau de Sélection automatique de la station volume change automatiquement sur le niveau lors de l’utilisation des touches préréglé. - Page 119 Codes PTY NEWS: Information RELIGION: Programmes traitant des AFFAIRS: Programmes d’actualité sur les aspects de la foi ou de la affaires ou l’information courante croyance, de la nature de la vie INFO: Programmes qui communiquent ou d’éthique des conseils sur une grande PHONE IN: Programmes où...
-
Page 120: Fonctionnement Du Lecteur Cd
FONCTIONNEMENT DU LECTEUR CD Référez-vous à “UTILISATION DES DISQUES L’affichage change comme suit: MP3/WMA” aux pages 25 à 28 pour utiliser les Indicateur CD disques MP3/WMA. Lecture d’un CD Indication de la source actuelle Ouvrez le panneau de commande. Durée de lecture Nombre total de totale du disque plages du disque... -
Page 121: Localisation D'une Plage Ou D'un Passage Particulier Sur Un Cd
Pour arrêter la lecture et éjecter le CD Pour aller directement à une plage particulière Appuyez sur 0. La lecture de CD s’arrête et le panneau de Appuyez sur la touche numérique commande s’ouvre. Le CD est éjecté correspondante au numéro de plage souhaité automatiquement de la fente d’insertion. -
Page 122: Sélection Des Modes De Lecture De Cd
Pour reproduire les plages répétitivement Comment utiliser les touches +10 et –10 (Lecture répétée de plage) • Ex. 1: Pour choisir la plage numéro 32 Vous pouvez reproduire la plage actuelle pendant la lecture de la plage répétitivement. numéro 6 Appuyez sur M MODE pour entrer en mode de fonction pendant la lecture d’un CD. -
Page 123: Lecture Des Cd Text
Lecture des CD Text Interdiction de l’éjection du disque Dans un CD Text, certaines informations à propos du disque (son titre, l’interprète et le titre Vous pouvez interdire l’éjection d’un disque et le de la plage) sont enregistrées. Ces informations verrouiller dans la fente d’insertion. -
Page 124: Présentation Du Format Mp3/Wma
PRÉSENTATION DU FORMAT MP3/WMA Qu’est-ce que le format MP3/ Comment les fichiers MP3/ WMA? WMA sont-ils enregistrés et reproduits? MP3 est l’abréviation de Motion Picture Experts Group (ou MPEG) Audio Layer 3. MP3 est Les “fichiers (plages)” MP3/WMA peuvent être simplement un format de fichier avec un rapport enregistrés dans des “dossier”... -
Page 125: Fonctionnement Des Mp3/Wma
FONCTIONNEMENT DES MP3/WMA Référez-vous aussi “FONCTIONNEMENT DU L’affichage change comme suit: LECTEUR CD” aux pages 20 à 23. Indicateur CD Lecture d’un disque Ouvrez le panneau de commande. Indication de la source actuelle Indicateur WMA ou MP3* Remarque sur le fonctionnement monotouche: Si un disque se trouve déjà... -
Page 126: Localisation D'un Fichier Ou D'un Passage Particulier Sur Un Disque
Pour arrêter la lecture et éjecter le disque Remarques: • L’affichage montre 8 caractères en même temps et Appuyez sur 0. défile s’il y a plus de 8 caractères. La lecture s’arrête que le panneau de commande Référez-vous aussi à “Pour choisir le mode de s’ouvre. - Page 127 Pour aller rapidement à un fichier Pour aller directement à un dossier donné particulier dans le dossier actuel (touches +10 et –10) IMPORTANT: Pour choisir directement un dossier en Appuyez sur M MODE pour entrer en mode utilisant les touches numériques, il faut que le de fonctions pendant la lecture d’un disque.
-
Page 128: Sélection D'un Mode De Lecture
Pour sauter au dossier suivant ou Indicateur Reproduit Mode précédent allumé aléatoirement FLDR RND Les Tous les fichiers du Appuyez sur 5 (haut) pendant la indicateurs dossier actuel, puis lecture d’un disque pour sauter RND et les fichiers du au dossier suivant. s’allument. -
Page 129: Ajustement Du Son
AJUSTEMENT DU SON Sélection des modes sonores Indication Pour: Valeurs préréglées préréglés (C-EQ: égaliseur LOUD personnalisé) USER (Son plat) ROCK Musique rock ou disco Vous pouvez choisir un mode sonore préréglé (C-EQ: égaliseur personnalisé) convenant à votre CLASSIC Musique –02 genre de musique. -
Page 130: Ajustement Du Son
Ajustement du son Quand vous ajustez les graves, les aigus ou le loudness, l’ajustement réalisé est mémorisé pour le mode sonore actuellement choisi (C-EQ) y compris Vous pouvez ajuster les caractéristiques du son à “USER”. votre préférence. Si vous utilisez un système à deux enceintes, réglez le niveau de fader sur “00”. -
Page 131: Autres Fonctions Principales
AUTRES FONCTIONS PRINCIPALES Modification des réglages Ajustez l’élément PSM choisi. généraux (PSM) Vous pouvez changer les éléments du tableau ci-dessous et de la page 32 en utilisant la commande PSM (mode de réglage préféré). Procédure de base Répétez, si nécessaire, les étapes 2 Maintenez pressée SEL (sélection) et 3 pour ajuster les autres éléments pendant plus de 2 secondes de... - Page 132 Valeurs/réglages Réglages pré- Voir Indications sélectionnables réglés à l’usine Page PTY STBY Attente PTY 29 types de programmes (voir la page 19) TA VOL Volume des informations VOL 00 — VOL 30 ou 50 VOL 20 routières P-SEARCH Recherche de programme DAB AF Recherche de fréquence AF OFF...
- Page 133 Pour choisir la couleur de l’affichage Pour choisir le silencieux téléphonique —COLOR —TEL Vous pouvez choisir la couleur de l’affichage en Ce mode est utilisé quand un système de fonction de vos préférences. téléphone cellulaire est connecté. Selon le À l’expédition de l’usine, “ALL DEMO” est choisi. système de téléphone utilisé, choisissez Les couleurs pouvant être choisies sont les “MUTING 1”...
-
Page 134: Affectation De Noms Aux Sources
Pour choisir l’appareil extérieur—EXT IN Pour choisir la commande de gain de l’amplificateur—AMP GAIN Vous pouvez connecter un appareil extérieur à la prise du changeur CD à l’arrière de l’appareil en Vous pouvez changer le niveau de volume utilisant l’adaptateur KS-U57 (non fourni). maximum de cet appareil. -
Page 135: Changement De La Plaque Standard
Vous pouvez changer la plaque standard par une autre fournie avec votre appareil. Vous pouvez aussi les télécharger sur le site <http://www.jvc.co.jp/jvccar>. • Lors du changement de la plaque, faites attention de pas laissez vos empreintes sur la plaque ou le couvercle. - Page 136 Remarques: Remplacez-la par une autre plaque • Assurez-vous de conservez la clef hexagonale pour (une plaque standard, une plaque une utilisation future. découpée ou une plaque que vous • Quatre vis de rechange pour le couvercle de la avez téléchargée) de votre choix. plaque sont fournies avec l’appareil.
-
Page 137: Détachement Du Panneau De Commande
Comment attacher le panneau de Détachement du panneau de commande commande Insérez le côté droite du panneau de Vous pouvez détacher le panneau de commande commande dans la rainure située du quand vous quittez la voiture. côté droit du porte-panneau. Lors du détachement ou de la remise en place du panneau de commande, faites attention de ne pas endommager les connecteurs situés à... -
Page 138: Fonctionnement Du Changeur De Cd
FONCTIONNEMENT DU CHANGEUR DE CD Lecture des disques Nous vous recommandons d’utiliser le changeur de CD compatible MP3 JVC avec votre appareil. Choisissez le changeur de CD (CD-CH). En utilisant ce changeur de CD, vous pouvez reproduire vos CD-R (enregistrables) et CD-RW (réinscriptibles) originaux enregistrés au format... - Page 139 Pour aller directement à un disque • Quand le disque actuel est un CD: La lecture démarre à partir de la première particulier plage du disque actuel. Appuyez sur la touche numérique correspondante au numéro de disque souhaité pour commencer sa reproduction (alors que le changeur de CD est en lecture).
- Page 140 10 (par ex. la plage/le fichier 10, 20, 30). C’est uniquement possible quand un changeur Puis chaque fois que vous appuyez sur la de CD JVC possédant la capacité de lire les touche, vous pouvez sauter 10 plages/fichiers informations des CD Text et/ou des disques MP3 (référez-vous à...
-
Page 141: Sélection Des Modes De Lecture
Sélection des modes de Pour reproduire les plages/fichiers répétitivement (Lecture répétée de plage/ lecture dossier/disque) Pour reproduire les plages/fichiers dans Appuyez sur M MODE pour entrer en mode de fonctions un ordre aléatoire (Lecture aléatoire de pendant la lecture. dossier/disque/magasin) Appuyez sur M MODE pour Appuyez sur RPT (répétition) entrer en mode de fonctions... -
Page 142: Fonctionnement De L'appareil Extérieur
FONCTIONNEMENT DE L’APPAREIL EXTÉRIEUR Lecture d’un appareil extérieur Mettez l’appareil connecté sous tension est démarrez la lecture de la Vous pouvez connecter l’appareil extérieur à la source. prise du changeur de CD à l’arrière de l’appareil en utilisant l’adaptateur d’entrée de ligne KS-U57 Ajustez le volume. -
Page 143: Fonctionnement Du Tuner Dab
KT-DB1000 avec votre appareil. Si vous possédez un autre tuner DAB, consultez Typiquement, un ensemble diffuse au moins 6 votre revendeur autoradio JVC. programmes (services) en même temps. Après • Référez-vous aussi au manuel d’instructions fourni avec votre tuner DAB. -
Page 144: Mémorisation Des Services Dab
Pour accorder un ensemble particulier Commencez la recherche d’un sans recherche ensemble. Pour rechercher les Avant de commencer..ensembles de fréquence Appuyez brièvement sur FM/AM DAB si la CD, le supérieure changeur de CD ou l’appareil extérieur est la source actuelle. Maintenez pressée FM/AM DAB pour choisir Pour rechercher les ensembles de fréquence le tuner DAB comme source. -
Page 145: Accord D'un Service Dab Présélectionné
Accord d’un service DAB Accordez l’ensemble que vous présélectionné souhaitez. Vous pouvez accorder facilement un service DAB présélectionné. Rappelez-vous que vous devez d’abord mémoriser d’abord les services. Si vous ne les avez pas encore mémorisés, Choisissez le service souhaité de Référez-vous à... -
Page 146: Ce Que Vous Pouvez Faire Avec Le Dab
Pour ajuster le niveau de volume DAB Ce que vous pouvez faire avec le DAB Vous pouvez ajuster le niveau d’entrée du tuner DAB et le mémoriser. En ajustant correctement le niveau d’entrée de façon qu’il corresponde au Suivi du même programme niveau sonore FM, vous n’avez pas besoin automatiquement (Réception alternée) d’ajuster le niveau de volume chaque fois que... -
Page 147: Dépannage
DÉPANNAGE Ce qui apparaît comme un problème n’est pas toujours très sérieux. Vérifier les points suivants avant d’appeler un centre de réparation. Symptômes Causes Remèdes • Le son ne peut pas être Le niveau de volume est réglé Ajustez-la sur le niveau entendu des enceintes. - Page 148 Symptômes Causes Remèdes • Le disque ne peut pas être Aucun fichier MP3/WMA n’est Changez le disque. reproduit. enregistré sur le disque. Les fichiers MP3/WMA ne Ajoutez les codes d’extension possèdent pas de code <.mp3> ou <.wma> au nom des d’extension <.mp3>...
- Page 149 Symptômes Causes Remèdes • “NO DISC” apparaît sur Il n’y a pas de disque Insérez des disques dans le l’affichage. dans le magasin. magasin. Les disques sont insérés à Insérez les disques l’envers. correctement. • “NO MAG” apparaît sur Aucun magasin n’est en place Mettez un magasin en place.
-
Page 150: Entretien
ENTRETIEN Manipulation des disques Lors de la reproduction d’un CD-R ou CD-RW Avant de reproduire un CD-R ou CD-RW, lisez attentivement leurs instructions et précautions. Cet appareil est conçu pour reproduire les CD, • Utilisez uniquement des CD-R ou CD-RW CD-R (enregistrable), CD-RW (réinscriptible) et “finalisés”. -
Page 151: Spécifications
Réponse en fréquence: 40 Hz à 15 000 Hz Si vous souhaitez obtenir des plaques Séparation stéréo: 30 dB téléchargées additionnelles, vous pouvez les Rapport de synchronisation: 1,5 dB télécharger sur le site <http://www.jvc.co.jp/ jvccar>. [Tuner PO] Sensibilité: 20 µV Sélectivité: 35 dB [Tuner GO] Sensibilité: 50 µV... -
Page 152: Ünitenizin Sωfωrlanmasω
LAZER ÜRÜNLER∑ ∑Ç∑N ÖNEML∑ NOTLAR 1. SINIF 1 LAZER ÜRÜNÜ 2. D∑KKAT: Üst kapa∂Ω açmayΩn. Ünitenin içinde kullanΩcΩ tarafΩndan servis edilebilir hiçbir parça yoktur; tüm servis iπlerini yetkili personele bΩrakΩn. 3. D∑KKAT: AçΩk durumdayken ara kilidi arΩzalΩ veya devre dΩπΩ oldu∂unda görünür ve görünmez lazer ΩπΩnΩmΩ... - Page 153 Bir JVC ürünü satΩn aldΩ∂ΩnΩz için teπekkür ederiz. TalimatlarΩ tümüyle anlamak ve üniteden olasΩ en iyi performansΩ elde etmek için, çalΩπtΩrmadan önce tüm talimatlarΩ dikkatle okuyun. ∑Ç∑NDEK∑LER MP3/WMA ∑∏LEMLER∑ ....25 Ünitenizin sΩfΩrlanmasΩ ....... M MODE tuπunun kullanΩlmasΩ ....Bir diski çalmak ......... 25 Bir disk üzerinde bir dosyayΩ...
-
Page 154: Tu∏Larin Yerler
TU∏LARIN YERLER∑ Kumanda panosu Ekran penceresi 1 Uzaktan kumanda sensörü Ekran penceresi 2 Kumanda dü∂mesi f Tüner (radyo) alΩcΩ göstergeleri—MO (mono (bekleme/zayΩflatΩcΩda) tuπu ses), ST (stereo) 4 SEL (seç) tuπu g Disk türü göstergeleri—WMA, MP3 5 Vidalar (M2 × 5 mm) h CH (CD de∂iπtirici) göstergesi 6 Levha kapa∂Ω... -
Page 155: Uzaktan Kumanda
Uzaktan kumanda 3 • Radyoyu (veya DAB tuner) dinlerken kayΩtlΩ istasyonlarΩ (veya servis) seçer. Tuπa her bastΩ∂ΩmΩzda önceden ayarlΩ istasyon (veya servis) numarasΩ görünür ve seçilen istasyon (veya servis) ayarlanΩr. SOUND • Bir MP3 veya WMA diski dinlerken bir önceki klasörün ilk dosyasΩna atlar. -
Page 156: Uzaktan Kumandanωn Hazωrlanmasω
BIRAKMAYIN. Aksi taktirde hasar görebilir. Pil yerine yerleπtirin. Pili, + tarafΩ yukarΩ gelecek ve sabit bir biçimde oturacak πekilde yuvanΩn içine KD-SC601 direksiyon simidi uzaktan kumanda kaydΩrΩn. iπlevine sahiptir. TaπΩtΩnΩz direksiyon simidi uzaktan kumandasΩ Lityum yassΩ pil ile donatΩlmΩπsa bunu kumanda vasΩtasΩyla (ürün numarasΩ:... -
Page 157: Temel ∑∏Lemler
TEMEL ∑∏LEMLER Ünitenin açΩlmasΩ Ses düzeyi görüntülenir. Üniteyi açΩn. Ses düzeyi göstergesi Tek Temasla ÇalΩπtΩrma (One-Touch Sesi istedi∂iniz düzeye ayarlayΩn. Operation) hakkΩnda not: (29 ila 30. sayfalara bakΩn). Aπa∂Ωdaki 2 . adΩmda bir kaynak seçti∂inizde ünite otomatik olarak açΩlΩr. Üniteyi açmak için bu tuπa basmanΩz πart de∂ildir. -
Page 158: Ekran Tanωtωm Gösterisinin Iptal Edilmesi
Ekran tanΩtΩm gösterisinin “DEMO OFF” seçimini yapΩn. iptal edilmesi DEMO ON Fabrikadan ekran tanΩtΩm göstergesi aktif halde DEMO OFF gönderilir ve yaklaπΩk 20 saniye boyunca hiçbir iπlem yapΩlmadΩ∂Ωnda otomatik olarak devreye girer. • Üniteyi ilk kez kullanmadan önce ekran tanΩtΩm göstergesini iptal etmeniz önerilir. -
Page 159: Saatin Ayarlanmasω
Saatin ayarlanmasΩ AyarΩ bitirin. AyrΩca saat sistemini 24 veya 12 saat temelinde atayabilirsiniz. Ekranda PSM ö∂elerinin görünmesi için SEL (seç) tuπunu 2 saniyeden daha uzun süreyle basΩlΩ tutun. Yürürlükteki saati kontrol etmek veya ekran (PSM: 31 ila 32. sayfalara bakΩn). modunu de∂iπtirmek için Arka arkaya DISP (ekran) tuπuna basΩn. -
Page 160: Radyo ∑∏Lemler
RADYO ∑∏LEMLER∑ Radyo dinleme Bir istasyonun sinyali alΩnmadan aramayΩ durdurmak için, arama yapmak üzere bastΩ∂ΩnΩz tuπa basΩn. Belli bir istasyonu dinlemek için otomatik arama veya elle arama seçeneklerini kullanabilirsiniz. Bir istasyonun elle aranmasΩ: Bir istasyonun otomatik olarak Elle arama aranmasΩ: Otomatik arama BandΩ... -
Page 161: Stasyonlarωn Belle∂E Kaydedilmesi
∑stasyonlarΩn belle∂e “M” (el ile) iπareti yanΩp sönerken bir kaydedilmesi istasyona ayarlayΩn. Daha yüksek frekanslΩ YayΩn yapan istasyonlarΩ belle∂e kaydetmek için istasyonlara ayarlamak için aπa∂Ωdaki iki yöntemden birini kullanabilirsiniz. • FM istasyonlarΩnΩn otomatik olarak ön ayarΩ: SSM (ArdΩπΩk Kuvvetli ∑stasyon Belle∂i) •... -
Page 162: Önceden Ayarlamωπ Bir Istasyonu Dinlemek
Elle ön ayarlama Baπka istasyonlarΩ di∂er numaralara kaydetmek için yukarΩdaki Her bantta (FM1, FM2, FM3 ve AM) 6 istasyonu prosedürü tekrarlayΩn. elle önceden ayarlayabilirsiniz. Örn.: 92.5 MHz frekanslΩ FM istasyonunun FM1 Notlar: bandΩndaki 1 numaralΩ belle∂e • AynΩ numaralΩ belle∂e yeni bir istasyon kaydedilmesi. -
Page 163: Rds ∑∏Lemler
RDS ∑∏LEMLER∑ RDS ile neler A∂ ∑zleme Sistemini kullanmak için yapabilirsiniz? AynΩ programΩ en iyi alΩndΩ∂Ω πekilde dinlemeye devam etmek için a∂ izleme sisteminin farklΩ modlarΩnΩ seçebilirsiniz. RDS (Radyo Verileri Sistemi) FM istasyonlarΩnΩn Fabrika çΩkΩπΩnda “AF” seçene∂i devrededir. normal program sinyalleriyle birlikte ek sinyaller göndermesine olanak tanΩr. - Page 164 Bekleme Modunda TA Alma Ekranda PSM ö∂elerinin görünmesi iπlevinin kullanΩlmasΩ için SEL (seç) tuπunu 2 saniyeden daha uzun süreyle basΩlΩ tutun. Bekleme Modunda TA Alma iπlevi ünitenin geçici (PSM: 31 ila 32. sayfalara bakΩn). olarak o anki kaynaktan (baπka bir FM istasyon, CD veya ba∂lΩ...
- Page 165 Bekleme Modunda PTY Alma AyarΩ bitirin. iπlevinin kullanΩlmasΩ Bekleme Modunda PTY Alma iπlevi ünitenin geçici olarak o anki kaynaktan (baπka bir FM istasyon, CD veya ba∂lΩ di∂er bileπenlerden) sevdi∂iniz programa (PTY: Program Türü) geçmesine olanak tanΩr. 7 Geçerli kaynak FM oldu∂unda PTY •...
- Page 166 Sevdi∂iniz programΩn aranmasΩ Seçilen PTY kodunu istedi∂iniz numaraya kaydetmek için numara PTY kodlarΩndan istedi∂inizi arayabilirsiniz. Buna tuπunu 2 saniyeden daha uzun ek olarak numara tuπlarΩna sevdi∂iniz 6 program türünü kaydedebilirsiniz. Fabrika çΩkΩπΩnda süreyle basΩlΩ tutun. numara tuπlarΩna (1 ila 6) aπa∂Ωdaki 6 program türü...
- Page 167 Sevdi∂iniz program türünü aramak Sevdi∂iniz program için PTY arama için iπemini baπlatmak amacΩyla ¢ veya 4 tuπuna basΩn. Bir FM istasyonunu dinlerken T TP/PTY tuπunu 2 saniyeden daha uzun süreyle basΩlΩ tutun. • Seçti∂iniz kodla aynΩ PTY koduna sahip bir program yayΩnlayan bir istasyon bulunursa, o En son seçilen PTY kodu görünür.
-
Page 168: Di∂Er Uyumlu Rds Iπlevleri Ve Ayarlarω
Di∂er uyumlu RDS TA ses düzeyinin ayarlanmasΩ iπlevleri ve ayarlarΩ Bekleme Modunda TA Alma iπlevi için ses düzeyini önceden ayarlayabilirsiniz. Bir trafik programΩ alΩndΩ∂Ωnda ses düzeyi otomatik olarak Numara tuπlarΩyla otomatik önceden ayarlanmΩπ düzeye geçer. istasyon seçme • AyrΩca 31. sayfadaki “Genel ayarlarΩn (PSM) de∂iπtirilmesi”... - Page 169 PTY kodlarΩ NEWS: Haberler SOCIAL: Sosyal aktivitelerle ilgili AFFAIRS: Güncel haberler veya olaylarla programlar ilgili konulu programlar RELIGION: ∑nanç veya imanΩn herhangi bir INFO: Oldukça çeπitli konular hakkΩnda yönüyle ya da varoluπ veya tavsiyeler sunan programlar ahlakΩn do∂asΩ ile ilgili SPORT: Spor etkinlikleri programlar...
-
Page 170: Cd ∑∏Lemler
CD ∑∏LEMLER∑ MP3/WMA disklerinin çalΩπtΩrΩlmasΩ için 25 ila 28. Ekran de∂iπerek aπa∂Ωdakileri gösterir: sayfalardaki “MP3/WMA ∑∏LEMLER∑” bölümüne CD göstergesi bakΩn. CD çalmak Kumanda panosunu açΩn. Çalan kaynak göstergesi Yerleπtirilen diskin Yerleπtirilen diskteki Tek Temasla ÇalΩπtΩrma (One-Touch toplam çalma süresi toplam parça sayΩsΩ Operation) hakkΩnda not: Yükleme yuvasΩnda zaten CD varsa, CD CD-CH tuπuna basΩldΩ∂Ωnda ünite otomatik olarak açΩlΩr... -
Page 171: Cd Üzerinde Parça Veya Parça Içinde Bir Kωsmω Bulmak
ÇalmayΩ durdurmak ve CD’yi Do∂rudan belli bir parçaya gitmek çΩkartmak için Belli bir parçayΩ çalmak için parçanΩn sΩra numarasΩnΩ numara tuπlarΩna basarak girin. 0 tuπuna basΩn. CD çalma iπlemi durdurulur ve kumanda panosu açΩlΩr. CD otomatik olarak yükleme yuvasΩndan çΩkar. Bir önceki kayna∂a geri dönülür. •... -
Page 172: Cd Çalma Modlarωnωn Seçilmesi
ParçalarΩ tekrarlΩ olarak çalmak +10 ve –10 tuπlarΩnΩn kullanΩmΩ (AynΩ ParçanΩn TekrarlanmasΩ) için • Örn. 1: 6 numaralΩ parçayΩ çalarken 32 Yürürlükteki parçayΩ tekrarlΩ olarak çalabilirsiniz. numaralΩ parçayΩ seçmek için CD çalarken M MODE tuπuna basarak iπlevler moduna girin. Ekranda “MODE” ibaresi yanΩp (Üç... -
Page 173: Metin ∑Çerikli Bir Cd'yi Çalmak
Metin ∑çerikli bir CD’yi Disk çΩkartmanΩn çalmak yasaklanmasΩ Diski çΩkartmayΩ yasaklayabilir ve bir diski Metin ∑çerikli bir CD’de diskle ilgili bazΩ bilgiler (disk adΩ, sanatçΩ ve parça adΩ) kayΩtlΩdΩr. yükleme yuvasΩnda kilitleyebilirsiniz. Bu Metin ∑çerikli CD bilgileri Metin ∑çerikli bir CD CD CD-CH tuπuna basΩlΩyken çaldΩ∂ΩnΩzda otomatik olarak gösterilecektir. -
Page 174: Mp3/Wma Tanitimi
MP3/WMA TANITIMI MP3/WMA nedir? MP3/WMA dosyalarΩ nasΩl kaydedilir ve çalΩnΩr? MP3, Motion Picture Experts Group (veya MPEG) Audio Layer 3’ün kΩsaltmasΩdΩr. MP3, MP3/WMA “dosyalarΩ (parçalar)”, PC 1:10 (128 Kbps*) oranΩnda veri sΩkΩπtΩrma terminolojisiyle ifade edersek “klasörlere” kapasitesine sahip bir dosya biçimidir. kaydedilebilir. -
Page 175: Mp3/Wma ∑∏Lemler
MP3/WMA ∑∏LEMLER∑ AyrΩca 20 ila 23. sayfalardaki “CD ∑∏LEMLER∑” Ekran de∂iπerek aπa∂Ωdakileri gösterir: bölümüne de bakΩn. CD göstergesi Bir diski çalmak Kumanda panosunu açΩn. Çalan kaynak göstergesi WMA veya MP3 göstergesi* Tek Temasla ÇalΩπtΩrma (One-Touch Operation) hakkΩnda not: Yükleme yuvasΩnda zaten bir disk varsa, CD CD-CH tuπuna basΩldΩ∂Ωnda ünite otomatik olarak açΩlΩr ve çalmaya baπlar. -
Page 176: Bir Disk Üzerinde Bir Dosyayω Veya Belirli Bir Bölümü Bulmak
ÇalmayΩ durdurmak ve diski Notlar: • Ekranda bir defada en fazla 8 karakter çΩkartmak için görüntülenebilir ve 8 karakterden fazla varsa 0 tuπuna basΩn. kaydΩrΩlabilir. Çalma iπlemi durdurulur ve kumanda panosu açΩlΩr. AyrΩca 33. sayfadaki “KaydΩrma modunun Disk otomatik olarak yükleme yuvasΩndan çΩkar. seçilmesi—SCROLL”... - Page 177 Çalan klasördeki belli bir dosyaya Do∂rudan belli bir klasöre gitmek hΩzlΩ bir πekilde gitmek (+10 ve –10 tuπlarΩ) D∑KKAT: Numara tuπ(lar)ΩnΩ kullanan klasörleri Disk çalarken M MODE tuπuna basarak do∂rudan seçmek için, klasörlere, klasör iπlevler moduna girin. adlarΩnΩn önünde 2 haneli numara verilmiπ olmasΩ...
-
Page 178: Çalma Modlarωnωn Seçilmesi
Önceki veya sonraki klasöre gitmek Etkin Rastgele çalar için göstergesi FLDR RND RND ve Çalan klasörün tüm Bir diski çalarken bir sonraki göstergeleri dosyalarΩ, sonra bir klasöre gitmek için 5 tuπunu yanar. sonraki klasörün (yukarΩya) basΩlΩ tutun. dosyalarΩ v.s. Tuπa arka arkaya her DISC RND RND ve Diskteki tüm bastΩ∂ΩnΩzda bir sonraki klasör... -
Page 179: Ses Ayarlari
SES AYARLARI Önceden ayarlΩ ses Gösterge Uygulama: Ön ayarlar modlarΩnΩn seçimi LOUD (C-EQ: özel equalizer) USER (Düz ses) ROCK Rock veya disko müzi∂i Önceden ayarlΩ bir ses modunu seçebilirsiniz (C-EQ: özel equalizer) müzik tarzΩna uygun. CLASSIC Klasik –02 müzik • Aπa∂Ωdaki prosedürün yapΩlmasΩ için bir süre POPS Hafif müzik sΩnΩrΩ... -
Page 180: Sesin Ayarlanmasω
Sesin ayarlanmasΩ Bas, tiz ya da gürlük ayarΩ yaptΩ∂ΩnΩzda, yapmΩπ oldu∂unuz ayar,“USER” da dahil olmak üzere seçili ses modu (C-EQ) için belle∂e alΩnΩr. Sesin niteliklerini tercihinize göre ∑ki hoparlörlü bir sistem kullanΩyorsanΩz, fader ayarlayabilirsiniz. düzeyini “00”a ayarlayΩn. Bu, yalnΩzca bir subwoofer ba∂landΩ∂Ω zaman Ayarlamak istedi∂iniz ö∂eyi seçin. -
Page 181: D∑Μer Ana ∑∏Levler
D∑µER ANA ∑∏LEVLER Genel ayarlarΩn (PSM) Seçilen PSM ö∂esini ayarlayΩn. de∂iπtirilmesi PSM (Tercih Edilen Ayar Modu) kumandasΩnΩ kullanarak aπa∂Ωdaki tabloda ve sayfa 32’de sΩralanmΩπ ö∂eleri de∂iπtirebilirsiniz. Temel Prosedür Di∂er PSM ö∂elerini ayarlamak için gerekirse 2 ve 3 . adΩmlarΩ Ekranda PSM ö∂elerinin görünmesi tekrarlayΩn. - Page 182 Fabrika ön ayarlarΩna sayfaya Göstergeler Seçilebilir de∂erler/ö∂eler getirmek bakΩn 29 program tipi PTY STBY PTY standby (19. sayfaya bakΩn) TA VOL Trafik anonsu ses VOL 00 — VOL 30 VOL 20 düzeyi ya da 50 P-SEARCH Program arama AF OFF AF ON AF ON DAB AF...
- Page 183 Ekran bilgilerini seçmek için—COLOR Telefon sessizleπtirmenin seçilmesi —TEL Ekran rengini tercihinize göre seçebilirsiniz. Fabrika çΩkΩπΩnda “ALL DEMO” seçene∂i Bir cep telefonu sistemi ba∂lΩ oldu∂unda bu mod devrededir. kullanΩlΩr. KullanΩlan telefon sistemine ba∂lΩ Seçilebilir renkler aπa∂ΩdadΩr: olarak, bu ünitede sesleri kΩsan hangisiyse, ya “MUTING 1”...
-
Page 184: Kayna∂A Ad Vermek
Harici ünite kullanΩmΩnΩ seçmek için Amplifikatör kazanç kontrol seçimi —EXT IN için—AMP GAIN Harici üniteyi Hat Giriπ Adaptörü KS-U57 (bu Bu ünitenin maksimum ses düzeyini üniteyle birlikte verilmez) ile arka taraftaki CD de∂iπtirebilirsiniz. E∂er hoparlörlerin maksimum de∂iπtirici fiπine ba∂layabilirsiniz. giriπ gücü 50 Watt’tan az ise, zarar görmemeleri Harici üniteyi bu ünitede çalma kayna∂Ω... -
Page 185: Standart Levhanωn De∂Iπtirilmesi
Örn.: Kaynak olarak CD’yi seçti∂inizde Standart levhayΩ ünitenizle birlikte verilmiπ bir Bir karakter seçin. baπka levha ile de∂iπtirebilirsiniz. AyrΩca, <http://www.jvc.co.jp/jvccar> adresini ziyaret ederek bunlarΩ indirebilirsiniz. • LevhayΩ de∂iπtirirken, levha veya kapa∂Ω üzerinde parmak izinizi bΩrakmamaya dikkat edin. Verilen Alyan anahtarΩ ile vidalarΩ... - Page 186 Notlar: ∑stedi∂iniz bir baπka levha ile • Alyan anahtarΩnΩ ileride kullanmak üzere saklayΩn. (standart, kesik ya da indirilmiπ • Levha kapak ba∂lantΩsΩ için üniteyle birlikte iki levhalar) de∂iπtirin. yedek vida verilmiπtir. Montaj/Ba∂lantΩ Elkitabl (ayrΩ bir yayΩndΩr) bakΩn. • Standart bir levhayΩ takarken •...
-
Page 187: Kumanda Panosunun Sökülmesi
Kumanda panosunun Kumanda panosunun takΩlmasΩ sökülmesi Kumanda panosunun sa∂ tarafΩnΩ, pano tutaca∂ΩnΩn üzerindeki yuvaya TaπΩtΩ terk ederken kumanda panosunu yerleπtirin. sökebilirsiniz. Kumanda panosunu sökerken veya takarken, kumanda panosunun arkasΩndaki ve pano tutaca∂ΩnΩn üzerindeki konektörlere hasar vermemek için dikkat edin. Kumanda panosunun sökülmesi Kumanda panosunu sökmeden önce üniteyi kapattΩ∂ΩnΩzdan emin olun. -
Page 188: Cd Deµ∑∏T∑R∑C∑ ∑∏Lemler
CD DEµ∑∏T∑R∑C∑ ∑∏LEMLER∑ Disklerin çalΩnmasΩ Ünitenizle JVC MP3 uyumlu CD de∂iπtirici kullanmanΩzΩ tavsiye ederiz. CD de∂iπtiriciyi (CD-CH) seçin. Bu CD de∂iπtiriciyi kullanarak kayΩtlΩ orijinal CD-R’larΩnΩzΩ (Kaydedilebilir) ve CD-RW’larΩnΩzΩ (Yeniden yazΩlabilir) hem ses CD hem de MP3 CD-CH* formatΩnda çalabilirsiniz. • Di∂er CH-X serisi CD de∂iπtiricileri de (CH-X99 ve CH-X100 hariç) ba∂layabilirsiniz. - Page 189 • Çalan disk bir CD ise: Do∂rudan belli bir diske gitmek Çalma, mevcut diskin ilk parçasΩndan baπlar. ÇalmayΩ baπlatmak için disk numarasΩna tekabül eden numara tuπuna basΩn (CD de∂iπtirici çalΩyorken). • 1 – 6 arasΩnda bir disk numarasi seçmek için: KΩsa süreyle 1 (7) –...
- Page 190 * +10 veya –10 tuπuna ilk bastΩ∂ΩnΩzda parça/ Bu yalnΩzca, metin içerikli bir CD ve/veya MP3 dosya, on rakamΩnΩn katlarΩndan oluπan bir diski bilgisi okuma özelli∂i olan bir JVC CD parça/dosya numarasΩna sahip en yakΩn de∂iπtiriciye ba∂lΩ iken mümkündür. sonraki veya önceki parçaya/dosyaya atlar (örn.: 10., 20., 30.).
-
Page 191: Çalma Modlarωnωn Seçilmesi
Çalma modlarΩnΩn ParçalarΩ/dosyalarΩ devamlΩ olarak çalmak için (AynΩ ParçanΩn/AynΩ seçilmesi Klasörün/AynΩ Diskin TekrarlanmasΩ) ParçalarΩ/dosyalarΩ rastgele çalmak Çalma esnasΩnda M MODE tuπuna basarak iπlevler moduna için (Klasördeki parçalarΩ Rastgele/ girin. Diskteki parçalarΩ Rastgele/Kutudaki parçalarΩ Rastgele Çalma) Ekranda “MODE” ibaresi yanΩp sönerken RPT (tekrar) tuπuna Çalma esnasΩnda M MODE basΩn. -
Page 192: Har∑C∑ Ün∑Te ∑∏Lemler
HAR∑C∑ ÜN∑TE ∑∏LEMLER∑ Bir harici ünitenin Ba∂lΩ üniteyi açΩn ve kayna∂Ω çalΩnmasΩ çalmaya baπlayΩn. Sesi ayarlayΩn. Harici üniteyi Hat Giriπ Adaptörü KS-U57 (bu üniteyle birlikte verilmez) ile arka taraftaki CD de∂iπtirici fiπine ba∂layabilirsiniz. HazΩrlΩklar: • Hat Giriπ Adaptörü KS-U57 ve harici üniteyi ba∂lamak için Montaj/Ba∂lantΩ... -
Page 193: Dab Tuner ∑∏Lemler
Ünitenizle birlikte DAB (Digital Audio Broadcasting) tuneri KT-DB1500 veya servislerden birini KT-DB1000 kullanmanΩzΩ tavsiye ederiz. dinlemek Bir baπka DAB tuneriniz varsa, JVC IN-CAR ENTERTAINMENT bayinize danΩπΩn. • DAB tuneriniz için tedarik edilen Talimatlara da Tipik bir orkestrada aynΩ anda 6 veya daha fazla bakΩn. -
Page 194: Dab Servislerinin Belle∂E Kaydedilmesi
Arama yapmaksΩzΩn belli bir Bir orkestrayΩ aramaya baπlayΩn. orkestraya ba∂lanmak Daha yüksek Baπlamadan önce..frekanslardaki orkestralarΩ Çalmakta olan kaynak bir CD, CD de∂iπtirici veya aramak için harici ünite ise, FM/AM DAB’a kΩsa süreyle basΩn. Daha düπük frekanslardaki orkestralarΩ DAB tunerini kaynak olarak seçmek için aramak için FM/AM DAB’Ω... -
Page 195: Önceden Ayarlamωπ Bir Dab Servisini Dinlemek
Önceden ayarlamΩπ bir ∑stedi∂iniz orkestraya ayarlanmak DAB servisini dinlemek için. Önceden ayarlanmΩπ bir DAB servisine kolayca gidebilirsiniz. UnutmayΩnΩz, önce servisleri kaydetmeniz πarttΩr. Henüz kaydetmediyseniz, 44 ila 45. sayfalardaki Dinlemek istedi∂iniz bir orkestra “DAB servislerinin belle∂e kaydedilmesi” baπlΩklΩ servisi seçin. kΩsma baπvurun. Bir sonraki servisi seçmek Baπlamadan önce.. -
Page 196: Dab Ile Baπka Neler Yapabilirsiniz
DAB ses düzeyini ayarlamak için DAB ile baπka neler DAB tunerinin ses düzeyini ayarlayabilir ve yapabilirsiniz? belle∂e kaydedebilirsiniz. Ses düzeyini FM ses düzeyi ile uyuπacak πekilde do∂ru olarak AynΩ programΩn otomatik olarak ayarlarsanΩz, kayna∂Ω her de∂iπtirdi∂inizde ses düzeyini yeniden ayarlamak zorunda izlenmesi (Alternatif AlΩm Sistemi) kalmazsΩnΩz. -
Page 197: Ariza G∑Derme
ARIZA G∑DERME Görünürde ciddi olan sorunlar bazen kolayca giderilebilir. Servis merkezini aramadan önce aπa∂Ωdaki noktalarΩ kontrol edin. Belirtiler Nedenler Çözümler • Hoparlörlerden ses Ses düzeyi minimuma Optimum düzeye ayarlayΩn. gelmiyor. ayarlanmΩπtΩr. Ba∂lantΩlar yanlΩπtΩr. KablolarΩ ve ba∂lantΩlarΩ kontrol edin. • Bu ünite hiç çalΩπmΩyor. Ünitenin mikroiπlemcisi parazit Kumanda panosunu çΩkarttΩktan vs. - Page 198 Belirtiler Nedenler Çözümler • Disk çalΩnamΩyor. Diske MP3/WMA dosyalarΩ Diski de∂iπtir. kayΩtlΩ de∂il. MP3/WMA dosyalarΩnΩn dosya BunlarΩn dosya adlarΩna <.mp3> adlarΩnda <.mp3> veya veya <.wma> uzantΩ kodunu <.wma> uzantΩ kodu yok. ekle. MP3/WMA dosyalarΩ ISO Diski de∂iπtir. 9660 Level 1, Level 2, (Uygun bir uygulama ile MP3/ Romeo, veya Joliet’e uygun WMA dosyalarΩnΩ...
- Page 199 Belirtiler Nedenler Çözümler • Ekranda “NO DISC (disk Kutuda disk yoktur. Diskler ters yerleπtirilmiπtir. yok)” sözcükleri görüntüleniyor. Diskleri kutunun içine yerleπtir. Diskleri do∂ru yerleπtirin. • Ekranda “NO MAG” CD de∂iπtiricide CD kutusu yok. Kutuyu yerleπtir. sözcükleri görüntüleniyor. • Ekranda “RESET 8” Bu ünite CD de∂iπtiriciye do∂ru Bu üniteyi ve CD de∂iπtiriciyi sözcükleri görüntüleniyor.
-
Page 200: Bakim
BAKIM Disklerin kullanΩlmasΩ Bir CD-R ya da CD-RW çalarken CD-R’larΩ ya da CD-RW’larΩ çalmadan önce, talimatlarΩnΩ veya uyarΩ beyanlarΩnΩ dikkatle Bu ünite, CD’ler, CD-R’lar (Kaydedilebilir), okuyun. CD-RW’lar (Yeniden yazΩlabilir) ve Metin içerikli • Sadece “bitirilmiπ (finalized)” CD-R’larΩ ya da CD’leri ço∂altmak üzere tasarlanmΩπtΩr. CD-RW’larΩ... -
Page 201: Tekn∑K Özell∑Kler
50 dB Sessizleπtirme DuyarlΩlΩ∂Ω: 16.3 dBf (1.8 µV/75 Ω) Ek olarak bazΩ indirilmiπ levhalar isterseniz, Alternatif Kanal Seçicili∂i (400 kHz): bunlarΩ <http://www.jvc.co.jp/jvccar> sitesini 65 dB ziyaret ederek indirebilirsiniz. Frekans YanΩtΩ: 40 Hz ila 15 000 Hz Stereo AyΩrma: 30 dB Yakalama OranΩ: 1.5 dB... - Page 202 Having TROUBLE with operation? Please reset your unit Refer to page of How to reset your unit ¿Tiene PROBLEMAS con la operación? Por favor reinicialice su unidad Consulte la páfina de Cómo reposicionar su unidad Vous avez des PROBLÈMES de fonctionnement? Réinitialisez votre appareil Référez-vous à...