Advertisement
Quick Links
Advertisement

Related Manuals for AEG ALM58SP24


Summary of Contents for AEG ALM58SP24
- Page 1 ALM58SP24 Original instructions...
- Page 2 mportant! It is essential that you read the instructions in this manual before assembling, operating, and maintaining the product. Subject to technical modifications.
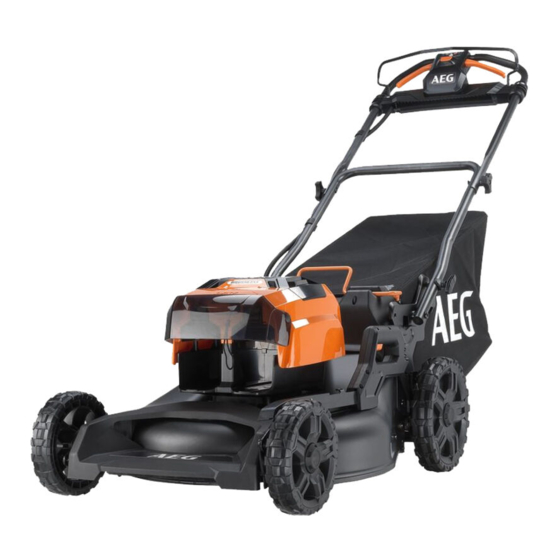
- Page 3 ALM58SP24...
- Page 4 SAFETY ON/OFF BAIL BAR MULCH PLUG BATTERY PACK RELEASE HEIGHT ADJUSTMENT TRIGGER BATTERY PACK...
- Page 5 SELF- PROPEL TRIGGER SPEED CONTROL SLIDER HANDLE ADJUSTMENT START BUTTON UPPER HANDLE KNOB GRASS CATCHER CUTTING HEIGHT INDICATOR BAR BLADE...
-
Page 6: Replacing The Blade
INSTALLING AND REMOVING THE MULCH PLUG REPLACING THE BLADE... -
Page 7: Operating The Mower
START OPERATING THE MOWER UNFOLDING THE HANDLES USING THE SELF-PROPEL FEATURE... -
Page 8: Adjusting The Cutting Height
ADJUSTING THE CUTTING HEIGHT INSTALLING AND REMOVING THE BATTERIES STORING THE PRODUCT... - Page 9 INSTALLING AND REMOVING THE GRASS CATCHER INSTALLING AND REMOVING THE SAFETY KEY...
- Page 10 UNFOLDING THE HANDLES...
- Page 12 INSTALLING AND REMOVING THE BATTERY PACKS NOTE: Every time the mower starts, it checks capacity of the battery packs. During operation, the mower draws power from the battery pack that has the higher capacity. click NOTE: The mower can run on either 1 battery or 2 for extended runtime.
- Page 13 INSTALLING AND REMOVING THE SAFETY NOTE: The safety key must be installed to operate the mower.
- Page 14 START OPERATING THE MOWER STOP...
- Page 15 START USING THE SELF-PROPEL FEATURE STOP...
- Page 16 INSTALLING AND REMOVING THE GRASS CATCHER NOTE: The mower does not start unless the grass catcher is properly installed. The grass catcher/ mulch plug frame slot has 2 microswitches that activate and allow the mower to start when the grass catcher or mulch plug is installled.
- Page 18 ADJUSTING THE CUTTING HEIGHT NOTE: The mower height cutting range is 18-75mm.
- Page 20 INSTALLING AND REMOVING THE MULCH PLUG 1. Pull the mulch plug handle to its maximum length. 2. Insert the mulch plug assembly into the rear discharge chute, ensuring that the metal frame is properly aligned with its slot. 3. Push down on the mulch plug handle until the metal frame is fully inserted into its slot.
- Page 22 REPLACING THE BLADE 40 N...
- Page 23 NOTE: Always properly dispose of a used blade. NOTE: For the replacment blade part number, see the specifications table. NOTE: Tighten the blade bolt to a torque of 35- 40 Nm. Blade bolt tightening torque (35~40 Nm)
- Page 24 STORING THE PRODUCT...
- Page 26 NOTE: Store the product in a cool, dry, and well- ventilated area that is inaccessible to children. Keep the product away from corrosive agents, such as garden chemicals and de-icing salts. Do not store the product outdoors. vibr Iden It sh...
- Page 27 ALM58SP24 TECHNICAL DATA CORDLESS LAWNMOWER Rated voltage 58 V d.c. Width of cut 52.5 cm Height of cut 18 - 75 mm Rated input 1200 W No-load speed 2650/min Weight (without battery) 34.6 kg Weight (with x 2 heaviest battery packs) 38.2 kg...
-
Page 28: Work Area Safety
■ CORDLESS LAWNMOWER SAFETY WARNINGS operating the product. Do not operate the product while tired, ill, or under the influence of drugs, alcohol, or medication. A lapse in Before use, always visually inspect the product to ensure that blades, concentration while operating the product may result in serious blade bolts, and cutter assembly are not worn or damaged. -
Page 29: Transportation And Storage
■ Hands and feet of all persons are not clear of the cutting TRANSPORTING LITHIUM BATTERIES enclosure. Transport the battery in accordance with local and national provisions des, Never operate the product if the on/off switch on the handlebar does and regulations. - Page 30 SYMBOLS Read and understand all instructions before operating the product. Follow all warnings and safety instructions. Wear ear protection. Wear eye protection. Do not operate the product on inclines greater than 15°. Mow across the face of slopes, never up and down.
- Page 32 31 Gilby Road, Mount Waverley, VIC, 3149, Australia Techtronic Industries N.Z. Limited Unit C, 70 Business Parade South, Highbrook, Auckland 2013, New Zealand AEG is a registered trade mark used under license from AB Electrolux (publ) 960087559-01 © 2020 Techtronic Cordless GP.