
Related Manuals for Linksys LNE100M


Summary of Contents for Linksys LNE100M
- Page 1 EtherFast ® 10/100 Managed Network Adapter Use this guide to install: LNE100M User Guide...
-
Page 3: Table Of Contents
Installing NT Networking and the Adapter’s Driver Installing the Adapter’s Driver if Networking is Already Installed C C h h a a p p t t e e r r 8 8 : : M M a a n n u u a a l l I I n n s s t t a a l l l l a a t t i i o o n n... - Page 4 Installing SNMP for Windows NT Installing SNMP for Windows 2000 and XP Adding the Adapter’s SNMP Agent Utilizing the Adapter’s SNMP Agent A A p p p p e e n n d d i i x x C C : : S S h h a a r r i i n n g g Y Y o o u u r r F F i i l l e e s s a a n n d d P P r r i i n n t t e e r r s s...
-
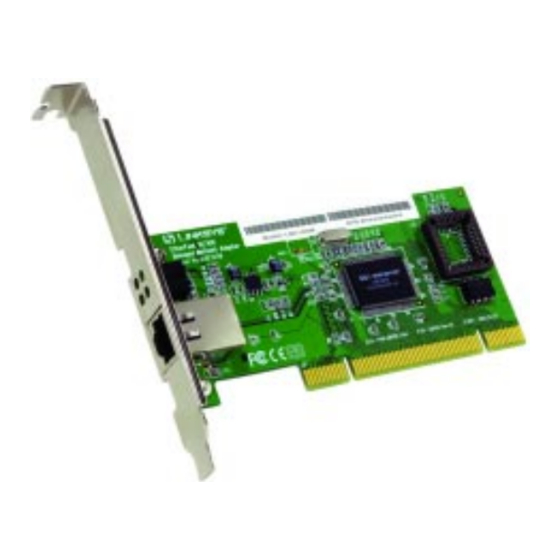
Page 5: The Etherfast
Features • Easy to Use Plug-and-Play 10/100 PCI Network Adapter • Adapter settings can be managed via SNMP using standard MIB browser • Full Duplex Capability at Up To 200Mbps • Connects to Both 10Mbps Ethernet and 100Mpbs Fast Ethernet Networks •... -
Page 6: Leds
Chapter 3: Installing the Adapter Overview Each Adapter is equipped with an RJ-45 port that automatically adjusts to either 10Mbps or 100Mbps speeds, allowing your PC to attach to either Fast Ethernet (also known as 100BaseTX) or regular 10BaseT Ethernet network segments without additional hardware or software. - Page 7 3. Open your computer and locate the PCI slot(s) on your motherboard. PCI slots are easily identified by their beige or white color. Remove the metal slot cover on the back of the PC, then insert the Adapter into an empty PCI slot, as shown in Figure 3-1.
-
Page 8: Overview
Using the Setup Utility The Install Wizard works for installing the drivers under Windows 98, Me, 2000, and XP. To manually install and setup the Adapter on a Windows NT PC, refer to Chapter 7: Manual Installation and Setup for Windows NT. -
Page 9: Overview
Installing the Adapter’s Driver 1. Start up your PC in Windows 98. 2. Windows 98 will automatically detect the presence of the Adapter in your 3. Insert the Setup Utility CD into your CD-ROM drive while the Add New Figure 4-5 ®... - Page 10 Figure 5-4, click button. 7. Windows will begin copying the Adapter’s driver files to your PC. Refer to the chart below to help guide you through the process.
-
Page 11: Network Component Configuration
• Linksys LNE100M Managed Network Adapter • TCP/IP -> Dial-Up Adapter • TCP/IP -> Linksys LNE100M Managed Network Adapter There may be additional components listed; however, if any of the compo- nents shown are missing, you’ll need to manually install them. Refer to Appendix F: Manually Installing the Network Components in Windows 98 and Me now. - Page 12 ® Figure 5-8 EtherFast ® 10/100 Managed Network Adapter 6. After ensuring that all of the listed network components are installed on your system, select Client for Microsoft Networks from the Primary Network Logon pull-down menu. 7. Click on the Identification tab, shown in Figure 5-10. Type the name of your computer in the Computer Name box.
- Page 13 Figure 5-11 EtherFast ® 10/100 Managed Network Adapter 13.Once you are at the Windows 98 desktop, double-click on the Network Neighborhood icon. You should see one icon for the entire network and the names of the other PCs on the network.
-
Page 14: Overview
Chapter 6: Manual Installation and Setup for Windows Me Overview After physically installing the Adapter in your computer, follow these instruc- tions to manually install the network device driver. If at any time during the installation you encounter problems, consult the Troubleshooting section. -
Page 15: Network Component Configuration
CD-ROM drive). 7. If Windows asks you to supply any drivers beginning with “lne” or “lne100m”, re-direct Windows to the Setup Utility CD-ROM (D:\drivers). 8. Windows will finish installing the software onto your PC. When the screen shown in Figure 6-4 appears, click the Finish button. - Page 16 Figure 6-6 Figure 6-7 EtherFast ® 10/100 Managed Network Adapter 6. After ensuring that all of the listed network components are installed on your system, select Client for Microsoft Networks from the Primary Network Logon pull-down menu. 7. Click on the Identification tab, shown in Figure 6-8. Type the name of your computer in the Computer Name box.
- Page 17 Figure 6-9 EtherFast ® 10/100 Managed Network Adapter 13.Once you are at the Windows Me desktop, double-click the My Network Places icon, the Entire Network icon, and then the Your Workgroup icon. You should see one icon for the entire network and the names of the other PCs on the network.
-
Page 18: Overview
Chapter 7: Manual Installation and Setup for Windows NT Overview The following instructions will set up the Adapter in a computer running NT 4.0 Server/Workstation. You should have your original Windows NT CD-ROM available during the installation, as you might be asked to supply it. - Page 19 EtherFast ® 10/100 Managed Network Adapter 7. The adapter will be added to the list of Network Adapters on the Network Setup Wizard screen, shown in Figure 7-7. Click the Next button. Figure 7-7 8. Make sure that on the following screen, shown in Figure 7-8, there is a check mark beside TCP/IP Protocol.
- Page 20 11. NT will copy the necessary network drivers to your PC. When the copying is complete, you will see a list of installed bindings. These bindings are appropriate to the Adapter you are installing. Click the Next button to go through these two screens.
-
Page 21: Installing The Adapter's Driver If Networking Is Already Installed
Windows NT documentation. If you have not already installed networking onto your NT PC, please refer to your Windows documentation. These steps will install the Adapter’s driver software on your PC, enabling your PC to properly communicate with the Adapter. Remember that you must be logged on as a network administrator to continue. -
Page 22: Setup For Windows 2000
8. Once your PC has rebooted, double-click the Network Neighborhood icon on your desktop. Make sure that you have access to the network. If you do, the Adapter has been properly installed. The Windows NT Installation and Setup of the Adapter is complete. Instant EtherFast ®... - Page 23 D:\drivers\win2000 (as shown in Figure 8-4) and click the OK button 6. The Driver File Search Results dialog box will appear, as shown in Figure 8-5. Click the Next button to continue. ® 10/100 Managed Network Adapter Figure 8-4 Figure 8-5...
-
Page 24: Overview
After physically installing the Adapter in your computer, follow these instruc- tions to manually install the network device driver. Windows XP has a driver for the Adapter. After physically installing the Adapter into your PC, Windows XP will automatically install the Adapter’s driver. -
Page 25: Overview
® Chapter 10: Configuring the Adapter Overview Configuration of the Adapter is handled through the PC’s Device Manager within the control panel. Instructions will differ depending upon your operat- ing system. For Windows NT For Windows 98SE and Me Click the Start button, select Settings, and open... -
Page 26: General Tab
Adapter and allows you to enable or disable it. Device Type This shows the type of device; in this case a Network Adapter. Manufacturer This shows that you are using a Linksys Network Adapter. Location This shows in which PCI slot the Adapter has been installed. Device Status This will show if the Adapter is functional. - Page 27 The third option pro- vided, Hardware Default (shown in Figure 10-5), allows the Adapter to auto- matically detect if it is con- nected to such a networking device. Instant EtherFast Series EtherFast ®...
-
Page 28: Driver Tab
The Driver Tab, shown in Figure 10-10, provides information about the Adapter’s drive and allows the user to uninstall and update the driver. Driver Provider This displays the source of the driver used for the Adapter. Driver Date Driver Version This shows the version of the driver currently installed. -
Page 29: Resources Tab
Figure 10-11 Allow this device to bring the computer out of standby. Any PC equipped with the Adapter, that is in Standby mode, will come out of Standby mode to receive packets sent to it from the network. All the computer to turn off this device to save power. After the Adapter is unused for a few minutes, this setting will allow your computer to power down the Adapter to save power. -
Page 30: General Tab
General Tab The General Tab will display the Adapter’s current functions and settings. In the window at the top of the screen, the Adapter’s settings are shown: MAC Address, IP Address, Link Speed, and Duplex Speed. In the screen shown in Figure 11-5, the Adapter was not connected to a network. - Page 31 This allows for more efficient transfer of data and should only be selected when connected to networking devices that support flow control. The third option provided, Hardware Default (shown in Figure 11-10), allows the Adapter to automatically detect if it is connected to such a networking device.
- Page 32 Shown in Figure 11-11, the Network Address selection is set to Not Present by default. This setting is the Adapter’s MAC Address and should only be changed when no other device with the same MAC Address is present in the network.
-
Page 33: Statistics Tab
Statistics Tab The Statistics Tab will show how, in a smaller screen, the Adapter is function- ing. This tab consists of three sub-tabs: General, IEEE 802.3, and Others. These are described in this section. GENERAL Figure 11-15 Shown in Figure 11-15, the “General” statistics are as follows: Frames Tx OK This shows the amount of frames transmitted successfully. - Page 34 Frames Tx after Deferral This shows the number of frames success- fully transmitted after the Adapter defers transmission at least once. Frames Tx Fail (Max Collision) This shows the number of frames not trans- mitted due to excessive collisions.
-
Page 35: Diagnostics Tab
Diagnostics Tab The Diagnostics Tab, shown in Figure 11-19, will allow you to test the Adapter’s functionality. Simply check the function to be tested in the checkbox beside the name and click the Start Diagnose button. Select the number of tests you wish to run from the bar on the bottom of the screen or check the Continuous box for constant testing. -
Page 36: Common Problems And Solutions
Appendix A: Troubleshooting This section provides possible solutions to problems regarding the Adapter’s installation and operation. If you can’t find an answer here, check the Linksys website at www.linksys.com. Troubleshooting hints for Windows can be found below. If you are using Windows NT, or another network operating system, skip to the Adapter Diagnostics instructions in this section. - Page 37 Windows’ networking. To do this, click on the Start button, select Settings, open the Control Panel, and double-click on the Network icon. Click once on the component entry with the words TCP/IP and Linksys or TCP/IP on its own, then click on the Remove button. Click OK when finished and restart your PC.
-
Page 38: Running The Adapter's Diagnostics
EtherFast ® Running the Adapter’s Diagnostics If you suspect that there may be a problem with the Adapter, or if you need to identify the Adapter’s MAC address, you can use the DIAG diagnostic program on the Setup Utility CD. -
Page 39: Overview
Appendix B: Managing the Adapter through SNMP and the RMON Agent Overview SNMP (Simple Network Management Protocol) is the protocol governing net- work management and the monitoring of network devices and their functions. RMON (Remote Network Monitoring) provides standard information that a network administrator can utilize to monitor, check and troubleshoot an array of local area networks (LANs). -
Page 40: Installing Snmp For Windows Nt
9. Windows will now ask you to restart your computer. Click Yes to restart now. SNMP has now been added for Windows 98SE and Me. Now, proceed to Adding the Adapter’s SNMP Agent in this appendix. Installing SNMP for Windows NT These installation instructions are for PCs running Windows NT, service pack 6, only. -
Page 41: Installing Snmp For Windows 2000 And Xp
Network screen. When asked to restart your computer, click the Yes but- ton. SNMP has now been added for Windows NT. Now, proceed to Adding the Adapter’s SNMP Agent in this appendix. Installing SNMP for Windows 2000 and XP These installation instructions are for PCs running Windows 2000 or Windows XP in Classic Mode only. -
Page 42: Adding The Adapter's Snmp Agent
Once SNMP has been added for Windows in the instructions above, and you have rebooted your computer, you will need to add the Adapter’s SNMP Agent. The Adapter’s SNMP agent is located on the Setup Utility CD by opening the Autorun folder and opening the Utility folder within. Double-click the NicSNMP icon. -
Page 43: Overview
• Full access allows other users to create, change, or delete files on the selected drive. • Depends on Password allows other users to have Read-Only and/or Full access to the selected drive, depending on the password that you decide to give them. ® 10/100 Managed Network Adapter once... -
Page 44: Enabling Printer Sharing
Appendix D: Windows 98 and Me Client for Windows Domain Server If you are installing the Adapter in a Windows 98 or Me PC that you plan on log- ging in to a Windows NT or 2000 domain server, follow the directions below. -
Page 45: Starting Over In Windows 98 Or Me
If you experience installation difficulties, you may need to re-install all of the Windows networking components. The instructions below explain how to give your PC a clean sweep so that you can retry the Adapter’s driver installation. Starting Over in Windows 98 or Me 1. -
Page 46: Starting Over In Windows 2000 Or Xp
8. Scroll down to the Network Adapters listing and expand it by clicking on the plus sign. 9. Remove all devices with the name Linksys in its description. (If at any point you are asked to restart the computer, Click the No button.) 10. - Page 47 5. Right-click on EtherFast 10/100 Managed Network Adapter and select Uninstall..., as shown in Figure E-3. Figure E-3 6. The Confirm Device Removal screen, shown in Figure E-4, will ask if you want to remove the Adapter. Click the OK but- ton.
- Page 48 Control Panel. From the Control Panel, shown in Figure G-1, double-click on the Network icon. 2. Select EtherFast 10/100 Managed Network Adapter from the list, as shown in Figure G-2, and click the Add button. From this screen, you can also press the Properties button.
- Page 49 PCI card (such as the Adapter) into your computer: 1. The Adapter should be used in a 32-bit PCI slot that supports PCI Bus 2. When using NT, set your system’s PnP OS option in the BIOS settings to 10/100 Managed Network Adapter ®...
- Page 50 If you need to configure your PC's BIOS in order to resolve an IRQ or other conflict with the Adapter, there are a few possibilities: No Changes Allowed: Your PC may not allow you to change the IRQ value(s) of the PCI slot(s). In this case, you will ONLY be able to use the IRQ and I/O values that have been pre-assigned to each slot.
- Page 51 Diagnostic Tools. USER’S GUIDE Selecting this tab brings up a PDF version of this user guide. CONTACT US Linksys contact information for sales and technical support is available by selecting this tab. EXIT To close the Setup Utility, click this tab.
- Page 52 EtherFast ® 10/100 Managed Network Adapter Driver - A workstation or server software module that provides an interface between a network interface card and the upper-layer protocol software running in the computer; it is designed for a specific NIC, and is installed during the initial installation of a network-compatible client or server operating system.
- Page 53 MAC (Media Access Control Address) - A unique number assigned by the manufacturer to any Ethernet networking device, such as a network adapter, that allows the network to identify it at the hardware level. Mbps (MegaBits Per Second) - One million bits per second; unit of measure- ment for data transmission.
- Page 54 NIC (Network Interface Card) - A board installed in a computer system, usu- ally a PC, to provide network communication capabilities to and from that com- puter system. Also called an adapter. Node - A network junction or connection point, typically a computer or work station.
- Page 55 (such as audio players, joysticks, keyboards, telephones, scanners, and printers). With USB, a new device can be added to your comput- er without having to add an adapter card or even having to turn the computer off.
-
Page 56: Environmental
FROM THE PRODUCT'S PACKAGING ON HAND WHEN CALLING. RETURN REQUESTS CANNOT BE PROCESSED WITHOUT PROOF OF PURCHASE. IN NO EVENT SHALL LINKSYS’S LIABILITY EXCEED THE PRICE PAID FOR THE PRODUCT FROM DIRECT, INDIRECT, SPECIAL, INCI- DENTAL, OR CONSEQUENTIAL DAMAGES RESULTING FROM THE USE OF THE PRODUCT, ITS ACCOMPANYING SOFTWARE, OR ITS DOCUMENTATION. - Page 57 Appendix N: Contact Information For help with the installation or operation of this product, contact Linksys Technical Support at one of the phone numbers or Internet addresses below. Sales Information 800-546-5797 (LINKSYS) Technical Support 888-326-7114 RMA Issues 949-261-1288 949-261-8868 Email support@linksys.com...